Archive for the ‘In the Garden’ Category
Deciding How Many Vegetables to Plant

The effort to reclaim my little homestead is coming along, albeit slowly, which is fine by me.
And, although we are in full planting swing, weather wise, I am happy for a slower less rushed pace to get seeds in the ground.
It’s amazing what a year of inactivity can do to a vegetable patch. But, the respite has given me the chance to rethink my gardening efforts. Now that Brianne is out of school and on her own I am cooking for one, rather than two. You’d think that cooking for one person isn’t that different than cooking for two, but amazingly enough…it is! More times than not I’m happy to come home and throw together a big salad with tons of chopped veggies and a bit of meat and cheese. This would have NEVER flown with Brianne in the house. She was, and still is, a carnivore.
The weather over the past few weeks has been bouncing around like a kite in the wind…hot, cold, rain, wind, take your pick, we’ve had it all. Although the weather has kept me indoors I haven’t been unproductive. I’ve used the cold and rainy days as an opportunity to layout my new vegetable garden, sometimes wondering, “what the heck will it be”?
I have to admit, it has been a bit of a struggle deciding how much of each vegetable to plant for a one person household. In years past I planted with abandon, ending up with mounds of something that looked really tantalizing in the seed catalog, but wasn’t enjoyed or eaten all that much in real life.
I also had to take into consideration how much preserving I would be doing, whether canning or freezing because that would also dictate how much of each seed I planted.
But, I think I have a plan!
Famous last words, right?
So—on a rainy Sunday afternoon I set out to create my new vegetable garden design. There are no great plans to reconfigure the already installed raised beds. I’ll just work with what I already have. First things first, though. I had to decide “what” to plant.
I thought about my daily meals and what I really like to eat, making a list of all my favorite vegetables and how often I use them. Onions and carrots, for example, are the basis of many of the dishes I prepare, so they should be planted in greater quantities. Zucchini, however, I like, but only eat occasionally. And then there were the decorative pumpkins and winter squash, that can be stored. This process helped guide my planting decisions. It was also the beginnings of laying out my beds.
Keep in mind that location will also dictate the planting schedule. Here in So Cal, where we can garden almost 365-days-a-year, we don’t have to worry about growing enough at one time to last an entire year. We can plant many veggies, successively, throughout the year.
I decided to incorporate a modified “square-foot” plan where I could plant different seeds in each square rather than a single variety. So, one square may contain beets, carrots and onions, or lettuce, spinach, and kale. And, since my beds are 4-feet by 8-feet it will be easy to mark off the 1-foot squares. It will also make succession planting super easy because I will have two rows of squares to work with—one planted and one waiting to be planted.
I also had to take into consideration the growing habits of some vegetables. Squash, pumpkins and melons all have a rambling growing habit and can literally take over the garden. Runner beans, on the other hand, need vertical space and support to handle their meandering ways, so these veggies will be planted outside of my raised beds.
One year our runner beans outgrew their supports and attached themselves to the branches of a neighboring tree. We had vines more than 15 feet into the tree, making picking a challenge.
Inside my raised beds I will plant root crops, lettuces, spinach, onions, carrots, beets, peppers, bush beans and a variety of other more contained veggies, while the more uncontrollable pumpkins and squash will be planted in the old sheep corral.
But—I still had the uncertainty of how much to plant. The “square-foot” plots would dictate part of this, but think about how many different varieties of lettuces there are. As much as I love salads, and eat them often during hot summer months, do I really need multiple squares of lettuce. I had to really fine tune my garden plan, which I did.
The One Person Garden Plan
(This plan is for MY one person household, based on my personal preferences, but can be increased to accommodate a larger family, or food preservation plans.)
Beans (bush): 4-6 plants (successively planted at 2-week intervals)
Beans (pole): 3-6 plants (for each of my 3 arbors)
Beets: 30-50 plants (successively planted throughout the season)
Broccoli: 6-12 plants (successively planted at 2-week intervals)
Brussel Sprouts: 3-6 plants (successively planted throughout the season)
Cabbage (Asian): 4-6 plants (successively planted at 3-week intervals)
Cabbage (Green): 4-6 plants (successively planted at 3-week intervals)
Carrots: 30-50 plants (successively planted throughout the season)
Cauliflower: 3-6 plants (successively planted throughout the season)
Cucumbers (Slicing): 3-6 plants (successively planted at 3-week intervals)
Cucumbers (Specialty): 3-6 plants (successively planted at 3-week intervals)
Garlic: 15-20 plants (successively planted at 2-week intervals)
Kale: 2-4 plants (successively planted at 2-week intervals)
Lettuce & Musclun: 2-4 plants (successively planted at 2-week intervals)
Melons: 2-4 plants (planted at the same time)
Onions: 20-40 plants (successively planted at 2-week intervals)
Parsnips: 10-12 plants (successively planted at 2-week intervals, late summer to early fall)
Peas: 10-12 plants (successively planted at 1-week intervals, early spring to winter)
Potatoes (Bakers, Mashers & Fingerlings): 15-20 plants (planted at the same time)
Potatoes (Sweet & Yams): 10-15 plants (planted at the same time)
Pumpkins: 3-6 plants (planted at the same time)
Radishes: 20-30 plants (successively planted at 2-week intervals)
Shallots: 20-40 plants (successively planted at 2-week intervals)
Spinach: 30-50 plants (successively planted at 3-week intervals)
Squash (Summer): 1-2 plants (successively planted at 3-week intervals)
Squash (Winter): 2-3 plants (successively planted at 3-week intervals)
Sweet Peppers: 2-4 plants (planted at the same time)
Tomatoes: 3-5 plants (planted at the same time)
With my new garden layout and a more realistic planting schedule, I should have fresh, homegrown produce all year long!
Testing Seeds for Viability
Well—I’ve gone and done it this time!
I really have.
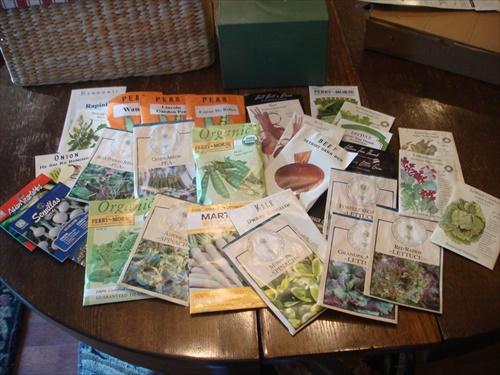
In my eagerness to reclaim my suburban homestead and get green things growing again, I started a bunch..and I mean a bunch of seeds in the greenhouse. I prowled through my seed box and found the flower seeds I wanted. I straightened up the greenhouse and prepared my workspace (can we say cobwebs?). I cleaned and sanitized the pots I would use. I even ran to town to buy…yes…buy…seed starting soil so I didn’t have to spend time mixing my own.
Sounds okay so far, right?
Then I filled the pots, planted the seeds, watered them in and set them on trays in the sunny windows of my greenhouse, and then I impatiently waited.
And, waited.
And, waited.
Nothing.
Still nothing.
Have you ever experienced that…
…you prep the soil, carefully draw out the planting rows, gingerly plant the seeds, water everything in, wait for the proper amount of time for germination…then nothing happen??
If you have, then you know what I’m talking about.
What started off as a great idea unfortunately turned into a dismal failure. I broke a cardinal rule of gardeners, and that is to test a small sample of seeds if the package date is older than THIS growing season, to make sure the seeds are still viable.
And, that’s where it all went off the rails.
I didn’t test my seeds! Can you see me gritting my teeth with an annoyed look on my face? Yeah, not Pretty!
Seeds are tough little guys and they can have a decent shelf life, if you store them properly. But, seeds that are a few years old may have a reduced germination rate so you’ll want to find that out before you start shoving them in the ground.
I know…”do as I say and not as I do” is running through my head right now.
So what am I doing, now? You guessed it. I’m taking the time to test a sampling of my vegetable and herb seeds to make sure that I don’t waste any more time, energy or supplies planting dead seeds.
Steps for Testing Seed Viability
Supplies:
Old seeds you want to test
A few sheets of paper towel
Spray bottle with water (make sure it wasn’t used for anything that could kill your seeds)
Plastic bag
Marker
STEP 1: Fold a paper towel in quarters and mark off the quadrants with a marker.
STEP 2: Label each quarter with the seed you want to test.
STEP 3: Lightly spray the whole towel with water. You want it damp, but not sopping wet.
STEP 4: Place 5 seeds on the paper towel. (I use 5, so I can calculate the germination rate, but not waste seeds)
STEP 5: Spray a second paper towel and place it on top of the first. This will make sure there is dampness all around the seeds, and help hold the seeds in place while you roll up the paper towel.
STEP 6: Place rolled, damp paper towel in a plastic bag and seal it. Place the bag in a warm place.
Germination times will vary depending on seed variety. (Beans and peas are fairly fast, while pumpkins and squash will take longer, but a general rule of thumb is 7 to 14 days for most garden seeds, unless you’re a radish seed, then they’re ridiculously fast to germinate).
Check the dampness of the paper towels daily. You don’t want them to dry out or your seeds will stop germinating. Re-spritz if necessary.
A few days after your seeds begin to sprout count how many have sprouted vs. how many have not. You’ll need this information to calculate the germination rate. At this point, you can plant the sprouted seeds either in pots or in the garden, depending on the type.
Calculating Seed Germination Rate
To calculate the germination rate: divide the number of germinated seeds by the total number of seeds in the test sample then multiply by 100.
Example:
5 seeds germinated/5 seeds in sample x 100 = 100% germination
2 seeds germinated/5 seeds in sample x 100 = 40% germination
3 seeds germinated/5 seeds in sample x 100 = 60% germination
The higher the germination rate, the higher success you’ll have in the garden. A low germination rate does not always mean disaster in the garden. Low germinated seeds can be double planted to make up for the low rate.
Seeds that were packaged for “THIS” growing season do not need to be tested, only older seeds.
Seed Storage & Viability Chart
| Seed Type | Longevity of Properly Stored Seeds |
| Artichokes | 5 years |
| Arugula | 3 years |
| Beans | 3 years |
| Beets | 4 years |
| Broccoli | 3 years |
| Brussels Sprouts | 4 years |
| Cabbage | 4 years |
| Carrots | 3 years |
| Cauliflower | 4 years |
| Celery/Celeriac | 5 years |
| Chard | 4 years |
| Collards | 5 years |
| Corn | 2 years |
| Cress | 5 years |
| Cucumbers | 5 years |
| Eggplant | 4 years |
| Endive/Escarole | 5 years |
| Fennel | 4 years |
| Kale | 4 years |
| Kohlrabi | 4 years |
| Leeks | 1 year |
| Lettuce | 5 years |
| Melons | 5 years |
| Mustard | 4 years |
| Okra | 2 years |
| Onions | 1 year |
| Peas | 3 years |
| Peppers | 2 years |
| Pumpkins | 4 years |
| Radish | 5 years |
| Rutabagas | 4 years |
| Spinach | 2-3 years |
| Summer Squash | 4 years |
| Tomatoes | 4 years |
| Turnips | 5 years |
| Watermelon | 4 years |
| Winter Squash | 4 years |
8 Steps to Dividing Bearded Irises

Ever since I was young I have had a love affair with flowers…
…all kinds of flowers.
Sure, I have my favorites, but there are few that I don’t like. I love the colorful blooms, the bright green foliage and the scents of different flowers as it drifts over my suburban homestead on a sultry summer breeze.
When I was young I use to help my mom at garden club plant giveaway days, and hound her to bring home anything that was left over…no matter how many there were.
This was never really a problem. We lived in the suburbs on a ¼-acre lot that we treated like a mini farm and flower garden. And, a ¼-acre is a lot of ground to cover. I guess this is partly where, or why, I became what I call “a child of the earth”, someone who enjoys getting down in the dirt, digging, planting, nurturing and watching green things grow. I have never lost that childlike enthusiasm.
Although I’m no longer a child I still get a childlike giddiness every time spring comes around, or when I visit a beautiful garden or potager, the endless possibilities for what I can incorporate into my own garden are always exciting. A potager is a fancy French word for kitchen/flower garden. I say that in all loving jest because I love visiting gardens, finding new plants or techniques I can bring into my own garden. Over the years I have seen dozens of flower and vegetable gardens in America, France, England and Ireland. It is a huge dream of mine to create a quintessential English garden on my own property. But, with California’s arid weather, not to mention the ongoing drought, this dream will only take place if I move to an area that gets more rainfall than we do (or, I win the lottery and can afford the water bill). A girl can dream though, can’t she?
All is not lost, though.
No need to feel sorry for me.
I do have a flower garden, one that is on the verge of bursting with blooms this time of year. And the flowers I am most looking forward to seeing in bloom is my collection of bearded irises. I say collection because I have acquired about 50 different varieties (colors) that I’ve gathered through the years. Some came from those early garden club giveaways, some were given as gifts, some I brought from my previous home, and some were purchased from iris growers here and abroad. I have to say, it’s a tricky thing to get iris bulbs through customs:)
But, most of my collection has been acquired from other iris gardeners when they divide their bulbs.
And, in turn, I have supplied new iris enthusiasts with divisions from my own garden. Garden people are like livestock people…we are always willing to help a new member of our “unofficial” club.
To help new gardeners, or to maintain my own beds of irises, I divide my iris rhizomes every 2 to 3 years so they don’t become overcrowded, affecting their ability to bloom. Dividing, separating and transplanting helps to rejuvenate the clump and to give the gardener a way to enlarge the iris bed. Always a huge plus in my book.
Dividing irises isn’t a difficult thing to do, but it is important that the irises be divided during the right season so the bulbs have time to reestablish after being divided and transplanted.
The steps below will help you make the most of your iris bed, so that you will be ensured of lots of future blooms.
8 Steps to Dividing Bearded Irises
Step 1: Timing is Everything — For best results, divide irises after they have bloomed. This can be done from late spring through early fall, depending on the weather. (I usually divide in the fall when it’s not so hot) If winter lingers in your area, wait for warmer days. Also, irises should not be divided in winter when they go dormant and use their stored energy to survive.
Step 2: Digging the Clump — Use a sharp spade or fork to dig deep below the roots and gently lift the clump up. Remove excess dirt by shaking or hosing it off.
Step 3: Divide the Fans — Bearded iris leaves look like a multi-pointed fan. Break off larger fans, or cut with a knife, at a joint, making sure that they are firm and not squishy. Limp or squishy divisions can be diseased and should be thrown away. Do not compost them, as they can spread disease.
Step 4: Prepare Divisions for Transplanting — Remove dead and older, limp leaves. Trim remaining healthy leaves to about 8-inches above the rhizome. This will help keep the plant from toppling over while it establishes new roots.
Step 5: Prepare New Planting Area — Dig and sprinkle the new planting area with lime, irises like a bit of lime. For group plantings, create a triangle with 18 to 24-inch sides. For all plantings, form a mound and set the rhizome on top of the mound, spreading the roots out in the hole. For group plantings, make sure the “toe” or bulb part faces in towards the triangle.
Step 6: Settle in the Rhizome — Firm soil around to the top of the bulb and pack it down. It is alright if part of the bulb is showing.
Step 7: Spacing your Irises — Whether planting in a triangle, square or line, plant bulbs at least 12-inches apart and make sure the fans all point in the same direction. Closer spacing is fine, but you will be dividing your clump more often. This is not a problem, it’s just that irises are perennials that may not bloom the first year after dividing.
Step 8: Water in your Transplants — Give your transplants a good soak to settle in the soil, then deep watering a few times a week to establish your new patch. Less frequent watering is better as irises are fairly drought tolerant. Too much water, though, can rot the bulbs.
Once your patch is established you’ll have beautiful blooms all season long.
8 Tips to Growing Better Tomatoes
![]()
A garden is just not a garden without the ramblings of tomato plants.
The warmer weather of our somewhat early spring took me into the garden to begin the reclamation of my much neglected suburban homestead. Between pulling weeds, mulching beds and turning over the soil I was eager to get some plants in the ground.
A few weeks before I had potted up a bunch of seeds in my greenhouse, but I wanted more instant gratification than those little seeds could provide. I wanted growing things! Badly.
The timing was perfect because the annual Tomatomania event was taking place at a local nursery that very weekend. It’s a celebration of sorts, all things tomato, for the serious tomato lover. The three day event touts over 300 different varieties of heirloom and hybrid tomato plants, from green to pink to orange to yellow, you can find anything you want, tomato wise. Some plants come in 4-inch pots and some in 1-gallon pots…for people who need more instant gratification than me I suppose.
To be honest, I’m not much of a fresh tomato person. Oh…I do enjoy sliced tomatoes and mozzarella with balsamic and basil, and a slice now and again on a burger, but that’s about it.
My favorite varieties are the fleshier roma or plum types rather than the juicy slicing varieties like Better Boy or Beefsteak.
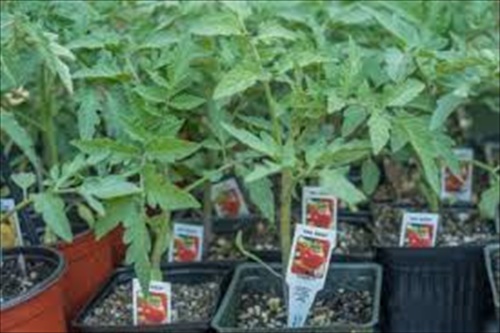
After combing the racks I settled on 3 heirloom varieties – San Marzano, Orange Strawberry and Bleeding Heart.
The San Marzano is an indeterminate long-season red plum type variety with lots of thick flesh and a strong, sweeter and less acidic flavor that matures in about 90-days.
The Orange Strawberry is an indeterminate mid-season German variety, shaped like a strawberry with a deep orange color and a crisp sweet flavor that matures in about 80-days.
Bleeding Heart is an indeterminate mid-season multi-colored heart-shaped tomato with a mild sweet taste that matures in about 70-days.
My choices had more to do with color and interest than production or canning ability. I wanted something new, something I had never grown before for my new garden. But, that doesn’t mean I don’t want them to produce well.
So—what do all these terms mean? Read on!
Tomato Terms
Determinate tomato plants reach a certain height and produce most of their fruits in a short period of time, which makes them perfect for homesteads that want to can sauces or paste. Determinate types also make great choices for container or patio growing.
Indeterminate tomato plants continue to set fruit all along its stems throughout their growing season. These are also more rambling plants that need extra support to keep the fruit off the ground.
Early Variety are tomatoes that ripen fruit in 50 to 60 days. These are prized for bringing fruit off long before most other varieties, or being planted in the late summer for an early fall crop.
Mid-season varieties are those that can be harvested in the middle of the growing season, typically ripening fruit in 70 to 80 days.
Late-season varieties are those that take 90 or more days to ripen fruit. These are traditionally varieties that won’t be picked until late summer.
Most suburban homesteaders like the mid-season varieties with a goal (or challenge) of getting tomatoes by July 4th.
Tips for Growing Better Tomatoes
1.) Make Your Choice. Choose a variety that is best for you and your area. Choose early, mid- or late-season tomatoes, letting the “days to maturity” guide you. Choose seedlings with sturdy stems and bright green foliage.
2.) Find a sunny spot. Tomatoes love sun and heat. 6 hours is the minimum and 8 hours is preferable. If your area is unusually hot during the day you may need to rig up some shade during the hottest part.
3.) Amend the soil. Be generous with soil amendments and compost and remember to feed your plants with organic fertilizer. Tomatoes love a good rich soil. Layering over the top of the soil will protect the roots from being disturbed by tilling.
4.) Plant seedlings deep. Remove the lower sets of leaves and plant up to the remaining leaves, leaving about 3 to 4-inches of plant above the surface. The little leaf nodes will send out roots, making you plants sturdy and better able to carry the weight of the crop.
5.) Be water wise. Watering correctly means soaking the root ball every 3 to 4 days for the first few weeks after planting. Proper watering can affect the taste as the tomatoes grow, so once the plant starts growing, water deeply and less frequently, giving them just what they need.
6.) Fertilize. Feed plants around the root zone once they are established and again when they flower. If your soil is depleted you may need to fertilize more often or with a particular fertilizer to address the deficiency.
7.) Provide support! Especially with indeterminate varieties, since some of these can get to be 10-feet tall. Stakes or bamboo are good and sturdy. Cages also work well.
8.) Be patient! Just because a tomato is red (or yellow or pink or orange) doesn’t mean it is at its peak of flavor. Look for a deep true color of the variety and some give when touched before devouring your harvest.
These steps will help you get the most out of your tomato season!
Sanitizing Seed Starting Pots
For decades I’ve been a huge fan of pots; like my love of galvanized watering cans, it borders on a slight obsession.
Old mossy green pots that look like they have been used in a garden shed for a hundred years. The one’s covered in a lovely patina that harken you back to Victorian era gardens, or at least Victorian era garden shows.
With my yearlong funk over and the weather finally turning warm I have been antsy to get some seeds started, to feel the soil between my fingers and inhale the sweet smell of warm, damp earth so fragrant in spring.
I literally haven’t touched a plant in almost a year. Saying I’m eager to get back to gardening is actually a huge understatement. So I dug out my box of seeds to see what I had in the way of flower seeds and found Hollyhocks, Poppies, Bachelor Buttons and Nasturtiums. Then it was off to the greenhouse to gather my pots. That’s when I discovered…I have no seed starting soil. Great!
I also realized that my collection of seed starting pots had also been sitting collecting dust and God knows what else for the past year. This was not good.
When you go through a funk many things fall by the wayside.
I was determined not to be thwarted in my newfound vigor to get my hands in the garden. So, I decided to clean and sanitize the pots and let them dry while I went to town to buy the supplies I needed to make my seed starting soil.
I set up my cleaning station in the sink of my greenhouse, along with a few scrub brushes for scrubbing mystery gunk.
Sanitizing your seed starting pots
There’s really no magic trick to doing this, honestly, but I do have a few words from years of experience—Don’t Use Bleach! It’s hard on your hands and fingernails, stinks like the devil and it makes your hands slimy—yuck. The better alternative is good old fashioned, common as hell, cheap3% hydrogen peroxide. Yep, you got it. Don’t fuss around and over think this, just buy the cheapest stuff you can find. I get mine from Big Lots for less than $1.00 per bottle and have several bottles on hand for wounds (human and animal), household cleaning solutions, detoxing baths and you got it…sanitizing garden pots.
Here’s how I cleaned and sanitized my pots.
One: I filled my tub with water and a bit of anti-bacterial liquid soap.
Two: I brushed off all residual soil and grime, and, in my case, cobwebs and dead bugs.
Three: I then scrubbed the pots in the soapy water to remove any crusted on soil, and to clean and disinfect them.
Four: Lastly, I poured a bottle of hydrogen peroxide into a shallow wash pan and added about a quart of water. Then I bathed each pot in the peroxide solution before setting them on the rack to dry.
Why do I use hydrogen peroxide instead of bleach?
Simple. Bleach can soak into the clay pots and be leached out when the planted pots are watered, killing the seedling. Because the peroxide has beneficial properties, is diluted, but still strong enough to sanitize, it won’t hurt the plants.
You can also use this process on plastic pots, pony packs and seed trays. Just soak them and let them air dry.
If you’re in a hurry you can also spray each pot with regular white vinegar. If you’re really concerned about fungus or bacteria, give your cleaning process the one-two punch by soaking the pots in the peroxide solution before spraying them with vinegar. That combo will kill just about anything.
This process took a bit longer than I had hoped because I was cleaning dozens of pots. By the time I got to town to buy my seed starter ingredients I was in no mood to spend the afternoon mixing soils. It was time for some instant gratification, meaning I purchased premixed seed starter soil.
I know, I know.
But, I can be a lazy homesteader for a day, can’t I?
Using Fall Leaves as Mulch
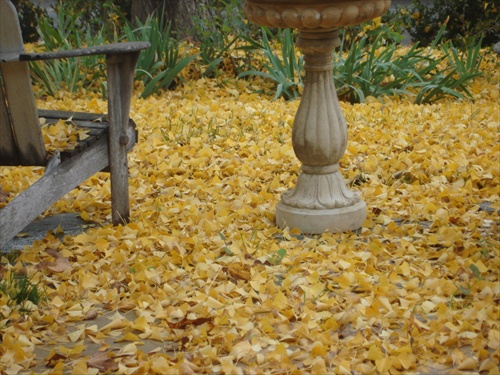
For many people, the release of fall leaves onto the yard is an unwelcome sight, fraught with raking, and bagging and disposing of mounds and mounds of debris. But, for me it is just the opposite. I welcome a yard full of fall leaves because I have always thought of them as a valuable crop (in a manner of speaking) to be harvested, shredded or composted and used as mulch in my garden.
I learned, long ago, that when you shred or compost leaves you end up with nitrogen and nutrient rich garden mulch that is totally free and readily available. When you layer the confetti like leaves in garden beds it settles down with each watering or rainfall and new application of leave to knit together creating a felted like carpet that doesn’t blow away in the wind, but stays loose and porous enough to let water penetrate.
My deciduous trees like the Sycamore and Gingko are in the front yard, which isn’t very big, so I don’t get tons of leaves, but what I do get is stored in an unused compost bin until I have good amount to shred. Throughout the fall they are collected and shredded and will mulch several garden beds.
When life gets busy and doesn’t leave time for raking or shredding all those leaves they get mowed over with the lawn mower and used as mulch, as is, or piled into the compost bin to break down into nutrient rich soil. If I’m feeling really energetic and need more leaves than my trees can provide I ask neighbors if I can have their’s. You can always find someone willing to let you clean their yard of leaves, so they don’t have to.
Homemade Fish Emulsion

When I was in grade school (a million years ago) we would read books about the Pilgrims and the Indians this time of year. What always struck me as odd was the part of the stories that talked about how the Indians buried a fish in the hole where they planted corn or pumpkin or squash seeds. Little did I know at the time that the decomposing fish provided food and nutrients to the germinating seeds and growing plants, much the same way topical fertilizers do today.
But, unlike in the Pilgrim days, if you search for fish fertilizer, sometimes called fish emulsion, in garden or farm stores you’ll quickly discover that they are quite expensive, too expensive for a frugal farm girl, like me. So years ago I set out to learn how to make my own. What I found out was if you have access to fish parts the process is fairly easy. Fortunately, I had a father-in-law who was an avid fisherman, and not just the catch and release type. He only believed in catching and eating. I also live fairly close to the coast with a small, but vibrant fishing industry, so my supply of fish guts was pretty steady.
Once I had the supply part figured out, it was easy going from there on.
To make your own Homemade Fish Emulsion, follow these 5 simple steps and you’ll be well on your way to creating your own nutrient packed, Pilgrim era fertilizer that your plants will love.
STEP 1: Find yourself a fairly large barrel with a lid, like a 33-gallon plastic trashcan or one of those blue water collection barrels, and label it FISH FERTILIZER, ‘cause you won’t want to mistakenly use it for anything else. A lid is important to keep the critters out, so make sure it fits securely.
STEP 2: Gather up your fish guts and bones and skins and toss them into the barrel. Crab and shrimp parts also work well because they are loaded with calcium. They take a bit to break down, but they’re worth it. You want to fill the barrel about 1/3 of the way, so if you don’t want to make very much or you don’t have access to a lot of fish parts use a 5-gallon bucket and stick with the 1/3 ratio. You’ll see why in a second.
STEP 3: Layer in some brown stuff, just like you would with a compost pile, so you have a nice carbon/nitrogen mix. Leaves work great. Layering the fish then leaves and so on will help the materials break down. You want the barrel to be about 2/3’s full.
STEP 4: Pour on a bit of sugar for the bacteria and micro-organisms to feed on and to help lessen the fishy smell. It also adds a bit more carbon to the mix. I use a livestock molasses that can be purchased in a gallon jug from a farm supply or feed store. Use ¼ to ½ cup for smaller buckets and about a cup for the larger barrels. This isn’t a fine science so don’t get obsessed with it. The sugar helps with the fermenting process.
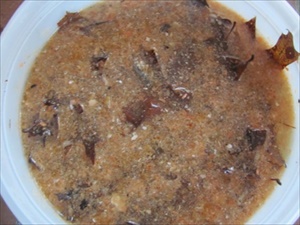
STEP 5: Fill the bucket with water to a few inches from the top. Now stir you’re gunky, sloppy mess until everything is well incorporated. Looks great, doesn’t it? Yep — it’s supposed to look that gross. Now place the lid on, but not too tight, the pressure that builds up from the fermenting will blow the lid off. You’ve been warned.
NOTE: Try not to let flies in the barrel or you’ll have a stellar breeding ground for maggots, and that’s not what we want. One solution is to drill a few holes in the lid and then line the underneath side with a fine mesh. This will let the gases release, but won’t let the flies in.
Now comes the hard part.
Let it sit for a few weeks, a month is better, so everything can ferment. Give it a good stir every few days to keep things well mixed and decomposing. It will ferment faster in warmer weather than in cooler weather, but it smells worse in warmer weather. You’ve been warned, again. After about a month your brew is ready to use!
Using Fish Emulsion
There are several different ways you can use your fish emulsion. One is to stir it well and then scoop out what you want to use, drizzling it around your plants. This gives plants bio-available nutrients in a soluble form. You can also strain off the solids and use just the liquid in a watering can like you would a manure tea, using the solids to start another batch. Or, you can use it as a drench, diluting 2-3 tablespoons in a gallon of water, and then applying it around the base of your plants. Some people use it as a foliar spray, but there’s something so unappealing about rotting fish guts coming in contact with my salad greens that I personally refrain. But, if you’re braver than me, mix 1 tablespoon of emulsion per gallon of water and use a foliar sprayer, applying it in the cooler part of the day rather than in the heat of the day.
Other Tips for Using Fish Emulsion:
- Kick start your compost pile by using ½-cup in a gallon of water and layering it in.
- Your brew will keep for a year if you make it in large batches. Smaller batches can be made seasonally.
- This stuff smells! Store it in an out-of-the-way place so the odor won’t knock you off your feet.
- Did I mention this stuff smells? EVERYTHING it comes in contact with will smell like dead fish. Choose your buckets, stirs and sprayers or water cans with this in mind, and be careful not to get it on your clothes or shoes when using it, the deodorizers don’t work very well.
- Solids can be used up to three times before they lose their potency. After that you can add them to your compost pile.
Sources for Fish Parts:
- Your own fishing trips
- Fisheries
- Local fishermen
- Farmer’s Markets
- Grocery store fish counter or fish market
Brewing & Using Manure Tea
Looking to make your garden grow even better than it does now?
Well—if you have chickens, rabbits, sheep, goats, cows or horses you have all you need to make your own power packed liquid fertilizer.
Yep, that’s right. Manure can be made into a liquid fertilizer, often referred to as “manure tea”.
Mulching your garden with leaves, grass clippings, used livestock bedding or any other organic material is a great way to add nutrients back into the soil, making it friable and easy to work. But, adding a dose of manure tea will punch up the nutrients ten-fold.
We have a routine around our homestead…late fall is the time when the livestock trailer is cleaned out and old shavings and straw is used to fill the nesting boxes in the chicken coop. It’s wintered over in the coop and the hens add another layer of manure to the mix. Come spring we have a good amount of compost to add to the garden beds, enriching the soil and increasing the good bacteria and microorganism population. Gotta keep up the good stuff in our soil, right?
But now we have one added step. We add a generous dose of manure tea to the beds before mixing in all that great compost. Unlike compost tea, which increases the good microbes in the soil, manure tea pulls the nutrients out of the manure, dissolving them into a liquid tea. Making manure tea is also a simple and fast process, so it won’t take long before your garden can benefit from all those added nutrients.
Although chicken manure has the highest level of nitrogen and one of the highest levels of Phosphorous and Potassium, any manure can be used to make manure tea. Since we have chickens, rabbits, ducks and sheep that’s what we’ve used over the years.
So—how simple is making manure tea?
This simple:
- Grab yourself a 5-gallon bucket (preferably one without a crack, (sometimes hard to find around here).
- Dump in a heaping shovel full of aged manure. (Use aged, as fresh can burn your plants and roots).
- Fill the bucket with water and vigorously stir to churn everything up.
- Let the bucket sit for about a week so the “tea” can brew. Stir every day to aerate the mixture so bad bacteria doesn’t grow.
I told you it was simple.
How to Use Manure Tea
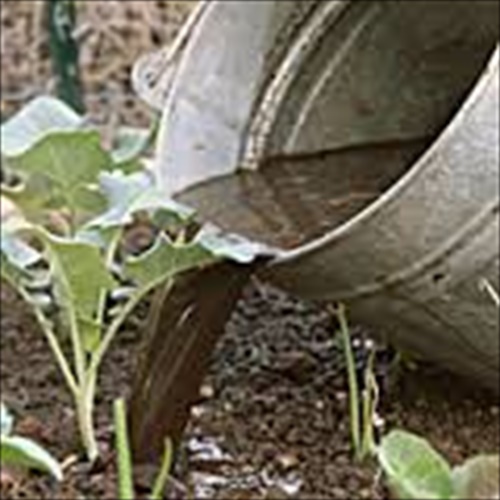
Finished manure tea can be used straight from the bucket using a ladle or watering can.
If your tea turns out really dark it should be diluted at a 1:1 ratio. Simply pour half the tea into a new bucket and fill with water, then strain out the solids from the original bucket and fill with water. Now you have two buckets of tea. Add the solids to your compost pile or till them into garden beds.
Manure tea is best used around the base of young seedlings or plants, giving them a boost of nitrogen to help them grow. Applications can be made once a week using a watering can or pump sprayer. Be cautious, though. Manure has pathogens that can cause illness, so manure tea should not be used on root crops like beets, carrots, onions or potatoes. Also, it should not be applied to the leaves of edible plants like lettuce, kale, spinach or other greens where the leaves can be eaten.
NOTE: I make a big batch of manure tea using an old 35-gallon water tub. Because of the container size I fill it with about 8 to 10-inches of manure, then fill with water. I let it steep and pull out the finished tea using a bucket or watering can. It is used straight on the garden beds as I am preparing them for planting in early spring. I wait about a week or so before planting. After planting I can reapply using a watering can or ladle.
7 Steps to Improve Garden Soil Through the Winter Months
Last fall I was about to pull my hair out!!!
Seriously.
Have you ever had a conversation with someone…the same conversation you’ve had with them for years? Well, that was me this past summer, and I’m still recovering.
For the umpteen millionth time my mom asked me what is wrong with her garden. And—for the umpteen millionth time I have responded…STOP ADDING SAND AND GYPSUM!!!
Mom thinks that if a little is good a whole lot more is better.
Let me explain…
Years ago someone, somewhere convinced my mom that adding sand and gypsum to her soil would help break up the clay and make the soil more plant friendly. But, somehow I don’t think they meant she should make those additions every year for 50 years.
Yep…you got it. For the past 50 years my mom has been dumping buckets of sand and bags of gypsum onto her garden beds. Rather than creating the dark rich workable soil that is deep with organic material and teaming with life all she has managed to do is make CEMENT!
Ya know what grows in cement? Not much of anything.
This is a conversation we’ve had every year since I became an avid gardener and suburban homesteader. Every year I tell her how to improve her soil, and every year she tells me I have no idea what she deals with because my soil is so wonderful.
Well…I have a news flash…my soil wasn’t always wonderful. Great soil is created more often than it just exists. Soil can be good, but great soil is constant work and somewhat of an art form, albeit not fine art.
I think I’ve made a breakthrough, though. Mom has finally decided to take my advice on how to improve her soil so she can finally have the garden she has always wanted.
So how does one go from dead and barren soil to dark, rich, friable soil that plants actually want to live and thrive in? One step at a time, that’s how.
7 Steps to Improve Your Garden Soil During the Winter Months
Grass Clipping & Yard Trimmings:
If you still have a lawn to mow, layer the clippings in the garden instead of dumping them in the yard waste barrel. Alternate with trimmings from flowering plants, vegetables, and non-woody shrubs. Any soft plant material can be laid right on ground, like our forefathers use to do.
Pile on the Manure:
Manure is one thing most farms have in abundance. I consider my chicken, rabbit and sheep manure to be “gold” for my garden. Although chicken manure can be a bit “hot” to spread directly on plants, it is perfect for building up your soil before the planting begins. Cow manure is a great all-round addition, but may be hard to find in suburban areas. Check with local 4-H Clubs or FFA programs for possible sources. Horse is usually very plentiful, but it can contain more salt from the urine than is good for your garden. Apply it sparingly or mix with other less “salty” manures from sheep or goats. I’ve had success finding large qualities of cow and horse manure on CraigsList, but a word of caution here…you may get weed or grain seeds in the bargin, so be sure to mulch heavily so the heat of decomposition will kill them.
Add Mulch:
I’m a hug fan of mulch as the primary source to build up your soil. Straw, hay, shavings and shredded plants help retain moisture, suffocate weeds, and when it breaks down it makes the perfect breeding ground for an army of beneficial garden worms. Some mulching materials can be purchased from local feed stores or garden amendment companies. Lay your mulch about 4-inches deep.
Compost:
If you don’t already have a compost pile, it’s time to start one. It’s the best way to turn kitchen scrapes, coffee grounds, egg shells, weeds, trimmings and manure into a nutrient rich soil additive. When building your compost pile think green and brown, fresh and dried. To set up a compost bin quickly, fasten 3 wooden pallets together and then hinge the 4th for s gate. Nothing fancy is needed.
Natural Amendments:
Inferior garden soil will benefit from a sprinkling of natural amendments like bone or blood meal, worm castings, wood ash (I fill a small trashcan full when I clean out the fireplace), fish emulsion, or Epsom salts.
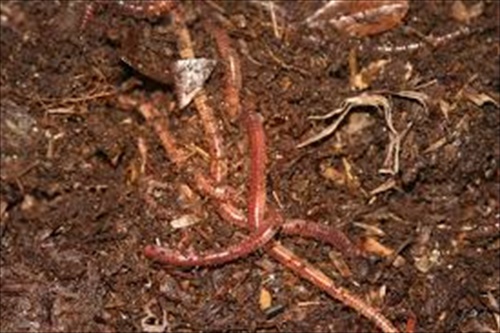
Add Earthworms:
Earthworms are nature’s eager tillers. As they move through the soil they create air pockets, allowing air, nutrients and water to penetrate dead soil. They chew up decomposing matter and shed castings that help improve the soil’s body.
Plant a Winter Cover Crop:
Cover crops are a great way to build up soil and break down hard soils while infusing it with nutrients, improving aeration, killing weeds and weed seeds, and improving water retention. Deep rooted crops like ryegrass are especially good because they’re deep root systems help break up and aerate the soil. Once you’ve built up your soil you can plant nitrogen fixing cover crops, like clover, to improve the nitrogen level of your soil.
When mom made the decision to seriously improve her garden soil we had a lot of work to do. Here are the steps we took beginning in fall and extending into the next growing season.
Season One: Layering the Garden
- Remove all plants and weeds.
- Lightly till soil.
- Add natural amendments, sparingly.
- Layer on manure.
- Top with mulch.
- Pile on compost.
- Plant ryegrass cover crop.
- Drench with manure tea.
- Winter over.
Season Two: Building the Soil
- Deeply till the garden to incorporate all the organic matter from season one.
- Test soil and add needed natural amendments.
- Add earthworms to help speed decomposition and aerate soil.
- Layer on manure, mulch and compost.
- Plant nitrogen fixing cover crop.
- Water generously with manure tea.
Now, here it is…the following fall and my mom’s garden is ready to plant with fall vegetables, bulbs, perennial herbs and flowers.
How to Test Your Soil’s pH Level
Soil pH is the backbone of any productive garden. Soil pH is important to know because it influences how easily plants can absorb nutrients from the soil.
But, what is pH?
Simply put, pH shows how acidic or alkaline your garden soil is. And, although some plants like and do well in acidic or alkaline soil, most common vegetables thrive on a balanced pH level.
The ideal pH level for garden soil is 6.0 to 7.0 pH. Levels below 6.0 are considered acidic, while levels above 7.0 are considered alkaline.
Garden soil should be tested before you begin gardening so you can find out how “out of balance” your soil is and make adjustments. There are soil testing kits and companies that test a soil sample you send them, but these are often times expensive and time consuming.
I much prefer a simple “homemade” test that I can do any time before planting or after the last harvest. That way I can start adding amendments to balance out the soil between planting seasons.
To test your soil at home, use this simple process.
NOTE: Soil pH can vary from garden spot to garden spot. Each growing area should be tested.
- Find 2 glass jars (for each growing area to be tested) and label them “Alkaline” and “Acidity” (include the garden area they came from). Example: “Raised Bed Garden – Acidity” or “Berry Patch – Alkaline”. Quart-sized canning jars work great.
- Dig down a few inches and add a handful of soil to each jar.
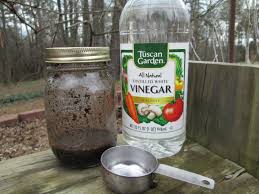
- To the Alkaline jars add ½ cup of white vinegar.
- To the Acidity jars add ½ cup of water and ½ cup of baking soda.
Now wait a few minutes.
Reading the results…
If the Alkaline jars, with the vinegar, start to bubble your soil is too Alkaline and you need to lower the soil’s pH by adding pine needles or sulphur.
If the Acidity jars, with the baking soda mixture, start to bubble your soil is too acidic and you need to add lime or wood ash (which we have lots of coming out of winter).
Each time you test your soil you can readjust the additives to help level out the pH so your veggies and plants will grow strong and healthy. It is also a great tool to measure the soil for alkaline and acid loving plants, that don’t like a balanced soil.
A few acid loving herbs and veggies
Garlic
Parsley
Spinach
Peas
A few alkaline loving plants
Sage
Oregano
Asparagus
Artichoke
To find out what pH level your favorite plants will like, check out this list from The Farmer’s Almanac
Recent comments
Aenean nonummy hendrerit mauris. Phasellus porta.