Archive for October, 2013
Soup’s On!!!
We had a glorious fall weekend, with mild temps and just a slight breeze. It was the kind of weather that calls out for chores to be done more out of the pleasure of being outside than the necessity of getting the job done.
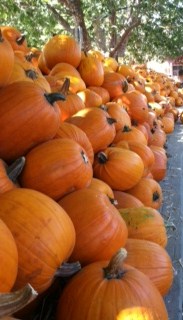
Vines that once fed our pumpkins and squash were pulled up and composted. Garden soil was turned over and amended and made ready for a late Fall planting of cool weather crops. There was cleaning around the barn, but not actually in the barn. A stack of rabbit cages needed to be cleaned and made ready for their new owners.
After years of raising meat rabbits both for fair and freezer I have decided to stick with meat chickens. So, I popped up a post on Craigslist and within hours the whole lot was snatched up by a family eager to turn their backs on GMO fed and factory raised rabbits. We had a nice chat on the phone and by the end they seemed more excited than ever to start their own rabbitry, or maybe it was the fact that I wasn’t put off by the idea of raising one’s own meat.
As the day lingered I worked my way, slow and steady, through picking up, cleaning up and reorganizing the barn and tack storage, and a little bit in the garage. I always feel so much lighter and in control when my farm is organized and makes sense.
As I shoveled the last pile onto the compost pile the sun threw a golden cast over the whole farm. It was glowing with peace and tranquility, if not cleanliness. It was a signel though, that the end of my day was coming. I worked well past dark finishing up chores and picking up tools because I knew there was a hot meal waiting when I was through.
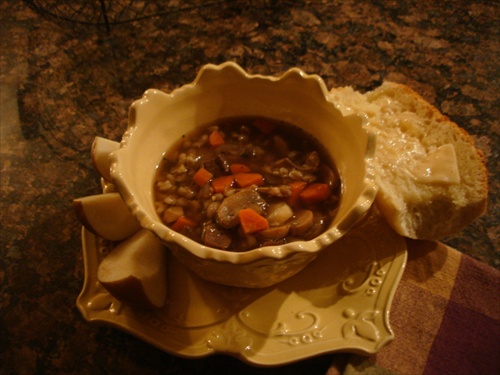
Earlier in the day I had started a batch of beef barley soup in the crockpot. I’m a huge fan of crockpot cooking because it allows me the freedom to tend house and farm without watching over a stove.
Tonight’s meal would be a combination of leftover steak, hearty vegetables and a rich aromatic broth. Paired with fresh picked pears from a local farm and some crusty bread fresh from the oven it would be the perfect fall meal to the ending of a perfect fall weekend.
My recipe is simple, just like the meal. 6 cups of beef broth, 3 diced carrots, 3 diced potatoes, 1 diced onion, 4 chopped mushrooms, leftover steak, chopped, ½ cup pearl barley and ½ cup frozen peas. Throw the whole mess in the crockpot and set on high.
The weather has turned off blustery and cold; the kind of cold that bites at you and cries out for multiple layers, thick and warm. Its days like these that make me grateful for the simple pleasures of a hard job done well and the meal waiting like a reward.
A Handful of Treasure
Every night when I get home from work I walk the farm. It has turned into an evening ritual that helps me shed the stresses of the day. It also gives me a chance to fill water troughs and feeders, pick ripened veggies, deadhead flowers and take stock of chores that need to be done.
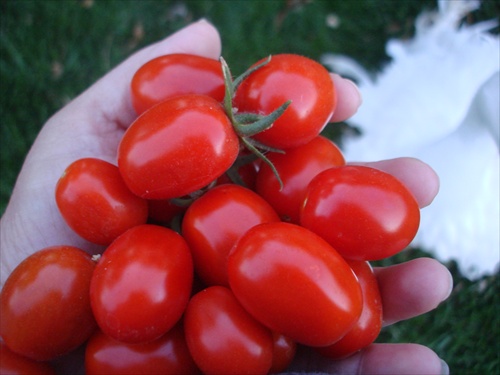
During this evenings walk I noticed a bit of red peering out from between the roses. It was small, but bright, like a shiny marble. At first I thought it must be a bud that hadn’t opened or a rose hip that was especially red this year. As I walked closer I could see a few more scattered between the branches and leaves. When I bent over I realized the tiny red balls had nothing to do with roses at all. They were ripe Grape Tomatoes hanging in little clusters intertwined in the roses and the arbor. Some had even grown through the fence and attached themselves to a roll of garden wire on the other side. They were perfect; firm and bright and sweet right off the vine. I picked all I could see, more than a dozen in all. They will make a great addition to salads or sautéed with zucchinis and onions.
But, it’s a curious thing though. I never planted Grape Tomatoes, nor did I buy a plant. And, if I had I would never have planted them with the roses. These little gems were an act of kindness from a passing bird.
We get a few odd additions to our garden every year. A few plants that nature has decided we need. And why not? We do feed a few of her feathered friends with our garden. Maybe it’s just her way of reciprocating. No matter the reason or the cause everyone can use a handful of treasure once in a while.
The Downside of Backyard Poultry
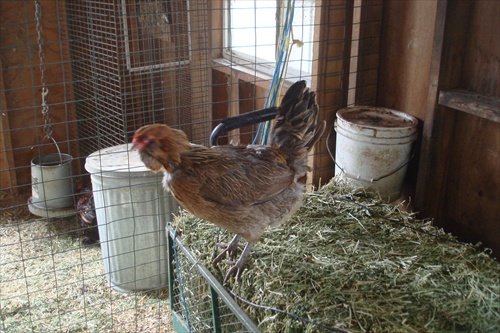
A few years ago, my friend and neighbor, fell in love with our newest batch of day old chicks. What’s not to love? They are tiny, soft, and fluffy and have the sweetest peeps of anything on the farm. Several days later she announced that she too was going to start her own backyard flock and raise her own eggs. She wanted me to come by and tell her all about raising chickens. She wanted to know about breeds, feeding, housing, how to collect eggs, clean them, and store them. She wanted to know how I sold my eggs, how much I charged for them and what I did with any I didn’t sell. As much as I tried, though, the one thing she didn’t want to know about was what to do when the hens were no longer laying.
The years have gone by, and the hens have now stopped laying. It happens, its part of the cycle. We have dealt with it for years. But, it is also the part that most backyard chicken raisers don’t want to know about, and that is what to do when the hens stop laying. By this point the hen(s) are part of the family. They are no longer a farm animal, they are a treasured pet. They follow the family all over the yard. The kids play with them and some even sleep with the dog or cat, they have become so intertwined in the family. The owners have neither the heart nor the will nor the know how to turn their beloved old hen into the best chicken soup ever. So, many of them are sent off to the local animal shelter. Our shelters are full of these aged cast offs.
But, my neighbor would have none of it. She felt sending her “girls” to the animal shelter was more cruel than my practice of butchering them. Instead, she drove to an animal rescue 45 miles away and donated her old hens. I tried to rationalize this in my mind. How to make sense of spending hours of my day driving, using gallons of gas that costs about $3.80 a gallon all in the name of a $5.00 hen. I couldn’t.
It was pride in her voice as she told me how SHE had allowed her girls to live out their lives on a peaceful farm rather than MY practice of butchering them for stews or soup. I couldn’t help but wonder how long the girls would actually live, how were they really being cared for and if they were in fact living a better life. I strained to imagine a world where all farm animals were sent away to live out their lives in some other place rather than being consumed. But, I could not. It made no sense. And, at the end of the day she did get rid of her unproductive hens, abandoning them to the care of someone else. I wondered how was this better for an animal proclaimed to be part of the family. Would she have done this to her dog or cats? Were they just as dispensable when they were old and unproductive? Probably not.
Nope, folks, I’m standing by my adage that if you’re going to raise chickens to have your own fresh eggs, learn how to butcher your old hens (and those roosters you thought were hens) for wonderful soups and stews, or pay to have them processed for you.
As I write this I can’t help but remember our own batch of hens butchered earlier this year. It is definitely not my favorite job. I don’t think any farmer would say butchering an animal they have raised is a pleasure. The only thing that keeps me raising and processing animals for my freezer is remembering how much we will enjoy them later on. But, to be perfectly honest I don’t butcher many older hens. The coyotes, raccoons and opossums usually get there first.
To Stew an Old Hen
The secret to a tender stewing hen is to cook her low and slow. I put about 1-1/2 cups of frozen chicken broth in a crockpot along with chopped garlic, onion, celery and carrot, mixed herbs like Herbs de Provence or Italian herbs, sea salt and coarse ground pepper. I set it on low and let it cook all day. Old hens have a lot of fat you’ll need skim it off when it’s finished cooking. You can keep the fat for use in dumplings for chicken and dumplings or in a pie crust for chicken pot pie, substituting the shortening with the fat. Stewed hens work best when used in casseroles, stews, pies or soups.
The Homesteaders GMO
Wait! Don’t yell at the screen, throw your computer, or block the blog. I haven’t lost my mind or gone over to the dark side. In fact, I am very much in control of my senses. And, I am still very much against splicing, dicing and re-arranging the genes in our food. We have already manufactured all nutrients out of our food, why take it one step further by bringing the alien stuff into our kitchen.
The GMO I am speaking of is:
Grinding My Own.
That’s right, folks, grinding grains, primarily for baking.
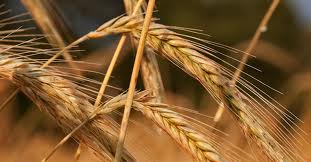
All the media about GMO’s (the other one) has had one very positive effect—the increased interest and growing of various grains and wheats regionally. These are not huge corporate farms that grow for mega businesses like Pillsbury. These are small farmers growing grains suited to their area. Grains like the heirloom Red Fife, a low-yield grain that packs big flavor and loft to whole wheat bread, or, the Sonora wheat, a stubby, drought-tolerant variety grown for tortillas since the 1880’s.
This comeback in growing heirloom varieties has been spurred by the desire to eat more locally, grow grains with more flavor and vitamins than commercial grains have. And, with local grown and milled, grains are fresher than store bought. Small lot local mills also grind their grains differently than large-scale commercial operations. Small mills grind the entire wheat berry at cooler temperatures, which retains more of the flavor and nutrients, whereas commercial millers separate the different parts of the berry, then re-combine them to make whole-wheat flour. This milling may produce flour that has a longer shelf-life, but many of the vitamins have been lost in the process.
It may take a bit of time to bring many of these grains into larger markets, mainly because the farmer, miller, and market infrastructure hasn’t changed since the 1900’s. But, there is a benefit to the home baker and that is we can get our hands on these nutrient rich, little know grains now and grind them ourselves, producing an even fresher loaf of bread.
Home grains are just at the beginning stage of being used, but they are poised to be as coveted as the heirloom tomato. For many it will be like baking with a new ingredient.
If you’re interested in experimenting with your baking try these suppliers for wheat berries and flour. Wheats are good for up to one year when refrigerated.
Local Harvest. localharvest.org, for a list of local Farmer’s Markets
Bluebird Grain Farms. bluebirdgrainfarms.com
Bob’s Red Mill. bobsredmill.com
Camas Country Mill. camascountrymill.com
Community Grains. communitygrains.com
Fairhaven Organic Flour Mill. www.fairhavenflour.com
Also try well-stocked grocery stores and local mills in your area.
Get started baking your own bread with this simple recipe.
True Whole Wheat Bread
Ingredients
SOAKER
5 teaspoons coarse whole-grain polenta or corn grits
3 tablespoons bulgur wheat
DOUGH
About 3 1/2 cups whole-wheat bread flour such as hard red, hard white, or Red Fife
1 3/4 teaspoons instant yeast such as RapidRise
1 3/4 teaspoons fine sea salt
About 2 tbsp. olive oil or grapeseed oil
1 teaspoon melted butter
DIRECTIONS
1. Make soaker: Put polenta and bulgur in a small bowl, add 1/2 cup boiling water, and let stand until grains are softened, 3 to 4 hours.
2. Make dough: Combine 3 1/2 cups flour, the yeast, and salt in a bowl of a stand mixer or large mixing bowl. Add 1 cup plus 2 tbsp. room-temperature water, the soaker, and 2 tbsp. oil, mixing on low speed with a dough hook or stirring by hand with a wooden spoon until well incorporated. The dough should be soft and tacky; adjust with flour or water as necessary. If using a mixer: Beat on medium speed, scraping down inside of bowl occasionally, until dough is smooth, soft, and stretchy (it should still feel tacky), 12 to 15 minutes. If kneading by hand: Transfer to a lightly floured work surface and knead with damp hands, adding only a light coating of flour and wetting hands as required to prevent sticking, until dough is smooth, soft, and stretchy (it should still feel tacky), 12 to 15 minutes.
3. Let dough rest 5 minutes for the moisture to even out. Make any final flour or water adjustments, using mixer or by hand, adding water or flour, until dough feels soft, supple, and tacky but not sticky.
4. Transfer dough to a 2-qt. glass measure, if you have one, or put in a medium bowl. Cover bowl and let dough rise at room temperature until it’s 1 1/2 times its original size, 45 minutes to 1 1/2 hours; when touched gently, it should spring back slowly.
5. Punch dough down, knead a couple of times, and shape into a smooth 9-in. oval. Set in an oiled 5- by 9-in. loaf pan. Brush top with oil and cover with plastic wrap. Let rise until dough comes to top of pan and holds a small dent when pressed with a finger, 30 minutes to 1 1/2 hours.
6. Meanwhile, preheat oven to 375°. When dough has risen, brush with butter and bake until bread is nicely browned and an instant-read thermometer inserted into center registers at least 195°, about 40 minutes.
7. Let bread cool in pan on a rack about 10 minutes, then loosen from pan (if it sticks, cool in pan another 5 minutes). Cool at least 1 hour on rack.
Make ahead: For soaker, up to 1 day, chilled. Bring to room temperature before using.
Hot Soup and Hand Pies
For days our start to the month of hallows has been hot and dry with winds blowing steady at 45mph and gusting up to 60mph. It’s the kind of weather that makes your hands crack and your skin crawl. No matter how much lotion you use or time spent soaking in an oil laced bath you can’t escape it. I was more than ready for a cooling trend. But this morning’s weather was something I did not expect. The sky roiled and rowed like an angry ocean squall; its clouds shaded like a soft dove to the color of a blacksmith’s iron. The horizon was tinged with flecks of steel blue as the sun fought to be noticed. The temperature had dropped below 55 and the wind was blustery and chilled from the cool night air. It was storm-like and fall-like and I was in heaven.
Fall is my season. From the first hint of gold in a late afternoon sky to the first freeze of winter this is where I live, where I want to live. I love the blaze of fall leaves that swirl up the road as cars drive by. I breathe in deep the wafts of cold air tainted with the smoke of first wood fires. I love the hearty meals of bubbling soups and stews paired with hot rolls or baked bread. Yes, in deed, this is my season.
After an early morning speaking engagement I drove back to the farm, through a stormy horizon, through a blustery wind, through a drizzle that teased me with the chance of a heavier rain. Its days like this that I work better from home. With my soft instrumental mountain music playing and the glow of scented candles burning it is just the ambience I need to write with abandon. And write I did. Deadlines loomed, proposals called out to be completed and new ones clamored to be roughed out. Its days like this when I can hunker down, away from the chaos of the office, and accomplish a lot. And I did just that.
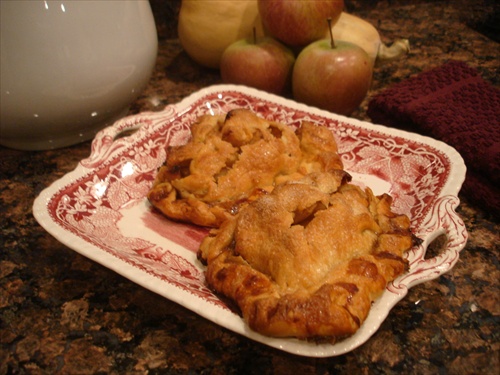
Before starting final edits I took a break to figure out dinner. It was late afternoon and I had nothing defrosted. A bowl of apples, victims of the weekend wind storm, caught my eye as did a jar of white bean soup perched on a shelf in the fridge. I immediately thought of the wonderful warm lunches I had on a New England vacation, bean soup and small apple hand pies. I smiled as I saw in my mind the perfect meal to end the perfect day.
The soup was a Crockpot endeavor made a few days ago when news reports falsely called for colder weather. It is full of white beans, ham hocks, vegetables and broth. But, life always turns out the way it’s suppose to; bean soup would not be possible for dinner started so late in the afternoon. All I needed to do now was pour the soup into a large kettle and set it to simmer while I worked on the hand pies. If you’re not familiar with the term “hand pie” it is similar to a turnover or a smaller version of a normal apple pie. It uses the same amount of dough as a double-crust pie. The only exception is that the dough is cut into four pieces before it is rolled out. The best part though is making the filling. The aroma that fills the house is sensational.
Two to three apples are peeled, cored, and chopped; sautéed in 2T of butter until semi-soft. Then ¼ cup white sugar and 2T brown sugar along with ¼ t of salt and 1t of cinnamon are added and cooked to caramelize the sugars and incorporate the whole mess. You can’t help but want to lick the spoon, but be warned…it’s hot!
Once you have reached the consistency you like, pull the pan off the stove to cool. Roll out the dough, pile about 1/3c of the apple mixture in the middle, fold over the crust, seal and crimp the edges to hold in the juices. Brush an egg wash over the top and sprinkle with white sugar. Pop into a 400-degree pre-heated oven for 20-30 minutes until golden brown. There you have it…the perfect little pie for any size hand.
My dough got a bit warm waiting for the apples to cool, which allowed the apples to poke through. They may not be pretty, but man were they good.
No matter what Mother Nature throws my way meals like this will always carry me through.
Happy Fall!
End of Season Berry Jam
The end of berry season is fast approaching. This will probably be the last pick I get. Our weather lately has been a roller coaster of hot and cool; fog and howling hot, dry east winds. What hasn’t blown off may not even be enough for one small batch of jam, but we’ll see.
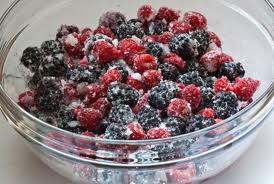
The pick was in deed small, barely two pounds. But, I can augment it with a few small containers of frozen berries to make a version of the jam below. I don’t want to use too many frozen berries or there won’t be any berry cobblers this winter. The end result may lean a bit towards blackberry, but this is a very forgiving recipe and turns out great no matter what the quantities are.
This recipe was given to me by a local cooking store and it has been our “go to” recipe for small bits of fruit that we don’t want to eat fresh. Try it with a combination of soft fruits as well.
Mixed Berry Jam
1 pound Blackberries
1 pound Raspberries
1 pound Blueberries
1-1/2 pound sugar
6 ounces fresh lemon juice (use Eureka, Meyer lemons don’t have enough acid)
Cook as you would a single berry jam. Leave ½-inch of head space; water bath for 10 minutes.
Ended up with four 1/2-pint jars, there will be jam on toast and biscuits this winter!
Farming for One
It’s been a year since Brianne moved off to college and life on our little farm is different, decidedly different. The rhythm, the pace, the flow of the farm has changed drastically. No more are there 6 market lambs to feed every morning. Gone are the meat rabbits that kindled in spring, were shown in August and processed in September. And, there is no need to raise more than one batch of meat chickens or ducks. One is more than enough to last the whole year. The 6 laying hens provide plenty of eggs for omelets and scrambles; baking and breads, with some left over to share.
The garden beds are smaller too, arranged and planted to meet the needs of a single person household rather than a home with a busy child. There is no need to plant an entire bed of lettuce or spinach or beets or beans. A short row of each is plenty for table and fridge. The amount of food I preserve has lessened too. Rather than canning dozens of jars of produce, fruit or jam, a few will suffice.
The farm’s calendar has changed too. There are no colorful hi-lighted boxes to grab our attention and remind us of upcoming activities. There are no confirmation slips or auction flyers or shopping lists to tell us where we are going and what we need to buy. Our farm no longer revolves around school and livestock auctions; sheep shows and trips to the feed store. There is no need to set a planting calendar around trips away from the farm because the reasons for leaving no longer exist.
At first it was hard getting use to the “new” farm. Hard to come to terms with a morning routine that took only minutes and night time rituals that were finished long before the sun went down. I felt like I was missing something, that I had forgotten to do something and I couldn’t figure out what it was. I would stand in the garden looking around, checking off a mental list of chores completed like watering the beds, feeding the hens, picking ripe produce, staking a vine heavy with fruit. When you have time on your hands it can be unsettling, especially for someone who has spent so much time, so many years thinking months in advance, planning for events that were weeks off or outlining projects that were seasons away.
I had time on my hands and nothing to fill it. Or, so it seemed.
It took “time” to realize that life on our farm was not so terribly different after all. I still garden, just on a smaller scale. I still raise livestock, just in smaller batches. And, I still cook and bake and preserve, just in smaller portions. As time went on I realized one important thing that I never really thought of when my life was so scheduled, so deliberate. That is “time” is a precious gift, especially time to leisurely go about your life instead of rushing from place to place and chore to chore. I have time to sit in the coop and watch the girls scratch in the dirt. I have time to observe the nitty gritty life on my farm. From the red wigglers growing big and fat in the damp ground under the chicken’s water trough, to the blue jay that has build a nest of straw and twigs and twine in a far off protected corner of the barn. Time had given me these gifts.
And, now, I have time to spend with friends, to participate in community and to share with people who want to know about life on a farm. Now, I have time to read more, listen more and engage more. Time has made me a farm of one, a woman farming for one, but it hasn’t made me alone.
It’s time, folks. Time to take stock of how we spend our time. Time to make time for what is truly important. Time may change you and life may be different, but that doesn’t mean it can’t also be good. Oh, so good.
Red, Ripe & Juicy
This Ain’t No Store Bought Catsup
Bottled ketchup may dominate the condiment shelf at the local grocery store, but 100 years ago it wasn’t so easy to come by. In fact, it wasn’t unusual for families to make their own ketchup from vine-ripened, home-grown tomatoes rather than use store bought. So why should we bother making our own when we can run to the store? One very good reason—taste. Today’s favorite condiment pales in comparison to yesteryears bold, thick, and brownish concoction. And, when you consider all the additives, fillers and preservatives in today’s bottle of ketchup why not make your own. Another reason is the ability to experiment with spices to create your own unique version.
The basic recipe for catsup hasn’t changed much over the years. All versions use the same basic ingredients of tomatoes, vinegar, sugar and spices. But it’s the spices that can vary the most.
Ketchup is technically fruit butter, meaning that it is spreadable, like butter. Fruit butter recipes are fairly simple. You take some fruit, add some sugar, and cook it way, way down.
Ingredients:
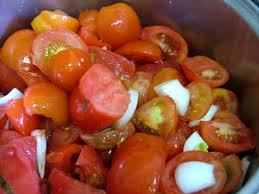
1/2 bushel ripe tomatoes (25-26 pounds)
1 medium onion, diced
1 clove garlic, peeled
2 tsp. red pepper flakes
3 cups cider vinegar
3 tbsp. salt
1 cup dark brown sugar
1 tsp. ground allspice
1 tbsp. ground cloves
1 tbsp. ground cinnamon
4 tbsp. dry mustard
2 tbsp. Worcestershire Sauce
1 tsp. ground black pepper
1. Remove bad parts from the tomatoes. Wash and quarter and place in a very large stock pot, along with the onion, garlic, and red pepper flakes. Crush the mixture a bit to release some liquid. Bring to a slow simmer for 30 minutes. Let cool.
2. Run the contents of the stock pot through a food mill in batches, using an old-fashioned kind of food mill with a fixed fine disk works best.
3. Put the milled mixture back into the stock pot and simmer very slowly (to keep the tomatoes from burning), until the volume is reduced by about 1/2. It should have the consistency of thick tomato sauce. This step may take 6 to 12 hours, maybe more, depending on the tomato variety. Let cool.
4. Run the contents of the stock pot in batches through a blender.
5. Return the mixture to the stock pot and bring to a simmer until the mixture is the consistency of commercial catsup. This step may take six hours or more.
6. Add the remaining ingredients, bring to a simmer, and reduce to the desired consistency. (This is where it can get personal. You can make the catsup thick or thin depending on what you like and what you’ll use it for).
7. Prepare 8 – 10 pint canning jars, lids and bands. Prepare water bath canner; keep water boiling with lid on.
8. Fill hot jars with catsup, leaving 1/2-inch of head space. Wipe jar rims, put lid on, screw down band finger tight, and place in canner. Put lid on canner and process in boiling water bath for 15 minutes. Remove jars from canner; listen for the ping as the catsup cools and the lids pop into place. Let the jars sit until cool. Store in a dark place.
Go ahead and try it. What else are you going to do with all those end of season tomatoes?
Did you know that the modern catsup/ketchup started out as a Chinese fish sauce?
Recent comments
Aenean nonummy hendrerit mauris. Phasellus porta.