Archive for May, 2018
The Ultimate Banana Pecan Nut Bread Recipe

Bananas seem to be a staple in any home that has (or had) children in it. It is the “go-to” snack for toddlers, a vitamin packed boost for after-school activity crazed grade-schoolers, and a perfect addition to the health conscious meal for older kids and adults. Like I said…it’s a staple in most homes.
In our home they were cut up into oatmeal for breakfast, whirled into smoothies for a cool refreshing drink, or dipped into melted chocolate for decadent treat. But, with all those bananas hanging around there were bound to be a few that didn’t get eaten quite fast enough. And, once they get past their prime they’re not so popular anymore.
When bananas were too soft for fresh eating I would make banana pancakes on the weekend, so they didn’t go to waste. Frugal moms can get very creative when they live on a budget and don’t want to waste food.
We are fond of banana pancakes, but how often can you eat a thing before it becomes boring. I had to find other ways to use up the spotted yellow and brown skinned tropical fruit. When no ideas came to mind immediately (scary I know) I threw the now very ripe bananas in the freezer until I could think.
That’s when it happened. That ah ha moment when you find what you’re looking for without really even looking. I was flipping through a cookbook, looking for a completely different recipe, and there it was, bold as day…a banana bread recipe for a holiday breakfast.
Now, why didn’t I think of that? In my defense…I can’t be “on it” all the time! Cut me some slack, please:)
I read over the recipe and mentally checked off the ingredients one at a time (it’s so nice having a well-stocked pantry). The recipe called for slightly softened fresh bananas, but I only had the one’s I had thrown in the freezer a few weeks earlier.
What the heck, I’ll give it a try.
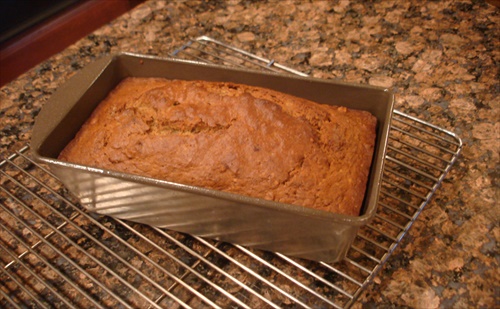
I thawed the banana’s, reread the recipe, making a few adjustments, and the end result was a soft, moist, dark-colored nutty bread with the most intense banana flavor I had ever tasted.
It was, in fact, the best banana bread I had ever eaten.
So what makes this banana bread so different?
My gastronomically uneducated opinion is…the sticky, sweet, intensely flavored syrup that is given off when the bananas defrost; that and the combination of brown sugar, applesauce instead of oil and the addition of pecans rather than walnuts.
This recipe has become a favorite. We have eaten it toasted and buttered for breakfast, grilled it like French toast, and cut off chunks and taken them on hikes. We have even taken it on airplanes when traveling.
The Ultimate Banana Pecan Nut Bread Recipe
INGREDIENTS:
½ cup butter, room temperature
2 eggs
1 cup light brown sugar
1-1/2 cups all-purpose flour
1 teaspoon baking soda
1 teaspoon salt
½ teaspoon cinnamon (sometimes I use pumpkin pie spice, which is nice too)
1 cup mashed very ripe bananas (toss in the bananas and the syrup if using frozen bananas)
½ cup applesauce (any kind)
1 teaspoon vanilla
½ cup chopped pecans
DIRECTIONS:
- Preheat oven to 350F.
- Cream together butter, brown sugar, and eggs.
- Sift dry ingredients and combine with the butter mixture. Blend well.
- Add the bananas, applesauce, and vanilla; stir well, but don’t overwork the mixture.
- Fold in the pecans and pour into a well-buttered loaf pan.
- Bake one hour, or until a knife inserted in the middle comes out clean. Turn out onto a rack to cool. Makes: 1 large loaf.
TIPS: This is one of those full proof recipes. It’s hard to screw it up, so be a little adventurous with it. I have used different kinds of applesauce from plain to chunky homemade to cinnamon. If you do try it with cinnamon applesauce, reduce the cinnamon in the recipe by half.
INGREDIENTS:
- ½ cup butter, room temperature
- 2 eggs
- 1 cup light brown sugar
- 1-1/2 cups all-purpose flour
- 1 teaspoon baking soda
- 1 teaspoon salt
- ½ teaspoon cinnamon (sometimes I use pumpkin pie spice, which is nice too)
- 1 cup mashed very ripe bananas (toss in the bananas and the syrup if using frozen bananas)
- ½ cup applesauce (any kind)
- 1 teaspoon vanilla
- ½ cup chopped pecans
DIRECTIONS:
- Preheat oven to 350F.
- Cream together butter, brown sugar, and eggs.
- Sift dry ingredients and combine with the butter mixture. Blend well.
- Add the bananas, applesauce, and vanilla; stir well, but don’t overwork the mixture.
- Fold in the pecans and pour into a well-buttered loaf pan.
- Bake one hour, or until a knife inserted in the middle comes out clean. Turn out onto a rack to cool.
- Makes: 1 large loaf.
My Ultimate Guide to a Frugal Pantry & Healthy Eating
Grab a drink and a chair, folks. This is gonna be a long one.
In the world today, monthly payments on a vehicle (or two) are at the top of the list of family expenses. Second to that is the cost of groceries. Whenever I get together with friends or family or for a potluck somehow the conversation always circles around to the cost of food and “how can I save on groceries?!” It’s a darn good question too because unlike other budget items we can cut back on or eliminate (think clothing, take-out, fancy coffees or cable), food is a necessity. Although it is true that food IS a necessity, it is also true that expensive food is NOT. I fashion my menus and my shopping around my favorite Paul Fussell saying: “I can feed better at home”.
Over the years I have updated, changed and turned on its head the ways in which I save on groceries, prepare meals and basically treat the subject of food. I’m going to outline the most complete, scrumptious rundown of our frugal pantry, food and meals that I can manage. You’ll find many more posts in my “In the Kitchen” & “Frugal Living” sections of the blog and I encourage you to peruse those posts and the recipes, because it will show just how well we eat without spending a fortune on food. I also encourage you to look through the recipes because I won’t be posting any here, as this post is more about how I save money on food.
With that said…here we go.
First and foremost, when talking about food and food budgeting you have to do two things right away in order to have any success.
- Jettison the Excuses.
- Identify your Boundaries.
Excuses: You know what I’m talking about, I know you do. That little voice in your head rationalizing why you NEED eight different flavors of coffee creamer or why you have to keep an array of “treats” in the house because if you don’t there will be mutiny. If you want to get a handle on your food budget, doing away with the excuses is a must or you won’t be successful. Instead of lamenting what you think will be lost, start building a mindset of gratitude and anticipation over really looking at how you can eat better and spend less. Remember: frugality IS NOT deprivation.
Some of the excuses I hear when I talk about frugal eating:
- You don’t know what it’s like shopping and cooking for a large family! (Oh yes I do! I come from a family of 5).
- I’m a one person house and it’s hard to cook for one person! (News flash…I’m single too!)
- I eat vegetarian (or vegan) and those foods are really expensive!
- I can’t go a meal without meat, and meat is expensive!
- All the recipes are complicated and I hate to cook!
- I love trying new recipes so I’m always buying special ingredients! (Yay, I get this one, trust me. I’m a foodie, too)
No joke…these are common excuses I hear ALL. THE. TIME. While the differences might be funny it also shows just how hard people hold onto their beliefs rather than be willing to change their thinking, like it is possible to be frugal and eat well at the same time. In a word…YES!
I do realize that every person’s situation is different and that my household of two (now one) is not the same as, say, my mom’s situation of raising three kids, or my friends who have 5 to 7 kids. Obviously, I spend less on groceries than a larger family, but let’s not use comparison as an excuse. Try to glean information that can be useful to you, finding ways to reduce the amount of money you spend on food. So, identify your boundaries and preferences for food (mine are: lots of fresh, whole foods, vegetables and fruits) and embrace them, leaving the excuses on the sidelines.
As with other aspects of your life, make food choices that matter to you, but remember…not everything can be a priority. Remember also, the general category of “food” is not a viable priority. Be specific about what you value and write it down.
Where to Shop
Where you shop will have a big impact on your food costs. Constantly shopping at the same store because it’s “on the way home” or “it’s where I’ve always shopped” could be biting into your food budget if you don’t know for sure that you’re getting the best prices. Comparing prices from store to store will let you know which has the lowest prices. One caveat here: I’m not advocating that you run all over the county to buy a few lesser priced items miles from home. That’s not frugal! What I am advocating is doing your due diligence. If you need to stock up on rice or peanut butter you won’t know which store is cheaper unless you compare prices!
Here’s what I did: early in my frugal path, I made a list of the most commonly used foods in my kitchen and priced them out at the stores in my area—a restaurant supply store that is open to the public, a big box store where I buy my gas, the chain stores and an ethnic market.
Once you have this information you can shop at the store that has the lowest prices on most of the items you need, or you can shop at several stores if they are not out of the way. I primarily shop at one store because their prices on produce is consistently lower than any other store, but I usually don’t buy staples, frozen or bakery items there because I can get better prices at the chain stores. Weekly grocery store circulars can be a big help here, if you get them.
(I can remember combing through those circulars with my mom as she planned the weekly menus based on what was on sale that week. I bet you have a similar story.)
It may sound time consuming to shop at multiple stores, but if you go armed with your list and stick to only the items you need rather than roaming all over the store it’s not that bad. I’ve created a routine over the years where I do my grocery shopping and errands on Saturday morning. The tricky part is mapping out my journey so perishable items are not sitting in the car for too long. Fortunately, all the stores I shop at are within a few miles of the gas station where I fill up my tank every Saturday morning. Although I’m not a big on-line shopper for regularly purchased foods, I do compare on-line prices when buying bulk non-perishable items like seasonings, grains and nuts.
Let’s Talk Ethnic Markets
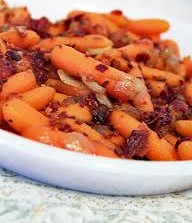
I’m letting the cat outta the bag here. The store I shop at most often is actually an ethnic market that caters to the Hispanic and Indian populations in our area. Why? You may ask. Because they have a great produce section where I can buy reasonably sized produce, not huge specimens, and they consistently have the lowest prices than any other store in my area. I routinely buy items to fill in when the garden is young, or the crop is low. Imagine buying carrots or onions for 25-cents a pound, or potatoes for 50-cents a pound. They also have rocking specials on meat. Several times a year they have chicken quarters for 39-cents a pound, with a 20-pound maximum. Where else can you buy 20-pounds of chicken for $7.80? If you do know of another source I’m all ears!
Be Cautious with Coupons
I’ve had a serious love hate relationship with coupons over the years. On the one hand they are great if the coupon is for something you would buy anyway, but more times than not they entice consumers into buying something they hadn’t planned on, or may not even eat, which puts a dent in your food budget and wastes food. My advice…if you don’t have the control to say NO to a seemingly great deal, don’t use them!
Even though I have used coupons over the years, with great savings, I have to watch myself to make sure I’m not falling victim to the marketing ploy. You’re not saving money if you’re buying something you don’t need! Secondly, and more importantly, coupons are usually for brand name, pre-packed or pre-made foods that are much more expensive than their homemade counterparts. My philosophy has always been to shop the outer isles, which is where the “whole foods” are.
When & How to Shop
Old habits die hard, I get that. But, when you shop and how you shop will have a positive or negative impact on your overall food budget and your ability to save on food expenses.
Don’t shop when you’re rushed for time. As a busy single mom I completely understand the luxury of “extra time”, it doesn’t seem to exist, but do the best you can. Shopping when you are rushed lessens the time you take to really think about what you’re purchasing and what you’re spending on certain items. Calculating costs seems to also go out the window when you’re rushed. You tend to just grab and go, not putting much thought into what goes into the shopping cart. To get a handle on your food expenses you have to slow down and shop with purpose. Shop in the evening without the kids or shop when the kids are busy with afterschool activities. Be creative and find what works in your situation. When Brianne was at home I would shop on the days she was with her dad. Now that she’s out of the house, Saturday morning seems to work best. I don’t shop during the week because I hate running errands after a long day at the office.
It wasn’t always a burden shopping with Brianne. If I did have her along, we would play divide and conquer. I would give her a few specific items with a particular price point to pick out on her own. Example: variety of apples or type of cheese…her choice. This gets older kids into the habit of looking at what they buy, what the price is, and if there is a cheaper option.
Always shop with a list and stick to it! Make your list at home before stepping foot inside the grocery store. If you’ve taken the time to look over the fridge and pantry you’ll know what you need and what you don’t, so you’re not buying something you already have, while leaving out something you actually need. This is a great time to ask if there are any specific requests other people in the house might have.
Don’t shop hungry! This is not revolutionary, I know. But, it really does make a difference to your food budget bottom line because a rumbling tummy can be a huge distraction as you pay more attention to what you can grab and eat in the store rather than the best price on cuts of meat. The best time to shop is after you’ve eaten (hence my Saturday morning shopping routine). If that isn’t possible, at least take along a snack and nibble in the car on your way. That way those easy open, filling, processed food items won’t be calling your name.
What to Buy

This area will be based a lot on food preferences, dietary considerations, medication restrictions and priorities. In essence, every person’s choices will be different.
There is a general guideline that I adhere to that should work for your particular situation: shop the outer isles. The perimeter of a grocery store is where you will find the majority of whole, fresh, raw, unprocessed foods. Think about that for a moment. The produce section, meat department, dairy and egg case are all on the perimeter of the store. There are some exceptions of course, the bulk bin section, if your store has one, oatmeal, baking goods, like flour, sugar and salt, etc. are on the inner isles, but for the most part what’s on the inside isles are mostly expensive processed foods. If you stick to the outer isles you’ll have less expensive, wholesome foods in your cart.
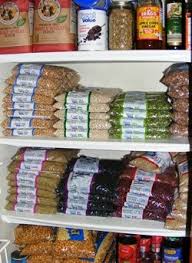
I’m also a huge advocate of bulk shopping, something I’ve done my entire adult life. With a farm to manage, livestock to tend, a child in school and everything life can throw at you it just makes sense to have a well-stocked pantry. I also live by my own motto of: “last one, buy one”, which basically means that when I open the last container of something, whether it be a condiment or oatmeal, I put that item on my shopping list. Buying in bulk also enables me to take advantage of sales and stock up on items I use regularly at a lower price.
Disclaimer: for the most part, my well-stocked pantry means I have multiples of many items. I don’t just buy a one-pound bag of split peas or beans for soup; I buy 5 or 10-pounds in bulk and repackage to fit my needs. I also check the Manager’s Specials in the meat section to see what is at a super discount. I routinely find tri-tip, top sirloin, short ribs, and pork roasts for just a few dollars, which can be frozen for later use.
What I mean by whole foods:
- Whole foods are the raw unprocessed ingredients needed to make a particular dish rather than buying its pre-made equivalent.
- Rather than buying a jar of salsa, buy the ingredients to make your own: tomatoes, onions, chilies, olive oil, and cilantro.
- Rather than buying pre-cut packages of fruits and vegetables, cut your own. Did you know that dipping cut fruit, like apples or peaches, into a bowl of water with the juice of half a lemon will help keep the fruit from turning brown? And, that root veggies like carrots, beets and parsnips last a long time in the fridge?
- Rather than buying expensive sweet breads like pumpkin or banana, buy all the ingredients and make your own. Or, better yet, work towards having the ingredients on hand so you can make it anytime.
By looking through your pantry, fridge and freezer you can see what pre-packaged foods you buy, and plan to make them from scratch, saving you a ton of money.
What I mean by not buying processed foods:
Simply put, these are any foods that are NOT in the raw ingredients. Think pre-formed sausage or hamburger patties, or canned soups. Buying the pork shoulder and seasonings, and making your own homemade sausage is much cheaper. Cooking down a chicken carcass and adding veggies, herbs and rice will produce a big pot of soup for multiple meals. Making your own meals is healthier as well because home-cooked meals are not full of preservatives and sodium.
Buying whole ingredients in bulk and steering clear or processed foods is the cornerstone of frugal healthy eating.
Dine-In Rather than Din-Out

I struggle with this one, too. Eating out or getting take-out is a hard one for most people to overcome, because they enjoy the socializing aspect, the convenience of not having to cook after a long day, or they have a few gourmet dishes that they think are too hard to make at home. I’m not suggesting you do away with eating out altogether, although that is the direction I’m heading with this. Let’s be honest…portions are WAY too large, the calorie, sodium and fat content is more than is good for us, eating out is expensive and more times than not it’s very fattening. What I am suggesting is that you realize that with a bit of planning and a well-stocked pantry you can prepare most, if not all, of your favorite foods at home for less than you’d spend at a restaurant.
Here are a few ideas to consider:
- My sister has a group of friends that meet monthly for a simple meal, usually soup & salad; chili & cornbread; pasta, salad & garlic bread. Sometimes they do a potluck where each person brings a different course and the host makes the entrée. The point is that socializing doesn’t have to be at a 5-star restaurant, or even a 3- or 4-star for that matter. What’s important is that good friends are getting together in love and friendship.
- I have a group of ladies that meet during the warm summer months for water aerobics and potluck. It’s the same house each week, because she has the pool and she loves to host. We each bring a favorite finger food to share. Sometimes we have theme nights like Mexican, Asian, Picnic, etc. Have fun with it, be creative! Don’t have a pool? How about lawn bowling or croquet?
- When I find a new recipe to try and it makes much more than I can eat or want to freeze I hold a Guinea pig party. Anyone willing to try a new, unknown dish is welcome to come. I haven’t poisoned anyone yet, just in case you’re wondering.
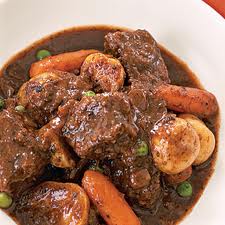
- When we decided to start eating out less (not that we ate out a lot to begin with) we made a list of all our favorite dishes and began searching for copycat recipes on the internet. I’m sure you’re already aware of the plethora of food blogs with great recipes that can be found. Think “The Julie and Julia Project”. It was during one of these “new recipe” events that I taught Brianne how to make Julia Childs’ famous Beef Bourguignon. Yes, it was an all-day affair, but it was a great mother/daughter time as well. Amazing things happen when you cook with your kids…no matter what age they are.
These are just a few ways to ease into not eating out. I’m sure you can think of more. If eating out is an absolute necessity, but you still don’t want to bust your budget, consider reducing it to once a month, share a meal, forego the beverages, and factor the expense into your budget. This way eating out becomes more special than routine. Plus you can consider a more gourmet restaurant rather than the run of the mill coffee shop.
Meals at the Ready — ( Freezer Meals)
Life is unpredictable, I know. Traffic, meetings, sports events, school events, lambing season, calving season, show season, frost season, you name it, any number of events can make you late getting home with no time to cook, so you grab the phone and call the pizza delivery guy. Do you have him on speed dial? ‘Cause we’re gonna break you of that right now.
Any frugal household (including mine) will tell you the two saving graces of life are:
- A slow cooker, and
- Freezer meals
I seriously think a slow cooker should be gifted to every single parent. Here’s why:
Imagine you’ve just had the worst day of your working life. After sitting in traffic you arrive at your child’s school only to find out that volleyball practice has been extended for another hour. The fact that you are 30-minutes from home doesn’t help either. When you finally get home, animals want to be fed, the dogs are going crazy, the kid smells from hours of sweating, and just when you want to fall down here comes the all too common question…”what’s for dinner, mom”? Sound familiar? In your previous, not so frugal life you would have pushed that speed dial button for the pizza delivery guy, but not anymore because you have joined the ranks of frugal food weirdoes.
In all of these situations I didn’t have to get take-out because I either had the slow-cooker bubbling away on the counter or I had meals already prepared and waiting in the freezer.
At any given time (or season) I have soups, chili esand stews in the freezer. No matter what the situation is that brings us home late or the disaster that strikes, like a broken water line or a lamb jumping over the fence and slitting his side open on a t-post (true stories , both), we can still sit down to a warm hearty meal at the end of a long, stressful day.
Anytime I’m making a batch of soup, chili or stew, I always make an extra batch to freeze. I portion it out into 24-ounce square freezer containers (I’m not a huge fan of Ziploc bags. Why buy something so you can throw it away?). This is just enough for two portions, with a bit left over for lunch the next day. They also stack nicely in the freezer.
I know from personal experience that with as much as I enjoy cooking, even “I” don’t want to cook every night. Having a stock of freezer meals means I can eat well without busting my budget. Nothing can derail a budget faster than getting caught having to buy take-out.
I also want to say, “be kind to yourself”, especially during the week. With everything that goes on in a week, why add to the stress by thinking you need to create a 7-course meal every single night. Save those impulses for times when life runs smoothly. For every other time, have a nice selection of meals to fall back on.
If you think we eat like the Food Network every single night I can assure you nothing could be farther from the truth. We eat simple meals made with simple whole ingredients. Think baked chicken, rice & salad; pork chops, smashed yams & green beans; or pasta, salad & garlic bread. There are several casserole dishes (and salads in the warmer months) that rotate in and out of our menu selection, too. As surprising as it may seem we pretty much eat the same rotation of foods from week-to-week, with an occasional new dish thrown in when we have the time. Even though I love to cook as much as I love to eat, I have better uses for my time and my money.
After years of preparing meals like this I also don’t do a lot of hardcore meal planning. I have in my head what I can whip up with what’s in the pantry. Depending on what I make, one meal may be eaten over several days as leftovers. We love leftovers! You may want to plan meals if you’re new to creating a stash of frozen meals.
Some of our favorite meals:
Chopped Salad – This has everything in it but the kitchen sink. The lettuce mix is just the canvas for chopped up meats, cheeses and a whole lot of veggies. Great way to clean out the fridge, too.
Orange Chicken Rice Bowls – This is great for leftover chicken, or cook a batch specifically for this dish. The rice has carrots, peas and broccoli in it. Once it is all mixed together the quantity expands exponentially, which makes it perfect for leftovers.
Green Veggie Sauté – I whip up a big batch of onions, mushrooms, spinach, green beans and asparagus into an Asian style sauté, which lasts for days.
Breakfast for Dinner – You always have plenty of eggs when you have layers, so why not turn mealtime on its head and have a frittata, scramble or just eggs and toast. Frittata’s and scrambles are a great way to use up a variety of leftover veggies.
Pasta Fagioli – This is a favorite, especially in cold weather. It’s hearty, packed with protein and perfect for freezing. There’s no way to make a small batch of this, just saying.
White Chicken Chili – Another favorite.
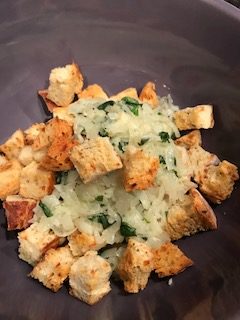
Anti-Pasta Platter – Perfect for those hot days when no one feels like heating up the kitchen. We lay out a combination of sliced meat (whatever we have), cheese, olives and whatever else we have. It’s usually paired with a seasoned olive oil, for dipping, rustic crusty bread and a simple salad.
Bruschetta – Another hot weather favorite. Grilled rustic bread loaded up with chopped tomatoes, basil and seasonings, paired with a Caesar salad.
Batches of soups, stews and chili are a great way to “clean out” the freezer. None of us are perfect and even I have had those packages of frozen meats or veggies hidden in the dark recesses of my freezer. After doing a thorough cleaning and super batch cooking marathon, I try (operative word…try) to maintain a strict “first in, first out” rotation of frozen foods.
Use Meat Sparingly
I have to say up front that I am a total carnivore. There’s nothing I like better than to cook (or grill) a good piece of meat! But, as we all know, meat can be an expensive part of your everyday meal. To combat the bloat of your food budget, use meat sparingly; giving it a supporting role rather than a starring role. If I make a roasted whole chicken one night, I’ll shred some and use it in lettuce tacos, or make a chicken stew. After I think I’ve pulled off all the meat, I throw the entire carcass into a pot to make a base for chicken soup. You’d be surprised at how much meat is still left when you think you’ve gotten it all. Left over beef can be chopped up and used to make Beef and Barley soup; a completely hearty and feel good meal. This way I’m extending the protein into multiple meals, saving time and money.
If I’m not raising a protein myself I’ll buy from a local producer. Traditionally, I‘ll buy a left over fair lamb from a 4-H or FFA member. Not only am I helping to support a young livestock producer, but I get a great product at a fair price. I have the lamb processed into steaks and stew meat, rather than whole cuts because they are more useful for my type of cooking. Meat also freezes well, so I also stock up on certain cuts when they are on sale (usually pork because I don’t raise hogs).
I also don’t eat meat at every meal. A few times a week I go meatless, but that doesn’t mean I’m scrimping on taste or protein. I just get my protein from other foods. My lunches are also primarily meatless. I’m a big salad fan (who wouldn’t be living in Cali), as well. Egg salad and crackers, hummus with pita bread and veggies, or whatever is hanging out in the fridge that needs to be eaten are all good lunch alternatives.
Going without meat a few times a week doesn’t mean you have to forego flavor or being full, but it does mean you’ll lower your grocery bill.
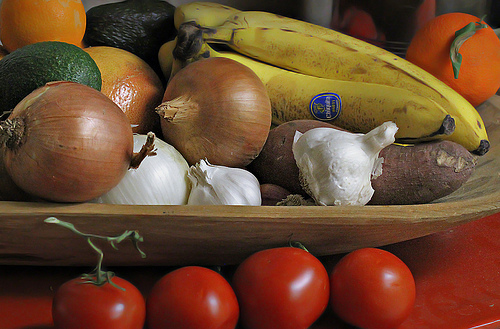
Have a Well-Stocked Pantry
Any meal is possible if you have all the ingredients you need without running to the store. This is where your list of most commonly eaten foods comes in handy. Once you know what you eat on a regular basis you can decide how you’d like to stock your pantry. This is important if you live far from town, have harsh winter weather or get stuck at home for some other reason. The point is…can you whip up a meal day-after-day, even a simple soup or stew, with just the contents of your pantry?
Having a variety of raw ingredients on hand also means you’ll go to the store less frequently and when you do go, your trips will be shorter. Sometimes I only go to the store once or twice a month because I have everything I need right at home.
My Basic Pantry Staples:
Rice – (white, brown, Arborio, jasmine) (kept in the freezer for long-term storage)
Beans – (white northern, kidney, Lima, butter, garbanzo)
Split peas
Steel cut oats
Pasta – (various kinds and shapes)
Oil – (olive and vegetable)
Butter – (salted & unsalted)
Vinegar – (various types)
Herbs & Spices (a whole lot of variety)
Potatoes & Yams
Carrots, onions & celery – (the three basics for almost every dish known to man)
Garlic – (fresh and dried)
Butters – (peanut, pumpkin and apple)
Condiments, olives & pickles
Flour, sugar, salt and other baking ingredients
Nuts, raisins & dried fruit
These are the foods I buy in bulk, because the per ounce price is cheaper. I replenish as my stock becomes low. They are also foods that are shelf-stable and will last for several weeks (or months) in proper storage conditions.
Stocking a pantry in one fell swoop can be an expensive proposition. You may enjoy about how to build up your pantry over time, here.
Snack Time
This is an area that can really wreak havoc on the grocery bill if you are not properly prepared. And, don’t think your will of iron will keep you from rushing to the first fast-food place or mini-mart you find when the hunger pangs begin. We’ve all been there. I won’t pretend we haven’t.
So…what is my plan for snacks? In short…to have them with me all the time! I take them to work, when I shop, go for a hike, run errands…you get the picture. This is especially important when you have little ones. Here are a few of our favorites:
Homemade trail mix; at least our version. Almonds, peanuts, dried cranberries, dried blueberries & chocolate chips. Hey! I’m frugal, not into deprivation.
Dried fruit – mangos, cranberries, blueberries, apples, apricots and of course, natures candy…banana chips.
Deviled eggs – back to the laying hens. I make these by the dozen, which really means 24 halves. They are filling, super tasty and packed with protein.
Edamame – boiled and salted and ready to pop into your mouth. They are great cold, too.
Popcorn – not a week goes by that we don’t have popcorn. I buy it in bulk from Win-Co.
Are Drinks Damaging Your Food Budget?
Along with prepackaged foods, drinks can put a serious dent in your food budget. To help combat this expense only buy them for special occasions. When Brianne was in grade school everyone thought she wasn’t allowed to drink sodas, but that was not the case. She was allowed to have them at picnics, beach parties, sleepovers and the like, if she wanted them, but they were not part of my weekly shopping list. As a result, she never acquired a taste for them and now she rarely drinks them. Side note: can I just say how crazy it makes me to see a toddler downing a full sized soda.
What we regularly drink:
H2O – yep…right outta the tap. It’s cheap, good for you and we don’t waste plastic bottles. Some people think it gets boring, but you can spice it up by making “spa water”. Toss some sliced fruit, ginger or cucumbers into a jug of water to give it a light refreshing flavor.
Tea – Hot or cold. I will just confess up front that I’m a tea freak. I like all kinds of tea, black, green, fruited, spiced, you name it. But, my go-to is iced tea. I usually make a small batch in the evening that fills my 24-ounce reusable bottle. When I’ve finished that, usually by lunch time, its water for the rest of the day. Like many coffee drinkers I know I can’t give it up, so rather than depriving myself, I just limit how much I drink. I look for sales on tea bags and stock up when the price is good.
Spirits – I’m not much of a hard liquor person. In fact, I cook with liquors more often than I drink them, but I do have a nip now and again. The airplane sized bottles are perfect.
Wine – It’s hard to live in California and NOT be a wine connoisseur. When I do buy wine I stick with Trader Joe’s and Cost Plus, and keep the price less to than $10 a bottle.
Frugality isn’t about depriving yourself. It’s about finding less expensive alternatives, which is the mainstay of living a frugal life. So buy what you love, just frugalize it!
Waste Not; Want Not
That pretty much sums it up. DON’T WASTE FOOD.
Did you know that 40% of all food produced in the US ends up in a landfill? Think about that for a moment. If you spend $100 a week on groceries, would you be okay with throwing away $40 every time you shopped? I bet not. What’s more astonishing is that if you are okay with the waste, you’d be throwing away over $2,000 a year! That’s not chump change!
Here are the most common reasons for food waste:
Buying more food than your family can eat. When you make a list and stick to it you end up only buying those items that you need and will use. Regularly cleaning out your pantry and freezer will help use up foods, reduce the amount of food you buy and help you to determine what you r family really eats each week.
Getting Sucked in by Sales on Items You Don’t Like. Everyone loves a sale. I get that. Even I’ve done this on occasion. But, the purchase is no bargain if you end up with foods your family doesn’t like and won’t eat, not matter how much you extol its attributes. Stick to what you know is healthy and what your family likes and will eat.
Choosing Take-Out Rather than Dine-In. Ordering take-out rather than eating food you already own occurs because of a lack of planning. Having a list of easy meals, that you can make in bulk, or using a slow cooker, will go a long way to reducing your food waste and thereby money waste. If done right, you could have a wholesome, homemade meal every night of the week for a fraction of the cost of a take-out dinner.
Waiting too Long to Eat Leftovers. To avoid food waste and the following waste of money, you MUST eat any leftovers. Not doing so is not an option. If this is not possible, then freeze the leftovers and eat them at another time. Conversely, if you have veggies that are not quite good enough for fresh eating, freeze them to be used later in soups, stews, casseroles or chili. Even the smallest portion of veggies can be added to any of these dishes. If your family doesn’t like leftovers, start cooking just enough for that one meal.
I realize that food waste isn’t entirely avoidable. There will always be some unusable bits. But there’s no excuse for trashing an entire pot of soup just because you got bored eating it, or you didn’t want the same thing twice in a week. I’m not hardcore on a lot of things, but having been in the food banking world for years has made me keenly aware of the waste. Tossing food is not only a waste of your money; it is also a waste of the time and resources spent to produce the food. I always encourage people to have a good way to store leftovers. I use reusable lidded freezer containers rather than Ziploc bags because you buy them once and use them for years, or in my case, decades. If you have chickens, they will devour veggie bits and pieces, spent lettuce and even crushed eggshells. If not, get a compost bucket and build your own soil!
Work Day Breakfast
I’m not known for being a morning person. Odd for a homesteader, I know. But I’m not. The last thing I want to do after jumping out of bed in the morning is fill my stomach with food. But that doesn’t mean I don’t eat breakfast. It just means I wait until later in the morning. The challenge with this is I’m usually already at work. My remedy: take my breakfast to work. My favorite breakfast is good ole fashioned oatmeal. Loaded with pecans and dried cranberries, and microwaved with a splash of milk and you’ve set yourself up for the entire morning. The added bonus is it costs pennies per serving and keeps you from running by a coffeehouse for a $4 coffee and a $3 pastry. Better for you too.
Hitting the Open Road? Take your Food!
Whether you’re going on a long trip or a short hop, never leave home without food and drink. Seriously, don’t do it. There’s nothing that will eat into your budget faster than constantly stopping to feed someone. Whenever I leave the house I always have a water bottle, a container of snacks and of course, a tumbler of iced tea. No matter what.
We got pretty good at this road trip food thing after years of weekend livestock shows and volleyball tournaments. We’d pack egg salad sandwiches for the drive, along with our trail mix (almonds, peanuts, dried cranberries and chocolate ships), homemade banana bread and plenty of cold drinks, because rule #1 on the road…”feed the driver”! No kidding.
Samples of our packed foods:
Pack a lunch for work or school. Pack it every day. To make this easier, pack the night before so that you don’t get caught rushing and forget. I do this while I’m making my iced tea. Our favorite lunches are egg salad, either on bread or with crackers, salads, soups and leftover whatever. Occasionally I’ll take homemade pate, cheese and rustic bread.
The workplace stash. This is similar to the road trip foods, but for your desk. Simple foods like trail mix, dried fruit, granola bars, even peanut butter and crackers can help fend off hunger pangs and keep you from heading towards the vending machines for a pick-me-up. If you’re lucky enough to have a fridge in your office, like I am, you have a lot more options. A container of cut fruit or cubes of cheese are a great energizer in the afternoon.
You can do this, I know you can! And, after you get into the swing of things spending $15 for lunch or $5 for a soda and chips will feel less like a luxury and more like a burden; a financial burden that is.
Just Dig in and Eat It!
With the best of intentions we have all had our version of the culinary epic failure. I know I have. So what do you do when a meal turns out to be less than stellar? Eat it anyway. Yep, we do…as long as it’s safe. And after it’s gone you can put that recipe in the “never to be made again” pile.
Don’t forget to check out the “In the Kitchen” and “Frugal Living” sections for more ideas on meals, recipes and saving money.
Savory Mushroom & Bread Pudding

When I think of bread pudding I usually think of some kind of dessert. Chunks of bread with fruit in an oozing sweet custard made of sugar, eggs and milk. And, that’s really not my thing. I’m not a dessert person, so this has never held much fascination for me. I can take the sweet stuff or leave it.
Savory dishes, on the other hand, are a completely different matter. I love the full rich flavors, the layers of textures and tastes, and the mix of ingredients in savory dishes that accompany a well roasted piece meat. That’s my culinary “love zone”.
I love trying new foods. Living in So Cal gives me many opportunities to try new markets, new ingredients and new types of Cuisine that inspire and make your taste buds stand at attention. I get excited to “get in the kitchen” to recreate a new found favorite, or search the internet for something different. That’s the wonderful thing about food. You can be your own artist. You can be as creative and daring as you like, or you can revel in your family’s favorites. There’s no wrong direction with food.
So, imagine my surprise (and delight) at finding this savory take on what is traditionally a dessert.
Let’s just say it’s like a food lover’s nirvana.
I was so anxious to try it that I didn’t quite have ALL the ingredients, so I made due with what I had. Typical me. I’ll note the changes I made below.
It turned out fantastic anyway, and definitely something I will make again. I can totally envision serving this on a cool fall evening with a grilled meat, or with just a salad, making the bread pudding the main dish.
Savory Mushroom & Bread Pudding
INGREDIENTS:
- 4 cups of dried bread cut into one inch chunks (I used a loaf of rosemary parmesan I had on hand)
- 1 stick, salted butter
- 2 large yellow onions, thinly sliced or chopped (I used a combination of onion and shallots)
- 1 handful of fresh sage, rough chopped
- 5 to 2 pounds mushrooms, sliced ¼ inch thick (Any kind will work) (I used Crimini & Baby Bella’s)
- 4 cloves of garlic, minced
- 3 cups of white Vermouth
- 6 eggs, beaten
- 5 cups of heavy cream
- 10 ounces Parmesan or pecorino, shredded
- Fresh grated nutmeg (I used ground nutmeg)
- Parsley to garnish (I omitted because I didn’t have any, not even in the garden)
DIRECTIONS:
- Preheat oven to 350F
- Toast breadcrumbs until browned. Pour into large bowl, setting aside a few chunks for the top
- Generously butter a 9 x 13 casserole dish or Dutch oven
- Melt 4 tablespoons of the butter, then add the onions and sage
- When the onions begin to soften, add the garlic. (Garlic cooks faster than onions)
- Season with salt and pepper
- Remove from heat and add to the bowl with the bread
- Melt remaining butter in the same skillet and add the sliced mushrooms
- Sauté until the moisture from the mushrooms evaporates. It will take some time, but it will evaporate
- Add cooked mushrooms to the bowl
- Carefully pour Vermouth into the hot skillet and reduce by slightly more than half
- Pour over the bread mixture and mix well
- Set for ten minutes so the liquids can be absorbed and the flavors meld
- Spoon into your prepared casserole dish or Dutch oven
- In the same bowl add the beaten eggs, cream and shredded cheese. Reserving some cheese to sprinkle on top
- Add in a little grated nutmeg and pour the egg mixture over the bread and mushroom mixture
- Gently move the bread around so the eggs mixture can get into all the crevasses
- Sprinkle the reserved cheese over the top, and arrange reserved bread chunks
- Bake for 30-35 minutes
- Garnish with parsley
Serve as a side with your favorite grilled meat or with a simple salad for a light supper.
If you’re a lover of savory foods, like me…this dish will have you dancing in the kitchen.
INGREDIENTS:
- 4 cups of dried bread cut into one inch chunks (I used a loaf of rosemary parmesan I had on hand)
- 1 stick, salted butter
- 2 large yellow onions, thinly sliced or chopped (I used a combination of onion and shallots)
- 1 handful of fresh sage, rough chopped
- 1.5 to 2 pounds mushrooms, sliced ¼ inch thick (Any kind will work) (I used Crimini & Baby Bella’s)
- 4 cloves of garlic, minced
- 3 cups of white Vermouth
- 6 eggs, beaten
- 1.5 cups of heavy cream
- 10 ounces Parmesan or pecorino, shredded
- Fresh grated nutmeg (I used ground nutmeg)
- Parsley to garnish (I omitted because I didn’t have any, not even in the garden)
DIRECTIONS:
- Preheat oven to 350F
- Toast breadcrumbs until browned. Pour into large bowl, setting aside a few chunks for the top
- Generously butter a 9 x 13 casserole dish or Dutch oven
- Melt 4 tablespoons of the butter, then add the onions and sage
- When the onions begin to soften, add the garlic. (Garlic cooks faster than onions)
- Season with salt and pepper
- Remove from heat and add to the bowl with the bread
- Melt remaining butter in the same skillet and add the sliced mushrooms
- Sauté until the moisture from the mushrooms evaporates. It will take some time, but it will evaporate
- Add cooked mushrooms to the bowl
- Carefully pour Vermouth into the hot skillet and reduce by slightly more than half
- Pour over the bread mixture and mix well
- Set for ten minutes so the liquids can be absorbed and the flavors meld
- Spoon into your prepared casserole dish or Dutch oven
- In the same bowl add the beaten eggs, cream and shredded cheese. Reserving some cheese to sprinkle on top
- Add in a little grated nutmeg and pour the egg mixture over the bread and mushroom mixture
- Gently move the bread around so the eggs mixture can get into all the crevasses
- Sprinkle the reserved cheese over the top, and arrange reserved bread chunks
- Bake for 30-35 minutes
- Garnish with parsley
12 Farm Projects Made with Livestock Panels

Livestock panels, sometimes called cattle panels, hog panels or sheep panels are not only a God send to fencing for a variety of animals, but have many other uses as well. Panels are 16-feet long and made of heavy gauge galvanized welded wire and vary in height from 36-inches to 54-inches. With a few panels and tee-posts, a sledge hammer and some fastening wire a single person, or two people, can create a sturdy pen for their animals.
As a single shepherd, I had no time for repairing fences or chasing escaped sheep, so livestock panels became my “go to” supply not only for fencing, but for a variety of other farm projects, from trellises for climbing peas or beans, to supports for espaliered fruit trees and berry canes, to outdoor pens for growing meat chickens and ducks.
What I especially like about these panels are their many uses around the farm or in the garden. They are more than just fencing, they are a multipurpose necessity, even on a small suburban homestead.
Check out these inspiring uses for livestock panels, or let your imagination run wild.
- Storage or Firewood Shelter
- Hog Moving Panel
- Greenhouse or Potting Shed
- Trellis for Climbing Crops & Flowers
- Support for Espaliered Fruit Trees
- Portable Chicken or Rabbit Tractor
- Arbor for Climbing Roses, Berries or Grapes
- Livestock Housing or Shaded Area
- Livestock Alley
- Livestock Hay Feeders
- Hanging Tool Rack
- Livestock Transport Box for Pick-up Truck
What great ideas do you have for using livestock panels on your suburban homestead?
Slow Cooker Cuban Pork & Cubano Sandwiches

I’m notorious for cobbling recipes together—seriously—no kidding!
I rarely—if ever—follow a recipe from start to finish without looking for ways to make it different (ah hem, giving it my touch, I mean).
So, when I visited the newest addition to our culinary scene I just had to try one of the dishes at home.
It was a work lunch. Someone had suggested we try the new Cuban restaurant in town. Being the foodies we all are we couldn’t resist. Well—let me tell ya, we were not disappointed…not at all.
It was a fun, lively open air place with long wooden tables where you, and the strangers sitting near you, could ooh and ahh over the rich, spicy aromas wafting in from the kitchen. It was like one big beach party, rather than a stuffy business lunch with colleagues.
As is our want to do, we ordered different dishes so we could taste many different items from the menu. Sounds strangely unsettling for a biz lunch, but when you are friends as well as colleagues, business lunches take on a whole new meaning. We love to share.
There were Cuban style taco concoctions, black beans and rice; a Cuban-style shredded beef; mojo-marinated pork shoulder roast; a Cuban-style chicken Stew; and, the Cubano Sandwich, piled high with ham, pork, pickles and cheese.
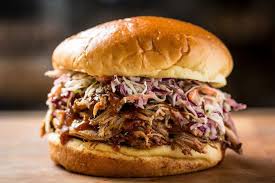
We ate, stealing tidbits from each other, laughed and talked as friends and colleagues, with as little business as possible being conducted. The one business-like discussion we did have revolved around which dish was our favorite. Hands down the fan favorite was the Cubano Sandwich, the perfect combination of savory slow-cooked pork, the bite of dill pickles and the creaminess of mayo and Dijon mustard all held together by two layers of melted Swiss cheese. YUM!!!
So—in true to me fashion I asked the restaurant if they would share the recipe. After a bit of friendly girl talk…okay…a lot of girl talk…well… some would call it serious flirting…the darling restaurant owner gave me the basic rundown of how to make a Cubano Sandwich. Armed with that info and with a bit of time combing the internet for recipes I cobbled together a few that I liked.
Knowing that this would make a lot, I enlisted the help of my family to be guinea pigs for my latest culinary creation. We served our sandwiches with black beans, white rice, and coleslaw. The results were amazing and no one went away hungry, or disappointed. SUCCESS!!
To try your own island creation check out the recipe below.
A word of warning, though, these are the perfect dripping, gooey flavorful sandwich, so break out the dish towels, folks, ‘cause a napkin ain’t gonna cut it!
Slow Cooker Cuban Pork Roast
INGREDIENTS:
To Make Slow Cooker Cuban Pork:
- 2 Pounds pork shoulder
- Kosher salt & ground black pepper
- 1 Tablespoon ground cumin
- 1 Tablespoon ground coriander
- 1 Tablespoon dried oregano
- 4 Cloves garlic, peeled and gently smashed with the side of your knife
- 1/4 Teaspoon dried red chili flakes
- 1 Medium onion, sliced thin
- 1 Cup fresh squeezed orange juice
- 1 Lime, fresh squeezed
- 1 Cup chicken broth
- 2 Bay leaves
- 4 Cuban bread rolls or other firm bread like a Telera Roll
- Mayo
- Dijon mustard
- Dill pickles, sliced
- 8 Thin slices Swiss cheese
- 8 Thin slices deli ham
- Butter
DIRECTIONS:
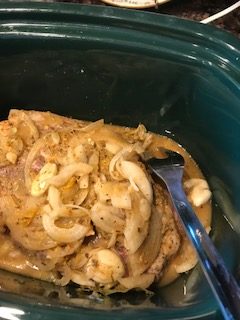
Trim pork shoulder of excess fat. Season with salt and pepper. Place in the slow cooker.
Mix remaining ingredients and pour over pork. Roll the pork around in the mixture to coat well.
Cook on low for 6-8 hours (meat should be fork tender).
Remove meat and set on cutting board, cut from bone and slice or shred. Remove any excess fat from the pot. Return meat until you are ready to assemble the sandwiches.
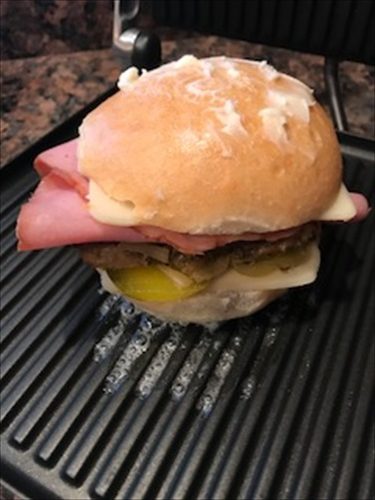
HOW TO BUILD YOUR CUBANO SANDWICH

Slice rolls in half and butter the outside of the top and bottom.
Smear both sides with a little mayo and Dijon mustard.
Starting on the bottom half, layer with 1 slice of cheese, a slice of the pork roast (at this point you can drizzle with a little of the cooking liquid), the deli ham, the pickle, and then another slice of cheese. Put the top on. Stack um high, folks.
Place on a hot Panini maker and close the lid. Apply slow pressure to compress the sandwich. It will shrink to about 1/3 of its size. You can also use a skillet or griddle, but will have to weight down skillet in order to compress the sandwich. Another heavy skillet will work.
NOW—pop open a beer, crank up the Caribbean music, and break out your dancing shoes…its party time!
INGREDIENTS:
- 2 Lbs. Pork Shoulder
- Kosher salt & Pepper
- 1 Tablespoon ground cumin
- 1 Tablespoon ground coriander
- 1 Tablespoon dried oregano
- 4 Cloves garlic, peeled and gently smashed with the side of your knife
- 1/4 Teaspoon dried red chili flakes
- 1 Medium onion, sliced thin
- 1 Cup fresh squeezed orange juice
- 1 Lime, fresh squeezed
- 1 Cup chicken broth
- 2 Bay leaves
- 4 Cuban bread rolls or other firm bread like a Telera Roll
- Mayo
- Dijon mustard
- Dill pickles, sliced
- 8 Thin slices Swiss cheese
- 8 Thin slices deli ham
- Butter
DIRECTIONS:
- Trim pork shoulder of excess fat. Place in slow cooker.
- Mix remaining ingredients and pour over pork. Roll the pork around in the mixture to coat well.
- Cook on low for 6-8 hours (meat should be fork tender).
- Remove meat and set on cutting board, cut from bone and slice or shred. Remove any excess fat from the pot. Return meat until you are ready to assemble the sandwiches.
- HOW TO BUILD YOUR CUBANO SANDWICH
- Slice rolls in half and butter the outside of the top and bottom.
- Smear both sides with a little mayo and Dijon mustard.
- Starting on the bottom half, layer with 1 slice of cheese, a slice of the pork roast (at this point you can drizzle with a little of the cooking liquid), the deli ham, the pickle, and then another slice of cheese. Put the top on. Stack um high, folks.
- Place on a hot Panini maker and close the lid. Apply slow pressure to compress the sandwich. It will shrink to about 1/3 of its size. You can also use a skillet or griddle, but will have to weight down skillet in order to compress the sandwich. Another heavy skillet will work.
Deciding How Many Vegetables to Plant

The effort to reclaim my little homestead is coming along, albeit slowly, which is fine by me.
And, although we are in full planting swing, weather wise, I am happy for a slower less rushed pace to get seeds in the ground.
It’s amazing what a year of inactivity can do to a vegetable patch. But, the respite has given me the chance to rethink my gardening efforts. Now that Brianne is out of school and on her own I am cooking for one, rather than two. You’d think that cooking for one person isn’t that different than cooking for two, but amazingly enough…it is! More times than not I’m happy to come home and throw together a big salad with tons of chopped veggies and a bit of meat and cheese. This would have NEVER flown with Brianne in the house. She was, and still is, a carnivore.
The weather over the past few weeks has been bouncing around like a kite in the wind…hot, cold, rain, wind, take your pick, we’ve had it all. Although the weather has kept me indoors I haven’t been unproductive. I’ve used the cold and rainy days as an opportunity to layout my new vegetable garden, sometimes wondering, “what the heck will it be”?
I have to admit, it has been a bit of a struggle deciding how much of each vegetable to plant for a one person household. In years past I planted with abandon, ending up with mounds of something that looked really tantalizing in the seed catalog, but wasn’t enjoyed or eaten all that much in real life.
I also had to take into consideration how much preserving I would be doing, whether canning or freezing because that would also dictate how much of each seed I planted.
But, I think I have a plan!
Famous last words, right?
So—on a rainy Sunday afternoon I set out to create my new vegetable garden design. There are no great plans to reconfigure the already installed raised beds. I’ll just work with what I already have. First things first, though. I had to decide “what” to plant.
I thought about my daily meals and what I really like to eat, making a list of all my favorite vegetables and how often I use them. Onions and carrots, for example, are the basis of many of the dishes I prepare, so they should be planted in greater quantities. Zucchini, however, I like, but only eat occasionally. And then there were the decorative pumpkins and winter squash, that can be stored. This process helped guide my planting decisions. It was also the beginnings of laying out my beds.
Keep in mind that location will also dictate the planting schedule. Here in So Cal, where we can garden almost 365-days-a-year, we don’t have to worry about growing enough at one time to last an entire year. We can plant many veggies, successively, throughout the year.
I decided to incorporate a modified “square-foot” plan where I could plant different seeds in each square rather than a single variety. So, one square may contain beets, carrots and onions, or lettuce, spinach, and kale. And, since my beds are 4-feet by 8-feet it will be easy to mark off the 1-foot squares. It will also make succession planting super easy because I will have two rows of squares to work with—one planted and one waiting to be planted.
I also had to take into consideration the growing habits of some vegetables. Squash, pumpkins and melons all have a rambling growing habit and can literally take over the garden. Runner beans, on the other hand, need vertical space and support to handle their meandering ways, so these veggies will be planted outside of my raised beds.
One year our runner beans outgrew their supports and attached themselves to the branches of a neighboring tree. We had vines more than 15 feet into the tree, making picking a challenge.
Inside my raised beds I will plant root crops, lettuces, spinach, onions, carrots, beets, peppers, bush beans and a variety of other more contained veggies, while the more uncontrollable pumpkins and squash will be planted in the old sheep corral.
But—I still had the uncertainty of how much to plant. The “square-foot” plots would dictate part of this, but think about how many different varieties of lettuces there are. As much as I love salads, and eat them often during hot summer months, do I really need multiple squares of lettuce. I had to really fine tune my garden plan, which I did.
The One Person Garden Plan
(This plan is for MY one person household, based on my personal preferences, but can be increased to accommodate a larger family, or food preservation plans.)
Beans (bush): 4-6 plants (successively planted at 2-week intervals)
Beans (pole): 3-6 plants (for each of my 3 arbors)
Beets: 30-50 plants (successively planted throughout the season)
Broccoli: 6-12 plants (successively planted at 2-week intervals)
Brussel Sprouts: 3-6 plants (successively planted throughout the season)
Cabbage (Asian): 4-6 plants (successively planted at 3-week intervals)
Cabbage (Green): 4-6 plants (successively planted at 3-week intervals)
Carrots: 30-50 plants (successively planted throughout the season)
Cauliflower: 3-6 plants (successively planted throughout the season)
Cucumbers (Slicing): 3-6 plants (successively planted at 3-week intervals)
Cucumbers (Specialty): 3-6 plants (successively planted at 3-week intervals)
Garlic: 15-20 plants (successively planted at 2-week intervals)
Kale: 2-4 plants (successively planted at 2-week intervals)
Lettuce & Musclun: 2-4 plants (successively planted at 2-week intervals)
Melons: 2-4 plants (planted at the same time)
Onions: 20-40 plants (successively planted at 2-week intervals)
Parsnips: 10-12 plants (successively planted at 2-week intervals, late summer to early fall)
Peas: 10-12 plants (successively planted at 1-week intervals, early spring to winter)
Potatoes (Bakers, Mashers & Fingerlings): 15-20 plants (planted at the same time)
Potatoes (Sweet & Yams): 10-15 plants (planted at the same time)
Pumpkins: 3-6 plants (planted at the same time)
Radishes: 20-30 plants (successively planted at 2-week intervals)
Shallots: 20-40 plants (successively planted at 2-week intervals)
Spinach: 30-50 plants (successively planted at 3-week intervals)
Squash (Summer): 1-2 plants (successively planted at 3-week intervals)
Squash (Winter): 2-3 plants (successively planted at 3-week intervals)
Sweet Peppers: 2-4 plants (planted at the same time)
Tomatoes: 3-5 plants (planted at the same time)
With my new garden layout and a more realistic planting schedule, I should have fresh, homegrown produce all year long!
Tangerine Mimosa’s

Set your Mother’s Day celebration apart this year with something truly unique and beautiful—Tangerine Mimosas!
Nothing says “I Love You” better than a sweet, bubbly, pretty cocktail perfect for moms special Brunch.
I picked the last of the tangerines from my dwarf tree today. It is by far the most productive fruit tree I have on my little suburban homestead, which always surprises me considering the little thing barely stands 4-feet tall. Each fall it sets hundreds of sweetly scented white blossoms that turn into sweet, juicy tangerines months later, just in time to ward off the grey days of winter.
They provide a great source of vitamin C all winter long and remind us that spring is no too far off. We usually eat them fresh as a snack or as a side fruit with lunch. It’s not hard to eat a half dozen in one sitting…they’re that good!
This last pick wasn’t huge, about a two dozen, or so, fruits. But, it WAS enough to mix up a refreshing batch of tangerine mimosas, and that’s what I decided to do with them. Mimosas are such a festive way to spend a lingering afternoon in the sun, but sometimes the same old recipe gets boring. Since mimosas are super easy to make, and very forgiving in the kind of juice you use, I decided to “mix things up” as it were and juice the tangerines instead of the standard orange juice.
And, boy was it delicious! Light, sweet, refreshing…perfectly lovely.
Tangerine Mimosa Recipe
INGREDIENTS
3 cups fresh squeezed tangerine juice
1 bottle champagne, chilled (750ml)
Strips of tangerine peel for garnish
DIRECTIONS
Squeeze tangerines and place juice in the fridge for an hour or more to chill.
Divide tangerine juice evenly between 4 Champagne flutes. Top with Champagne. Slightly stir to blend and garnish with the strips of tangerine peel. Serve immediately. Makes 4 servings.
Cook’s Note: Blood Oranges, Cara Cara Oranges or Ruby Red Grapefruit would be wonderful alternatives, as well.
Tangerines and Champagne…what a perfect combination for this Mother’s Day weekend!

Testing Seeds for Viability
Well—I’ve gone and done it this time!
I really have.
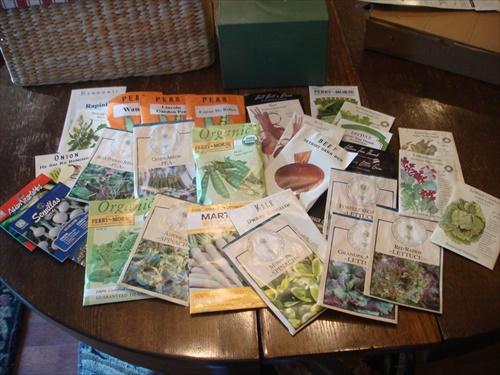
In my eagerness to reclaim my suburban homestead and get green things growing again, I started a bunch..and I mean a bunch of seeds in the greenhouse. I prowled through my seed box and found the flower seeds I wanted. I straightened up the greenhouse and prepared my workspace (can we say cobwebs?). I cleaned and sanitized the pots I would use. I even ran to town to buy…yes…buy…seed starting soil so I didn’t have to spend time mixing my own.
Sounds okay so far, right?
Then I filled the pots, planted the seeds, watered them in and set them on trays in the sunny windows of my greenhouse, and then I impatiently waited.
And, waited.
And, waited.
Nothing.
Still nothing.
Have you ever experienced that…
…you prep the soil, carefully draw out the planting rows, gingerly plant the seeds, water everything in, wait for the proper amount of time for germination…then nothing happen??
If you have, then you know what I’m talking about.
What started off as a great idea unfortunately turned into a dismal failure. I broke a cardinal rule of gardeners, and that is to test a small sample of seeds if the package date is older than THIS growing season, to make sure the seeds are still viable.
And, that’s where it all went off the rails.
I didn’t test my seeds! Can you see me gritting my teeth with an annoyed look on my face? Yeah, not Pretty!
Seeds are tough little guys and they can have a decent shelf life, if you store them properly. But, seeds that are a few years old may have a reduced germination rate so you’ll want to find that out before you start shoving them in the ground.
I know…”do as I say and not as I do” is running through my head right now.
So what am I doing, now? You guessed it. I’m taking the time to test a sampling of my vegetable and herb seeds to make sure that I don’t waste any more time, energy or supplies planting dead seeds.
Steps for Testing Seed Viability
Supplies:
Old seeds you want to test
A few sheets of paper towel
Spray bottle with water (make sure it wasn’t used for anything that could kill your seeds)
Plastic bag
Marker
STEP 1: Fold a paper towel in quarters and mark off the quadrants with a marker.
STEP 2: Label each quarter with the seed you want to test.
STEP 3: Lightly spray the whole towel with water. You want it damp, but not sopping wet.
STEP 4: Place 5 seeds on the paper towel. (I use 5, so I can calculate the germination rate, but not waste seeds)
STEP 5: Spray a second paper towel and place it on top of the first. This will make sure there is dampness all around the seeds, and help hold the seeds in place while you roll up the paper towel.
STEP 6: Place rolled, damp paper towel in a plastic bag and seal it. Place the bag in a warm place.
Germination times will vary depending on seed variety. (Beans and peas are fairly fast, while pumpkins and squash will take longer, but a general rule of thumb is 7 to 14 days for most garden seeds, unless you’re a radish seed, then they’re ridiculously fast to germinate).
Check the dampness of the paper towels daily. You don’t want them to dry out or your seeds will stop germinating. Re-spritz if necessary.
A few days after your seeds begin to sprout count how many have sprouted vs. how many have not. You’ll need this information to calculate the germination rate. At this point, you can plant the sprouted seeds either in pots or in the garden, depending on the type.
Calculating Seed Germination Rate
To calculate the germination rate: divide the number of germinated seeds by the total number of seeds in the test sample then multiply by 100.
Example:
5 seeds germinated/5 seeds in sample x 100 = 100% germination
2 seeds germinated/5 seeds in sample x 100 = 40% germination
3 seeds germinated/5 seeds in sample x 100 = 60% germination
The higher the germination rate, the higher success you’ll have in the garden. A low germination rate does not always mean disaster in the garden. Low germinated seeds can be double planted to make up for the low rate.
Seeds that were packaged for “THIS” growing season do not need to be tested, only older seeds.
Seed Storage & Viability Chart
| Seed Type | Longevity of Properly Stored Seeds |
| Artichokes | 5 years |
| Arugula | 3 years |
| Beans | 3 years |
| Beets | 4 years |
| Broccoli | 3 years |
| Brussels Sprouts | 4 years |
| Cabbage | 4 years |
| Carrots | 3 years |
| Cauliflower | 4 years |
| Celery/Celeriac | 5 years |
| Chard | 4 years |
| Collards | 5 years |
| Corn | 2 years |
| Cress | 5 years |
| Cucumbers | 5 years |
| Eggplant | 4 years |
| Endive/Escarole | 5 years |
| Fennel | 4 years |
| Kale | 4 years |
| Kohlrabi | 4 years |
| Leeks | 1 year |
| Lettuce | 5 years |
| Melons | 5 years |
| Mustard | 4 years |
| Okra | 2 years |
| Onions | 1 year |
| Peas | 3 years |
| Peppers | 2 years |
| Pumpkins | 4 years |
| Radish | 5 years |
| Rutabagas | 4 years |
| Spinach | 2-3 years |
| Summer Squash | 4 years |
| Tomatoes | 4 years |
| Turnips | 5 years |
| Watermelon | 4 years |
| Winter Squash | 4 years |
What to do When a Hen is Egg Bound?

I came home the other night to find one of my hens dead. She had hidden herself in the corner of the coop, near the feed bin.
It was sad, because I love watching my girls cluck and scratch around the yard, and I will miss the eggs, but losing livestock on a homestead is not uncommon, it’s part of the farm life. That doesn’t mean it’s easy or something we get use to. A farmer NEVER likes to lose livestock because it’s lost income or food. But, aside from the financial considerations, farmers are the most animal loving people you will ever meet. They will go out of their way to protect and care for their animals. So, if we lose one, we take it personally.
Livestock loses are, however, something we must accept as part of living this life. Illness, disease, predators, even accidents are a fact of life on a homestead. We do our best to prevent such events, but sometimes life is beyond our control.
Ok…I’m gonna say something you may think is completely horrible, but completely true…livestock are not pets.
There…I said it.
Sure we can get attached to a friendly milk cow, a playful goat or a wonderfully productive breeding ewe, but at the end of the day a vet bill may add up to more than the animal is worth, in terms of monetary value. The emotional value is a different matter altogether.
Trust me, after decades of raising livestock I have lost my fair share of animals—sometimes to illness, sometimes to lambing difficulties, sometimes to predators, and sometimes in horrific circumstances, like a dog attack.
Raising livestock is certainly NOT for the faint of heart!
After checking the hen over, I determined she died because she was egg bound, which is the inability of a hen to fully expel an egg. Basically, the egg got stuck in the oviduct.
Causes of egg bound:
- A lack of calcium or other nutrients needed for good health
- An overweight hen
- A young hen
- An unusually large egg
- A misshapen egg
What was really puzzling is that my hens are fed a balanced layer mash with added calcium, they have free range of the garden, so they get plenty of exercise and are not overweight, and they are not young. So, most of the causes of egg bound were not present.
Hens also usually show signs of being egg bound, which she did not, at least not that I saw the day or so before she passed.
Signs a hen is egg bound:
- She lays around looking sick, lethargic, fluffing herself
- She has a decreased appetite and isn’t drinking much
- If she is walking, she walks like a penguin, stopping and trying to squat
- She may appear to be straining, like she’s trying to expel something, which she is
- She may pump her tail up and down, trying to expel the egg
- She may also be panting
What can you do if your hen is egg bound?
There are a few things you can do to help the hen release the egg, once you’ve determined she really is egg bound. The above signs can be an indicator of several other conditions, so you’ll have to be sure.
First, wash your hands in warm soapy water and apply a lubricant, like vegetable oil. Very gently insert a finger into the vent, pushing straight back an inch or two. You should be able to feel the egg. If you don’t, she’s not egg bound.
If you do feel an egg, prepare a shallow tub or wash pan with warm water and Epsom salts at a ratio of 1-gallon water to 1-cup salts. The water should be deep enough so that the hen’s belly is submerged about 3 to 4 inches.
Gently put her into the water bath and let her relax there for 15 to 20-minutes. The moist heat will help her relax so she can pass the egg. After 20-minutes remove her from the water and gently towel her off. Apply some of the vegetable oil around and just inside her vent, then set her in a warm, dim, quiet place where she can rest. A dog crate works great for this because you can keep an eye on her.
Once you get her settled in, give her 1cc of calcium and some Nutri-Drench (according to package directions), then leave her alone to pass the egg. This may take a bit of time, so be patient. Be especially gentle during the entire process because the hen will be uncomfortable.
Despite your best efforts, though, she may not expel the egg, at which point you can seek a vet’s advice.
So—here’s my second horrible statement.
Does a hen warrant the expense of a vet?
For me personally, the answer is no.
There, I said it, again.
This particular hen was 3 years old. She was at the end of her productive life, and for the cost of a visit to the vet’s office, I could buy a whole new flock. So, no, if I had discovered her in time, and was not able to help her expel the egg I would not have sought vet services. It’s part of the life I’ve signed up for–the good and the bad.
What can you do to prevent a hen from becoming egg bound?
- Feed a high quality layer mix
- Provide oyster shells or crushed egg shells free choice
- Limit treats
- Make sure hens have room to roam for exercise
Recent comments
Aenean nonummy hendrerit mauris. Phasellus porta.