Testing Seeds for Viability
Well—I’ve gone and done it this time!
I really have.
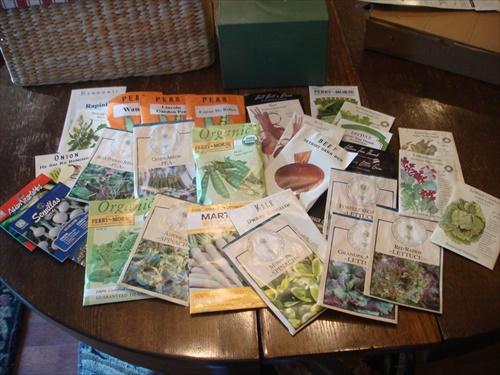
In my eagerness to reclaim my suburban homestead and get green things growing again, I started a bunch..and I mean a bunch of seeds in the greenhouse. I prowled through my seed box and found the flower seeds I wanted. I straightened up the greenhouse and prepared my workspace (can we say cobwebs?). I cleaned and sanitized the pots I would use. I even ran to town to buy…yes…buy…seed starting soil so I didn’t have to spend time mixing my own.
Sounds okay so far, right?
Then I filled the pots, planted the seeds, watered them in and set them on trays in the sunny windows of my greenhouse, and then I impatiently waited.
And, waited.
And, waited.
Nothing.
Still nothing.
Have you ever experienced that…
…you prep the soil, carefully draw out the planting rows, gingerly plant the seeds, water everything in, wait for the proper amount of time for germination…then nothing happen??
If you have, then you know what I’m talking about.
What started off as a great idea unfortunately turned into a dismal failure. I broke a cardinal rule of gardeners, and that is to test a small sample of seeds if the package date is older than THIS growing season, to make sure the seeds are still viable.
And, that’s where it all went off the rails.
I didn’t test my seeds! Can you see me gritting my teeth with an annoyed look on my face? Yeah, not Pretty!
Seeds are tough little guys and they can have a decent shelf life, if you store them properly. But, seeds that are a few years old may have a reduced germination rate so you’ll want to find that out before you start shoving them in the ground.
I know…”do as I say and not as I do” is running through my head right now.
So what am I doing, now? You guessed it. I’m taking the time to test a sampling of my vegetable and herb seeds to make sure that I don’t waste any more time, energy or supplies planting dead seeds.
Steps for Testing Seed Viability
Supplies:
Old seeds you want to test
A few sheets of paper towel
Spray bottle with water (make sure it wasn’t used for anything that could kill your seeds)
Plastic bag
Marker
STEP 1: Fold a paper towel in quarters and mark off the quadrants with a marker.
STEP 2: Label each quarter with the seed you want to test.
STEP 3: Lightly spray the whole towel with water. You want it damp, but not sopping wet.
STEP 4: Place 5 seeds on the paper towel. (I use 5, so I can calculate the germination rate, but not waste seeds)
STEP 5: Spray a second paper towel and place it on top of the first. This will make sure there is dampness all around the seeds, and help hold the seeds in place while you roll up the paper towel.
STEP 6: Place rolled, damp paper towel in a plastic bag and seal it. Place the bag in a warm place.
Germination times will vary depending on seed variety. (Beans and peas are fairly fast, while pumpkins and squash will take longer, but a general rule of thumb is 7 to 14 days for most garden seeds, unless you’re a radish seed, then they’re ridiculously fast to germinate).
Check the dampness of the paper towels daily. You don’t want them to dry out or your seeds will stop germinating. Re-spritz if necessary.
A few days after your seeds begin to sprout count how many have sprouted vs. how many have not. You’ll need this information to calculate the germination rate. At this point, you can plant the sprouted seeds either in pots or in the garden, depending on the type.
Calculating Seed Germination Rate
To calculate the germination rate: divide the number of germinated seeds by the total number of seeds in the test sample then multiply by 100.
Example:
5 seeds germinated/5 seeds in sample x 100 = 100% germination
2 seeds germinated/5 seeds in sample x 100 = 40% germination
3 seeds germinated/5 seeds in sample x 100 = 60% germination
The higher the germination rate, the higher success you’ll have in the garden. A low germination rate does not always mean disaster in the garden. Low germinated seeds can be double planted to make up for the low rate.
Seeds that were packaged for “THIS” growing season do not need to be tested, only older seeds.
Seed Storage & Viability Chart
| Seed Type | Longevity of Properly Stored Seeds |
| Artichokes | 5 years |
| Arugula | 3 years |
| Beans | 3 years |
| Beets | 4 years |
| Broccoli | 3 years |
| Brussels Sprouts | 4 years |
| Cabbage | 4 years |
| Carrots | 3 years |
| Cauliflower | 4 years |
| Celery/Celeriac | 5 years |
| Chard | 4 years |
| Collards | 5 years |
| Corn | 2 years |
| Cress | 5 years |
| Cucumbers | 5 years |
| Eggplant | 4 years |
| Endive/Escarole | 5 years |
| Fennel | 4 years |
| Kale | 4 years |
| Kohlrabi | 4 years |
| Leeks | 1 year |
| Lettuce | 5 years |
| Melons | 5 years |
| Mustard | 4 years |
| Okra | 2 years |
| Onions | 1 year |
| Peas | 3 years |
| Peppers | 2 years |
| Pumpkins | 4 years |
| Radish | 5 years |
| Rutabagas | 4 years |
| Spinach | 2-3 years |
| Summer Squash | 4 years |
| Tomatoes | 4 years |
| Turnips | 5 years |
| Watermelon | 4 years |
| Winter Squash | 4 years |
Recent comments
Aenean nonummy hendrerit mauris. Phasellus porta.