Archive for March, 2018
Springtime is Chick Time – Easy DIY Chick Brooders
Like most farm girls I’m a sucker for baby livestock,
especially chicks—seriously.
There’s no hope for it.
Even when I’m not looking to add to my flock I find it hard to pass up those chirping, fuzzy puffballs.
So—I was totally impressed with myself when, in a moment of total self-control, a few weeks ago I oohed and aahed over the dozens of livestock tanks at my local Tractor Supply filled with, you guessed it, chicks, and was able to walk away without buying a single one.
Be still my heart.
I must admit, though, I will miss those sweet little chirps that greet you anytime you’re near the brooder, but with the layers I have and the number of eggs I’m getting, I DON’T NEED ANY MORE HENS.
Sad to say, but there it is.
If baby chicks are in your future, good for you! I’m jealous.
If you are new to raising baby chicks keep reading…the basics are below.
Basics of Brooding Chicks
Brooding chicks is fairly simple. The most important things to remember are to keep them warm (at least 95-degrees), dry, fed and away from animals that like to eat them as snacks, like dogs and cats.
A brooder is simply a container where the chicks can be confined in a warm environment after the hen has hatched them. Brooded chicks are not going to be raised by the hen. I have hatched many batches of chicks over the years and let the hen raise them, so I have not always been dependent on purchased chicks. However, with DD off on her own, I don’t need as many layers as before, so when I need to replace aged hens I purchase chicks locally.
I brood my chicks until they are “fully feathered out”, meaning they look more like adult hens than gangly teenagers. This will take about 6 weeks or so, so placing your brooder in an area where you can check on the chicks often, but where it won’t be in your way is important. We used to set up our brooder just off the kitchen so we could peek in every time we passed by.
Brooder Supplies:
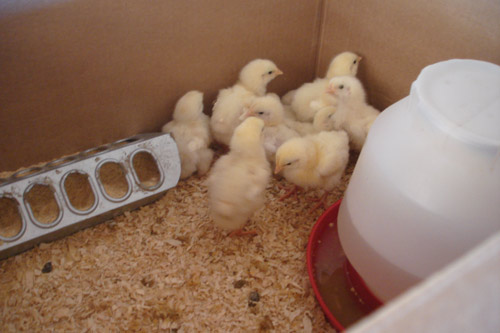
Bedding – I use pine shavings because the chicks don’t slip on the bottom of the brooder, splaying their legs. The shavings also help absorb the dampness of the droppings and spilled water.
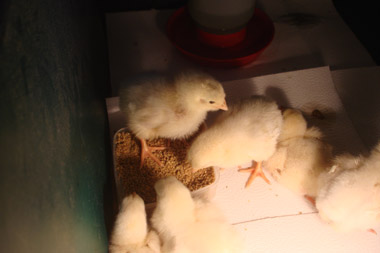
Heat Lamp – This is a must as the lamp keeps the chicks warm. I use the clip-on kind with an infrared, non-flammable bulb.
Thermometer – Chicks need heat to survive and thrive. 95-degrees is the minimum. Having an outdoor thermometer will help you monitor the temp inside the brooder and make adjustments when needed.
Feed – Chicks need a high level of protein for proper growth, so choose a pre-mixed “Chick Starter”. It will have all the necessary nutrients already mixed in. It comes medicated and unmedicated depending on your preference.
Water – Chicks drink a lot of water, and need a constant supply for good health. A gallon sized self-waterer is a good choice.
I’m not really good at the last minute thrown together brooder, so I’ve developed a system over the years that makes life much simpler. For one, I keep all my brooder supplies in a large plastic lidded container, which just so happens to be my brooder box. At the end of brooding one batch of chicks all the equipment is cleaned and sterilized, and placed in the box, so the next time I get a batch of chicks everything is clean, contained in one place and easy to find. No more hunting down stuff in the barn or garage. The brooder can be set up in just a few minutes. Easy!
There are many ways to brood chicks, and I will touch on what I think are the easiest and my favorites.
#1 — The Plastic Lidded Storage Container: This is my favorite brooder container. It’s inexpensive to buy, about $10, easy to set up and can be used to store all your brooder equipment when you’re done. If you have dogs or cats you may want to put a window screen over the top of the box so they can’t poke their noses in. If pets aren’t a concern, just off-set the lid a bit to make room for the heat lamp and to help keep the heat in. A word of caution: use a heat lamp that has a cage over the bulb. If the bulb touches the plastic it will melt a hole in your box. Been there, done that!
#2 — The Brooder Box: This is a wooden box that can be purchased at feed stores or on-line. They are usually made of thin plywood. Some have hinged sides so the box can be folded down for storage. This is not one of my favorites simply because they can be expensive, can warp out of shape, are hard to sterilize, and after a few uses the wood absorbs the smells of pooping chicks.
#3 — Livestock Water Tank: These are traditionally used by feed stores to house ALL their baby chicks. Although they look really cool and are sturdy, and all that, they are expensive (about $100 depending on size) and hard to store when not in use. But, if you have the space, go for it!
#4 — Cardboard Box: This is another favorite of mine. I get large, thick octagonal potato boxes from our local Big Box store and set up the brooder in the garage. The heat lamp can be hung by the rafters with a chain or rope. This is especially good if you are buying a large quantity of chicks. (I even raised our first batch of Cornish Game Hens in a box like this, albeit there were only 6. Worked like a dream.) When you’re finished using it, the box can be cut down and used as weed guard in garden pathways or put in the trash; nothing to store.
So—there you have it folks, a few simple ways to brood chicks that are easy, fast to setup and inexpensive to buy. Now you have no excuses to pass up chicks when you see um.
Let spring begin!
Resurrection


Well—hello, folks.
If anyone is still out there, I’m back.
And, if you are still out there I applaud your perseverance for sticking around through this very long hiatus.
I have started and stopped, rewritten and reworked several versions of this post to explain the absence, but I decided to just cut to the chase—as it were.
There’s only one word for the absence.
FUNK.
That’s it.
Honestly.
I was in a big ole fat funk and feeling like I had to write blog posts multiple times a week was just adding to the stress of an already heavy life load—so I stopped—cold turkey.
It was almost 15-months ago I decided to take a break. I thought it would only last a few weeks and then I’d be right back at it. But, that wasn’t the case. A few weeks turned into several weeks, which turned into a whole lot more weeks, and a lot more weeks turned into months, until next thing I knew almost a whole year had gone by.
But, in retrospect, the break gave me the time I needed to rethink life and my place in it. I came to a lot of conclusions, made a lot of decisions, changed directions and have implemented some new personal practices as I move forward. That all sounds so ominous I know, but it has all been good, really.
The one thing I did realize is that I really missed writing about my suburban homestead, my time living on a larger farm, raising animals, gardening for food and pleasure, and generally sharing it all with you.
I’m not quite sure what form this new blogging will take, but one thing I do know for sure is that it won’t be crazy making. The pressure to create the perfect post with the perfect photos was just so overwhelming. There may be fewer posts, farther apart, with fewer pictures, because all of that takes time and is a lot of work. This blog isn’t a business for me. It’s a creative outlet; one that I enjoyed very much and one that “I” let get out of hand, so I’m reining it in.
Now that DD is off on her own I also don’t have as many animals as I once did. In fact, I only have 6 layers, so many posts drawing on my 40+ years of experience raising livestock, farming, 4-H, and suburban homesteading, rather than “real time” activities, because while I may not be doing certain things at this moment, I have done them many times in the past.
After a year away from almost everything, my suburban homestead is a wreck, seriously. After months of not working in it, coupled with massive wind storms and wildfires last fall, there is much to be done, which I will begin to do right after it stops raining.
I am looking forward to jumping back in and sharing bits and pieces of my suburban homestead with you, sans the daily posts and beautiful “real time” photosJ
So—sit tight. I already have a few posts in the works.
If you have stuck around, thank you, I mean that sincerely. And if you want, drop a comment to let me know you’re there.
That’s it, folks. You’ll be hearing from me soon.
Recent comments
Aenean nonummy hendrerit mauris. Phasellus porta.