Archive for May, 2015
Spring!
Our rain fall this year has been practically nothing, but the lack of showers did not hamper the blooming of May flowers. The farm is bursting with color and I will relish it for as long as it holds out.
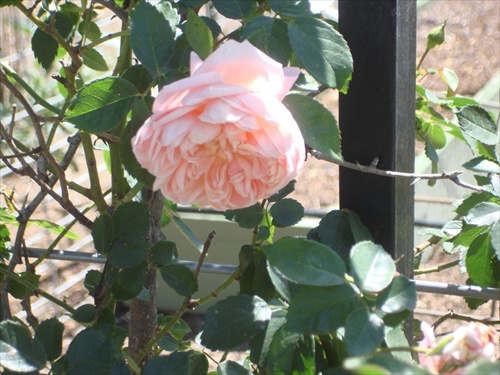
Antique roses cover every arbor on the farm and the delicate fragrance that wafts through the night air is intoxicating.
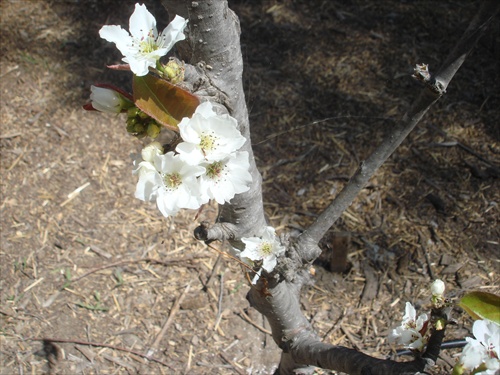
Apple blooms are a promise of fall’s juicy crispness. Cider, tarts, pies and fresh eating are still months away, but nonetheless thought of.
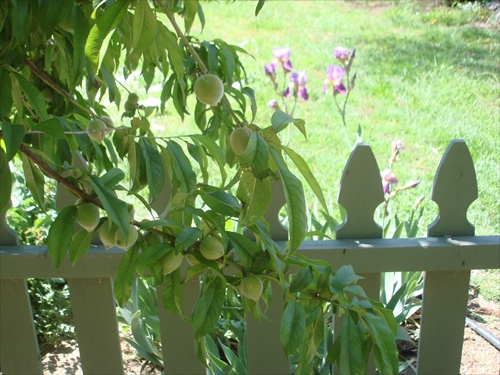
The little peach tree is laden with small fruit. By July we’ll be eating them by the dozen. I can’t wait to make the first tartin of the season.
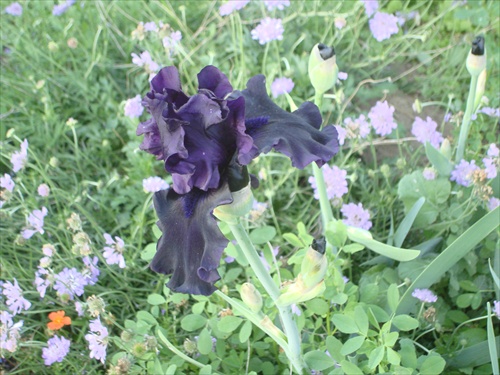
The deepest purple of this bearded iris makes it look almost black. Flowers like this are a reminder of wonderful friends. I got a few rhizomes from a fellow garden club member who loves to share. And, I will share too, I have no choice, everyone who sees it places an order for a bulb at dividing time. Fortunately for me that won’t be for another year or so.
Buttermilk Basics – How to Make Buttermilk
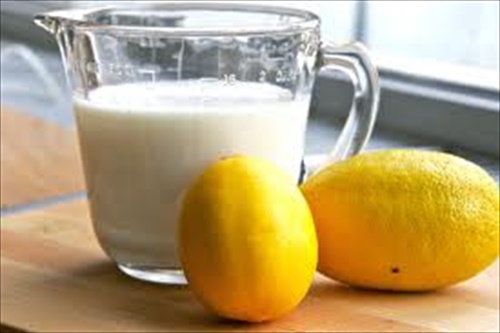
Buttermilk has been the beloved traditional ingredient of many southern dishes for decades. Whether sipped from a glass or poured from a measuring jar this old-fashioned favorite is experiencing a modern-day revival.
So—what is buttermilk? It’s a by-product of churning butter, the cloudy liquid flecked with tiny yellow bits of butter. It’s this delicate combination that makes ‘traditional” buttermilk the perfect ingredient for bringing southern flare to biscuits or southern fried chicken.
For centuries family farms and homesteads had their own milk cow and thus had a ready supply of buttermilk. But, in today’s world many modern day homesteaders live in areas that don’t allow large livestock. For some, though, housing and caring for a milk cow all year long is not part of their homesteading plan. But, that doesn’t mean you can’t have good quality buttermilk for your southern specialties. It just means you have to make your own. If you have access to good quality organic milk you can make your own buttermilk. It won’t be quite like the real thing, but it is a good substitute.
The recipe below uses lemon juice as the acid, which I think gives the buttermilk a pleasant tangy smell. The added benefit to making your own is that you can make as little or as much as you need for a given recipe. And, when used in your favorite recipes that call for buttermilk you will not be able to tell the difference.
How to make buttermilk
Step 1: Purchase a good quality organic whole milk. Or, purchase raw milk from someone who has a dairy cow.
Step 2: Combine 1 cup of milk and 1 tablespoon of fresh lemon juice in a mason jar and stir gently.
Step 3: Let mixture stand at room temperature for 5 to 10 minutes, but check the consistency after 5 minutes. It may be thick enough. If not, let it stand a bit more. The desired thickness is personal, so play around with it until you find what you like best. When finished, you’ll have thickened milk and bits of curd floating around. Perfect!
Step 4: Use the buttermilk and the curdled bits in any recipe that calls for buttermilk, like buttermilk biscuits, smoothies or buttermilk soaked fried chicken.
Store finished buttermilk in a covered mason jar in the fridge. Will last about a week or so.
Need a cool treat for a hot summer day?
Try this Mango-Buttermilk Smoothie and bring a bit of the old south to cool you off.
Mango-Buttermilk Smoothie
INGREDIENTS:
4 cups frozen diced mango
1 cup homemade buttermilk
1 tbsp. fine white sugar
½ tsp. vanilla extract
¼ tsp. cardamom
DIRECTIONS:
Pour all ingredients into a blender and process until smooth. To change the consistency, add more buttermilk, one tsp. at a time. Serve in a chilled glass with a slice of fruit on the side, and cool off!
Predator Protection on a Suburban Homestead
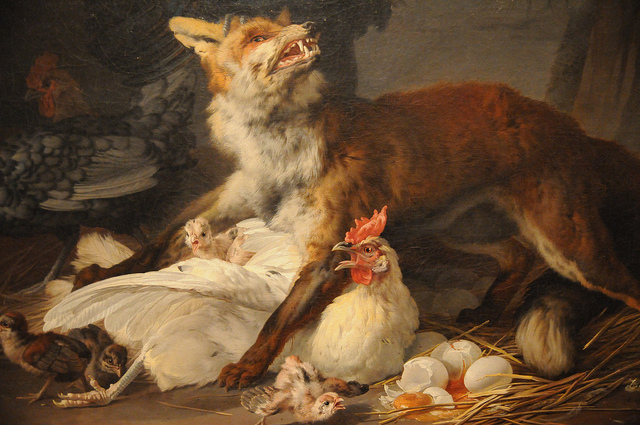
When you think of a suburban homestead you do not immediately think of predators killing your livestock. But you should, because your perimeter fencing, whether it be chain link, block wall or wood fencing, may not be sufficient to ward off animal attacks. Suburban homesteads are just as vulnerable as any other homestead or farm, maybe even more so because of the proximity of domestic dogs and feral cats.
Ninety-nine percent of the time, predator losses can be prevented. But, it’s the homesteaders’ responsibility, obligation even to be cognizant of the area in which you live and what critters live around you. Do not mistake the cute cartoon characterizations of raccoons, skunks, weasels or foxes as harmless. They all have the potential to wreck havoc on your small livestock. A raccoon can literally pull a chicken right through a wire fence and weasels can kill a nest full of chicks or kits (baby rabbits) in just a few minutes. Even foxes will kill, given the chance. Then there are the airborne predators – like eagles, hawks, falcons, and owls that can swoop down and pick off rabbits and chickens.
Free-ranging chickens will look good to stray cats, while the smell and noise of your livestock can be an attractant to wandering dogs. (Personally, I think domestic dogs are the worst most indiscriminant predators. A wild animal killing for food is heartbreaking, but somewhat understandable. But, a domestic dog that runs an animal to death or grabs at legs and flesh just for play, with no intention of consuming it is intolerable.)
With information about local wildlife and domestic animals in hand, you can plan and build structures and pens that will keep out what you don’t want in.
Barns, Sheds and Outdoor Pens
Structures and fencing do not have to be extravagant or expensive to provide proper protection, but they should be solid and secure if they are going to be successful in protecting your animals. Read the rest of the story »
Making Dirt!

Green + Brown + Water = Black Gold for the garden.
No garden is complete without a compost pile! A compost pile acts as a giant recycling bin for most decomposeable yard and kitchen waste. What’s more, compost does triple duty as a soil conditioner, mulch and fertilizer. All this wrapped up into one spade full of rich, friable black gold! It’s referred to as black gold because compost feeds the soils’ microorganisms that help to keep plants strong and healthy and adds nutrients like nitrogen to the soil, and helps less than perfect soils like clay and sand drain better.
Fall and winter is a great time to start a compost pile, too. With gardens being pulled up and put to bed for the winter and leaves falling in all those brilliant colors there is plenty of ingredients handy to feed your soil making bin.
Compost piles can come in all shapes and sizes too. Some can be made from shipping pallets or wire, others from scrap lumber or bottomless barrels. Still others can be purchased from home improvement stores or city parks departments. With the surge of home food production and recycling there is a wide variety of compost barrels and bins to choose from.
Compost housing aside, the main focus in producing good quality compost is the kinds of ingredients you add to the pile.
To build a compost pile that is easy to make, fast to decompose and dosen’t smell follow these simple steps. Read the rest of the story »
Selecting Livestock for your Suburban Homestead

It’s that time of year, folks. SPRING—the time when chicks hatch, ewes lamb, cows calve, sows farrow, does kid and rabbits kindle. A farm is alive with life as each new addition is born. But, as suburban homesteaders can we experience the same pleasures of raising livestock for food and fiber on our city lots just as our friends in the country can? Yes, we can!
Instead of curling up with a poultry catalog, scanning the internet dreaming of what could be or bemoaning what you think you can’t have, why not look into what you can have?
Bringing home your first flock or herd, or adding to an already existing one can be an exciting time. But, there are some things you need to do first. The most important first step, and the one I always recommend to any new suburban livestock owner, is find out what you are allowed to have on your property. Some suburban homeowners will only be able to raise a few rabbits, chickens, ducks or maybe a turkey, while others, like me, on a larger lot with different zoning regulations can have a larger variety – sheep and pigs. Regardless of your situation, you can still raise some of the meat and eggs your family eats, and that is better than nothing.
Including livestock on your suburban homestead is the backbone of a diversified healthy farm system and one that should be seriously considered regardless of your lot size. Even a few laying hens can clean up kitchen scraps, produce eggs and provide manure for the garden. It’s a whole cycle, folks.
Once you have determined which animals you are allowed to have on your property, decide what you want to have and how many. If you are allowed to have rabbits, but don’t like rabbit meat then don’t raise rabbits, at least not for meat. Rabbits for fun and manure is another choice.
The amount of space you have available for raising livestock will also dictate what you can raise and how many. Different species have different space requirements—chickens and rabbits only a few feet per animal, turkeys quite a bit more. As an example, I am zoned to raise a steer on my property, but, with gardens, fruit trees, berry patches and my existing animals I don’t have adequate space available for an animal that will eventually grow to 1000 pounds or more. I am looking into raising a heritage breed which tends to be small, but I may not have enough space for that either, even though I am zoned for a steer. So, I am content with raising meat chickens and ducks, freezer lambs and pigs because I can comfortably house and raise these animals if I raise them at different times of the year.
When you have decided what to raise and have calculated how many of each species you have room for, now is the time to seek out a breeder. Read the rest of the story »
How to Make Honey Peanut Brittle
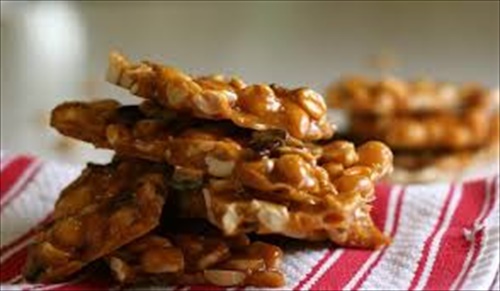
Bees are a versatile addition to any homestead and kitchen. A single hive can produce enough honey to maintain a family for a year, with a bit left over to sell, trade or share. From the earliest times honey was a prime commodity for selling or bartering. Many early-Americans came from beekeeping countries and used honey extensively in cooking and for medicinal uses. This rendition of southern peanut brittle is inspired by those early homesteaders. For a change of pace try using other nuts like pecans or almonds, or use this brittle crumbled over ice-cream for a cool and crunchy summer treat.
Honey Peanut Brittle
INGREDIENTS:
4 cups roasted & salted peanuts
1 cup sugar
1 cup honey
½ tsp. fresh lemon juice
1 tbsp. baking soda
1 tbsp. butter
Pinch of salt (optional)
DIRECTIONS:
In a deep pot bring peanuts, sugar, honey and lemon juice to a boil, stirring constantly until sugar dissolves. Continue boiling until a candy thermometer reaches 300. Remove from heat.
Carefully stir in baking soda, butter and salt (if you are using it), but be careful, the baking soda will make the mixture frothy. Spread mixture over a well-buttered baking sheet and cool completely (about an hour). When cool, break into pieces and store in an airtight container in a cool dry place. Keeps for a week, but guaranteed it won’t last that long.
Recent comments
Aenean nonummy hendrerit mauris. Phasellus porta.