Archive for May, 2010
Tricks to Peeling Fresh Hard Boiled Eggs

With all kinds of people raising their own chickens these days and more people buying fresh eggs at local farmers markets you knew there had to be a downside to this picture perfect farm product, didn’t ya?
Well, there is.
And, I was reminded of it this afternoon when I went to make myself lunch – fresh, homemade egg salad. Sometimes it seems nearly impossible to peel a fresh egg so that it looks good enough to use for anything other than what requires chopped eggs.
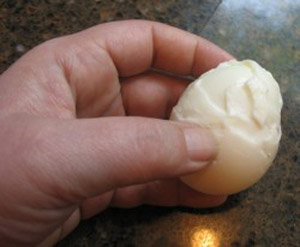
As you can see from the photograph above–they turn out looking like craggy moonscapes or postmarked, unsightly and just plain old ugly.
Standing there looking out the kitchen window trying in vain to peel the eggs I needed for my lunch, I chuckled to myself, remembering the battles my dad had using fresh eggs for his much-loved deviled eggs. It also reminded me of dad’s solution:
When he planned to make a dish that required pristine perfect hardboiled eggs, like for deviled eggs, he would set aside the number of eggs he needed a week or so in advance. Older eggs peel more easily, mainly because the air pocket inside the egg grows larger. As eggs age, the membrane of the egg doesn’t cling as tightly, allowing nimble-fingers to peel up a well-crackled shell by picking at a bit of membrane and zipping everything off in two or three swipes.
But, if dad was in a hurry, or just couldn’t wait to make deviled eggs, forcing him to use fresh eggs, it was hard to make them look as pristine as the older ones, and so, although they tasted great they never looked anything like ones made with older eggs.
If you can’t wait to use your homegrown eggs either try these tips for peeling fresh eggs. But remember – no matter how careful you are, fresh eggs are hard to peel and may not come out perfect every time.
Set eggs out so they come to room temperature; place in a pot and fill with water so you have at least 2-inches of water covering the eggs. Place on stove over medium-high heat until water comes to a full boil. Take pan off stove, cover and set aside for 12 to 15 minutes (18 minutes for extra large eggs). The hot water will continue to cook the eggs.
When the time is up, drain off the water and replace with cold water. If the water reheats, drain and refill again. (Remember to recycle the water in the garden or on potted plants.)
Once the eggs have cooled completely, gently tap the large end of the egg against a hard surface like your kitchen counter. This should crack the shell.
Turn the egg and crack the other end, then gently crack the shell all the way around. The shell should peel off easily at this point.
Here’s another…
Follow the cooking instructions above. When eggs are finished cooling gently crack them on the side of a pan or the counter. Find the membrane that lies between the cooked egg and the shell. Here’s the key…gently pull off the shell with the membrane sliding your thumb along the smooth shiny cooked egg, bringing the membrane and shell off together so that it doesn’t bring the cooked egg white off with the shell.
And another…
Once the eggs are cooked, drain the water. Shake the pan violently so the eggs crack into tiny pieces on all sides. Fill the pan with very cold water and let stand for several minutes. At this point the shell should come right off after you get it started.
Hard boiled eggs in the shell can be refrigerated up to one week. Hard boiled eggs out of the shell should be used right away.
The Sunny Fields of Denmark
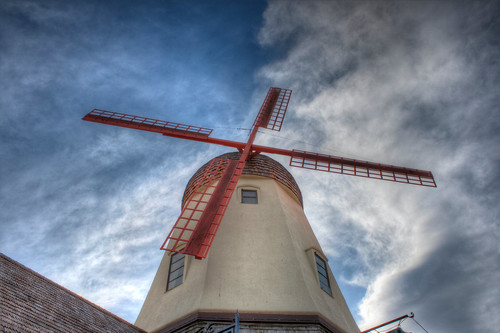
About an hour north of us is the quaint village of Solvang – an old Danish-American settlement nestled in the Santa Ynez Valley. Once home to settlers, refugees from Midwestern winters and educator’s, the village began its life as a folk school where students learned the basics of Danish craftsmanship and a love of Danish culture.
When the king and queen of Denmark visited, in 1936 and the Saturday Evening Post featured Solvang in an article 10 years later tourists flocked to the 9,000 acre Spanish land grant, attracted by the setting, the customs, and the idyllic life.
As a little girl, Solvang was a favorite weekend day trip for my family. Up the coastline of crashing waves and birds skittering over the water, then cut inland, through valleys where foothills were studded with oak trees and deer munched in the alfalfa fields that bordered the road. Finally we arrived on the outskirts of the village. No cars were allowed in the town limits back then, a rule that has since been repealed, much to the detriment of pedestrians.
To a little girl, this was a magical town. People dressed in traditional Danish costumes, horse drawn carriages slowly made their way down through the streets; the band stand at the center of town was always in full swing with music and dancing and shade trees to which tired children could lie under and rest while enjoying the merriment. There were shops and galleries and restaurants and hotels, each reflecting the area’s Danish architectural heritage. This was the good life where simple pleasures were remembered amidst old world charm and customs.
But, the thing I remember the most is the food. Yep, even then I lead my life with my stomach, a true “foodie” in the making. Pastries and cookies and breads, meats and sausages, even cabbage dishes, I tried them all. One of my favorites was Aebleskiver’s – traditional Danish pancakes made in a special pan called a monk’s pan. Think round pancake and you’ll get the picture. They’re light and fluffy and when filled with jam or chocolate they are wonderful!
To create your own bit of Denmark, try the recipe below
Basic Aebleskiver Recipe
Ingredients:
1 3/4 cups all-purpose flour
3/4 tsp. baking soda
1 tsp. baking powder
1 1/2 Tbs. granulated sugar
1/2 tsp. salt
3 eggs, separated
1 3/4 cups buttermilk
4 Tbs. (1/2 stick) unsalted butter, melted
Confectioners’ sugar for dusting
Maple syrup or jellies for serving
Directions:
In a bowl, whisk together the flour, baking soda, baking powder, granulated sugar and salt.
In a small bowl, lightly whisk together the egg yolks and buttermilk. Whisk the yolk mixture into the flour mixture until well combined; the batter will be lumpy.
In another bowl, using an electric mixer fitted with the whisk attachment beat the egg whites on high speed until stiff but not dry peaks form, 2 to 3 minutes. Using a rubber spatula, gently fold the whites into the batter in two additions.
Put 1/2 tsp. butter in each well of a filled-pancake pan. Place over medium heat and heat until the butter begins to bubble. Pour batter into each well ¾ full and cook until the bottoms are golden brown and crispy, 3 to 5 minutes. Using 2 wooden skewers flip the pancakes over and cook until golden and crispy, about 3 minutes more. Transfer to a plate. Repeat with the remaining batter.
Dust the pancakes with confectioners’ sugar and serve warm with maple syrup. Makes about 40.
To make jam filled Aebleskiver’s simply fill each monk’s pan well 1/3 full of batter then add a dollop of preserves, then a dollop more of batter and proceed as directed above. Dust with confectioners’ sugar and serve with extra jam.
For chocolate Aebleskiver’s, add 1/3 cup cocoa powder to the dry ingredients and proceed as directed. Serve with whipped cream.
Today, Solvang is still a charming town with roots firmly planted in its Danish tradition, but it has also evolved into a major tourist mecca, as its many Danish-American residents continue to perpetuate their Danish heritage. I haven’t visited for many years, but the memories of Danish folk dancing, music, parades, displays and, of coarse the food are all firmly fixed in my mind. I’m not lonely for it though because anytime I want to take myself back I just pull out my monk’s pan and make my own little Aebleskiver’s; all the while thinking, thank heaven I don’t have to pronounce it to eat it!
Monk’s pans can be found at Target, Amazon.com or William Sonoma, but you may find them at thrift stores and some local hardware stores as well.
Home Brew without the Kick
Last fall, while attending a livestock show, we had a chance to visit Bass Pro Shop. What a great place! It had everything you could imagine – from camping to hunting, fishing and outdoor cooking. It’s like an outdoorsman’s paradise on steroids; Disneyland for the sportsman really.
While paroozing the cooking section, I came across a novel item – a root beer home brewing kit. I was intrigued. Home brewing has been on my radar for a while now. And, seeing a kit complete with ingredients, equipment and even bottles sparked a hell of an interest in me. But, being the frugal, practical person that I am, and not really seeing that I would have the time to watch the home brew until it was ready really didn’t seem in the cards at the time. So I kept on walking. Months later though, I had this gnawing desire to learn how to make my own home brew, and felt a little disappointed that I hadn’t taken the opportunity when I had it.
After all, this wasn’t like making hard cider or beer or wine. There wouldn’t be the hazards of over yeasted bottles exploding in the kitchen or accidental poisonings because things went wrong. This was root beer for God sake – frothy, foaming soda you pour over ice cream.
Anyway, the root beer project seemed harmless enough. I didn’t need any complicated vats or tubing and the whole process from mixing to carbonating to cold in your hands took only 3 days. Five brainless steps to produce a rich and creamy drink that will taste our taste buds back in time. Pretty straight forward right? Also, trying something non-alcoholic seemed like a safe start.
So last week I broke down and ordered one Mr. Root Beer root beer brewing kit. And tonight Brianne and I are in the kitchen mixing the concoction of water, sugar, root beer extract and yeast with a big wooden spoon.
When I felt confident we had followed the directions correctly, we poured it into the old-fashioned looking 1-liter bottles that came with the kit, and watched the foam rise to the top, which would in theory, carbonate it. In 3-days, if all goes well, it should be ready to drink. I’ll pour the plastic bottle into a nicer serving jug, a brown colonial looking one I found while on vacation in Virginia, and place it in the fridge to chill.
If all goes well we’ll soon be sipping root beer floats made with Ben and Jerry’s Vermont Homestead vanilla ice cream drowning in our own home brew; hopefully in front of a beautiful western sky with a chorus of chirping finches in the background.
Cheers everyone!
It’s Sew Easy
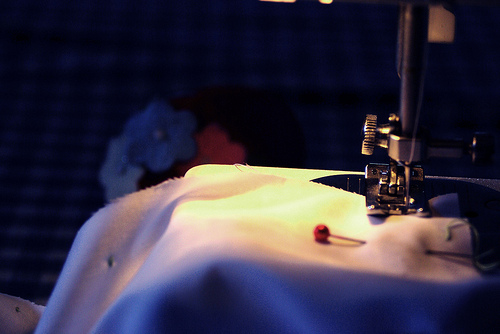
There are so many skills to learn as a homesteader – building, gardening, tending livestock are the one’s we think of first. But, there are plenty of indoor skills to be learned as well – canning, cooking, baking and of course sewing and knitting. Sewing and knitting are two of the most practical skills a homesteader can learn. They give you the ability to mend damaged clothes, extending the life of your clothes; they enable you to make old garments into new useful pieces; and they allow you to pursue something fun that in the end produces something practical and made for you.
Now, I’m not a highly skilled seamstress, nor a tailor. You won’t see me or any of my sewing projects for that matter on the latest episode of Project Runway. I’m a practical sewer. I sew to mend my daughter’s jeans or make them into shorts that will carry her through the next summer season. I make quilts out of scrap fabric and garments that are no longer useful or are too worn out to save. I fix hems, replace buttons, shorten waistbands…you get the idea.
The lack of skill in this area and other home keeping related skills is a sad commentary, I think, on our school system and society in general, but I will refrain from political commentary. I remember taking Home Ec in High School. We learned cooking, sewing, household budgeting, money management and frugality. But most women I know can’t even replace a button. And something simple like fixing a hem requires a trip to the dry cleaners or tailors shop.
While in 4-H I learned more about sewing from my project leader. I remember sitting around her dinning room table with the other girls (and some boys) as she taught us how to make simple garments like skirts, shorts, tote bags, aprons and pj pants. As our skills improved our projects got more intricate – jumpers, coats, dresses, suits.
I haven’t sewn full garments in years, but my turn to a simpler life has reawakened my desire to be more handy in this area. And, why not; making your own clothes is a guarantee that what you wear is of high quality and custom made to your tastes, not just a comeback fad of old-fashioned practicality.
Before you go out and buy a pile of fabric with patterns to match, I strongly suggest putting together your own basic sewing basket or kit. Nothing fancy is needed. A basket or lidded tin will do the trick, but these are must-haves for any would-be sewer so that all your supplies will be in one place when you get ready to start that project. It just makes life simple. My sewing basket is an old wooden, lidded box that has feet and a stationary handle. I found at a thrift store, and inside it contains
– Scissors
– Cloth tape measure
– Straight pins and a pin cushion
– Thread in assorted colors
– Seam ripper
– Needles, different sizes
– Washable fabric pen and pencil
If you think you’ll be using a sewing machine most of the time, you’ll also want to have sewing machine needles and bobbins for your machines make and model, but the above list is the bare-bones basics for simple hand sewing.
Knitting doesn’t take as many supplies as sewing does, which means less cost in the beginning. But, the results are very similar – handmade garments that reflect your personal tastes and are useful. If you’re just beginning, try using large diameter knitting needles and a thick, chunky yarn. I suggest this for a couple of reasons, 1) it’s easier to see what you’re doing when everything is larger, and 2) you’ll finish your project quickly which will give you a sense of accomplishment and satisfaction. My friend Nancy can finish a hat in the time it takes the Women’s Club to finish their meeting. Now that’s speed knitting!
Once you get the hang of knitting, you’ll see all the possibilities because each project – from scarf to hat to sweater – starts with just one simple row. After that it’s all good.
So – thread that needle or cast on that yarn folks! You know what they say about idle hands…
To try your hand at either sewing or knitting, check out these easy projects and inspiring websites. Or, for a more communal experience check out your local fabric shop or knitting store.
Free Tote Bag Patterns:
http://tipnut.com/35-reusable-grocery-bags-totes-free-patterns/
http://www.simplicity.com/
http://www.knittinghelp.com/
http://www.knitpicks.com/knitting.cfm
Three Sisters Gardening
The three sisters are not siblings at all. It refers to the three mainstays of the Native American diet – corn, beans and squash – known as the sustainers of life.
These crops are seen as three beautiful sisters, because they grow in the same mound in a garden. The corn provides a ladder for the bean vine. The squash vines shade the mound and hold moisture in the soil for the corn and beans. The well-being of each crop planted is said to be protected by the other. As legend has it, the three should be planted together, eaten together, and celebrated together. And, as legends go, they vary from tribe to tribe. One such legend goes like this:
The legend of “Three Sisters” originated when a woman of medicine who could no longer bear the fighting among her three daughters asked the Creator to help her find a way to get them to stop. That night she had a dream, and in it each sister was a different seed. In her dream, she planted them in one mound in just the way they would have lived at home and told them that in order to grow and thrive; they would need to be different but dependent upon each other. They needed to see that each was special and each had great things to offer on her own and with the others. The next morning while cooking breakfast, she cooked each daughter an egg, but each was different: one hard-boiled, one scrambled, and one over-easy. She told her daughters of her dream and said to them,
“You are like these eggs. Each is still an egg but with different textures and flavors. Each of you has a special place in the world and in my heart.” The daughters started to cry and hugged each other, because now they would celebrate their differences and love one another more because of them. From that day on, Native people have planted the three crops together—Three Sisters helping and loving each other.
Native Americans planted this way for centuries without the modern vocabulary we use today, like soil nitrogen, vitamins, etc. They often looked for signs that indicated the right soil temperature and weather for planting corn – when the Canada geese return or the dogwood leaves reach the size of a squirrel’s ear it was time to plant.
Early European settlers would certainly never have survived without the gift of the Three Sisters from the Native Americans, the story behind our Thanksgiving celebration. Celebrating the importance of these gifts, not only to the Pilgrims but also to civilizations around the globe that readily adopted these New World crops, adds meaning to modern garden practices
Success with a Three Sisters garden involves careful attention to timing, seed spacing, and varieties. In many areas, if you simply plant all three in the same hole at the same time, the result will be a snarl of vines in which the corn gets overwhelmed!
Corn, squash, and beans: three seeds of change that have forever altered the world. These plants were important in the time of Native Americans and are equally as important now. To plant your own Three Sisters garden follow the directions below. Read the rest of the story »


Recent comments
Aenean nonummy hendrerit mauris. Phasellus porta.