Archive for October, 2016
Homemade Fish Emulsion

When I was in grade school (a million years ago) we would read books about the Pilgrims and the Indians this time of year. What always struck me as odd was the part of the stories that talked about how the Indians buried a fish in the hole where they planted corn or pumpkin or squash seeds. Little did I know at the time that the decomposing fish provided food and nutrients to the germinating seeds and growing plants, much the same way topical fertilizers do today.
But, unlike in the Pilgrim days, if you search for fish fertilizer, sometimes called fish emulsion, in garden or farm stores you’ll quickly discover that they are quite expensive, too expensive for a frugal farm girl, like me. So years ago I set out to learn how to make my own. What I found out was if you have access to fish parts the process is fairly easy. Fortunately, I had a father-in-law who was an avid fisherman, and not just the catch and release type. He only believed in catching and eating. I also live fairly close to the coast with a small, but vibrant fishing industry, so my supply of fish guts was pretty steady.
Once I had the supply part figured out, it was easy going from there on.
To make your own Homemade Fish Emulsion, follow these 5 simple steps and you’ll be well on your way to creating your own nutrient packed, Pilgrim era fertilizer that your plants will love.
STEP 1: Find yourself a fairly large barrel with a lid, like a 33-gallon plastic trashcan or one of those blue water collection barrels, and label it FISH FERTILIZER, ‘cause you won’t want to mistakenly use it for anything else. A lid is important to keep the critters out, so make sure it fits securely.
STEP 2: Gather up your fish guts and bones and skins and toss them into the barrel. Crab and shrimp parts also work well because they are loaded with calcium. They take a bit to break down, but they’re worth it. You want to fill the barrel about 1/3 of the way, so if you don’t want to make very much or you don’t have access to a lot of fish parts use a 5-gallon bucket and stick with the 1/3 ratio. You’ll see why in a second.
STEP 3: Layer in some brown stuff, just like you would with a compost pile, so you have a nice carbon/nitrogen mix. Leaves work great. Layering the fish then leaves and so on will help the materials break down. You want the barrel to be about 2/3’s full.
STEP 4: Pour on a bit of sugar for the bacteria and micro-organisms to feed on and to help lessen the fishy smell. It also adds a bit more carbon to the mix. I use a livestock molasses that can be purchased in a gallon jug from a farm supply or feed store. Use ¼ to ½ cup for smaller buckets and about a cup for the larger barrels. This isn’t a fine science so don’t get obsessed with it. The sugar helps with the fermenting process.
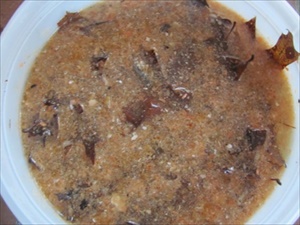
STEP 5: Fill the bucket with water to a few inches from the top. Now stir you’re gunky, sloppy mess until everything is well incorporated. Looks great, doesn’t it? Yep — it’s supposed to look that gross. Now place the lid on, but not too tight, the pressure that builds up from the fermenting will blow the lid off. You’ve been warned.
NOTE: Try not to let flies in the barrel or you’ll have a stellar breeding ground for maggots, and that’s not what we want. One solution is to drill a few holes in the lid and then line the underneath side with a fine mesh. This will let the gases release, but won’t let the flies in.
Now comes the hard part.
Let it sit for a few weeks, a month is better, so everything can ferment. Give it a good stir every few days to keep things well mixed and decomposing. It will ferment faster in warmer weather than in cooler weather, but it smells worse in warmer weather. You’ve been warned, again. After about a month your brew is ready to use!
Using Fish Emulsion
There are several different ways you can use your fish emulsion. One is to stir it well and then scoop out what you want to use, drizzling it around your plants. This gives plants bio-available nutrients in a soluble form. You can also strain off the solids and use just the liquid in a watering can like you would a manure tea, using the solids to start another batch. Or, you can use it as a drench, diluting 2-3 tablespoons in a gallon of water, and then applying it around the base of your plants. Some people use it as a foliar spray, but there’s something so unappealing about rotting fish guts coming in contact with my salad greens that I personally refrain. But, if you’re braver than me, mix 1 tablespoon of emulsion per gallon of water and use a foliar sprayer, applying it in the cooler part of the day rather than in the heat of the day.
Other Tips for Using Fish Emulsion:
- Kick start your compost pile by using ½-cup in a gallon of water and layering it in.
- Your brew will keep for a year if you make it in large batches. Smaller batches can be made seasonally.
- This stuff smells! Store it in an out-of-the-way place so the odor won’t knock you off your feet.
- Did I mention this stuff smells? EVERYTHING it comes in contact with will smell like dead fish. Choose your buckets, stirs and sprayers or water cans with this in mind, and be careful not to get it on your clothes or shoes when using it, the deodorizers don’t work very well.
- Solids can be used up to three times before they lose their potency. After that you can add them to your compost pile.
Sources for Fish Parts:
- Your own fishing trips
- Fisheries
- Local fishermen
- Farmer’s Markets
- Grocery store fish counter or fish market
How to Make a Rustic Apple Tart
I have a confession to make.
Wait for it…here it comes.
I am NOT a huge baker!
There — I said it.
I’m not a huge baker.
Don’t get me wrong, I do enjoy my desserts and toasted sweet breads now and then, but you won’t find a jar full of cookies or a plate of brownies, or even a pie on a cooling rack in my kitchen every day of the week.
That’s just not me, at all.
I do enjoy making my much requested (frozen) banana bread, and I love making my pumpkin spice bread during the fall. And, summer wouldn’t be summer without a juicy berry cobbler with its sweet, crunchy oatmeal topping. But cakes and pies or pastries and muffins have never held much fascination for me, other than occasionally eating them, of course.
The one thing I do enjoy making, especially this time of year, is a fresh gooey apple pie. Not just any apple pie, ‘cause remember I’m not into baking, but a quick and easy apple creation that can be thrown together in a matter of minutes, popped in the oven and ready to eat by the time dinner is finished.
That kind of apple pie.
So—how do I pull off this feat of culinary genius?
Simple…I use a pre-made pie crust.
Yep, you heard that right. The suburban homesteader uses pre-made pie crusts, sometimes. And, I don’t feel the least bit diminished.
I have to say they are a God send after a long day at work and even longer hours tending to the farm. There is nothing like throwing together sliced apples, spices, and butter, piling it all in the middle of a thawed pie crust and folding over the edges to encase all that yummy juiciness before popping it in the oven to bake.
I know I would be more of an authentic homesteader if I ground my own flour, sifted together the dry ingredients and folded in the wet before rolling it out and cutting it in the perfect circle, but sometimes life just gets away from us, and I’m okay with that. For me, homesteading is more a frame of mind and lifestyle that I work to achieve. It’s also a life that I’m successful at some weeks and not so much in other weeks, and I have to be okay with that too.
So, if you have a busy schedule, that prevents you from being the true to life farmer you’d like to be, take a deep breath, get yourself a pre-made pie crust, and bake a pie that is worthy of any farm girl. Don’t forget to smother it in vanilla ice cream:)
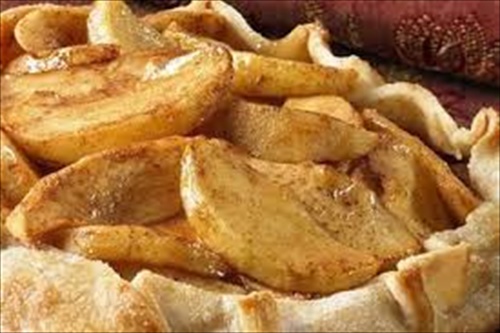
Rustic Apple Tart
INGREDIENTS:
2 tbsp unsalted butter
1/4 cup packed brown sugar
2 tbsp granulated sugar
8 cups sliced peeled tart baking apple, like Granny Smith (about 3 pounds)
2 tsp fresh lemon juice
1 tsp ground cinnamon
1/4 tsp ground nutmeg
1/2 package refrigerated pie dough (such as Pillsbury)
2 tsp ice water
2 tsp granulated sugar
2 tbsp apricot preserves
DIRECTIONS:
1. Melt butter in a large skillet over medium-high heat. Add brown sugar and 1 tablespoon granulated sugar; cook 2 minutes or until sugars dissolve. Stir in apples and next 3 ingredients (through nutmeg). Cover, reduce heat, and cook 10 minutes or until apples are tender, stirring occasionally. Remove from heat; cool to room temperature.
2. Preheat oven to 400°. Set oven rack to lowest third of oven.
3. Roll out dough and place on a piece of parchment paper. Place dough and parchment paper on a baking sheet. Arrange cooled apples in center of dough, leaving a 2-inch border. Fold the edges of dough toward center; pressing gently to seal (dough will only partially cover the apple mixture). Brush dough with 1 teaspoon ice water, and sprinkle evenly with 1 teaspoon granulated sugar. Bake at 400° for 45 minutes or until golden brown.
4. Place the preserves and 1 teaspoon water in a small microwave-safe bowl. Microwave on HIGH for 30 seconds or until bubbly. Brush the mixture over warm tart. Cut into wedges, and serve warm or at room temperature…with vanilla ice cream, of course.
INGREDIENTS:
- 2 tbsp unsalted butter
- 1/4 cup packed brown sugar
- 2 tbsp granulated sugar
- 8 cups sliced peeled tart baking apple, like Granny Smith (about 3 pounds)
- 2 tsp fresh lemon juice
- 1 tsp ground cinnamon
- 1/4 tsp ground nutmeg
- 1/2 package refrigerated pie dough (such as Pillsbury)
- 2 tsp ice water
- 2 tsp granulated sugar
- 2 tbsp apricot preserves
DIRECTIONS:
- 1. Melt butter in a large skillet over medium-high heat. Add brown sugar and 1 tablespoon granulated sugar; cook 2 minutes or until sugars dissolve. Stir in apples and next 3 ingredients (through nutmeg). Cover, reduce heat, and cook 10 minutes or until apples are tender, stirring occasionally. Remove from heat; cool to room temperature.
- 2. Preheat oven to 400°. Set oven rack to lowest third of oven.
- 3. Roll out dough and place on a piece of parchment paper. Place dough and parchment paper on a baking sheet. Arrange cooled apples in center of dough, leaving a 2-inch border. Fold the edges of dough toward center; pressing gently to seal (dough will only partially cover the apple mixture). Brush dough with 1 teaspoon ice water, and sprinkle evenly with 1 teaspoon granulated sugar. Bake at 400° for 45 minutes or until golden brown.
- 4. Place the preserves and 1 teaspoon water in a small microwave-safe bowl. Microwave on HIGH for 30 seconds or until bubbly. Brush the mixture over warm tart. Cut into wedges, and serve warm or at room temperature…with vanilla ice cream, of course.
Homemade Fire Starters
Looking for a great way to start your next fire?
Boy, do I have a dandy one that not only reuses, recycles and repurposes items that have outlived their usefulness; it’s a fun afternoon project as well.
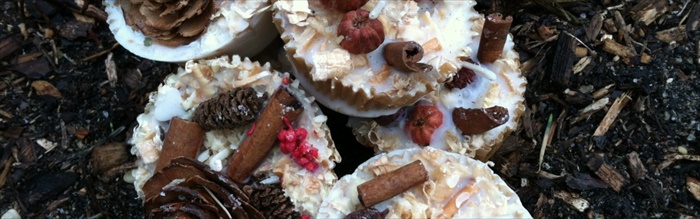
Fire starters are small wax bundles filled with various flammable materials and threaded with a wick. The bundles are used to start a small pile of wood, kindling or pinecones that in turn creates a larger fire.
They can be made from candle scrapes, bites of wax crayons, pine needles or small cones, wood shavings, even old potpourri or dried flowers.
Life on my farm is all about the senses—the looks, the smells, the sounds all play a role in making our farm a place that we love to hunker down in, so I use scrapes of scented candles and old potpourri for my mixture.
Have fun making your own homemade potpourri fire starters, or use your own materials to create new ones.
What You’ll Need:
- Paper cupcake wrappers and an old muffin tin. (I bought mine from a yard sale for a dime.)
- Wax candles scrapes, wax crayon pieces, old paraffin wax or used wax tarts. (Keep a box or bucket handy and toss all these leftovers into it.)
- Old potpourri.
- A large pot for water and smaller one for the wax. (Think of a double boiler set-up.)
- Old spoon and old ladle.
Directions:
Fill the large pan about half full of water and bring to a steady simmer.
While the water is coming to a simmer, line the muffin tin with the cupcake papers.
Place wax pieces into the smaller pan and set in the simmering water. Melt the wax slowly. Use caution when melting wax, it is very flammable.
Once the wax is completely melted, add the potpourri into the wax and stir until all the material is completely coated. The consistency should be fairly thick. If you need more material, try adding shaving, dried pine needles or small cones and seed pods, like mulberry cones. Keep the heat on so the wax won’t solidify.
Using a ladle, fill each cupcake paper. Use the old spoon to pack down the wax mixture.
When the cupcake papers are full, place the muffin tin in a safe place to cool.
When the starters have cooled, but have not solidified, run the wick through the bottom using a large needle.
Starting Your Fire
Place your kindling material in a small pile with the fire starter nestled in the middle. Light the wick, which in turn will set the fire starter on fire. The fire starter will create a flame that will last for about 5 minutes, giving time for the kindling to catch, and for you to add larger pieces of kindling. You should have a well started fire by then, and can add larger logs.
WARNING: Use great caution any time you use flammable materials or work with fire.
Shards of Golden Light

I wrote this post over a year ago, but it still holds true today; we gather and store burned down remnants of candles all year long, and we turn them into new candles in the fall. The box we store the bits and pieces in may be larger than when we first started, and the collection of fire safe containers has definitely grown, but the process of making light for winter remains the same–melt, pour, set, light.
I love the glow of candle light. It casts a warm comfortable feeling over the entire room. From the first hint of fall’s chill until buds burst in the warm spring air there are candles burning in my little farmhouse.
They are on my mantel, set in a collection of thrift store candle holders on my hearth, on the window sill of my kitchen, in my bedroom and even along side my bath tub. It’s amazing how much that little flickering flame of light can calm and restore and bring peace at the end of a busy day.
But, what once was a necessity for lighting a room, reading a newspaper, or illuminating a path has become almost a luxury. Years ago I could buy candles for a few dollars, but now they cost more than I spend on a bag of chicken feed. Being the frugal farmer that I am however, I have found a few tricks to keep my love affair with candles without breaking the bank.
One is to use the department store gift cards I receive in the mail. You know the ones I’m talking about…where they give you $10 off of a purchase to entice you into the store, hoping you’ll spend more. I’m too savvy for their ploys, though. I am usually able to find 3” pillars, or jarred candles or 6 votives for just under the minimum $10 (which I am still able to use my card to purchase). More times than not I walk out of the store with beautiful scented candles for no money at all. How’s that for farm girl frugality?
My second method to keeping the candle flames flickering is to save all the little bits and pieces of burned down candle wax. I keep them in a ziplock bag. When I have gathered enough pieces of the same color (or similar color) I melt them down to make new candles. I save all the old jars from any jarred candles because they are made of tempered glass and safe for pouring hot wax into.
For just a few dollars in a package of wick and a $2.00 pot I bought at the thrift store I can make a new candle in less than 30-minutes and enjoy the glow of my recycled wax for hours. How great is that!
To make your own candles out of bits and pieces all you need is a stainless steel pot (one you don’t mind getting covered with wax), a larger pot, an old jarred candle jar and a package of wicks.
Now—fill the larger pot half way with water and set it on a medium flame. Cut the wick 1-inch taller than the jar, tie a knot at one end, wrap it around a pencil or chop stick a few times so it sets nicely on the bottom of the jar.

Place the wax bits in the smaller pot and set it inside the larger pot–like a double boiler. Let the wax melt, stirring occasionally at first, then constantly as the wax gets hotter. When all the wax has melted, gently pour it into the prepared jar. (if your wax has bits of wick or debris in it, pour it through a small hand-held sieve). Let it set overnight. When you’re ready to burn the new candle, cut the wick to 1/2-inch and light it.

Voila! That’s all it takes to keep the candle glow burning all the way through to spring.
Homemade Mulling Spices
Can you feel it? It’s coming. Pushing out the warm sultry days of late summer and replacing it with crisp cool days that glow like gold. It’s creeping closer…softly…silently…like little cat feet.
It’s October!!!
October is my soul month, truly. And, if you’ve read this blog for long you’ve read lots of stories about my love of October. It’s the time of year that I feel the most alive, while at the same time feeling the most at home. I love everything about it—the way the afternoon sun turns golden and bathes the world in soft hues of amber, while the leaves shower down in shades of orange, red and umber; how the crisp air smells as it pushes summer out of its way. Or, the way pine and firewood smoke mingle and hang like a fragrant curtain.
October is a time for fall festivals, trips to local apple farms, hard cider tasting (and not so hard cider tasting), and searching for the perfect pumpkin to adorn our house. It is also a time when friends get together around a warm fireplace and turn a simple soup or stew dinner into a truly memorable evening. And, let’s not forget the array of hot toddies to keep the fall chill at bay.
Yep, October starts a fall season that is all about food, friends, family and merriment.
I break out my pumpkin scented candles, keep a big fire going whenever I’m home, and load up the slow cooker, but most of all I love to have a pot of mulling spices ready for a warm your soul cider concoction.
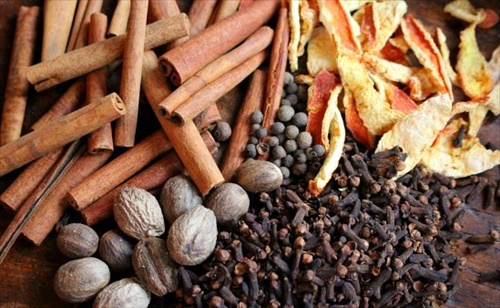
Can you smell the nutmeg cloves, orange, cinnamon, and apple cider?
Isn’t it heavenly?
It really sets the mood of a warm and inviting home, even if you’re not mulling cider or wine. Add the smell of a rich pumpkin pecan bread and you’ve got me hanging out at home all day! It’s that relaxing.
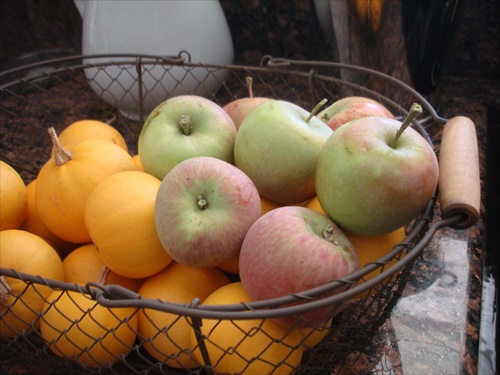
Our annual trip to the apple farms sets this scene in motion when we come home laden down with pounds of heritage apples and gallons of fresh pressed apple cider.
Looking towards the parties and cold weather ahead I mix up a batch of homemade mulling spices. I store mine in a canning jar and make a few 4-ounce jars to give as hostess gifts. They are unique and very much liked. This recipe makes eight 4-ounce jars.
Mulling Spice Mix
INGREDIENTS:
16 cinnamon sticks broken into pieces
4 whole nutmeg pods, smashed to pieces with the flat side of a meat mallet
½ cup whole cloves
¼ cup whole all allspice
½ cup dried orange peel
1 cup candied ginger, chopped
DIRECTIONS:
Place 2 or 3 pieces of cinnamon stick in the bottom of each jar. In a medium bowl, combine the nutmeg, cloves, allspice, dried orange peel and candied ginger.
Scoop mixture into each jar and close with the canning lid.
To make a mulling spice sachet: place 2 to 3 tablespoons of the spice mixture into empty clothe sachet or tea bags and tie closed, leaving some headspace.
TO MAKE MULLED APPLE CIDER: pour a ½ gallon of apple cider into a slow cooker and add 1 mulled spice bag. Allow to simmer for several hours before drinking. Keep slow cooker on low to keep cider warm. (Mulled cider can also be made on the stove top, but it takes longer. With the slow cooker you can add all in the ingredients and walk away; leaving the cider to do its business while filling the house with a wonder fall aroma.
To serve a “grown-up” version, adding a splash of Calvados before serving brings the whole thing together.
TO SERVE: Ladle hot mulled cider into mugs.
NOTE: One of the great things about making your own mulling spices is that you can tailor the mix to fit your tastes. Experiment with different combinations and make your own version.
Making Parmesan Biscuits

It’s no mystery that fall, and especially October, is my favorite time of year. I have written about my love affair with the season many times before, and you can read about it here, and here, and here.
The cast of an amber sun setting low in the sky throws a glow over the whole farm and bathes it in the quite serenity of a changing season. Colorful leaves carpet the ground like an artist’s painting. You can smell the coolness in the air as it pushes against the warm Indian summer breeze. Fall fruits and veggies stand out with their muted hues of red and orange; gold and plum. Even the earth takes on a new smell as the scent of fallen leaves mixes with freshly turned soil waiting to be planted with fall seeds.
But, the best part of fall.
The very best part of fall can be seen in the kitchen.
After months of summer greens, fresh salads, crispy vegetables, juicy fruits and plump berries, the kitchen switches over into heartier fare for the table. Soups and stews; roasts and chops take center stage now.
But, one of my most favorite things about fall is having a simmering pot of soup on the stove or in the slow cooker. The aroma that fills our little home is like a comfortable blanket spread over you as you lay in front of a crackling fire. It’s enough to warm the heart and soul, as well as the tummy.
On our little homestead soup is not only a mid-day snack, but a full blown meal as well. My stash of cookbooks has more soup recipes tucked in between the pages than any other kind. There are hearty fare soups chock full of chunky roots vegetables, a thick broth and bites of meat; creamy, full bodied soups with tubers, or noodles or rice; and then there’s the more brothy soups that spotlight flavorfully rich bases more than vegetables or meat. But, no soup would be complete without a little crispy biscuit to go with it.
Over the years I’ve tried many different kinds of biscuits with varying opinions, but the one we coming back to, the one that everyone keeps requesting is the Parmesan cheese biscuit. I found the recipe in a Farm Bureau long ago and it has been on our table ever since. It’s one of those recipes that you fall in love with, not for the sheer genius of it, but because it’s so dang simple. With just three ingredients, it takes no time at all to become totally addicted to the little things. Make a double batch of dough to keep in the freezer, just in case…or, just because.
Parmesan Biscuits
INGREDIENTS:
16 tbsp. unsalted butter, room temperature, softened
2 cups finely grated Parmigiano-Reggiano cheese (it’s important to use the real stuff. It is 1/3 of the ingredients after all)
1-3/4 cups all-purpose flour
DIRECTIONS:
1. Preheat oven to 350; position racks in top and bottom third of the oven. Line 2 baking sheets with parchment paper or baking mats.
2. Fit stand mixer with the paddle attachment. In the bowl combine the butter, cheese and flour, and beat until a stiff dough forms. (For a few minutes the dough will appear dry and not come together; keep mixing and it will form).
3. Divide dough in 3 pieces and roll each piece into a 9-inch log, about 1-1/2 inches in diameter. Wrap each log tightly with plastic wrap, and refrigerate for about an hour—this will make slicing the dough much easier.
At this point, you can freeze 2 of the logs and bake one; or if making a double batch, you can wrap each log in plastic wrap, vacuum seal it and freeze for up to 2 month. When ready to use, let it sit at room temperature for 15 minutes before slicing.
Moving on…
4. Slice the logs into 1/3-inch-thick rounds, and arrange on the cookies sheet about 2 inches apart. Bake for 15-18 minutes, or until they turn golden brown around the edges. Shift and rotate the pan half way through baking for even browning. Cool on the cookie sheet for 10 minutes before transferring to a wire rack to cool completely. The biscuits can be stored for 5 days at room temperature in an airtight container.
NOTE:
These little biscuits are great for stacking on ham, smoked turkey, salmon or trout pate. Spreadable cheeses, other pate’s, or just by themselves are also good options.
You can also make Parmesan sticks by rolling out the dough into a rectangle and slicing it long and thin.
INGREDIENTS:
- 16 tbsp. unsalted butter, room temperature, softened
- 2 cups finely grated Parmigiano-Reggiano cheese (it’s important to use the real stuff. It is 1/3 of the ingredients after all)
- 1-3/4 cups all-purpose flour
DIRECTIONS:
- 1. Preheat oven to 350; position racks in top and bottom third of the oven. Line 2 baking sheets with parchment paper or baking mats.
- 2. Fit stand mixer with the paddle attachment. In the bowl combine the butter, cheese and flour, and beat until a stiff dough forms. (For a few minutes the dough will appear dry and not come together; keep mixing and it will form).
- 3. Divide dough in 3 pieces and roll each piece into a 9-inch log, about 1-1/2 inches in diameter. Wrap each log tightly with plastic wrap, and refrigerate for about an hour—this will make slicing the dough much easier.
- At this point, you can freeze 2 of the logs and bake one; or if making a double batch, you can wrap each log in plastic wrap, vacuum seal it and freeze for up to 2 month. When ready to use, let it sit at room temperature for 15 minutes before slicing.
- Moving on…
- 4. Slice the logs into 1/3-inch-thick rounds, and arrange on the cookies sheet about 2 inches apart. Bake for 15-18 minutes, or until they turn golden brown around the edges. Shift and rotate the pan half way through baking for even browning. Cool on the cookie sheet for 10 minutes before transferring to a wire rack to cool completely. The biscuits can be stored for 5 days at room temperature in an airtight container.
- NOTE:
- These little biscuits are great for stacking on ham, smoked turkey, salmon or trout pate. Spreadable cheeses, other pate’s, or just by themselves are also good options.
- You can also make Parmesan sticks by rolling out the dough into a rectangle and slicing it long and thin.
Recent comments
Aenean nonummy hendrerit mauris. Phasellus porta.