Archive for May, 2011
Finding Buried Treasure

I’ve been worried about my hens lately. Their egg production has been so sporadic that I knew something was wrong. Some days I would get 6 good sized eggs, other day’s one or two small ones and still other days I would go to the coop only to find empty nesting boxes. The water trough always had enough water, but just to be safe I added another one. The hanging feeder had plenty of mash. Every few days they would get a treat of lettuce, carrot or beet tops, old bread or even a bit of fruit past its prime.
Everything seemed fine, but still I couldn’t figure out what could be causing such erratic egg laying.
Not until this morning that is. While getting dressed a couple of black crows frolicking in the yard caught my eye. They weren’t doing anything special just pecking at the ground. As I stood there watching, they kept dipping their beaks towards the ground then raising the heads high into the air, like birds do when they drink.
Pecking around the ground for a few moments more suddenly one of the crows hopped over to the flowerbed and disappeared into the low growing branches of a sweet pea bush. When he emerged he had a brown egg clutched between his beaks.
That was it! One of the girls had found a new hiding place and made it into a nest. After I finished getting dressed I walked outside to the flowerbed where I had seen the thieving crow, climbing over the scabiosa and coreopsis I moved the branches of the sweet pea bush out of my way and there tucked in the underbrush of plants and weeds was a small nest with three more eggs. One of the banty’s must have decided she preferred the quiet of the garden to the chaos of the coop.
All told I lost 5 eggs today—2 to the crows and three to the compost pile. I couldn’t keep the eggs I found because hard telling how long they had been buried.
I guess the crows are the only one’s to enjoy the bounty of finding buried treasure this clear spring morning.
Creative Ways to Save Big on Your Grocery Bill

We’re all trying to save on food these days and homesteaders are no different. While most folks we talked to admit that cooking from scratch and growing their own food are a good place to start, some haven’t made the jump to a garden that provides all their food needs. They do admit that buying in bulk, canning and planning meals around “in season” produce is a good way to go, and offer these helpful hints for saving on your next grocery bill.
- Share a CSA with another single person or couple and split the cost.
- Ask neighbors who have over loaded fruit trees if you can pick unwanted fruit from their trees.
- Glean fields for Second Harvest or other local food banks who work with local growers to reclaim un-harvested produce and reward volunteers with part of what they pick.
- Trade with a local hunter – your canned, frozen or baked specialties for wild game or fish.
- Ask a local butcher who processes wild game for bones and odds-and-ends that can be made into stock or broth.
- Start a “micro-coop” with family or friends, buying large qualities of staple items like flour, sugar, rice, beans, coffee and wine and splitting them with everyone.
- Consider volunteering for a vendor at your local farmer’s market in exchange for leftover produce. There may even be enough to can.
- If you live in an area with wild game, consider contacting the local police department or game warden to have your name put on the list of “takers” for animals that have been killed by vehicles. You may have a short time in which to react, but the venison, elk or other wild meat could be worth the effort.
- If you live in maple syrup or honey bee country, ask a local farmer if you can help with the harvest and processing for a gallon or so of the good stuff. The hands-on education would also be sweet.
- Many grocery store chains will give away “past prime” produce for livestock uses if asked. Many times this produce is not past eatable, just past sellable, and can be made into a variety of dishes or baked goods; canned or frozen for later use. What isn’t useable can then be given to chickens and pigs, or cooked down to supplement dog or cat food.
Other creative ways to stretch food into nutritious meals can also mean stretching every dollar.
- Toss together all kinds of veggie and meat odds-and-ends into fabulous stir-fries or satisfying soups.
- Use “filler” ingredients like rice, celery, onions and potatoes to add bulk and flavor to dishes.
- When recipes call for filler type ingredients try using oats, barley, brown rice or potatoes for added variety.
- Many dishes can use beans or legumes as the prime ingredient instead of meat.
- Cut down on the quantity of meat in your meal and load up on “in season” veggies, greens and fruit. Meat servings of 3 to 4 ounces should be sufficient if there are plenty of side dishes to go along with it.
- Get every last bit of meat off “bone-in” cuts of meat, chicken, turkey or rabbit carcasses. No matter how much you think you’ve pulled off the bone there’s usually enough, when cooked, to make a small pot of soup, a casserole, a stew or a pot pie when mixed with vegetables. The broth can also be frozen and used later.
- Go Meatless! One or two days a week. Or, substitute protein packed eggs for a meal that would normally include meat. Omelets, frittatas or egg scrambles with potatoes and fruit can be just as satisfying as a tradition dinner entrée.
- Use up all the food you buy. If produce is passing its peak plan a meal around them so they can be used. Don’t pass up the chance to use spent veggies in baked goods either. Zucchini and carrots make great quick breads, bananas are fabulous in pancakes and corn can be added to muffins for sweet, yummy, nutritious treats.
- If you can’t use “past-prime” veggies right away toss them in the freezer for later use.
- Instead of sipping on that pricey designer wine check out the two-buck-Chuck selection at Trader Joe’s. He may just be the only man that won’t let you down!
Armed with these grocery saving tips you are now armed to go forth and SAVE!
If you’re looking for people in your area to share or split bulk items with, check out www.splitstuff.com. Or, if your area is not listed consider starting your own split group with neighbors, family and friends.
![]() photo credit: Yuya Tamai
photo credit: Yuya Tamai
Blueberry French Toast Casserole

This coming month will be a busy time for our little homestead. Not only has spring finally arrived with all the chores and planting that goes along with its warmer weather, but a bounty of garden tours, workshops, lectures, festivals and gatherings are planned. Each weekend will be an opportunity to meet new friends, catch up with old ones and to show off what the season has to offer with a colorful array of potluck dishes. I love these kinds of gatherings, elegant and simple, yet unpretentious, with lots of time spent in gardens bursting with color and a peak at things to come. It’s a great way to shake off what has been an unpredictable winter that lasted weeks longer than normal.
It’s prime blueberry season in our neck of the woods and there’s nothing better than a weekend brunch marked by blueberries bursting with flavor. And the compliments for arriving with a clever dish that catches people’s eye and has them asking, “Can I get the recipe” ain’t bad either.
I came across a recipe for Blueberry French Toast Casserole and with a few adjustments it’s too wonderful and yummy to keep to myself. Here’s how you can make your own splash at a weekend brunch and have them coming back for more:
Blueberry French Toast Casserole
12 slices egg bread or Brioche, cut into 1-inch cubes
16 oz. cream cheese, softened
2 cups fresh local organic blueberries
12 farm fresh eggs
2 cups whole organic milk
1/3 cup pure Vermont maple syrup
1. Butter a 9”x13” baking dish.
2. Cut or tear bread into ½” cubes, spreading half the bread in the baking dish.
3. Cut cream cheese into 1” cubes and layer over bread. Top with blueberries and remaining bread.
4. In a large bowl, mix together eggs, milk and syrup. Pour mixture over layered bread. Use a spatula to press bread down into liquid.
5. Cover pan with foil and refrigerate for 8 hours or overnight. Set on counter 30 minutes before cooking. Preheat oven to 350F.
6. Bake for 45 minutes. Uncover and bake until top is golden brown and egg mixture is set in the middle, about 25-30 minutes more. Use a knife to check.
To make this dish even more decadent, serve it with a bit of Blueberry Sauce, which can be made while the casserole is baking.
Simply combine ½ cup sugar and a tablespoon of corn starch in a small saucepan. Add to it ½ cup of water and boil for 3 minutes. Then add ½ cup of fresh local organic blueberries and simmer until the berries begin to burst. This will take about 8 to 10 minutes. Take pan off the stove and stir in one teaspoon of nutmeg.
To serve your blueberry dream, cut into squares or spoon out portions onto a plate and drizzle blueberry sauce over the top. You can even add a shake or two of powered sugar.
Feeling a little adventurous with the coming of summer? Try making this casserole with other summer time berries like strawberries, blackberries, Olallieberries, or Logan berries.
![]() photo credit: Florida Magazine
photo credit: Florida Magazine
A Homesteaders Dozen
12 weeks before State Fair
11 vegetable beds ready to plant
10 yellow raspberries potted and ready to sell
9 pints of blackberry jam made
8 new chicks in the brooder
7 friends spending time at the beach
6 pounds of pork shoulder turned into sausage
5 dozen farm fresh eggs sold today
4 market lambs gaining steadily
3 roosters processed and made into soup base
2 farm dogs lazing around
1 gosling growing fat
0 complaints on this beautiful spring day
Did You Know… A baker’s dozen is (maybe) 13, but a shepherds dozen is 11.
What Are The Bees Telling Us?
QUEEN OF THE SUN: What Are the Bees Telling Us? is a profound, alternative look at the global bee crisis from Taggart Siegel, director of THE REAL DIRT ON FARMER JOHN.
Siegel takes the viewer on a journey through the catastrophic disappearance of bees and the mysterious world of the beehive, this engaging and ultimately uplifting film weaves an unusual and dramatic story of the heartfelt struggles of beekeepers, scientists and philosophers from around the world including Michael Pollan, Gunther Hauk and Vandana Shiva. Together they reveal both the problems and the solutions in renewing a culture in balance with nature.
To visit the official website for Queen of the Sun click here.
Vegetable Water Does Double Duty

When I was growing up my mom never boiled vegetables because, as she said, “the best part of the vegetable is lost”.
What she meant was the vitamins and nutrients were lost in the boiling water. As I got older and became more aware and educated about organic gardening I also began to wonder if the nutrients in water used to boil potatoes and beets or the water used to steam many of our other veggies couldn’t be used on my plants.
As an experiment I would cool a pot of vegetable water then use it to water my garden. After some time I began to notice how green and lush my plants were becoming.
Now, I never throw a pot of water down the drain, but rather cool it for watering my plants, both potted and ground planted. From pots of boiled potatoes and pasta to steamed vegetables to canning, the water I use throughout the day is doing double duty—cooking and providing a nourishing drink for my plants.
And, the fact that I save a little on my water bill is just an added bonus.
The Real Dirt on Farmer John
THE REAL DIRT ON FARMER JOHN follows Farmer John’s astonishing journey from farm boy to counter-culture rebel to the son who almost lost the family farm to a beacon of today’s booming organic farming movement and founder of one of the nation’s largest Community Supported Agriculture (CSA) farms. The result is a tale that ebbs and flows with the fortunes of the soil and revealingly mirrors the changing American times.
Make Your Own Honey Cow

Beekeeping is an art form that dates back thousands of years. It was a DIY project undertaken by both farm families and commercial enterprises. It is said that one hive will produce enough honey to supply a family for one year with enough left over to sell. That’s why small honey production has been a staple on small farms or homesteads for centuries.
Anyone can produce honey at home. Many different kinds of hives can be used. But, for the suburban homesteader city ordinances and zoning codes could be your biggest hurdle so check those out first. If you are lucky enough to be able to house a hive check out this inexpensive and simple design called the Honey Cow by Instructables.com
The Honey Cow is designed to mimic nature as much as possible. Unlike commercial hives that have frames, a foundation or excluders the Honey Cow only has top bars, allowing the bees to do naturally what they would do in a fallen log: build beautiful, natural combs.
It’s easy to make and manage, which makes it perfect for the beginner beekeeper. Plus it’s less intrusive to the bees.
To make your own Honey Cow check out the step-by-step instructions at instructables.com
Homemade Seed Tape

Some seeds are so small and hard to handle that you end up wasting more than you plant, or planting them so close that they need to be thinned heavily. But, it doesn’t have to be that way anymore. You can make you own homemade seed tape with toilet paper and a little bit of honey. The homemade version works just as well as the commercial ones for a lot less money.
Here’s how to make them.
1.) Start with a strip of toilet paper the length of the row you want to plant. If that is too long lengths of 12 to 18-inches is very workable and useable in a garden bed. Spread the toilet paper out flat being careful not to tear it then fold it in half length-wise. After you have creased the TP it can be unfolded to lay flat. Single or double-ply will work, but the single-ply works best because smaller seeds can root through the single layer, plus it decomposes faster. Also try to avoid scented and colored TP as it only adds chemicals to the soil.
2.) Mix about a teaspoon of honey with several drops of warm water to thin it out. The number of seed strips you are making will determine how much honey you will need. Using a small spoon, popsicle stick or paint brush gently spread a thin layer of the honey mixture down the middle of one of the folded sides of TP. Be careful not to press too hard or you will tear the TP.
3.) Before the honey dries, sprinkle an evenly spaced row of seeds down the line of honey. Check each seed packet for the recommended seed spacing. If shaking seeds out of the packet proves too difficult simply pour them into your hand or into a small bowl and place them one at a time onto the TP.
4.) Now fold the unseeded edge of the tape onto the seeded side and gently press so the honey can “glue” the two sides together. The long continuous line of honey will help keep the seeds from slipping out of place.
5.) Using a fine pen gently write the seed name, plant height, row spacing and date seed tape was made onto one edge of the seed tape. Be careful not to tear the tape. Including the plant height and row spacing will help when laying out your garden bed.
6.) After preparing the garden bed lay seed tape in desired location. Cover tape with a light peat moss mixture to the depth recommended on the seed packet. Water and keep moist as with direct sown seeds, especially after seeds have sprouted. The toilet paper tape will protect seeds from birds and small animals and from being blown away by the wind or washed away by rain or sprinklers.
The toilet paper quickly and easily decomposes never to be seen again and what remains is a perfectly laid out garden bed.
![]() photo credit: Minneapolis.Metblogs
photo credit: Minneapolis.Metblogs
Homemade Granola Bars
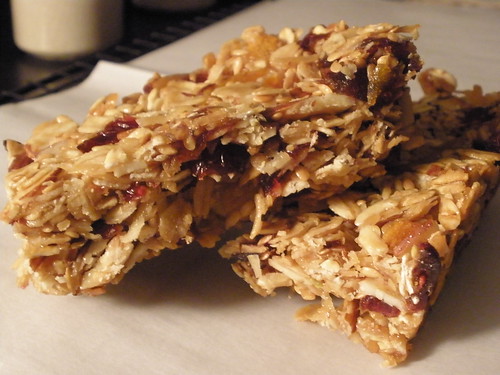
My daughter is crazy for granola bars. Between sports workouts and working her show lambs granola bars are her snack of choice for a quick energy packed pick-me-up. Unfortunately, most of the store bought granola bars are nutritionally no better than candy. Their cleverly designed packaging only makes them look like they are natural. The few that are truly natural are so tasteless it’s like eating cardboard and they cost like the dickens.
So, out of sheer necessity I was on the hunt again for a homemade alternative to a store bought item. After a bit of research and a few experiments I think I’ve found an unbeatable recipe for homemade granola bars. The list below is the core ingredients for the recipe, but it can be easily changed to accommodate personal tastes and preferences.
The cost of making your own nutritious flavor-packed granola bars is pennies on the dollar compared to their store-bought counterparts. But what’s even better than their low cost and high food value is that these bars are truly delicious — as any snack food (nutritious or otherwise) should be in order to make the list of favorites. Read the rest of the story »
Recent comments
Aenean nonummy hendrerit mauris. Phasellus porta.