Archive for July, 2016
Blackberry Cobbler with Oatmeal Topping
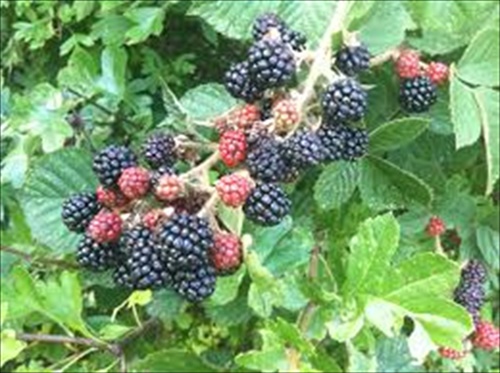
Peaches and plums and berries, oh my!
Its summertime and that means one major thing around here…cobbler. From the first bloom of spring right up to harvest time we dream of desserts made with our favorite fruits.
Every house I’ve ever live in has had a berry patch. Not a large mind you, but enough canes to produce enough fruit for summer desserts and extra for canning and freezing so we can enjoy the fresh taste of summer all winter long. They are perfect for the suburban homestead where space may be at a premium. They can be grown on fences, trellises or arbors, making them perfect for a vertical garden because they leave valuable ground for root crops or non-trailing vegetables.
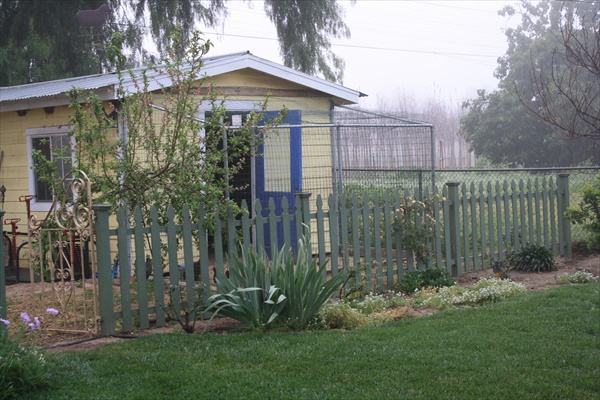
My current berry patch abuts a perimeter fence. It is just 3-foot wide by 30-foot long and has blackberries, raspberries and boysenberries that I train to grow on a 54-inch tall cattle panel. The canes are managed and pruned so we don’t have them rooting all over the place. As they start to push out new growth in the spring I fill one gallon nursery pots with rich compost and nestle the budding new growth down into the soil to root, starting a new batch of canes.
Over the years I’ve helped friends and family start their own berry patches with cuttings from my own. Berry canes are easy to root, grow in many different soil types and best of all…grow like weeds once they get started. It’s one of the best plants for new gardeners, and a favorite of well-seasoned homesteaders.
And, let’s not forget those plump, juicy, flavorful berries that explode in your mouth with a burst of flavor, or make a thick decadent jam, luscious pie or frozen little gems waiting to be blended up into a refreshing smoothie.
But…I have to admit there’s nothing better than a warm fresh berry cobbler warm from the oven. Well—unless it’s a berry cobbler with a big glob of creamy vanilla ice-cream on top. That’s a double yum.
There’s a lot of debate about fruit cobblers and what constitutes a “real” cobbler. There are cobblers topped with fluffy biscuits, some with cake-like toppings and others with a light batter pored over, creating a cobbled effect when it bakes. But, around here cobbler means one thing and one thing only, sweet seasonal fruit encased in a crumbly oatmeal brown sugar topping.

Blackberry Cobbler with Oatmeal Topping
INGREDIENTS
FILLING:
3 cups blackberries
2/3 cup sugar (depending on the sweetness of the fruit)
1 Tbsp. all-purpose flour
TOPPING:
1/3 cup all-purpose flour
½ cup packed brown sugar
¼ cup butter, melted
1 cup rolled oats
¼ Tsp. ground nutmeg
DIRECTIONS for Filling: Put all ingredients into a large saucepan and slowly bring to a boil until the sugar dissolves.
DIRECTIONS for Topping: Put all ingredients into a large mixing bowl. Pour melted butter over and mix with a fork until it is crumbly.
Heat oven to 375. Pour berry mixture into an 8-inch square baking dish. Cover with oatmeal topping. Bake for 30 – 35 minutes or until bubbly. Serve at room temperature with vanilla ice cream.
TIP: My family likes this topping so much that I make a double batch. I put a layer on the bottom and one on the top for an extra crispy yum.
INGREDIENTS:
- FILLING:
- 3 cups blackberries
- 2/3 cup sugar (depending on the sweetness of the fruit)
- 1 Tbsp. all-purpose flour
- TOPPING:
- 1/3 cup all-purpose flour
- ½ cup packed brown sugar
- ¼ cup butter, melted
- 1 cup rolled oats
- ¼ Tsp. ground nutmeg
DIRECTIONS:
- DIRECTIONS for Filling: Put all ingredients into a large saucepan and slowly bring to a boil until the sugar dissolves.
- DIRECTIONS for Topping: Put all ingredients into a large mixing bowl. Pour melted butter over and mix with a fork until it is crumbly.
- Heat oven to 375. Pour berry mixture into an 8-inch square baking dish. Cover with oatmeal topping. Bake for 30 – 35 minutes or until bubbly. Serve at room temperature with vanilla ice cream.
25 Ways Homesteading can Save you Money

People get into the homesteading life for all kinds of reasons. Some want to be more self-reliant or self-sufficient, while others come to homesteading for political or conservation or environmental reasons. Regardless of how or why homesteading appeals to people, they all seem to have one common denominator—living on less money.
I know as I have gotten older, stuff, toys and material things have taken a back seat to more simple pleasures, fun experiences and building great relationships. As I age I also think more about what my retirement life will look like and how I want to live when I stop working. All these considerations usually send my brain to thoughts of cutting costs or reducing expenses. But, when I sit down to make notes and charts of areas to cut expenses I realize my life is pretty inexpensive as it is. If I look at things more closely I can definitely say that homesteading saves me a lot of money.
Check out these 25 homesteading activities that can save you a ton of money.
1. Composting – creating your own soil from kitchen scrapes, manure, chicken coop bedding, spent veggies, grass clipping and yard trimmings will save on expensive potting soil.
2. Gym Memberships – all the fresh air, sunshine and physical work of a homestead is much better than any gym machine or cycling class.
3. Heating – cutting or gathering firewood to use in a fireplace or wood stove allows you to use your heater less.
4. Growing Herbs – the cost of herbs at the market is ridiculously high for what you get. Grow your own in pots or in the garden and you’ll never buy herbs again.
5. Grow a Vegetable Garden – I once read where growing even a small portion of your produce can save a family over $400 a month on their grocery bill. Start with the veggies you eat most often and expand from there.
6. Healthy Living – when you work outside, get lots of fresh air and sunshine, and eat wholesome homemade meals you get sick less frequent, which means fewer trips to the doctor.
7. Home Cooking – cooking from scratch at home will save you hundreds of dollars over eating out.
8. Seasonal Eating – if you purchase what you don’t grow, buying in-season fruits and veggies will cost less than buying them out-of-season.
9. Forage for Food – check out what grows in your area, whether suburban or rural. You’ll be surprised at what you can harvest from neighborhood fruits trees, wild berry patches and forest mushrooms. Educate yourself first so you know what to harvest and what not to harvest.
10. Supplemental Feeds – spent veggies, kitchen scrapes and trimmings are great for chickens, ducks, geese and rabbits. They get variety in their diet and you use less feed.
11. Lower Cable TV – when you spend a lot of time outside working in the garden, playing with animals or just enjoying the serenity of your homestead, you fall away from watching mindless TV programs. Cutting the cable is the first step to a more enjoyable life, in my opinionJ
12. Free Entertainment – simplifying your life and cutting costs spills over into entertainment as well. Many libraries and museums, even Parks Departments, offer enjoyable free programs like concerts, lectures and movies.
13. Homemade Fire Starters – with a bit of old melted candle wax and a handful of dried leaves, herbs or potpourri you’ll be starting fires for free and cutting out the gas.
14. DIY – homesteader types tend to be lifelong learners, picking up skills that others have to hire out, like plumbing, carpentry or electrical will save you a lot.
15. The Three “R’s” – self-sufficient living promotes reusing, repurposing or recycling items so they don’t end up at the dump. Scrape lumber for nesting boxes or shelves, pallets for fencing or broken down to make rabbit hutches or chicken coops, cast offs crafted into décor items, the skies the limit when you use your imagination.
16. Make Your Own??? – from laundry supplies, health remedies, beauty products and cleaning products, the projects will be fun and save a ton on chemical laden over-the-counter items.
17. Go Second Hand – thrift stores are a great place to find useful items from tools and equipment to clothing and household items. Just don’t go overboard, even a good deal can be a waste of money if you’re buying what you don’t really need.
18. Line Dry – every homestead should have a clothes line. Not only is hanging clothes on a line therapeutic (well, at least to me) it will save on the electric bill. Rig up an indoor line for winter use as well.
19. Clothing Repairs – sewing, knitting, crocheting and darning are common homestead skills people want to learn. It’s also a great way to save on tailoring or repair costs when you can do it yourself.
20. Big Batch Cooking – take advantage of a cold day and make big, or multiple big batches of soups and stews, freezing them for later use.
21. Extend the harvest – if you live in colder areas, you can still harvest fresh produce by building a few cold frames…out of scrape lumber and reused windows of course.
22. Hunt and Fish – these two skills can put pounds of food in the freezer and keep hundreds of dollars in your pocket.
23. Home Dairy – if you have the space and are allowed, consider keeping a dairy goat. The gallons of milk and pounds of cheese and yoghurt will more than offset the cost of feed.
24. Grow a Medicinal Garden – growing medicinal plants and making them into teas and tinctures can help stave off colds and flues, ease sore muscles, relieve headaches and help you fall asleep. It will also save on the cost of drugstore remedies.
25. Wearable Warmth – bundle up in warm wool sweaters or blankets and keep the thermostat low, saving on heating costs during the colder months.
What does it mean to hike your own hike?
Grab a cool drink and settle in someplace comfy folks, this is gonna be a long one.
I rarely, if ever, write about something I’ve read on another homestead blog, but a recent post about homesteading myths bothered me so much that after days of tossing and turning it around in my mind I had to say something.
First off, I want to say…I don’t know the blogger personally; we have never met, never communicated with each other. I drop by her blog once in a while and am impressed with the life she has carved out for herself and her young family. I’m also not here to defend her; she seems strong enough to do that herself.
So…what’s my beef? People who bash homesteaders because, in their view, we have not gone far enough, have not been authentic enough, have not been purist enough.
Like many most homestead bloggers, we love encouraging people young and old; city dweller or country newbie to find their way in the homesteading world regardless of how that looks. Pursuing a more self-sufficient life in a modern world is a very personal thing. No two lives, or homestead, will look the same. That’s the beauty of the community we are all trying to build. Variety is the spice of life and we can all encourage and support one another with our words, experiences and encouragement.
So, why was I bothered by her recent post?
It wasn’t her…honestly. Let me explain…
…I popped into her blog on the 4th of July weekend, just to see what she was up to. She had posted an article responding to emails she had gotten complaining that she was not a REAL homesteader, that she was not living a true homesteader lifestyle. Like many of us, she sometimes dines out with friends or family, watches movies and eats not-so-homemade meals. In essence the commenter was telling her she was not authentic in her journey as a modern homesteader.
In reality, none of us are living the same life as our homesteading forbearers lived, and I don’t know about you, but I don’t want to. Homesteading in the 1800’s was fraught with injury, disease, starvation, crop failure, bankruptcy and depravation. If you study that era just a bit you’ll see that children died of all kinds of illnesses and it was not uncommon for women to die in child birth.
Is this the kind of authenticity the commenter was referring to? I sincerely hope not.
Comments like this are not unusual for bloggers who open their lives up to the blogosphere. Many of us, me included, have been on the receiving end of less than pleasant comments by people who think we are not doing things right because we are not doing things the way THEY think we should. You have to be pretty thick skinned to lay your life open on the internet, and I have learned over the years to just let these kinds of comments roll off and chalk them up to people who are looking for something I am not providing.
But, this post bothered me…a lot. It was not the bloggers response…that she handled beautifully. It was the idea of what we are all trying to do, what we are trying to accomplish was not good enough, at least not by the commenters standards.
As I went about my day, getting ready for family celebrations, I couldn’t get the post out of my mind.
As I fed the chickens and collected eggs murmurs crept into my mind, “am I not a real homesteader because I don’t have hundreds of chickens?”
When I was making everyone’s favorite baked beans I thought, “am I not a real homesteader because I didn’t grow, harvest, clean, cull, and cook those beans before they were used to create a family favorite?”
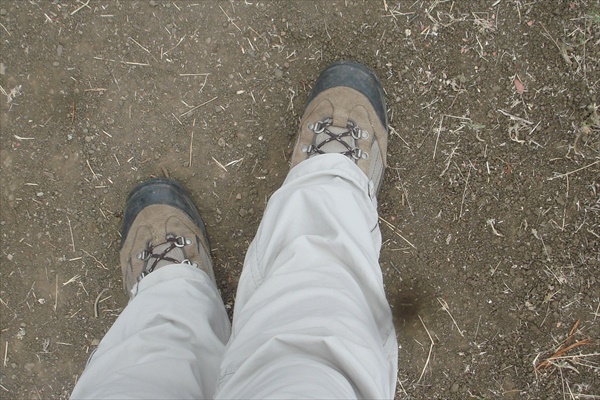
And, when I was pulling weeds, in what will be my new kitchen herb garden, watching my crazy little hen fluff herself in a cloud of dust, was I not a homesteader because I didn’t hatch her from an egg fertilized on my land.
I sat in the dirt thinking about that post, wondering how anyone can call themselves anything if they do not do it to the level of an anonymous audience.
Is a person who creates a few quilts a year, not considered a quilter because they don’t produce dozens a year?
Are the members of my church choir, not singers because they don’t sing professionally, have a record label or sing in a famous theater?
Is the painter who puts color to canvass for the joy of it not considered an artist because their works hang in a loving home rather than a gallery?
Are people who journal (or blog) not writers because they have not worked with big publishing houses?
Is the small land owner who sells at the Farmers Market not a farmer?
And, does my 40 years of raising livestock, gardening and pursuing a simpler way of life make me an unknowledgable fake rather than an experienced veteran?

I thought about this commenter’s line of thinking all weekend and into the following weeks. Everywhere I looked I saw signs of people the commenter might take issue with because they were not doing their craft, living their life at a level the commenter would think sufficient.
It wasn’t until a few weeks later, after finishing a full day’s work at my 9 to 5 job, making dinner from scratch, and doing evening chores around my suburban homestead that I finally sat down to relax. A cool breeze was coming in off the ocean, the soft wind pushing the day’s heat out of our valley. I sat on my patio watching my hens cluck and scratch around the yard as they do every evening. Fragments of that post still lingering in my mind. In that quiet, serene moment when I looked around and saw the life I had made, the projects that DD and I had worked on, and the food and animals that we had raised on a small suburban homestead at the edge of town, it came to me, something I was told many years ago, that has stuck with me all this time—hike your own hike.
What the heck does it mean to hike your own hike?
Bear with me while I explain.
It was back in 2011.
DD (aka Showie) was about to age out of two livestock programs that had taken us to fairs and expos and auctions all over California showing and selling sheep and chickens. Showing had been a huge part of our lives for 15 years. Prior to moving to our small lot at the edge of town, my sister and I had raised and shown sheep all over the western US for more than 30 years. DD went to her first ram sale at just 4 months old. Raising livestock was in our blood. It defined us, made us who we had become, and it was all going to stop in a matter of months.
Realizing that I would have a lot more time on my hands, I set out to think about the next phase in my life—the life of an empty nester. I thought about all the things I had not done, places I had not gone because buying, raising and showing livestock had always come first. I began making lists of places, activities, things I wanted to do.
One item on my list was to hike the Pacific Crest Trail, a trail that extends from Baja California to the south, through 3 states, ending at the Washington/Canadian border to the north; 2,650 miles through the California desert, the glacial expanses of the Sierras Nevada mountains; through the deep forests Oregon and over the volcanic peaks of the Cascade Mountain range.
A hiking venture like this is a huge undertaking. People spend years planning and training for this hike, it’s not something to be taken lightly, but was something I wanted to do.
As I researched the trial, spoke with outfitters who advised hikers, and read the trail journals of people who had, and were, hiking the trail, I came to understand what a feat this really was. I also realized that there were parts of the trail I had absolutely zero interest in hiking—the California desert for one. Several hundred miles of searing heat and freezing cold, the desolate surroundings were less than appealing as well. The other areas I had no interest in were the high snowcapped peaks of the Sierras and Cascade mountain ranges; the potential for sliding off a cliff or down the side of a mountain was equally unappealing.
Thinking about these revelations and the kind of hiking I really wanted to do, I set out to create “my own” hike, a condensed version of the original that I could hike in sections over many years. (Hikers refer to this as section hiking rather than thru hiking where you go from one end of the trail to the other in one trip)
A year later sis and I set out on a long weekend for the first leg of our hike, a 20 mile section near Mammoth Lakes. Over the course of two days we hiked past rivers, waterfalls, lakes, ponds, woodlands and jagged rock formations. We saw a variety of birds and wildlife we would have never encountered had we not gotten off the beaten path. It was fantastic, the beginning of a life-long dream, we were hooked.
As we came off the trail, covered in dust, sweat dripping from everywhere, our hair all askew we couldn’t help but feel a sense of accomplishment through the exhaustion. We made our way to the truck and pulled out our cooler. It was late in the afternoon and most of the picnic area was deserted. We set up our lunch at the edge of the trail—homemade chicken salad, fruit, cheese, nuts and a gallon of ice cold water. Food never tasted so good as it did that day. We sat in the shade eating, watching as hiker after hiker come off the trail and greeted us with the same dusty tired smiles we had an hour before.
I felt like part of a group that day, a group of people who were like me, just wanting an adventure, a challenge, and to be out in nature.
We must have sat there for hours when two young, spry men bounded off the trail like they had enough energy to hike another 20 miles. They greeted us, asked how we were doing, what we saw, where we had hiked. One thing led to another and they joined us at our table, pulling out a few bags of their trail food and bottles of water. They were pleasant and chatty, telling us all about their many hiking excursions. These were serious hiker, I thought.
During our conversations I found myself almost apologizing that we had not started our hike at the beginning of the trail. I made excuses about why we weren’t hiking the entire trail, that we had selected only certain sections. And, it must have seemed like I was asking permission to hike the trail over the course of years instead of the normal 5-months. When I realized what I was doing I felt almost sick. I didn’t need their permission or approval to hike where I wanted or to by-pass the areas I wasn’t interested in. Why was I rationalizing any of this to a perfect stranger!!!???
The guys were sweet and must have sensed that what I was really saying was…I. Am. Not. A. Real. Hiker.
We continued talking. They told us where they had hiked and where they were hiking on this trip. They told us about their lives and plans and how much they loved to hit the trails almost every weekend. Sitting there listening to these two young men I felt even more like a fraud. I hiked local trails; they hiked major sections of the US. Even though I had a wonderful hike, felt very proud of my accomplishment and was looking forward to our next trek onto the trails, I also felt slightly diminished, like what I had done was nothing compared to what these two young men had done, were doing.
I sat silently listening to them talk. I was in awe of what they were doing. I wondered why I waited so long. I felt like I had missed out on so much, wasted so much time not starting earlier in my life. I gazed off into the distance, their voices fading to a murmur, reflecting on what the hell I was doing. I was mid-life, I had a grown daughter, and I had not trained to hike a trail like this.
When the sun sank below the treetops and the air turned chilly, sis and I were ready for a long hot bath, a warm meal and a soft bed. We were spent. The young men decided to continue their hike to the next point on their map. I wished them well and safe trails. They hugged us and told us how awesome it was that we were out here doing our own thing. As they walked towards the trail, one of the young men turned back towards us and said something I will never, ever forget.
He said, “We all hike our own hike. Just because we do it differently than anyone else doesn’t make us any less of a hiker”. I smiled and thanked him, but what I really wanted to do was run up and hug him again because in those four words, a person who had hiked hundreds of miles in dozens of places around the country had just affirmed that I WAS A REAL HIKER TOO!!!
Why the long story?
Just this…
…homesteading, like hiking, is a personal decision, a personal challenge. We decide what and how we want our homesteading journey to look. Mine may not look like yours or the blogger in my story, but it’s not supposed to. We all have different interests we want to pursue, different skills we want to learn, different goals we want to reach.
No one homesteading venture is better than another, they all have meaning and value to the person who matters most—YOU!!
Throw off the shackles of convention, folks. Ignore what people think you should do or how you should do it.
In essence…HIKE YOUR OWN HIKE, folks, but always on your own terms.

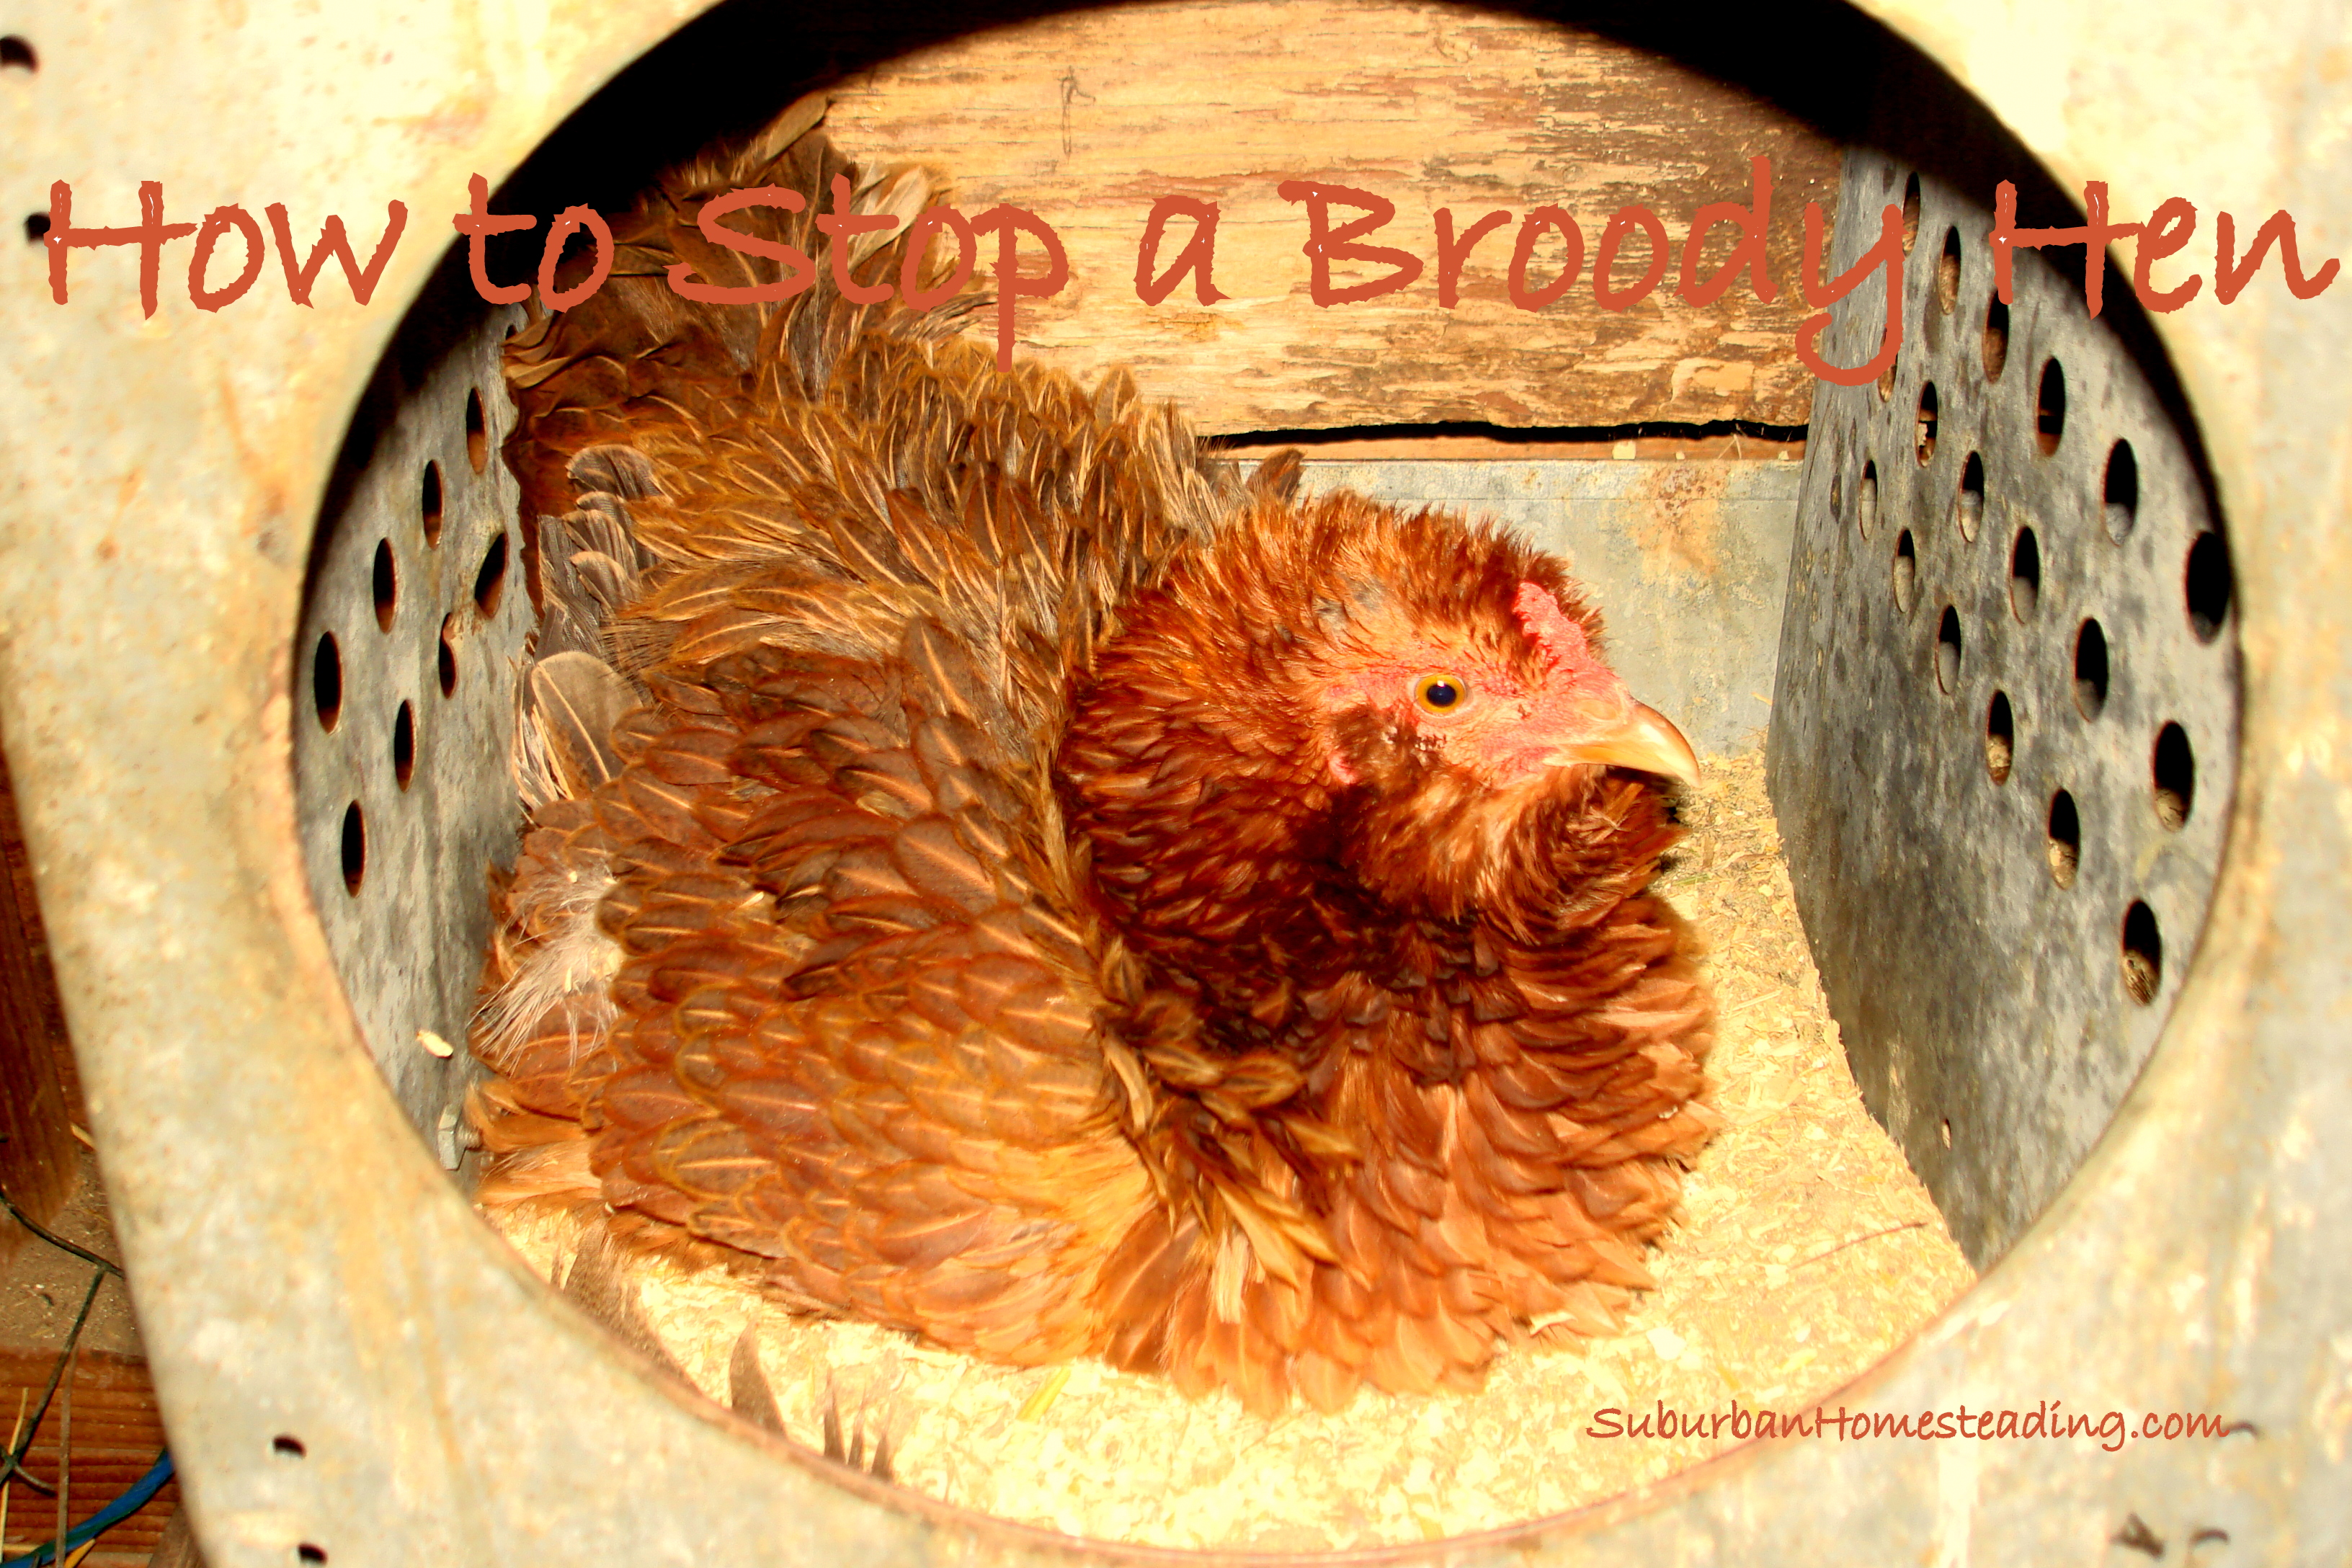
How to Stop a Broody Hen
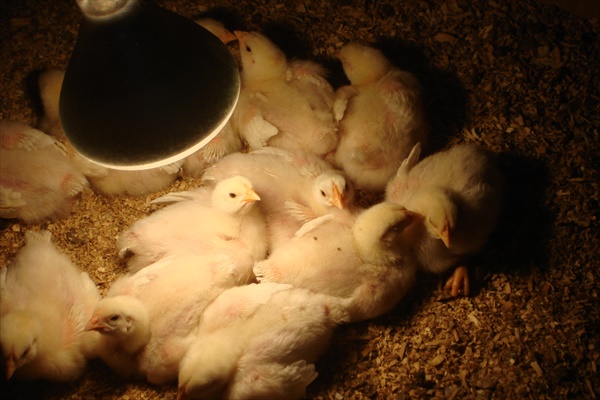
I love it when I want more chicks and a hen or two goes broody just in the nick of time.
What I don’t like, though, is a broody hen when I have no fertile eggs.
But, what’s even worse is a broody, bitchy hen. One that is territorial, that squawks at you every time you walk into the coop, one that pecks at you when you try to remove her eggs, and one that stays on the nest for days or weeks not laying eggs and getting thinner because she is not eating.
I have one such hen…and she is driving me nuts!!
She could be in the Guinness Book of World Records for the amount of time she has been sitting on her nest.
What makes a hen go broody?
No one knows for sure the exact science behind a hen going broody, but we do know it’s a combination of hormones, instinct and maturity that makes a hen want to sit on her eggs (or anyone else’s for that matter) and make them hatch. Not a bad proposition if you have fertile eggs and want a new batch of chicks. But, it’s not as desirable when you don’t have a rooster and there’s no chance of fertile eggs much less hatching chicks.
Why don’t you want a broody hen?
If you don’t want to hatch eggs then a broody hen can become a bad thing, one because she is not laying eggs while she is broody, and two, she can entice her fellow coop mates to go broody too. There goes you egg production!
Fortunately, my other hens have jumped on the crazed motherhood bandwagon. If they did I’ve have no eggs at all, and breakfast would go out the window.
What can I do about a broody hen?
The ultimate goal is to not have a hen go broody in the first place, unless you have fertile eggs you want to hatch. Removing eggs as soon as they are laid and keeping the hen out of the nesting box after she has laid eggs are both good starts to keeping a hen from going broody.
I’ll admit it…this is where all my troubles started. Long days at work and early morning meetings meant that eggs were being left in the nesting boxes for most of the day, or sometimes until the next morning. It was a perfect recipe to send even the most reluctant hen broody.
If practicality and time keep you from collecting eggs or shooing your hens out of their nesting boxes, here are a few more tips that should break her habit. Operative word, should.
1. Kick her out with the rest of the flock. Taking her off the nest and getting her outside the coop will help break the broody cycle. Feeding time is a good time to do this because it will distract her from being off the nest. Remember though, broody hens can be bite, so be cautious.
2. Block her out of the nesting box. To dampen her instincts, put a piece of wood over the nesting box hole so she can’t get back in.
3. Get her roosting again. As the sun sets and the rest of the flock is making their way to their place on the roost pick her up and place her on the roost. Chances are she won’t be brave enough to abandon the flock in search of her nest.
4. Lower her body temperature. A few people have mentioned putting a bag of frozen veggies underneath the hen. This lowers her body temperature and signals the brain that she is not broody any longer. I’ve not tried this before. Although it sounds interesting I’m not sure I’d want to waste good veggies.
5. If all else fails, cage her up. Sounds mean, but it’s not. Simply place her in a wire mesh cage in an area with lots of bright sunlight, and plenty of food and water, but no bedding for a few days. Afterwards, let her out and see if she socializes with the rest of the flock or returns to her nest. If she is socializing she is not broody. But, if she tries to return to the nest put her back in the cage for a few more days.
It shouldn’t take long to break a broody hen using any of these methods, unless of course you are ME. I think my hen is in perpetual broody mode.
So—what was my solution?
After weeks of admittedly, inconsistent, attempts to break her broody cycle the one thing that did work was a nighttime raid by a rouge raccoon.
Yep…that worked.
Luckily, my coop is like the Fort Knox of poultry housing, so the coon didn’t stand a chance. When I arrived on the scene, at two in the morning, she was up and about; a little stressed and sticking pretty close to the other hens.
Problem solved.
BTW — I don’t recommend the raccoon method:)
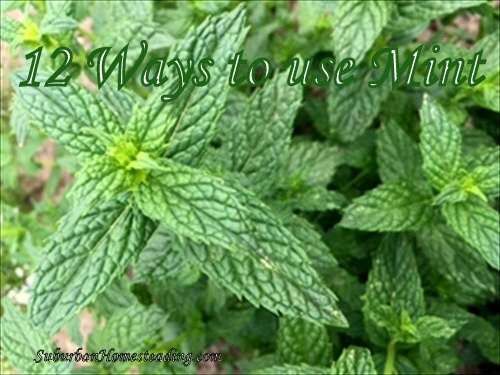
12 Ways to use Mint
We are being overrun!
No—really. I’m not joking.
With all the cool evenings and warm days my mint patch has literally exploded.
I thought I was being clever when I potted up a few of my favorite kinds of mint (spearmint, peppermint and some plain old garden mint someone gifted to me) to control its invasive growing habit, rather than plant it directly in the garden.
Seems I wasn’t so clever after all. Those aggressive little…I won’t say it…grew right through the hole in the pots and PLANTED themselves in my flowerbed. NOW, I have a forest of mint! Yikes.
I know what you’re thinking…
…we complain when a plant doesn’t produce and now I’m complaining when it produces too much.
Mint is one of those plants that grow extremely well regardless of the conditions, so controlling the chaos is a bit of a challenge.
With way too much on my hands I set out to find a few awesome ways to use and preserve my little radical greens. Here are a few:
1. Make mint lemon water – add a few sprigs of mint and several slices of lemon to a cold jug of water. It will keep you cool and refreshed no matter how hot the day.
2. Add it to iced tea or lemonade – for a twist on a summer classic.
3. Use as a room freshener – cut a few sprigs and place in a decorative vase or Mason jar.
4. Keep the bugs out – mint attracts “good” bugs and repels “bad” bugs, so plant up a few pots of Penny Royal mint and place them near doorways to repel ants and flies. I said POTTED, right?
5. Breathe freshener – who needs mint gum when you can just pluck and chew on a mint leaf?
6. Pair with fruit or veggies – mint gives a light fresh taste to veggies like tomatoes, peas, cucumbers, potatoes and beets. Or, mince and sprinkle on a bowl of strawberries.
7. Mojitos – this is a no-brainer. Who wouldn’t love an ice cold glass of lime juice, sugar, club soda, and rum, with a spring of mint, of course.
8. Tame an upset tummy – place a few peppermint leaves in a cup and pour hot water over. Let cool slightly and drink warm to calm things down.
9. Mint Pesto – whip up a batch of mint pesto to use on homegrown lamb kabobs or grilled chops.
10. Create a relaxing bath – pour 1 cup baking soda, 1 cup Epsom salts and ¼ cup of mint leaves in your bath for a relaxing, muscle easing soak.
11. Make fleas flee – pets can be bothered by fleas in summer, so bundle up 2 parts fresh spearmint, 1 part fresh thyme and 1 part fresh wormwood, and tuck it inside a small pillow, placed near your pet’s bed or another favorite resting place.
12. I SAVED THE BEST FOR LAST!!
Minted Lemon Slushy

INGREDIENTS:
- 1 cup fresh squeezed lemon juice (4-6 lemons)
- ½ cup honey
- 3 cups water, divided
- 1 generous handful mint leaves, remove from stems
DIRECTIONS:
- Juice lemons and remove any seeds. In a small pan, slowly heat lemon juice, honey and ½ cup of water. Stir until the honey dissolves. When mixture begins to simmer, remove from heat, and toss in mint leaves. Let steep for 10-minutes. Strain out leaves and add remaining water. Pour liquid into ice cube trays and freeze.
- When ready to serve, put minted lemon ice cubes into a blender and blend. Slowly add water until it reaches the slushy consistency you want (about a cup). Serve immediately with a sprig of mint.
Need a little more color in your life? Try juicing “Pink Lemonade” lemons for a fun summertime twist.
Want a more decadent version? Add a ½ cup of gin to the blender and add water only if you need to.
INGREDIENTS:
- 1 cup fresh squeezed lemon juice (4-6 lemons)
- ½ cup honey
- 3 cups water, divided
- 1 generous handful mint leaves, remove from stems
DIRECTIONS:
- 1. Juice lemons and remove any seeds. In a small pan, slowly heat lemon juice, honey and ½ cup of water. Stir until the honey dissolves. When mixture begins to simmer, remove from heat, and toss in mint leaves. Let steep for 10-minutes. Strain out leaves and add remaining water. Pour liquid into ice cube trays and freeze.
- 2. When ready to serve, put minted lemon ice cubes into a blender and blend. Slowly add water until it reaches the slushy consistency you want (about a cup). Serve immediately with a sprig of mint.
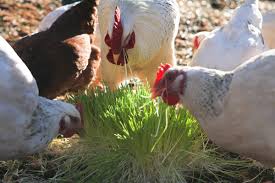
How to Grow Fodder for Small Livestock
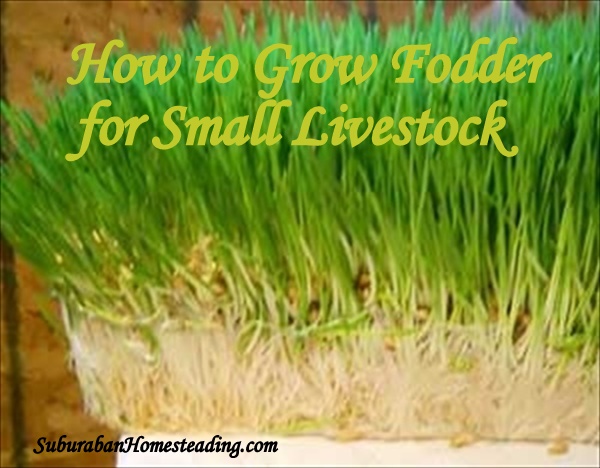 Fodder is very similar to sprouted grains and can be used as a supplemental feed for small livestock like chickens, ducks and rabbits. It’s a wonderful nutritional supplement for areas that have harsh winters, or where good quality hay might not be easily available. The digestibility of fodder is high. That’s because the starch from the sprouted grain turns to sugar and is more usable by the animal, so less is wasted through manure. Better to feed your animals than the ground through manure…don’t ya think? Many different grains can be used to grow fodder—alfalfa, barley, clover, filed peas, oats, millet, ryegrass, sunflowers and wheat just to name a few. The best part, though… …is the whole process, from soaked grain to ready-to-feed-fodder, takes about a week. In no time at all your animals will be munching on everything from roots to sprouts. Nothing will be wasted!
Building Your Own Fodder System
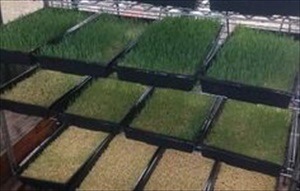 Commercial fodder systems can be outrageously expensive and many are too large for the small homesteader who is using fodder for supplemental feed rather than an animal’s primary feed source. But, with bit of ingenuity you can build your own system for a few dollars. You can build a simple PVC rack, buy a utility rack, find an old used wooden rack at the thrift store, or build one out of old pallets. Pallets are so useful, aren’t they? The important thing is for the growing container to fit the depth and width of the rack, so get the rack first before buying the growing containers. Any relatively shallow container will work, but it should be at least 2” deep. Vegetable seedling trays can be easily found at garden shops or purchased on-line, or plastic storage boxes will work too. Even old plastic rain gutters or large plastic pipe cut lengthwise can work. The possibilities are endless, use your imagination! When you have your growing containers drill about a dozen or so small holes evenly around the bottom. This is where having a sturdy container comes in handy. One pound of grain will produce 8 pounds of fodder so flimsy trays will crack and break after a few uses. Better to spend a bit more for longevity.
Now for the fun part!
Start by soaking your grain in a 5-gallon bucket for 12-24 hours. Place the grain into the bucket and fill with water. Swirl the grain around so the chaff floats to the top. The chaff won’t sprout, so just skim it off and add to the compost bin. The amount of grain you soak will depend on the number of trays you have and the amount of fodder you want to grow. Since I’m only feeding fodder to rabbits and chickens I soak 1 pound at a time. (Remember 1 pound of grain produces 8 pounds of fodder) Here’s a trick…drill a bunch of small holes (making sure the holes are smaller than the grain) in the bottom of the bucket, then set it inside another bucket before filling it with water. When the soaking is finished, simply lift out the top bucket, leaving all the water behind. After the soaking, spread the grain evenly in each tray to a depth of 2-inches; more than that can cause molding or decreased sprouting. Less than will dry out quickly and not give you a good, robust sprout. To help smooth out the grain, so it’s evenly level, use a spatula or putty knife. Place the trays on the growing rack in a sunny area or under grow lights. Grow lights work great in winter. Water each tray 2-3 times a day. The trays should be damp, but not have standing water. Some sources recommend using a catchment basin and small pump to recirculate the water through a tube back to the trays. On the surface, this sounds like a great idea—recycling water—but it can cause mold, slim and odors. Yuck! Another option is to use a 5-gallon bucket to pump clean water to the top tray and let it filter down through all the trays, before being caught at the bottom. The used water can then be used in the garden. Repeat the watering step for 7 to 9 days depending on how fast the grains sprout. Ideally, you want about 6-inches of fodder, but that will depend on temperature and water.
You’re ready to harvest!
Flip each tray over and gently pull out the fodder. You can either feed the whole thing…root mat, seeds, sprouts and ALL! Or, cut it into serving pieces with a knife or a box cutter. The root mat holds the whole thing together, like a roll of carpet. Start a new tray every day or so, so you’ll have an on-going supply of dense, rich, nutritious feed. Your animals will love you for it!
How Much Fodder Should I Feed?
7 Tips to Maintaining your Cutting Boards
Cutting boards are in use almost daily at my house. I have different kinds that I use for different purposes. There’s polyethylene for chopping vegetables or slicing cheese, and wood and bamboo for carving meat. They are hardworking pieces of equipment in my farm kitchen.
Over the years I’ve owned many sizes and kinds of cutting boards, but none of them really lasted that long. They would discolor, become riddled with bacteria or just plain crack. Then I discovered I was not taking care of them properly.
Yes, there is a right and a wrong way to care for your cutting boards!
Who knew!
Proper care will help them last a long time, while not taking care of them will shorten their useful life, causing you to replace them long before you should have to.
Following these 7 simple tips will help you extend the life of any cutting board.
1. Avoid letting your wooden cutting board to become too dry. Super dry cutting boards can crack and break.
2. Don’t soak your cutting board or let it sit wet. Dampness can swell the wood and weaken boards that are made of multiple pieces. And, never put a wooden board in the dishwasher, that’s just a bad thing all around.
3. Wash and dry boards immediately after each use, especially when cutting meat, fish or poultry, so bacteria doesn’t have a chance to seep into the cut marks. Use warm soapy water, work it into a lather so it gets into all the crevasses, then rinse well and allow to air dry before putting it away.
4. Use the entire surface of the board for cutting, move around the board. Cutting in one spot can cause the board to wear unevenly.
5. Use both sides of the board so both work surfaces are used, evening out the wear.
6. Never use a razor-edged cleaver, it can chip or splinter the board, creating spaces for bacteria to take hold.
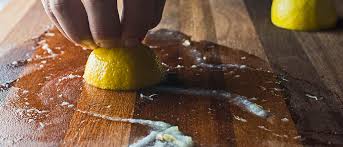
7. Season your wooden cutting boards periodically to keep them in good, usable condition, and from absorbing colors and odors from the foods you’re cutting.
How the heck do you season a cutting board?
It’s pretty easy and straight forward. Since I’m not a professional chef, that uses cutting boards all day long, I can get away with seasoning mine 2 or 3 times a year.
To start with, get yourself some food-safe mineral oil. I got mine at Wal-Mart. Then find yourself a clean soft cloth that can be dedicated to seasoning your boards. I bought a new flat cotton weave dish towel just for this purpose and store it on a lidded container.
Now—to season…
…pour on what looks like too much oil, and then rub it into the board using your cloth. Your board may look like it has a thick oil slick on it, but let it rest for about 5-minutes so the oil can soak in. You’ll be surprised at how fast a thirsty board will soak up the oil! I know I was.
Once you have oiled the top of all your cutting boards let them rest for several hours or overnight to the oil really soak in. You may need to reapply another layer if your board seems especially dry.
Now you can oil the other side (remember, you’ll be using both sides to even out the wear). When both sides are well-oiled you can stand them on one edge and let them air dry. I like to use a plate or platter rack for this part.
After your boards have been well seasoned, you can come up with your own schedule. I re-season mine in December, after the holidays and again in June, before the busy BBQ season begins.
To tell if your boards need to be freshened up, simply dribble a few drops of water onto the board. If it “beads” it is fine. If not, it’s time to re-season.
Keeping up a routine means you and your cutting boards will be well-oiled partners in the kitchen. How cool would that be? A kitchen partner!
With the right seasoning and care, a wooden cutting board can last for years, and may even become a family heirloom.
DIY Natural Toilet Tablets
Cleaning toilets is my least favorite household chore!
In reality…cleaning house is not my favorite thing at all. I’d much rather be in the barn or in the garden.
There, I said it. I’m not a great housekeeper!
But, living on a farm, even a suburban one, requires proper sanitation because of all the muck and mire we farm girls track in, so a clean bathroom is more than just a nicety. It’s a necessity.
Over the years I have tried to reduce the amount of chemicals in my home and use more natural cleaners. I have already made the switch to homemade laundry detergent, glass cleaner, dish soap and many others, but a toilet bowl cleaner has been pretty elusive—until now.
I have never used those stinky tables that hang in the tank and turn the water blue. I hate the smell of them, really! But, I still want my bowl to be fresh and clean. So—what’s the solution?
Homemade toilet tables!!
Honestly.
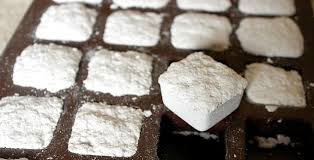
These tiny little tablets are made of baking soda and citric acid with a bit of water to hold the whole thing together and some essential oil to make it smell nice. They are powerful little things that keep the bowl sparkling with very little effort.
I’m in!
They are so easy to use…simply give your toilet an initial scrub (which may take some elbow grease the first time), drop in a tablet and watch it fizz and bubble. After about 20 minutes it should be dissolved (if not give it a few more minutes), then give the bowl a quick swish with your brush. Now you have a wonderful smelling bowl and bathroom that any farm girl can be proud of. Here’s a tip: change the essential oils you use to match the seasons—lavender or citrus for spring and summer, cinnamon for fall, or pine to chase away those winter time blues.
Ready to make your own natural toilet tablets? Here’s how…
Natural Toilet Table Recipe
Ingredients
1 cup Baking Soda
1/3 cup Citric Acid
30-40 drops Essential Oil (your choice)
Spray bottle of water (to moisten)
Directions
1. Combine baking soda and citric acid in a glass bowl, mix well.
2. Add essential oil and mix vigorously with a fork. The mixture will be very dry.
3. Spritz the mixture with water, while mixing and fluffing it with a fork.
4. When the mixture starts to clump slightly, test it. If you can take a small amount and form a ball, you’re done. If it doesn’t, spritz, mix and retest. Be careful, though, if you add too much water the mix will begin to fizz, and you want that to happen in the bowl.
5. Now you can form your tablets. Either take a spoonful and form it into single use sizes on a cutting board, or use a 24-cube silicone ice cube tray and fill each square, packing down the mixture. That size is perfect for one batch.
6. Let your tray dry overnight. To release the tablets, turn the try upside down and tap it gently. Store tablets in an airtight container. Although I’m a nut for Mason jars, I don’t really like glass jars in the bathroom so I use a plastic lidded container for storage.
On cleaning day, drop tablet into the bowl, let it bubble and fizz until dissolved, and wait for about 20 minutes so it can do its thing. Give the bowl a quick swish with your toilet brush and you are done.
Need a few ideas on which essential oils to use?
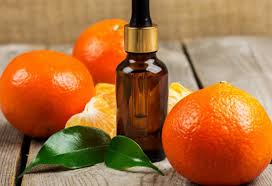
Here are 10 of the best essential oils for homemade cleaning products…
Tea Tree Oil – antimicrobial, antiseptic, and disinfecting
Lemon – antiviral and antibacterial
Rosemary – antibacterial and antiseptic
Wild Orange – cuts grease
Lavender – naturally antibacterial
Eucalyptus – a natural germicide
Peppermint – antibacterial
Cinnamon – antibacterial and antiseptic
Pine – it just smells great
Thyme – a powerhouse against germs
15 Ways to Save Money on Livestock Feed
I was heartbroken…
The first time I sat down to calculate the cost of raising my own meat and eggs and realized I could buy them cheaper at the market.
Mass food production has lulled us into a false sense that foods like meat and eggs should be ridiculously cheap; cheaper than they actually are.
I have been raising freezer lambs for most of my life, and you would think that homegrown—anything— would be less expensive than store bought, but it’s NOT true. Not by a long shot.
So, why do I raise my own meat and eggs if it’s more expensive? Good question.
I raise my own meat and eggs more for the quality of the product and knowing how my animals are raised and processed, rather than saving money. It’s also a quality of life decision, too. I just love watching my hens cluck and scratch around the yard, lambs stand on the fence waiting to be fed or rabbits greeting me when I walk in the barn. It makes me happy having critters around!
The overall cost of the end product depends greatly on the feed costs, but even with varying prices, store bought meat and eggs will still be the cheaper option. But, that’s not why we grow our own, is it? I love a thick cut lamb chop with plenty of marbling and a layer of fat to seal in those juices. And, let’s not forget about those bright orange egg yolks that turn into fluffy omelets when the weekend rolls around. There is satisfaction, a sense of accomplishment when you raise your own animals.
But, with all the positives the one negative is the shock of increased prices every time I enter the feed store. Don’t lose heart though, there are plenty of ways to save on livestock feed, AND boost your animals’ nutrition in the process. The following list will give you some good “cost saving” ideas to lower your feed bill without lowering animal nutrition—
15 Ways to Save Money on Livestock Feed
1. Compare prices. Call different feed stores, and feed mills, to get pricing. You’ll be surprised how much they vary. I keep a spreadsheet of sources and prices to track who is consistently lower. But remember—cheaper doesn’t always mean better. Don’t sacrifice your animals’ health by feeding lower quality grains. It’s not worth it!
2. Buy in bulk. I buy all of my livestock feed, and a lot of other homestead supplies, in bulk. Why? Because, I can get price breaks when I buy in bulk. I love discounts, don’t you? Many feed stores will give discounts when you buy multiple bags of feed. 10 bags seems to be the magic number in my area. When buying chicken, duck, rabbit or turkey feed I try to place an order with friends who also need feed. I also combine orders of pig food with a friend who raises feeder pigs for the freezer. The more we buy, the more we save. I’m a little more particular about my sheep feed. That was especially true when DD was showing lambs. But, even then I would buy 500 to 1,000 pounds at a time. My one caution: feeds that are ground or cracked can lose nutritional value in a short time, and feeds with molasses can go rancid if they sit too long. It’s best to buy a few months’ supply rather than a year’s supply.
3. Mix your own feed. Buying all the ingredients for a mixed feed may not be the most cost effective approach depending on your situation; it may actually cost you more. But, if you live in close proximity to grain mills that carry the right ingredients it would at least be worth looking into. When I had my large flock of sheep I fed cull lima beans that I purchased from a processor up the coast. The price was pennies per pound, which made the 2 hour drive worthwhile when I was buying 4,000 pounds at a time. Shop around, see what’s out there. You may even find a local farmer or grain processor that has old grains or grains not suitable for human consumption, but perfectly fine for your livestock willing to sell to you some. When I was in college I worked for a grain mill that bought grains for companies like Pillsbury. If the grains didn’t meet the moisture thresholds it was sold primarily to feed lots, but we did have a few smaller cattle ranchers buy from us. It’s worth looking into.
4. Don’t feed free choice. This is especially true for poultry and rabbits. Large livestock are usually fed their rations morning and night. I know filling that 5-pound automatic feeder with lay mash is easy, and there is quite a bit of debate around the topic. But, I like letting my girls chose when to eat and when not to eat. I think it keeps them evenly nourished and not gobbling down feed morning and night because they don’t know when they’ll eat again. When is regulating feed a good idea, especially for poultry and rabbits? When your animals free-range and have access to other foods. Have you noticed that your hens eat less when they roam? Another reason to control their feed is if you have a rodent problem. A trough full of feed is like an open invitation to a gourmet buffet to mice, rats and birds.
5. Free range your poultry and fowl as much as possible. Not a good idea with large livestock, though. I’m having visions of sheep on the road or crashing through the laundry line…not a good picture. Not everyone is able to free range, but those that can should. The variety of “goodies” adds important nutrients to their diet, plus helps keep the bug population at bay. Ranging also keeps your girls from getting bored, and it’s just plain delightful watching them scratch and peck around the farm.
6. Bring the yard to the coop or hutch. If your flock or herd can’t roam, or you have to confine them for some reason, bring overripe fruit, spent veggies, weeds and plant trimmings to the coop or hutch. A few years ago I had a problem with coyotes, even during the day, so my girls were confined to the coop and their fenced in run. Have you ever been scolded by an unhappy hen? Not pleasant I can tell you. Over time they came to enjoy having green stuff tossed in the coop. Rabbits, too, will enjoy fresh greens from the garden. They are natural browsers that like variety in their diet. Even sheep, goats and pigs can handle a bit of garden waste. Everyone will definitely appreciate all the fresh greens.
7. Get chaff from the feed store. Every bale of hay will lose a bit of chaff from being moved, creating a carpet of green around those giant stacks at the feed store. Ask if you can pick up a bucket or two, your animals will love you for it. If they are agreeable, move try filling a larger container.
8. Get scrap produce from local markets. It’s getting harder and harder to get stores to “give away” scrap produce, but it’s still worth asking. Trimmings, bruised fruit and overripe produce that can’t be sold are perfect treats for livestock. Bananas are a favorite of rabbits; chickens will love squishy tomatoes, and large livestock will go nuts for leafy greens. I’d stay away from any bakery items, though. They are heavily processed and contain preservatives and additives that we homesteaders are trying to keep out of our food sources, that goes for our eggs and meat, as well.
9. Grow your own. Even the smallest suburban homestead can grow a small patch of greens, cover crops or sunflowers dedicated just for supplemental livestock feed.
10. Create a fodder growing system. For a few dollars and a little bit of space you can start growing nutrient-dense feeds that your livestock will love. Sprouting grains like oats, barley and rye are perfect to start with because all livestock can eat them.
11. Raise meal-worms. I know what you’re thinking…totally gross, right? I’ve seen and done a lot in my life, but even I’m not up to growing squiggly little worm like things. Just the thought of it makes me shudder! BUT—they are protein packed and a fabulous low-cost way to supplement your chicken, duck and geese feed. Don’t try feeding it to other livestock, though. I’m not sure it would be a big hit.
12. Use leftover dairy products or whey from cheese making. Dairy is filled with protein. From leftover yoghurt and cheese to whey, your chickens and pigs will love it. Start them off with small amounts until they get used to it. For pigs, just pour it over the top of their grain. The moisture will help to hydrate them.
13. Feed kitchen scraps. Everyone can do this. I keep a small stainless steel bucket next to the sink and plop in veggie trimmings and leftover bread and melon rinds. As soon as I walk out the back door the ruckus begins. If my girls are out roaming they will come-a-runnin’ wanting their evening treat. Now, they go crazy anytime I have a bucket in my hand.
14. Market your eggs. Selling extra eggs may be be a way to save on feed, but is a great way to cover some of your feed costs, and have your hens pay for themselves. Plus, you’ll never be short on people looking for farm fresh eggs!
15. Cull non-productive hens and does. This may seem like a no-brainer, but many people keep small livestock just for the enjoyment of it, and that’s great. But, if your goal is to reduce feed costs, it may be time to cull those animals that are not productive. The next logical homestead step would be to butcher culled hens and make homemade broth and canned chicken for casseroles or pot pies. I know this may horrify some, but isn’t that what great-grandma would have done?
Recent comments
Aenean nonummy hendrerit mauris. Phasellus porta.