Archive for the ‘Around the House’ Category
How Decluttering can Simplify your Life

Have you ever noticed how heavy and out of sorts your life feels when your house is groaning under the weight of “too much stuff”?
Well—I have, and it can be crushing, almost debilitating.
Our body feels what our brain sees. So when a house, or homestead, has too much unnecessary stuff it can weigh heavy on our heart and our psyche.
One of the very best ways to lift your heart and your outlook on life is to consume less stuff. By doing this you spend less money, consume fewer natural resources and have fewer “things” swirling around in your universe. You may think owning stuff is really cool, but how much of it really owns you? Think about it, “the stuff” takes your money, your time, your attention, and all too often, your emotions.
Imagine what would happen if you used those spent resources on things that really matter to you?
Imagine how much better, lighter, freer your life could be without all that stuff!
In my own quest to simplify my life, and move into the next stage of my life, preparing for a future move, I have been taking a cold hard look at what I really love about my “things”, and what I really hate.
I love the special pieces that bring back great memories, or give me a warm and fuzzy feeling—the great antique that I would never part with or the statue I bought on a wonderful trip. My special pieces run the gamut from expensive antiques to thrift store finds. There’s really no rhyme or reason for why they’re meaningful, they just bring joy into my life.
But, then there are the less meaningful things. The one’s we feel obligated to keep because someone made them for us or gave them to us. They are the pieces that have outlived their joyfulness, and have now become a burden to our living space. These are the things that must go in order for us to feel lighter, happier and freer to move forward in our life.
I’ve acquired a lot of stuff raising a child, running a suburban homestead, showing livestock, and just living in general. So over that past years I have begun really looking at what I want to keep and what I can “let go”.
Case in point…I’m not really one to turn down an offer of free stuff, so over the years I have been given several garden carts, long handled tools, kitchenware, and clothing that was “too good to give away”. But, how many garden carts does one gardener need, really? Or, how many shovels, rabbit feeders or water troughs does one suburban homestead need when you’re only homesteading for one person?
Part of gleaning was incentivized by my desire to move out of CA and how much it will cost to move everyday items to another state versus buying new on the other end. For me, moving will be a new adventure, one that will enable me to change my style, rethink my life and the way I live. (Don’t panic, though, I’m not moving for a few years)
Why burden down the new adventure with old baggage?
So—with the cost of moving floating in my mind I set about gleaning what I don’t want or haven’t used in a very long time, and in the process I have made hundreds of dollars on the items I’ve sold. YAY! It will be the seed money for replacing the items I really need and want.
If your belongings are cluttering your life and your mind, consider these 8 ways to lighten your load.
You won’t regret it—I promise!
8 Ways to Declutter your Home & Life
Sell stuff you don’t use. Take a cold hard look at what you don’t use, and then list it on Craigslist or Facebook Neighborhood Market, take it to a consignment store, or sell it at Buffalo Exchange or Plato’s Closet, if you have one nearby. This may take some time, so be patient. If you don’t think it’s worth your time, donate it, someone else will love it.
Don’t feel guilty. Ok…you paid for something, so what. It has taken your money, your time and your attention, but if it no longer serves you then there’s no reason to keep it around. Let it go! Your heart will feel lighter for it.
Dump the duplicates. We all have them, those doubles we got with a buy one get one special, the same gift from a friend or family member, or the multiples we bought because we forget we already had one. Maybe you feared not having enough. From bake ware to garden trowels, one is usually enough.
Adopt a one in, one out habit. To keep the clutter at bay and really scrutinize your purchases commit to getting rid an item every time you bring one in. As an example, if you buy a new sweater, commit to getting rid of an old one. If you really want to keep the clutter at bay, try getting rid of two items for every one item you bring in.
Play hide and seek. If you’re not sure you really want to get of something, tuck it away where you can’t see it. If you haven’t used it, or even thought about it in several months it is not one of your beloved items and won’t be missed, get rid of it.
Challenge yourself. Experiment with living with or dressing with a smaller number of items. The number of items isn’t important, but learning to live with less is. You will gain valuable information about how much you really need, use and what is truly important to you.
Did you know that the average woman usually wears the same 20 items?
Lighten up. It can seem like “things” have a grip on you, but in reality it’s YOU that has a grip on your things. You can let things go until you lighten up and loosen up your grip.
Borrow or trade. Be selective about what comes into your home. Do you need that new gardening book, or can you borrow it form the library? Do you need a new seasonal wardrobe for the kids, or can you host a clothing swap? Do you have something that a neighbor borrows often? Try trading for something they have that you need.
The key to simplifying your life is to own what you love. But, remember it will own you right back, so make sure it’s worth it. Really think about how much value “stuff” brings to your life and what serves no purpose at all. When you own less you have a greater appreciation for what you do have, which frees you up to do what is truly important to you.
Shards of Golden Light

I wrote this post over a year ago, but it still holds true today; we gather and store burned down remnants of candles all year long, and we turn them into new candles in the fall. The box we store the bits and pieces in may be larger than when we first started, and the collection of fire safe containers has definitely grown, but the process of making light for winter remains the same–melt, pour, set, light.
I love the glow of candle light. It casts a warm comfortable feeling over the entire room. From the first hint of fall’s chill until buds burst in the warm spring air there are candles burning in my little farmhouse.
They are on my mantel, set in a collection of thrift store candle holders on my hearth, on the window sill of my kitchen, in my bedroom and even along side my bath tub. It’s amazing how much that little flickering flame of light can calm and restore and bring peace at the end of a busy day.
But, what once was a necessity for lighting a room, reading a newspaper, or illuminating a path has become almost a luxury. Years ago I could buy candles for a few dollars, but now they cost more than I spend on a bag of chicken feed. Being the frugal farmer that I am however, I have found a few tricks to keep my love affair with candles without breaking the bank.
One is to use the department store gift cards I receive in the mail. You know the ones I’m talking about…where they give you $10 off of a purchase to entice you into the store, hoping you’ll spend more. I’m too savvy for their ploys, though. I am usually able to find 3” pillars, or jarred candles or 6 votives for just under the minimum $10 (which I am still able to use my card to purchase). More times than not I walk out of the store with beautiful scented candles for no money at all. How’s that for farm girl frugality?
My second method to keeping the candle flames flickering is to save all the little bits and pieces of burned down candle wax. I keep them in a ziplock bag. When I have gathered enough pieces of the same color (or similar color) I melt them down to make new candles. I save all the old jars from any jarred candles because they are made of tempered glass and safe for pouring hot wax into.
For just a few dollars in a package of wick and a $2.00 pot I bought at the thrift store I can make a new candle in less than 30-minutes and enjoy the glow of my recycled wax for hours. How great is that!
To make your own candles out of bits and pieces all you need is a stainless steel pot (one you don’t mind getting covered with wax), a larger pot, an old jarred candle jar and a package of wicks.
Now—fill the larger pot half way with water and set it on a medium flame. Cut the wick 1-inch taller than the jar, tie a knot at one end, wrap it around a pencil or chop stick a few times so it sets nicely on the bottom of the jar.

Place the wax bits in the smaller pot and set it inside the larger pot–like a double boiler. Let the wax melt, stirring occasionally at first, then constantly as the wax gets hotter. When all the wax has melted, gently pour it into the prepared jar. (if your wax has bits of wick or debris in it, pour it through a small hand-held sieve). Let it set overnight. When you’re ready to burn the new candle, cut the wick to 1/2-inch and light it.

Voila! That’s all it takes to keep the candle glow burning all the way through to spring.
10 Reasons to Love your Clothesline this Fall
The dog days of summer are not quite over yet, but the soft, sweet, wafting early morning breeze tells me that fall is fighting its way through our hot September days.
Its days like this that I really enjoy seeing my laundry hanging on the clothes line. Vivid colors and bright whites flapping in the breeze is a quintessential farm look and looks so homey. But does that mean I have to give up my clothes line once the cooler days of fall arrive?
No way!
The benefits of a clothes line can be enjoyed year-round. So, if you’ve been on the fence about setting up your own eco-friendly clothes dryer now is the perfect time.
Need a little incentive? Here are my 10 reasons to use a clothesline all year long.
1. A clothesline uses no electricity. Kind of a no-brainer, right? What may not be so evident is the $300 dollars-a-year I save not using my dryer.
2. Clotheslines are more efficient because I can run my clothes through the washer and not have to wait for the dryer to finish. In just a few hours all my laundry is hanging on the line, letting the sun do its part while I do other chores.
3. Clothes last longer. The heat and agitation of a dryer can speed up the breakdown of fibers, while a clothesline helps preserve your clothes, especially those made from delicate fabrics.
4. Hanging clothes on a line is therapeutic. Honestly, it is. The few minutes I spend hanging clothes allows my mind drift away from our hectic world and into one that is calmer and more serene, one where hanging clothes on the line is your only important task.
5. Line dried clothes smell like a fresh outdoor breeze. No need for chemical laden dryer sheets that can cause irritation or allergies.
6. It makes my heart smile to see a line full of clothes. It’s a visual accomplishment.
7. Clothes dry faster outdoors than in a dryer. This is especially true in my area where the wind blows well into October and clouds rarely gather.
8. Folding clothes is faster when they’re not waded up from being in the dryer. I have a trick here, too. I put certain clothes on a hanger before hanging them on the line. When they’re dry, all I have to do is gather up the hangers and put them in the closest.
9. Fresh air and exercise. Moving, stretching, breathing deeply are all health benefits from hanging clothes on a line.
What’s that you say? Winter is on its way.
10. Get yourself a portable drying rack or set up a clothes line indoors. Damp clothes help humidify dry winter air while giving you many of the benefits of outdoor drying.
25 Ways Homesteading can Save you Money

People get into the homesteading life for all kinds of reasons. Some want to be more self-reliant or self-sufficient, while others come to homesteading for political or conservation or environmental reasons. Regardless of how or why homesteading appeals to people, they all seem to have one common denominator—living on less money.
I know as I have gotten older, stuff, toys and material things have taken a back seat to more simple pleasures, fun experiences and building great relationships. As I age I also think more about what my retirement life will look like and how I want to live when I stop working. All these considerations usually send my brain to thoughts of cutting costs or reducing expenses. But, when I sit down to make notes and charts of areas to cut expenses I realize my life is pretty inexpensive as it is. If I look at things more closely I can definitely say that homesteading saves me a lot of money.
Check out these 25 homesteading activities that can save you a ton of money.
1. Composting – creating your own soil from kitchen scrapes, manure, chicken coop bedding, spent veggies, grass clipping and yard trimmings will save on expensive potting soil.
2. Gym Memberships – all the fresh air, sunshine and physical work of a homestead is much better than any gym machine or cycling class.
3. Heating – cutting or gathering firewood to use in a fireplace or wood stove allows you to use your heater less.
4. Growing Herbs – the cost of herbs at the market is ridiculously high for what you get. Grow your own in pots or in the garden and you’ll never buy herbs again.
5. Grow a Vegetable Garden – I once read where growing even a small portion of your produce can save a family over $400 a month on their grocery bill. Start with the veggies you eat most often and expand from there.
6. Healthy Living – when you work outside, get lots of fresh air and sunshine, and eat wholesome homemade meals you get sick less frequent, which means fewer trips to the doctor.
7. Home Cooking – cooking from scratch at home will save you hundreds of dollars over eating out.
8. Seasonal Eating – if you purchase what you don’t grow, buying in-season fruits and veggies will cost less than buying them out-of-season.
9. Forage for Food – check out what grows in your area, whether suburban or rural. You’ll be surprised at what you can harvest from neighborhood fruits trees, wild berry patches and forest mushrooms. Educate yourself first so you know what to harvest and what not to harvest.
10. Supplemental Feeds – spent veggies, kitchen scrapes and trimmings are great for chickens, ducks, geese and rabbits. They get variety in their diet and you use less feed.
11. Lower Cable TV – when you spend a lot of time outside working in the garden, playing with animals or just enjoying the serenity of your homestead, you fall away from watching mindless TV programs. Cutting the cable is the first step to a more enjoyable life, in my opinionJ
12. Free Entertainment – simplifying your life and cutting costs spills over into entertainment as well. Many libraries and museums, even Parks Departments, offer enjoyable free programs like concerts, lectures and movies.
13. Homemade Fire Starters – with a bit of old melted candle wax and a handful of dried leaves, herbs or potpourri you’ll be starting fires for free and cutting out the gas.
14. DIY – homesteader types tend to be lifelong learners, picking up skills that others have to hire out, like plumbing, carpentry or electrical will save you a lot.
15. The Three “R’s” – self-sufficient living promotes reusing, repurposing or recycling items so they don’t end up at the dump. Scrape lumber for nesting boxes or shelves, pallets for fencing or broken down to make rabbit hutches or chicken coops, cast offs crafted into décor items, the skies the limit when you use your imagination.
16. Make Your Own??? – from laundry supplies, health remedies, beauty products and cleaning products, the projects will be fun and save a ton on chemical laden over-the-counter items.
17. Go Second Hand – thrift stores are a great place to find useful items from tools and equipment to clothing and household items. Just don’t go overboard, even a good deal can be a waste of money if you’re buying what you don’t really need.
18. Line Dry – every homestead should have a clothes line. Not only is hanging clothes on a line therapeutic (well, at least to me) it will save on the electric bill. Rig up an indoor line for winter use as well.
19. Clothing Repairs – sewing, knitting, crocheting and darning are common homestead skills people want to learn. It’s also a great way to save on tailoring or repair costs when you can do it yourself.
20. Big Batch Cooking – take advantage of a cold day and make big, or multiple big batches of soups and stews, freezing them for later use.
21. Extend the harvest – if you live in colder areas, you can still harvest fresh produce by building a few cold frames…out of scrape lumber and reused windows of course.
22. Hunt and Fish – these two skills can put pounds of food in the freezer and keep hundreds of dollars in your pocket.
23. Home Dairy – if you have the space and are allowed, consider keeping a dairy goat. The gallons of milk and pounds of cheese and yoghurt will more than offset the cost of feed.
24. Grow a Medicinal Garden – growing medicinal plants and making them into teas and tinctures can help stave off colds and flues, ease sore muscles, relieve headaches and help you fall asleep. It will also save on the cost of drugstore remedies.
25. Wearable Warmth – bundle up in warm wool sweaters or blankets and keep the thermostat low, saving on heating costs during the colder months.
DIY Natural Toilet Tablets
Cleaning toilets is my least favorite household chore!
In reality…cleaning house is not my favorite thing at all. I’d much rather be in the barn or in the garden.
There, I said it. I’m not a great housekeeper!
But, living on a farm, even a suburban one, requires proper sanitation because of all the muck and mire we farm girls track in, so a clean bathroom is more than just a nicety. It’s a necessity.
Over the years I have tried to reduce the amount of chemicals in my home and use more natural cleaners. I have already made the switch to homemade laundry detergent, glass cleaner, dish soap and many others, but a toilet bowl cleaner has been pretty elusive—until now.
I have never used those stinky tables that hang in the tank and turn the water blue. I hate the smell of them, really! But, I still want my bowl to be fresh and clean. So—what’s the solution?
Homemade toilet tables!!
Honestly.
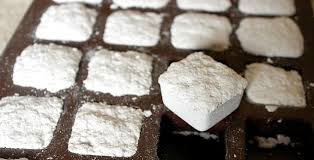
These tiny little tablets are made of baking soda and citric acid with a bit of water to hold the whole thing together and some essential oil to make it smell nice. They are powerful little things that keep the bowl sparkling with very little effort.
I’m in!
They are so easy to use…simply give your toilet an initial scrub (which may take some elbow grease the first time), drop in a tablet and watch it fizz and bubble. After about 20 minutes it should be dissolved (if not give it a few more minutes), then give the bowl a quick swish with your brush. Now you have a wonderful smelling bowl and bathroom that any farm girl can be proud of. Here’s a tip: change the essential oils you use to match the seasons—lavender or citrus for spring and summer, cinnamon for fall, or pine to chase away those winter time blues.
Ready to make your own natural toilet tablets? Here’s how…
Natural Toilet Table Recipe
Ingredients
1 cup Baking Soda
1/3 cup Citric Acid
30-40 drops Essential Oil (your choice)
Spray bottle of water (to moisten)
Directions
1. Combine baking soda and citric acid in a glass bowl, mix well.
2. Add essential oil and mix vigorously with a fork. The mixture will be very dry.
3. Spritz the mixture with water, while mixing and fluffing it with a fork.
4. When the mixture starts to clump slightly, test it. If you can take a small amount and form a ball, you’re done. If it doesn’t, spritz, mix and retest. Be careful, though, if you add too much water the mix will begin to fizz, and you want that to happen in the bowl.
5. Now you can form your tablets. Either take a spoonful and form it into single use sizes on a cutting board, or use a 24-cube silicone ice cube tray and fill each square, packing down the mixture. That size is perfect for one batch.
6. Let your tray dry overnight. To release the tablets, turn the try upside down and tap it gently. Store tablets in an airtight container. Although I’m a nut for Mason jars, I don’t really like glass jars in the bathroom so I use a plastic lidded container for storage.
On cleaning day, drop tablet into the bowl, let it bubble and fizz until dissolved, and wait for about 20 minutes so it can do its thing. Give the bowl a quick swish with your toilet brush and you are done.
Need a few ideas on which essential oils to use?
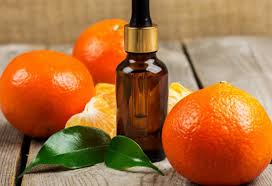
Here are 10 of the best essential oils for homemade cleaning products…
Tea Tree Oil – antimicrobial, antiseptic, and disinfecting
Lemon – antiviral and antibacterial
Rosemary – antibacterial and antiseptic
Wild Orange – cuts grease
Lavender – naturally antibacterial
Eucalyptus – a natural germicide
Peppermint – antibacterial
Cinnamon – antibacterial and antiseptic
Pine – it just smells great
Thyme – a powerhouse against germs
How to Make Whipped Body Butter
Winter weather can wreak havoc on a farm girl’s skin. From drying winds to freezing temps to furnace or fire that burns night and day, the effects are all the same. Dry, flaky, itchy skin! Yuck.
Being conscience of the number of chemicals that are in commercial body products and wanting something more organic that could be made in small batches to suit my own needs I decided a DIY body butter project was in order.
In a moment of brilliance I called my friend Sandy who is the homemade body product queen in my area. She has literally made everything from soap to toothpaste to lotion to lip balm all out of natural ingredients on her kitchen counter.
When she finished explaining to me how to make this incredibly nourishing body butter that your skin will love you for I was practically drooling. The recipe sounded more like something I could eat rather than something I was going to smear all over my body. BUT DON’T EAT IT.
The whipped butter is smooth and creamy without a greasy feeling and the basic recipe can be altered to make many different versions, using oils and essential oils that are your favorites.
Basic Whipped Body Butter Recipe
- 1/2 cup shea butter
- 1/4 cup coconut oil
- 1/4 cup sweet almond oil
- 10-20 drops of essential oil
- Small lidded jar (About a ½-pint size. I like to use cute one’s that look great in my bathroom.)
DIRECTIONS:
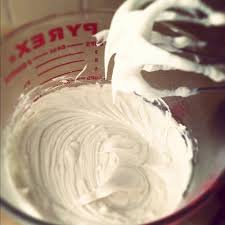
Combine all ingredients, except for the essential oils, in a small pot or double boiler. (I used an old Pyrex bowl set over a pot of simmering water, creating my own double-boiler). Gently melt over medium-low heat stirring constantly until everything becomes well incorporated and liquid.
Remove the bowl and set aside. Allow everything to partially set. It’s ready when you can stick your finger in the bowl, making an indentation that stays. The setting up part is important or your butter won’t whip up well.
When the mixture is properly set, add any essential oils you choose. This is where the fun comes in. You can literally use any oil or combination of oils that strike your fancy. How about a calming Orange-Vanilla or a relaxing and meditative lavender, or perhaps rosemary-mint? No matter which combination you settle on your body will love you for it!
Moving on…when the mix is partially set and the essential oils have been added, use a hand mixer, stand mixer or stick blender to whip the butter into a fluffy consistency and stiff peaks form.
You’re finished!
Spoon the butter into a jar and label it so no one thinks it’s edible because it kind of looks like frosting.
And, by all means…NO LICKING THE BEATERS!
You can store your body butter for about 60 days at room temperature or keep in the fridge. This is nice during the summer when the butter can slightly melt. If that happens simply pop it into the fridge until it sets up.
Now you’re armed to fight Mother Nature all winter long.
10 Ways to Use Wood Ash on a Homestead
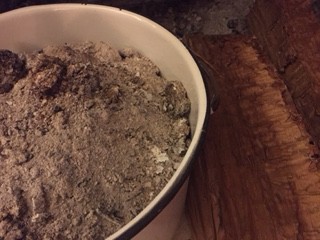
There’s nothing better on a cold winter’s day than a roaring fire. The warmth and ambiance fills the soul, not to mention warms it as well. I usually have a fire going from the time I get home from work until it’s time to turn in. The fire not only heats the house, but it also keeps the furnace from going on until it’s really needed. And, by that time I’m snug in a warm bed. So, the fireplace pulls double duty.
I get seasoned and split firewood from a local rancher who allows me to pick it up for free as long as I “pick it up”. No delivery service here. Not a bad deal and the exercise in the cool fall months is very energizing.
Our winters are not terribly cold here, so I only go through about 3-4 cords of wood. But, imagine 3 to 4 cords worth of fireplace ash! And, consider this…a cord of wood produces about 50 pounds of ash.
Yikes…what to do with all that ash???
Well—the good thing about natural wood and ash from the wood is that it’s considered a natural substance. When wood is burned it lets out nitrogen and sulfur as a gas, and what remains is magnesium, calcium, potassium and other trace elements. In fact, wood ash contains most of the 13 essential nutrients needed for soil to sustain plant growth. That’s right. Wood ash can be used as a soil conditioner, insect repellent, and fertilizer. It can even be used to make soap.
So—before you toss that ash into the trash bin check out these 10 uses around the homestead.
In The Garden
- Enrich Compost – Mix in about a cup of ash to a 4’x4’x4’ compost bin to enhance its nutrients. Or, calculate a cup per 64-cubic feet of raw compost materials. Don’t overdo it though. Ash is very alkaline and will throw off the Ph balance of your compost if you use too much.
- Use as a Pre-emergent – Sprinkle ash on the soil in winter or early spring, before plants emerge. If you add ash to areas where seeds or transplants will be planted, hold off planting for a few weeks. Also wait a few weeks to sprinkle around newly planted areas. The shock of the sudden increase in Ph could be too much for young plantings.
- Repel Slugs & Snails –Spread evenly around garden beds, on dirt paths, around berry patches and fruit trees to ward off slugs and snails. It’s caustic, so the slimy bugs won’t like it.
- Terrific Tomatoes – Make an ash tea to boost the potassium level of potassium loving tomatoes. Put 5 pounds of ash into a permeable cloth, like a burlap bag or an old t-shirt made into a bag. Tie it closed and lower the bag into a 50-gallon trashcan filled with water. Let it sit for about 4 days, then pour about a cup full on your tomatoes once a week.
- Feed your Lawn – Before a storm, lightly sprinkle ash on your lawn to provide extra nutrients. The rain water will help push the nutrients down to the roots, where they are needed.
The secret to using wood ash in the garden is to “dust it”, don’t “dump it”.
Around The Homestead
- De-skunk the Dog – If man’s best friend has tangled with a skunk, simply rub a handful of ash all over his body. The ash will naturalize the smell.
- De-Ice the Driveway – Ash won’t hurt the soil or cement so it can be used to melt ice, snow or provide traction where needed.
- Clean Sooty Windows – Use a damp sponge and dip into a pail of ash. The ash dust scrubs away soot and residue.
- Absorb Paint – Sprinkle ash onto an area where paint has been splattered and scuff with your boot to absorb and blend it in with the cement.
- Make Soap – Ashes can be made into lye by soaking them in water. Immerse the ashes in water and let them settle then skim off the lye from the top. You can do this every day until you have enough lye to make soap. The lye can be mixed with animal fat and then boiled to make soap.
Notes of Caution:
Before you launch off and clean out that wood stove or firebox there are a few tips to handling ash safely. First off, find yourself a sturdy metal trashcan with a lid, one that will be dedicated to hold only ash. Secondly, wait for the ash to cool completely before putting it in the trashcan. No warm or hot stuff. When cleaning out the firebox or stove use caution to not breathe in the ash dust or get it in your eyes, nose or mouth, it’s caustic. It’s best to wear protective gear when doing this. You know…goggles, gloves and mask. Better safe than sorry. Keep it stored in a safe place with the lid tightly fastened so a brisk wind won’t send the ash flying around the homestead for animals and humans to breathe.
I use a thrift store ash bucket to transfer ash from the fireplace to the larger ash can outside. This way I’m not dragging the bigger can in and out of the house. Whatever is not used in the garden or compost is put in my yard waste can for the trash company to compost.
Starting from Humble Beginnings
 When I was young my mom worked at the public library in a small town on the other side of our valley. It was a small mostly farming community with acres of fruit orchards, poultry farms and row crops; the kind of town with a main street and few stop lights…if any at all at that time. The library was on the corner of the main street and a winding road that lead through citrus orchards and over the hills to the north side of our county. The library was tiny by today’s standards, maybe 1,500 square feet. Across the street was the local junk store, the kind that people prowl through to find deals and treasures.
With three kids at home and new to the area money was tight. Tight enough that buying things like bedroom furniture was a luxury rather than a necessity. My mom was always combing garage sales and junk stores to furnish her new home. It was in that little junk store, in that tiny town that my mom found most of what we kids grew up with.
Each month mom would cart home her latest find and dad would clean it up, make any necessary repairs and paint or refinish it. I remember there was a dresser with big round knobs and a bed with a carved headboard; a vanity with an attached mirror and a stool, and a few bookcases.
It’s funny how those junk store finds served us well all through our growing up years and even into college. The paint or stain may have changed, but their functionality and meaning never did. Decades have passed since these little treasures entered our home, but surprisingly some are still with us today, some whole and some broken up and used for different purposes.
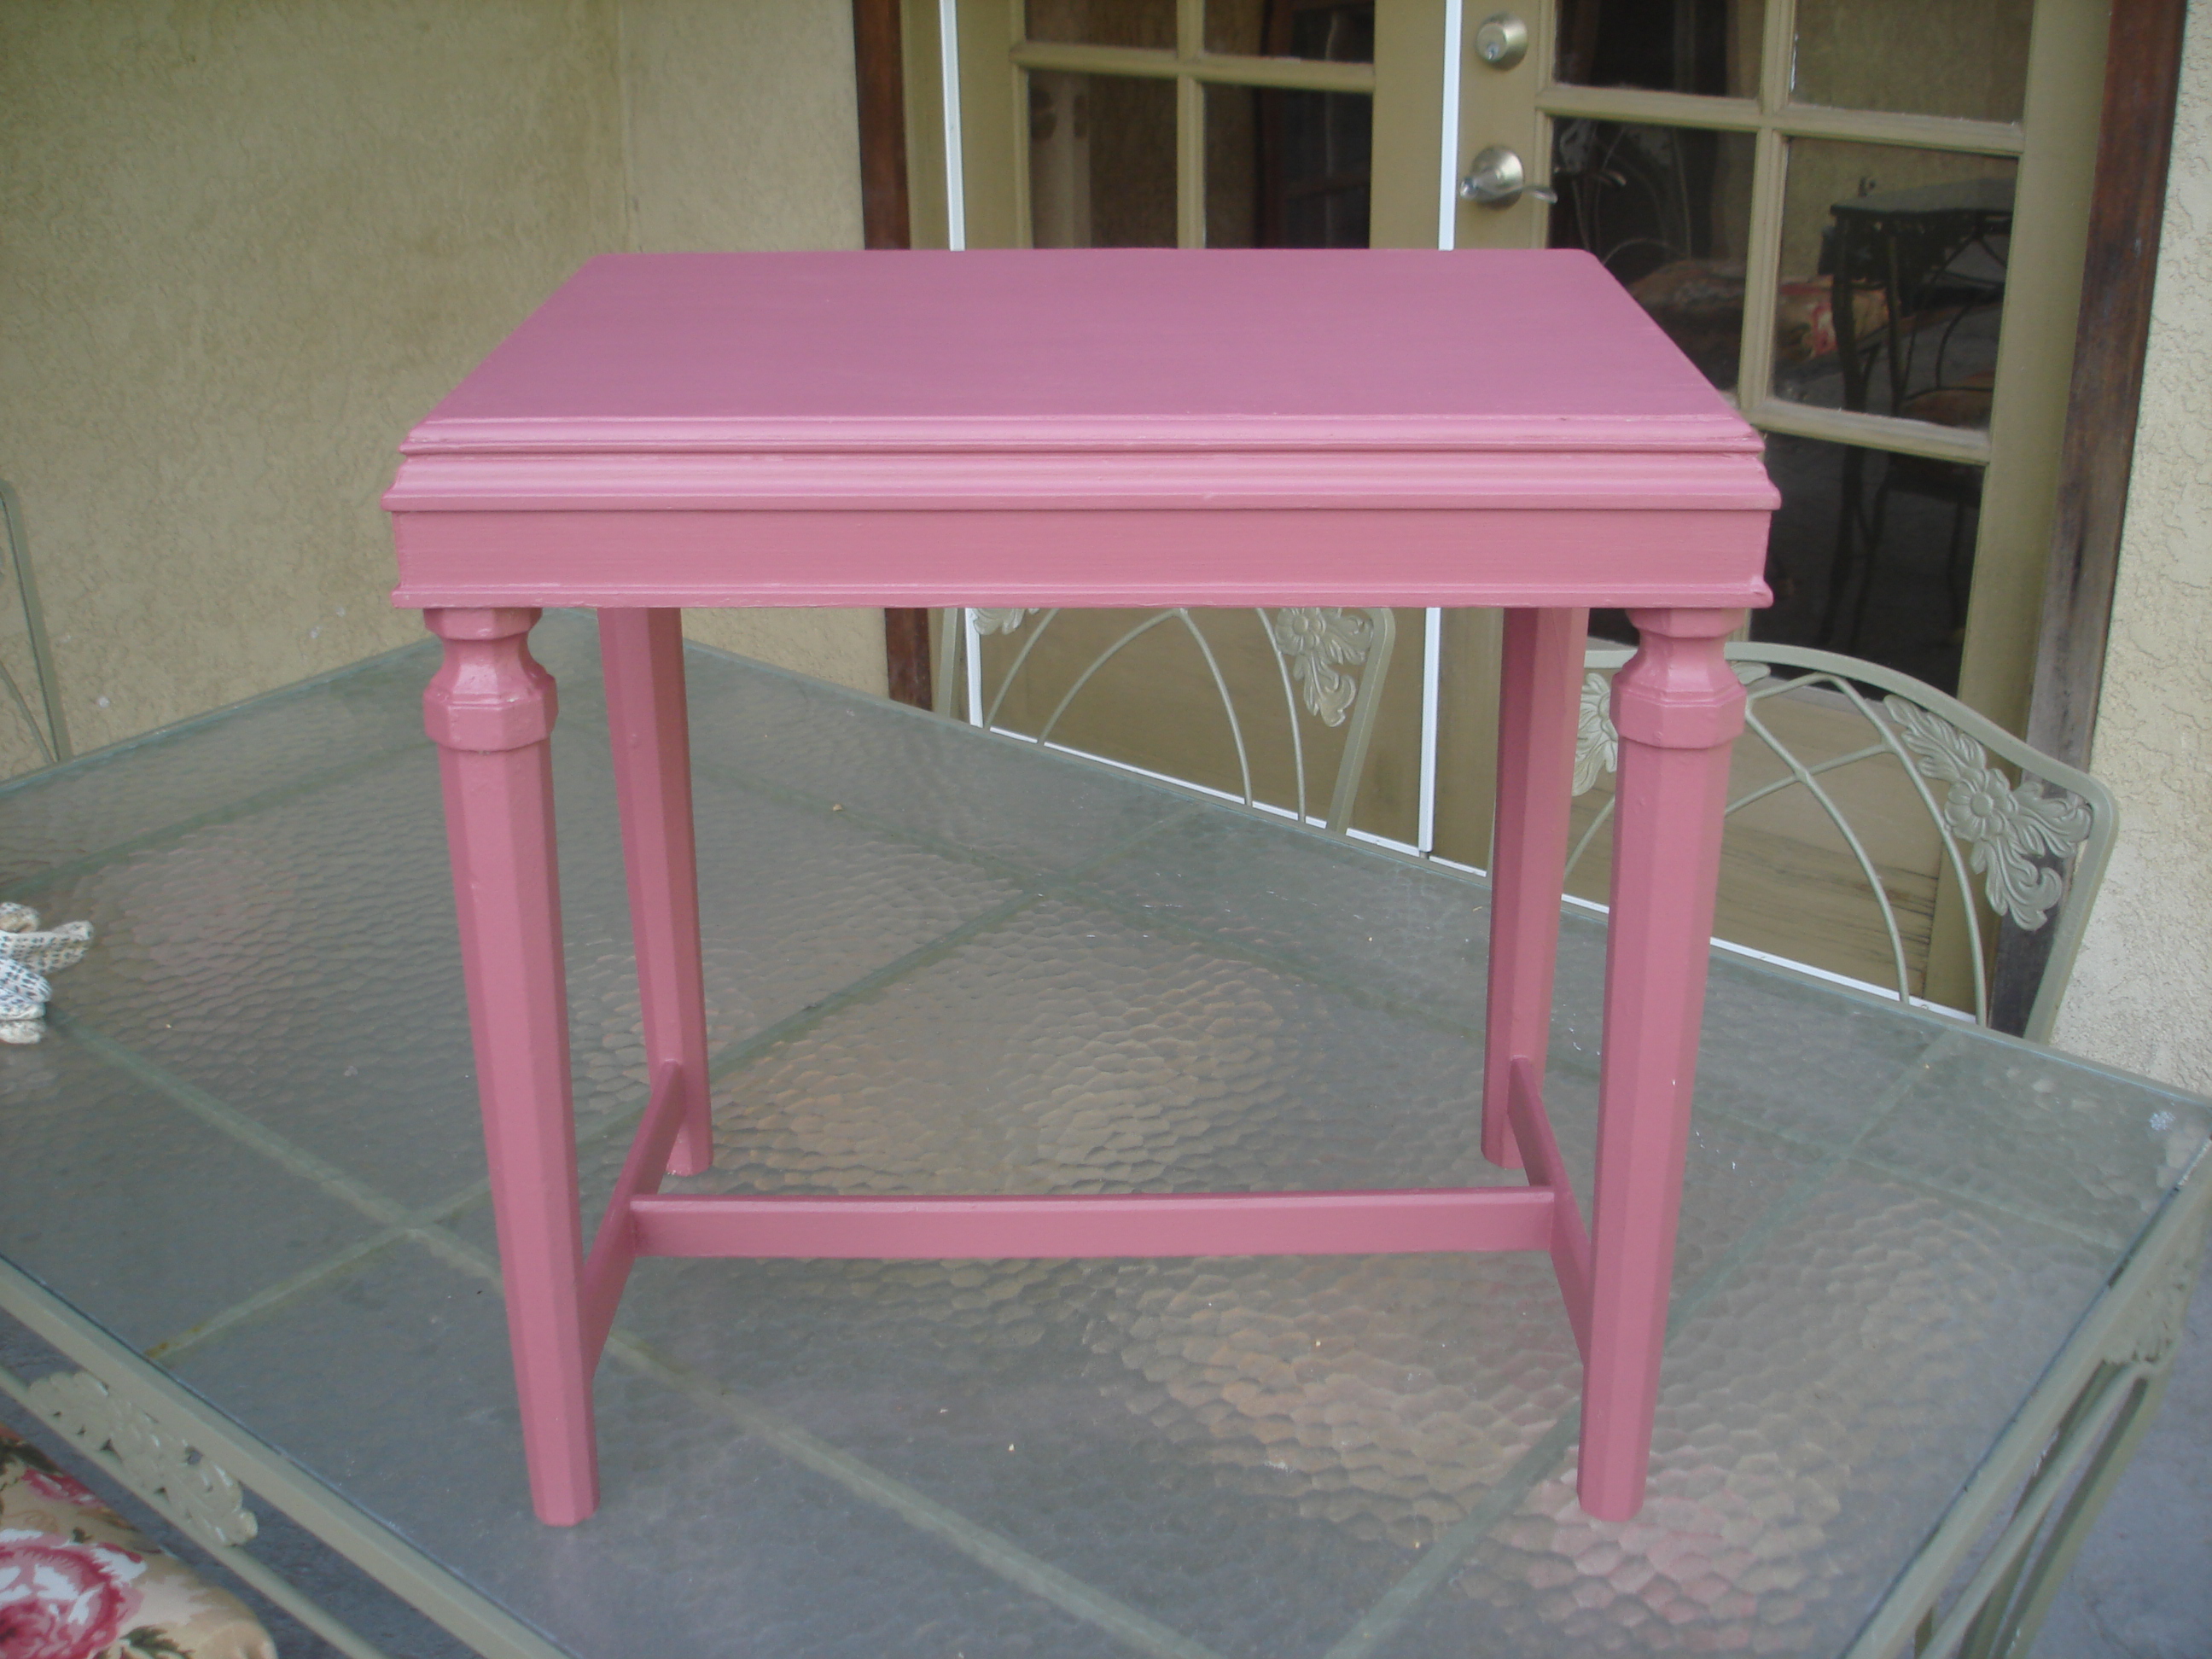
The bed carried Brianne through junior high before it was sold at a garage sale; sent on for another little girl to enjoy. The dresser serves as storage for a collection of floral arranging vases. The vanity, with its mirror long gone, has been refinished many times and now sits as a bedside table in my sister’s house. And that little bench for the vanity, well it has been repurposed—again—as a side table in my greenhouse sitting area.
I found the little gem while helping sis clean out her garage last summer. After days of stripping off layers of old paint—pink, purple, white—I finally got down to the bare wood, now more than 60-years old. But, as with years past and changing tastes the little bench was destined to a new life as a shabby chic table; a place where I could set a glass of tea, a book to be read or a stack of seed and gardening catalogs to be perused while working in my greenhouse.
The joy in repurposing is the pleasure of seeing objects in a different way, how the things around us can be used in many different ways. The challenge for each of us is to see with new eyes, in a new way.
Over the years I have taken many pieces of furniture and made them new again. An entertainment center that stands in my greenhouse is a potting cabinet, filled with the tools and supplies of an avid gardener; a buffet serves as a focal point and useful storage in my bathroom; a three-tiered plant stand holds bathroom towels, soaps and lotions a long side the tub; an old potting bench turned beverage station sits on the patio. And, my coming project…a refinished server will become a decorative vignette and buffet for my patio dining area.
Inspiration changes with the times, but the things we love stay with us forever, even if they do get a face lift from time to time. What do you have around your house that can be used in a new way? I bet there are several, so let you mind wander and see where it takes you.
Building a Fire to Improve Heat Efficiency

Sounds funny doesn’t it, learning how to build a fire. Can’t everyone build a fire? Probably. But, what most people don’t do is build a fire that can improve their heat efficiency.
Traditionally, a fire is built on a metal grate by stacking three or more logs with their sides facing the fireplace opening. Kindling or the gas line is ignited underneath the logs and near the back wall. What makes this an inefficient way to build a fire is the fact that the wood blocks the blaze and prevents the warmth from reaching the room you want to heat.
You can improve your heat efficiency by 100% without spending any extra money. All you have to do is stack the wood differently. It’s that simple. Read the rest of the story »
Homemade Laundry Detergent
If I told you that you could make 5 gallons of laundry soap for just a few dollars would that interest you? It peaked my interest and we’ve been making our own laundry soap ever since. The average American household washes 6 to 7.5 loads of laundry each week and spends $120 – $378 a year on detergent. With less than an hours worth of time and a few simple ingredients you could save hundreds of dollars a year.
Since making our own, this is the recipe we use. You can find all of the ingredients you need in the cleaning isle of your local grocery store, Target, K-mart or other variety store. Adding a few drops of an essential oil keeps our clothes smelling fresh as the day!
To make a 5 gallon bucket of laundry soap use:
1 cup Borax
1 cup washing soda
2/3′s of a bar of Fels-Naptha or 1 bar Ivory soap, grated (I keep an inexpensive cheese grater just for the soap)
12 cups of water, kept warm on the stove
8 cups of hot tap water to be added when you mix the ingredients in the 5 gallon bucket
2 gallons + 12 cups of hot tap water for your final stir.
Directions:
Heat 12 cups of water on LOW heat in a big pot.
Add the grated soap, stirring constantly to dissolve.
When the soap is completely dissolved add 1 cup Borax and 1 cup Washing Soda.
Stir until the Borax and Washing Soda is completely dissolved and the mixture thickens (about 5 minutes).
Add 8 cups of HOT tap water to your 5 gallon bucket.
Pour soap mixture into bucket and stir.
If you want a fragrant soap add a few drops of essential oil now. We use lavender or orange. It’s wonderful, smells fresh and clean!
Stir to combine the soap mixture, water and essential oils, if added.
Add 2 gallons + 12 cups of HOT tap water to make the five gallons.
Stir and cover. Let sit overnight.
When you’re ready to do laundry:
Use 1/2 cup of laundry soap for each load. I use the cap of an old liquid detergent container to measure with. To keep the cap from gunking up I just throw it in with the laundry. It comes out clean and fresh every time.
Store your homemade detergent in old laundry detergent containers or use it right from the 5 gallon bucket. For a pretty look in your laundry room pour it in old mason jars or decorative containers. Keep detergent covered when your not using it.
Recent comments
Aenean nonummy hendrerit mauris. Phasellus porta.