Archive for April, 2011
Peak Oil
I never intended this site to talk about militia tactics, conspiracy theories or post-oil survivalist ways, but it is becoming increasingly impossible to be involved in homesteading and the local food culture and not be at least aware of, if not affected by, the topic of Peak Oil.
I take solace though that the more I read and learn about energy issues the more content I feel that I have chickens who give us eggs, lambs who provide us with meat, a garden, berry patch and fruit orchard that supplies us with fresh produce and the where with all to combine those ingredients into a satisfying meal for my family.
If this topic is new to you or you’ve never heard about it before you may want to ask yourself these simple questions. What is Peak Oil? Do you think Peak Oil is fact or fiction? Do you or your family base decisions based on the future of oil?
Do you think the current boom in small farming and homesteading is the result of worries about peak oil, the food supply or energy issues in general, or is it just a fad? I’m sure our readers would be curious to know what you all think.
The Peak Oil clip above is a quick 3 minute video visually explaining Peak Oil, what oil is used for, and what the future may hold with regards to Peak Oil.
To learn more about Peak Oil check out this YouTube video by VideoNation, or simply plug Peak Oil into your browser window for more videos and articles.
Gardeners Hand Scrub
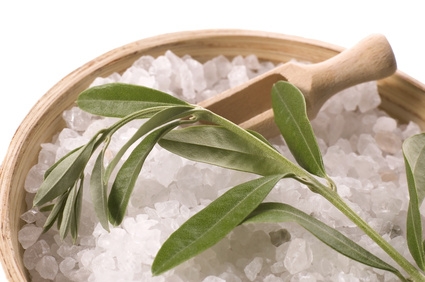
The beginning of the gardening season means not only lots of work, fresh produce and time spent in the outdoors, but also rough hands. Digging in the dirt without gloves, working with machinery, and using various tools can leave hands grimy, dirty, scratched, cracked and rough. This homemade, oil-based salt scrub will clean hands, cut through grease and promote healing. It was formulated by combining recipes and suggestions from several different sources.
Mix the ingredients thoroughly and store in a glass jar with a lid. A wide mouth canning jar works well, because it’s easy to reach into the jar and pull out a dab of scrub.
1 cup Olive Oil
½ cup Epsom salts
½ cup Rock Salt
½ cup Sea Salt
10 drops each Eucalyptus oil and Tea Tree oil
The Eucalyptus and Tea Tree oil add a bit of medicinal quality to the scrub. They provide antibacterial and anti-fungal qualities while soothing and healing rough or injured garden hands. This scrub is also good on feet and knees.
To use, wet your hands and scoop out about 1 teaspoon of the scrub. Gently rub all over hands then keep scrubbing while rinsing under warm water. Work in between fingers (or toes) and around nails get out dirt and grease. A little more may be needed on rough heels. When finished pull thick clean cotton socks or gloves over hands and/or feet. The warmth created will help the oils penetrate the skin leaving it smooth and rejuvenated.
If you take care of your hands, they take care of you, working hard in the garden!
Make Your Own Dibbler – It’s a Dandy in the Garden
What the heck is a dibble?
I’m usually not much of a perfectionist because it tends to create a whole lot of extra work. I leave those little idiosyncrasies to people like my sister, who actually measures the position of her place settings when giving a dinner party. I do however; tend to be a bit more fastidious when it comes to gardening. I lean more towards formally laid out gardens with their clean lines and appealing symmetry. And, at times I find a gardening approach, or tool, that gives me the formality I like while decreasing my workload. Fabulous!
Case in point…The Dibble…a centuries old tool that creates holes in the soil for planting bulbs or seeds, like the one below.
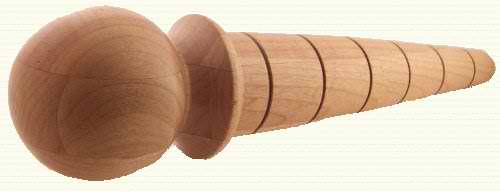
Most dibbles however, make only one hole. I wanted something that would speed up the planting process and get me off my knees. I pondered and stared, stared and pondered, before coming up with a brilliant idea – a dibble that could plant many perfectly spaced seeds at one time (did I say I wasn’t a perfectionist?).
I fantasized about how beautiful my vegetable beds would be, so formal, so linear, so precise that the gardeners of Versailles would weep. And the best part of all…I’d save money on seeds because with the right spacing I wouldn’t need to thin!
So, I set out to create the ultimate dibble for my vegetable beds. Anytime I act on one of my “fantasies” the first thing I do is scour the garage and barn to see what I have on-hand that can be salvaged. The vision in my head called for a dibble that would fit in my raised beds (4’x8’), be easy to handle and allow me to plant my seeds successively for an ongoing crop.
The vision…a board with evenly spaced pegs.
I found a nice piece of ½-inch plywood, but wanted to keep it for another project. I found 2×6’s. No. 2×4’s. No. Smaller pieces of plywood. No, no, no. Then, buried beneath a pile of scrap 1×6’s I found what I was looking for, a 1×6 that was 24 inches long, half the width of my raised beds. Perfect! I brushed it off and sanded down the edges a bit till all was smooth and clean. Then I started marking a grid pattern along the ends and sides. Since most seed spacing is 2 inches my grid spacing would be 2 inches.
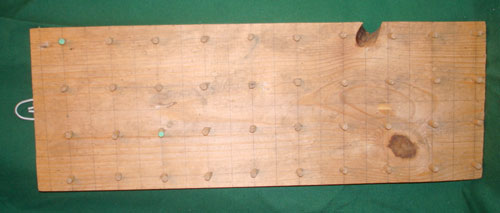
Some may think it may have been better to make a dibble that would cover a larger area, but such a contraption would be large, heavy and unwieldy. Nope this was the perfect size for my needs mainly because I often make successive plantings of certain crops and other times I plant many different varieties of the same crop in one bed. With a smaller dibble I would have more options on how to use it.
The process of making my dibble was fairly simple. After cleaning off my piece of wood I drew out the grid with intersecting points at 2 inch intervals. Read the rest of the story »
Starting Where You Live
With much of the country shaking off the last remnants of winter it looks forward to the opening of Farmer’s Markets; the burst of colorful vegetables, the smell of fresh produce and the variety of foods that can be found. But, with these new beginnings I can’t help but think back a few years to when I was working on a nutrition program with a local youth organization. The goal of the program was to encourage kids to eat a more healthy diet full of fruits and vegetables.
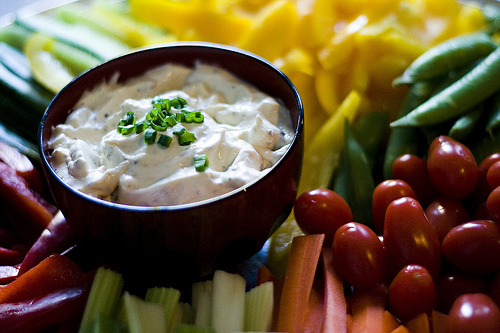
My goal was to get the kids to try fruits and vegetables, grown in our county, that they may have never eaten before. The primary teacher of the program encouraged the kids to dip their veggies in Ranch Dressing or sour cream based vegetable dips and their fruit slices in a sweet cream sauce or caramel. Not exactly what I would call healthful eating. Were our goals at odds? Were we at cross purposes?
When I was growing up my mom always insisted that food was best eaten plain or almost plain so the natural flavors and goodness could shine through. There was never any reason to drown carrots or celery in Ranch Dressing or slices of apple, pear or peach in sweetened sauces. Their freshness and natural sweetness was their own dressing.
Over the next few weeks the class grew. More and more kids joined us for the daily lecture on nutrition. But, more importantly, each day those kids sat down at the table and “ate” the fruits and vegetables we put in front of them. Most of what we served was locally grown, but not much of it was out of the ordinary.
Still, I think there is a greater point to this story:
Recent comments
Aenean nonummy hendrerit mauris. Phasellus porta.