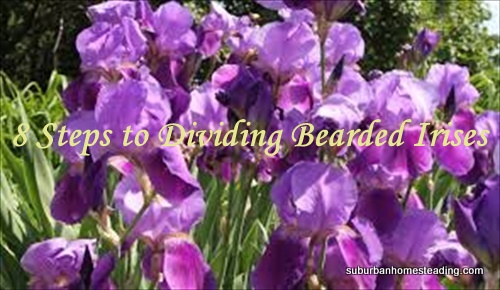
8 Steps to Dividing Bearded Irises
Ever since I was young I have had a love affair with flowers…
…all kinds of flowers.
Sure, I have my favorites, but there are few that I don’t like. I love the colorful blooms, the bright green foliage and the scents of different flowers as it drifts over my suburban homestead on a sultry summer breeze.
When I was young I use to help my mom at garden club plant giveaway days, and hound her to bring home anything that was left over…no matter how many there were.
This was never really a problem. We lived in the suburbs on a ¼-acre lot that we treated like a mini farm and flower garden. And, a ¼-acre is a lot of ground to cover. I guess this is partly where, or why, I became what I call “a child of the earth”, someone who enjoys getting down in the dirt, digging, planting, nurturing and watching green things grow. I have never lost that childlike enthusiasm.
Although I’m no longer a child I still get a childlike giddiness every time spring comes around, or when I visit a beautiful garden or potager, the endless possibilities for what I can incorporate into my own garden are always exciting. A potager is a fancy French word for kitchen/flower garden. I say that in all loving jest because I love visiting gardens, finding new plants or techniques I can bring into my own garden. Over the years I have seen dozens of flower and vegetable gardens in America, France, England and Ireland. It is a huge dream of mine to create a quintessential English garden on my own property. But, with California’s arid weather, not to mention the ongoing drought, this dream will only take place if I move to an area that gets more rainfall than we do (or, I win the lottery and can afford the water bill). A girl can dream though, can’t she?
All is not lost, though.
No need to feel sorry for me.
I do have a flower garden, one that is on the verge of bursting with blooms this time of year. And the flowers I am most looking forward to seeing in bloom is my collection of bearded irises. I say collection because I have acquired about 50 different varieties (colors) that I’ve gathered through the years. Some came from those early garden club giveaways, some were given as gifts, some I brought from my previous home, and some were purchased from iris growers here and abroad. I have to say, it’s a tricky thing to get iris bulbs through customs:)
But, most of my collection has been acquired from other iris gardeners when they divide their bulbs.
And, in turn, I have supplied new iris enthusiasts with divisions from my own garden. Garden people are like livestock people…we are always willing to help a new member of our “unofficial” club.
To help new gardeners, or to maintain my own beds of irises, I divide my iris rhizomes every 2 to 3 years so they don’t become overcrowded, affecting their ability to bloom. Dividing, separating and transplanting helps to rejuvenate the clump and to give the gardener a way to enlarge the iris bed. Always a huge plus in my book.
Dividing irises isn’t a difficult thing to do, but it is important that the irises be divided during the right season so the bulbs have time to reestablish after being divided and transplanted.
The steps below will help you make the most of your iris bed, so that you will be ensured of lots of future blooms.
8 Steps to Dividing Bearded Irises
Step 1: Timing is Everything — For best results, divide irises after they have bloomed. This can be done from late spring through early fall, depending on the weather. (I usually divide in the fall when it’s not so hot) If winter lingers in your area, wait for warmer days. Also, irises should not be divided in winter when they go dormant and use their stored energy to survive.
Step 2: Digging the Clump — Use a sharp spade or fork to dig deep below the roots and gently lift the clump up. Remove excess dirt by shaking or hosing it off.
Step 3: Divide the Fans — Bearded iris leaves look like a multi-pointed fan. Break off larger fans, or cut with a knife, at a joint, making sure that they are firm and not squishy. Limp or squishy divisions can be diseased and should be thrown away. Do not compost them, as they can spread disease.
Step 4: Prepare Divisions for Transplanting — Remove dead and older, limp leaves. Trim remaining healthy leaves to about 8-inches above the rhizome. This will help keep the plant from toppling over while it establishes new roots.
Step 5: Prepare New Planting Area — Dig and sprinkle the new planting area with lime, irises like a bit of lime. For group plantings, create a triangle with 18 to 24-inch sides. For all plantings, form a mound and set the rhizome on top of the mound, spreading the roots out in the hole. For group plantings, make sure the “toe” or bulb part faces in towards the triangle.
Step 6: Settle in the Rhizome — Firm soil around to the top of the bulb and pack it down. It is alright if part of the bulb is showing.
Step 7: Spacing your Irises — Whether planting in a triangle, square or line, plant bulbs at least 12-inches apart and make sure the fans all point in the same direction. Closer spacing is fine, but you will be dividing your clump more often. This is not a problem, it’s just that irises are perennials that may not bloom the first year after dividing.
Step 8: Water in your Transplants — Give your transplants a good soak to settle in the soil, then deep watering a few times a week to establish your new patch. Less frequent watering is better as irises are fairly drought tolerant. Too much water, though, can rot the bulbs.
Recent comments
Aenean nonummy hendrerit mauris. Phasellus porta.