Archive for the ‘In the Garden’ Category
How to Create a Deep Mulch Garden
It may be the beginning of a new year for us all and the dead of winter for some, but I, like many other die hard homesteaders can’t help but think about spring and a garden bursting with fresh grown produce.
But, before we sink seeds into the soil and sprouts rise to the sky there is much work and planning to be done. My favorite winter break project is to lay out my spring garden. Long stormy days just cry out for gardeners to put pen to paper. Sheets and sheets of graph paper lay strewn across my kitchen table, colorful felt pens stand in an old mason jar and the ideas of how I want my garden to look swirl in my head. It’s a creative time, but also an important time that takes thought.
My garden planning starts long before spring temperatures warm the soil enough to plant. The work of preparing the soil is just as important as which seeds to order and should be given as much care. The nutrients derived from mulch and compost are the basis of a productive garden and should not be overlooked.
How we Converted a Traditional Garden into a Productive Deep Mulch Garden
The steps below will work for first-time gardeners and seasoned gardeners trying to resurrect an unproductive garden.
1. We start in the fall. Bedding from the sheep trailer, that had been pooped on and peed on and stomped on, fluffed and turned all during show season is the first layer tilled into the garden beds, followed by a layer of rich compost.
2. After garden beds are cleared in the fall and any beds not in use for fall vegetables, each bed is spread with a very thick layer of a hay, straw, shavings, leaf and grass clipping mixture, about 6 to 8 inches. The thickness is important because the heat generated during decomposing helps kill weed seeds. If you are able, a 10-12 inch thick layer would be great. I get my spent hay from local horse farms because it is readily available. Straw can be purchased from local feed stores, and leaves or grass clippings can be gathered from the yard or from neighbors.
The amount of mulch you need depends on the size of your garden plot. I use 32-gallon trash cans to transport mulch and calculate 6-8 cans per 4’x12′ bed. A good rule of thumb is about a ½-ton minimum of loose matter for a 50’x50’ garden plot.
3. In early spring, all the layers are tilled in along with a broad spectrum fertilizer. This is allowed to sit for a few weeks while the soil warms enough to plant.
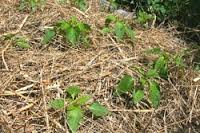
4. When it’s time to plant, I spread another thick layer of mulch over the beds. Using my garden diagram as a guide I decide where to put the rows and separate the mulch to expose a strip of soil.
5. I plant direct-sow seeds directly in the soil, like normal. When the seedlings are about 2 inches tall, I pull the mulch back around the sprouts to block weeds and conserve water. Veggies that were started inside are transplanted in the same way—pull the mulch away to expose a row of soil, plant and pull mulch back around each transplant. I check the garden often to see if more mulch is needed or bare spots have developed. This is where grass clippings come in handy. I keep a pile near the garden beds so I can spread it on any time.
6. When the growing season is over and everything has been harvested, I lightly till again and cover all the beds with a fresh layer of mulch. This will sit all winter until we start again in the spring with a new layer of mulch.
7. I rotate the beds used for fall/winter veggies so each bed has a chance to get mulched and composted every few years.
At this point I should offer a word of warning.
With the deep mulch method you will be spending a lot less time weeding and maintaining your garden. Don’t feel guilty! Just enjoy!
So…what do my garden chores look like now?
• I check small seedlings often to make sure the mulch hasn’t covered tender sprouts. When veggies are bigger this won’t be an issue.
• Water as needed. Of course, this will vary depending on your area and amount of rainfall. I end up watering only twice a week, except during really hot weather. The mulch will help retain moisture in the soil.
• If any weeds pop through the mulch simply pull them and add more mulch to the area, but there won’t be many if the mulch layer is thick enough.
• Lastly, I often breath a deep sigh of relief, grab a chair, a glass of tea and enjoy my garden!
Once you’ve tried deep mulching you’ll never want to go back to your old way of gardening. But, don’t get too caught up in the details of variety or quantity of mulch. Just mulch!! It’s really hard to mess this up as long as you use a pretty thick layer. Now, you’ll have fresh grown produce from a garden that doesn’t take over your life. How great is that!
Earthworms – your garden’s best friend
When we think about a garden’s soil teeming with life we generally think of tiny microbes that can only be viewed with a microscope.
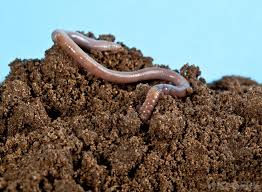
But, there’s one major player that needs no magnification—earthworms. These industrious creatures burrow into the soil, improving its structure from the surface down, and producing castings that feed the earth and provide nutrients to plants.
Around the world there are about 7,000 species of earthworms. They live in most countries, except hot, arid deserts and very cold regions with permafrost.
No matter where you live, these squirmy wigglers bring huge benefits to the garden as they chew their way through the soil, forming small pathways for water to drain, oxygen to reach the roots and carbon dioxide to escape.
Earthworms that live close to the surface typically eat organic matter, like grass clippings and dead leaves. Worms living lower grind their way through the soil gleaning fungi, bacteria and other bits of organic matter trapped between the soil particles.
For the most part, earthworms ingest soil and the like at a rate up to 30 times their body weight each day. All the while, their up and down and sideways movements deposit nutrient-rich castings to plant roots, redistribute organic matter and allow water to penetrate. The lubricating mucus earthworms secrete helps bind soil particles, open pores and help prevent caking and erosion of the soil. They also help prevent runoff in rainy areas.
There are three main categories of earthworms found in the garden—shallow-dwelling, field worms and deep-dwelling night crawlers.
In my area, shallow-dwelling field worms are most common. They live in the top 6 to 12 inches of soil for about a year or two, creating horizontal tunnels and secreting their castings wherever they travel.
Field worms are primarily active in the spring, when the soil is moist and the temperatures are moderate. Hot, dry soil sends them deeper into a resting stage, but they perk up in the fall with early rains or irrigation, then return to a resting stage to wait out a cold winter.
Deep-dwelling night crawlers are rare in my area, but more common in the east and mid-west, where they dig vertically into the soil creating tunnels several feet deep. When they slink to the surface to gather food and slide down to digest it, then back up again they deposit their castings and plant residue on top of the soil.
Like field worms, night crawlers burrow deep into the soil during hot spells, then perk up with spring and winter rains. Some studies claim they can travel up to 60 plus feet in one night. Night crawlers can live 3 to 4 years, if they’re not collected for fishing bait.
Another category of earthworm is the red worm, those debris loving wrigglers that thrive above the soil in leaf litter and compost bins or worm bins.
For most of the year in my area (the Central CA Coast) earthworms are dormant, curled up in little balls just below the soil’s surface encased in a protective covering lined with mucus.
No matter which type of earthworm you have in your area they are a powerhouse worker in the garden and should be cultivated, encouraged and protected, so they can produce maximum benefits for your vegetables and flowers.
5 Ways to Preserve your Carrot Harvest

I sat at the patio table organizing my stash of vegetable seeds, sorting by like kinds and those that were out of date. Without thinking I decided to sprinkle an old package of carrot seeds in my patio wash tub garden, not thinking what would happen if the seeds were still viable. When I say out of date I mean years, like 3, out of date.
I suppose I thought not many of them would be good and only a few would sprout. Man was I wrong, dead wrong!
It was kind of exciting to see a few green shoots emerge from the compost rich galvanized tub a week or so later. But, as time went on the sprouts multiplied and before I knew it the entire tub was covered with a feathery green carpet. I was not expecting a good portion of the seeds to sprout, that I can tell you. By now it was clear…I would have a bumper carrot crop, but in a potted garden instead of a raised bed.
As time went on and the feathery tops grew it occurred to me that at harvest time I would have more carrots than a one person household could handle. I needed a plan and I needed one FAST!
Fortunately, I love carrots, but honestly who needs that many fresh carrots…all at one time.
I mulled it over in my head and did a bit of research, then went back and forth trying to decide what to do. It was exciting to find several very useful ways to preserve my orange harvest, ones that would fit nicely with the kinds of dishes I use carrots in. That was a relief, I can tell you.
So here are five ways to preserve your carrot harvest, whether it’s small or large.
1.) Leave them in the ground
How easy is that? My temperate climate lends itself well to just leaving carrots in the ground for quite a while. In colder climates, though, carrots can be covered with a thick layer of straw or leaves, about a foot deep, then covered with plastic, a tarp or even a small hoop house. If you live in an extremely cold area you can add an extra layer of mulch just to be safe. These thick layers will help insulate the carrots while the covering will help keep them from getting overly wet and rotting. When it’s time to use a few, simply move the mulch away from the tops and pull as many as you need, then push the mulch back into place. Easy, right?
2.) Store them in a root cellar
Root crops do especially well in root cellars. The trick to holding them for a long time is to leave them as natural as possible, meaning don’t was them. When they are harvested, gently brush off the excess dirt, trim the tops to about 2-inches and store them in a single layer in sand, straw or shavings. Make sure, though, that the shavings have not been treated with any anti-flammable substance. For best results and long storage the root cellar temperature should be consistently between 35-40 degrees and have plenty of humidity. Under the right conditions carrots should keep for about 4 to 6 months in a cellar.
If you don’t have a cellar, like me, check out the link below for a simple root cellar perfect for the suburban homesteader. Or, you can cellar them in the fridge. Simply harvest, brush off excess soil and trim then store carrots in a zip lock bag or a shallow lidded container.
They won’t keep as long in the fridge, but you should have fresh carrots for several months at least.
3.) Freeze your carrots.
With a little bit of prep work carrots freeze very well. Wash thoroughly before cutting off tops and peeling. Slice or dice into desired size or cut into sticks, then blanch them for 3-minutes in boiling water. Remove from boiling water and immediately plunge them into a bowl of ice water to stop the cooking process. Cool completely before placing carrots into plastic freezer containers or bags. Frozen carrots work great in soups, stews, pot pies or casseroles.
If you don’t mind a little bit more work, place carrots on a parchment lined cookie sheet in a single layer and freeze. This way they freeze individually and are easier to pull out a small amount if that’s all your recipe calls for. I freeze my carrots this way because it’s the easiest method if I don’t have a large batch of carrots all at once.
4.) Traditional canning works, too.
Carrots are a low-acid vegetable and needs to be pressure canned if you choose this method. However, if you choose to make pickled carrots you can use the regular water bath method.
To pressure can carrots…
Wash thoroughly, removing all dirt then trim tops and peel.
Pack carrots into hot sterilized jars, and fill with boiling water leaving a 1-inch headspace. For my one person house I use primarily ½-pint and pint jars, but families may want to use larger jars.
Processing time & pressure…
Pints – 25 minutes at 10 pounds of pressure
Quarts – 30 minutes at 10 pounds of pressure
5.) Dehydrate your carrots.
Carrots lend themselves very well to being dehydrated, to be used later in many crock pot or casserole dishes, even baked goods like muffins and cakes. To dehydrate carrots, wash, trim and peel as in the other suggestions, then blanch them for 3-minutes in boiling water and dry completely before placing them on the drier tray. Place in a single layer at 125 degrees and dry until they are almost brittle.
There you have it, five ways to have the great taste of carrots in your winter dishes and baked goods.
Check out this post to learn how to make a simple mini green house for your garden beds.
How to Save Garden Seeds
Want to keep the garden going year-after-year without having to spend a lot of money on seeds?
Well—I do, too. That’s why seed saving is an essential garden skill.
This time of year the garden is bursting to overflowing. Veggies are producing at such a rapid rate it’s almost impossible to keep up with the harvesting, canning, freezing or consuming, much less think about the next year’s garden season. But, this is exactly the time to think about your next garden, when you have so many plants to collect seeds from.
For centuries gardeners and farmers alike have selected the best plants from their crops and collected seeds for the next planting, essentially creating their own personal seed bank, and you can too!
Following these few simple steps will start you on your way to harvesting not only today’s fresh vegetables, fruits and flowers, but tomorrows as well.
There are two types of seed categories—dry and wet, and while some seed saving steps are similar for both types, seed harvesting starts with one common and important step.
START WITH HEALTHY HEIRLOOM PLANTS!
Healthy plants produce healthy seeds, which in turn produce healthy plants. Choosing unhealthy plants produces just the opposite, so select robust, healthy plants to save seeds from. Planting a garden using heirloom seeds will give you a much better chance of producing viable seeds for saving versus their hybridized and highly modified counterparts. In fact, some plants are developed so they can’t reproduce seeds that can be saved, forcing you to buy new seeds every year.
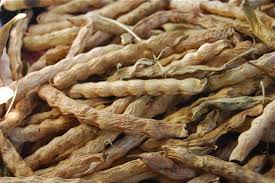
Dry Seeds—come from plants like sunflowers, beans and peas.
Select a few good plants and allow them to flower and dry-out on the stem. With beans, peas or any other “pod” type vegetable let the pods hang on the vine until they are dry. When the seeds are completely dry, cut them from the stem before they scatter, or before the birds get to them and gently remove them from the head or pod.
Plants that produce a flower head like onions or delphiniums can be cut with a length of stem and dried on a tray or stored up-side down in a paper bag to dry. Punch a few air holes into the side of the bag for ventilation. This paper bag method is also a good place to “catch” smaller seeds.
To clean heavier seeds of chaff pass them between two cups in front of a gentle fan or outside on a breezy day. Lightweight seeds like lettuce or carrot can be clean using a fine sieve. Place seeds in the sieve and gently toss them while blowing out the chaff.
To “cure” the seeds before storing, place them in a single layer on a fine window screen elevated on a few inches and store in a non-windy area for a week. After the seeds have cured completely they can be stored in envelopes or small lidded jars in a cool dark place until ready to use.
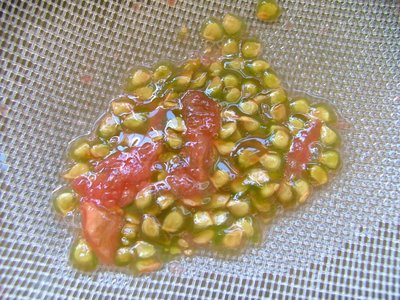
Wet seeds—come from plants like tomatoes, cucumbers and squash.
Wet seed fruit should be picked a few weeks past its prime, but before the fruit begins to rot. This will give seeds time to mature completely.
Gently scoop out seeds and place them in a large bowl. Fill the bowl, not quite to the top, with room temperature water and let the seeds stand for about four days. This soaking helps remove the film coating on the seeds and gives the “dud” seeds a chance to float to the top so they can be removed easily. No sense in storing bad seeds.
Drain the seeds through a sieve and rinse well with running water. Rub them gently to remove and residue.
To “cure” wet seeds use the same window screen treatment as before. Be sure to “cure” seeds completely as damp seeds will mold and rot, ruining your hard work and next season’s garden.
Be sure to store all saved seeds in a cool dry place so they don’t lose their viability.
Oh…and don’t forget to label each seed during the cleaning and saving process so you can properly label the storage envelope or jar. You don’t want your next garden to be a guessing game!
There you have it, an easy way to keep your garden going year-after-year for little or no money.
How to sanitize garden tools
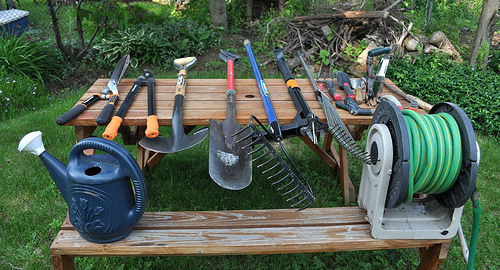
Garden tools get quite a workout during the growing season. Digging new garden beds, planting new vegetable starts and pruning all use a variety of hand and long handled tools that help make the garden a success.
With all this activity and contact with different plants dirty tools can spread disease from plant-to-plant. Not a good idea for keeping a healthy garden. To prevent disease from effecting other plants clean tools of dirt and grime after each use. Use a stiff brush to remove dirt and sanitize tools with a solution of 1 part bleach to 10 parts water. Swirl tools around in the bleach solution for a bit, then let them air dry in the sun.
Planning an Orchard on your Suburban Homestead
Ever since I can remember my one dream (or fantasy) has been to have a large orchard of my favorite fruits; chalk full of crisp juicy apples, sweet plums, pears, pluots, and peaches. I can see in my mind’s eye tall grasses and colorful wildflowers growing in between the trees, and let’s not forget the heady scent of blossoms floating on a light spring breeze. This is surely my kind of decadent.
But, on a small suburban homestead where space is at a premium and a large variety of trees is not practical, how do you make the dream a reality? Add to that the fact that most fruit trees take time to produce…sometimes several years, and the mind reels.
How do you go from dream to reality? My answer…step-by-step, that’s how.
STEP 1: Start with a Plan. As with most projects on my homestead they all started with pencil and paper. It actually started years ago with a master footprint of my property laid out on a large piece of graph paper. Once the perimeter lines of the property were drawn I penciled in the house, patio, walkways and stationary structures like the barn and the greenhouse. I also included large shade trees, raised beds, arbors and flowerbeds. At that point I knew the areas I could plant fruit trees in.
Needless to say, a small plot of land fills up fast, but it’s important to see where available space is in the greater picture rather than just digging a hole and planting a tree.
STEP 2: DREAM! Dream Big. This is the time to go crazy. Make a list of all the fruit trees you’ve ever wanted, and especially the ones your family enjoys most. Don’t worry about whether or not the variety will work in your climate, just dream.
STEP 3: Take your list and start researching. Check out growing zones for each tree. Some trees can’t handle hot dry weather while others shrink in humidity. You’ll also want to check the chill hours required to set fruit, especially for stone fruits, which need a certain number of hours below 45 degrees. This USDA plant hardiness chart will be helpful, while this chart at Grandpa’s Orchard gives a lot of good chill information. If you don’t see the variety of tree you want to plant just research it individually. No sense in going through the expense and work of planting an orchard only to have it fail.
Master Gardener programs, local nurseries, Cooperative Extension and local gardeners are also good resources for specifics about growing fruit in your area. And, they have a vested interest in helping you get it right.
Something else to consider…How much could your Orchard Produce?
As an example, a mature citrus tree can produce 200 pounds or more, while a mature stone fruit tree, like peaches or plums, will give you about 75 to 100 pounds of fruit. If you have multiple trees…that’s a lot of fruit!
So, unless you have a farm stand or family, friends or neighbors who you love to eat freshly picked fruit, you’ll need to think about preserving the harvest or limiting the number of trees in your orchard. Even a few trees can be a boon to your homestead production.
STEP 4: Check out Tree Pollination. After you know what trees will do well in your area you’ll want to know which ones are self-pollinating and which ones need another tree in order to pollinate. Self-pollinating types include: apricots, pomegranates, citrus, figs, grapes, persimmons, most peaches, most berries, and European plums (although they produce better with two varieties).
Trees that are not self-pollinators will need another tree for pollination in order to produce fruit. The trick here is you need to have two different varieties that bloom at the same time. If one tree blooms in spring and the other in summer they cannot pollinate each other. In a suburban setting you do have the opportunity to pollinate off a neighbors tree, as long as it isn’t much more than 50-feet away. Find out what variety they have and buy a different variety in order to cross pollinate.
Trees that require pollination include: Apples, pears, Japanese plums, cherries and all nut trees.
STEP 5: Space is always a consideration living on a small suburban homestead. But, that doesn’t mean an orchard cannot be in your future. With the surge in urban and suburban gardening and homesteading there is a plethora of fruit trees specifically for small areas. From dwarf to pole to espaliered trees you should be able to find what you’re looking for that will fit into your homestead plan. Remember also, that in a suburban setting you probably won’t have the traditional large orchard. Your fruit trees will probably be intermixed with flower beds, vegetable gardens, even planted close to a fence.
Dwarf fruit trees are regular fruit trees hybridized to grow less than 10-15 feet tall, while standard fruit trees can grow as tall as 10-20 feet with a spread about the same. Espaliered fruit trees are specially pruned to grow flat against a wall or fence, which makes them perfect for small areas. Pole fruit trees are just like they sound. They are fruit trees that have been hybridized and pruned to grow vertically like a pole. They too take a bit more pruning to keep them manageable, but it is well worth the effort to have your own productive orchard.
STEP 6: Walk your plan. Take your master plan and your list of fruit trees and walk your property. See where you have space and if the space is enough for a standard tree or if you’d be better off with a dwarf, pole or espaliered tree. Visualize how big the tree will be full grown and if it will over shadow other important areas of the homestead like the berry patch or veggie garden. No sense making a future problem for yourself. Also check water sources and proximity to neighbors. Once you plant your trees be sure to put them on your master plan and keep it safe for future reference.
STEP 7: Planting. Don’t think you have to plant all your trees at once. An orchard is a long term project that will unfold over several years. Of course, if you just moved in and are setting things up this is a perfect time to plant and orchard and other long lived perennial plants like berries, artichokes and asparagus. Planting a few trees each year won’t take long at all before your homestead has a full grown productive orchard.
Before you know it you’ll have juice dripping down your chin or sinking your teeth into a crunchy apple. Now that’s what I call Heaven!!
Spring!
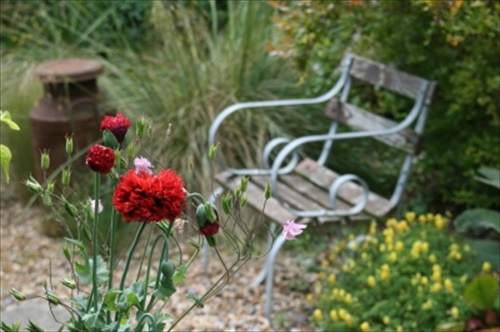
Our rain fall this year has been practically nothing, but the lack of showers did not hamper the blooming of May flowers. The farm is bursting with color and I will relish it for as long as it holds out.
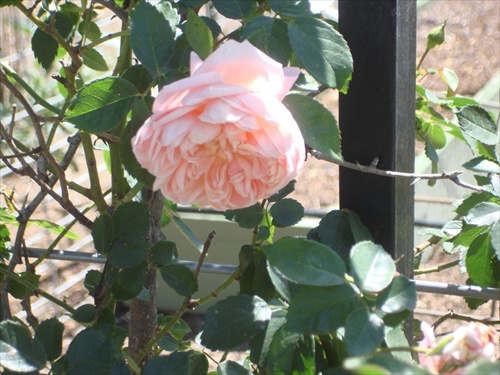
Antique roses cover every arbor on the farm and the delicate fragrance that wafts through the night air is intoxicating.
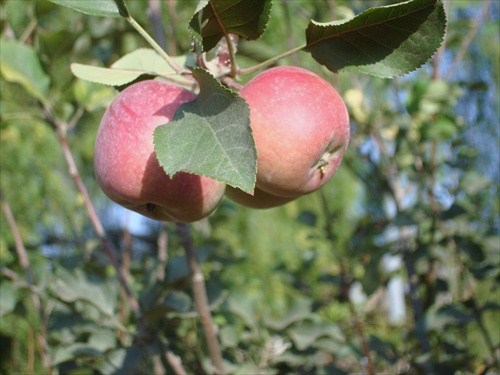
Apple blooms are a promise of fall’s juicy crispness. Cider, tarts, pies and fresh eating are still months away, but nonetheless thought of.
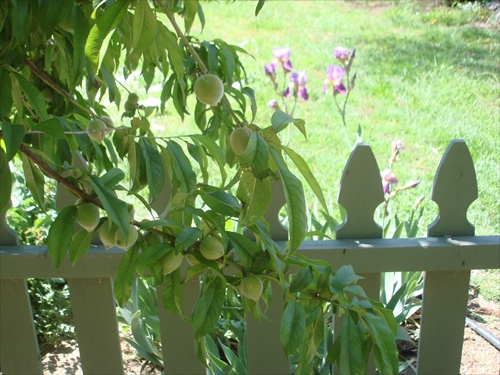
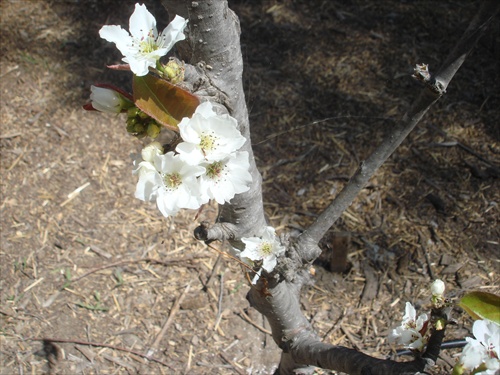
The little peach tree is laden with small fruit. By July we’ll be eating them by the dozen. I can’t wait to make the first tartin of the season.
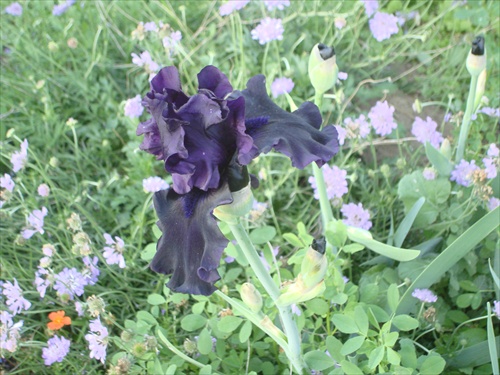
The deepest purple of this bearded iris makes it look almost black. Flowers like this are a reminder of wonderful friends. I got a few rhizomes from a fellow garden club member who loves to share. And, I will share too, I have no choice, everyone who sees it places an order for a bulb at dividing time. Fortunately for me that won’t be for another year or so.
Making Dirt!

Green + Brown + Water = Black Gold for the garden.
No garden is complete without a compost pile! A compost pile acts as a giant recycling bin for most decomposeable yard and kitchen waste. What’s more, compost does triple duty as a soil conditioner, mulch and fertilizer. All this wrapped up into one spade full of rich, friable black gold! It’s referred to as black gold because compost feeds the soils’ microorganisms that help to keep plants strong and healthy and adds nutrients like nitrogen to the soil, and helps less than perfect soils like clay and sand drain better.
Fall and winter is a great time to start a compost pile, too. With gardens being pulled up and put to bed for the winter and leaves falling in all those brilliant colors there is plenty of ingredients handy to feed your soil making bin.
Compost piles can come in all shapes and sizes too. Some can be made from shipping pallets or wire, others from scrap lumber or bottomless barrels. Still others can be purchased from home improvement stores or city parks departments. With the surge of home food production and recycling there is a wide variety of compost barrels and bins to choose from.
Compost housing aside, the main focus in producing good quality compost is the kinds of ingredients you add to the pile.
To build a compost pile that is easy to make, fast to decompose and dosen’t smell follow these simple steps. Read the rest of the story »
10 Tips for a Healthy Garden
Want to have a great garden along with a great life? Try these time-saving garden tips and you can have both.
Spring planting time always makes me giddy as a school girl. I wait with anticipation all winter for the seed catalogs to arrive and with baited breath I haunt the mail box until the seed orders arrive. I gingerly plant the delicate seeds in starter pots, work the soil to plant potatoes and onions and work until dark without a care in the world. And when my veggies emerge from the soil I talk about my garden, to anyone who will listen, as if I’m talking about my first born child. It’s a glorious and carefree time.
Then—the weeds begin to take over and the bugs descend, ravaging the growing beds. It’s then that we realize gardening is a lot of work and daily chores are the only thing that makes gardening less impossible. Using a few time saving tips early on can reduce the workload later when storms or sun threaten to squelch our garden magic, making our garden more enjoyable all season long.
Mulching to prevent weeds and conserve moisture. A three to four-inch layer of mulch like grass clippings, straw, hay or shredded leaves helps hold in moisture and can cut watering time by half. Mulching when crops emerge from the soil can also help prevent weeds from taking hold.
Grow a potted kitchen garden. For decades farmers and home gardeners grew often used plants like herbs close to the back door, saving footsteps to the larger garden. Potted sage, parsley and chives can be grown just feet from the cook’s domain.
Plant perennials. Perennial veggies like asparagus, artichokes and rhubarb come back year after year saving time in replanting. Many herbs can also be perennial in milder climates. Try sage, rosemary, thyme, marjoram and tarragon for great herbs all year long.
Create your own seed bank. Living in a year-round gardening area keeps me looking at my garden in all four seasons. Before placing an annual order I list all the seeds I want for the entire year. That way I save time from reordering and I can take advantage of specials and free shipping, saving me money. Saving seeds and also save you time and money in ordering.
Supercharge garden soil. When preparing garden beds and subsequent plantings be generous with nutrient rich compost and organic fertilizer. Well-built soils help plants stave off disease and resist insects.
Grow flowers to attract bugs and bees. Planting flowers that attract beneficial insects and bees helps reduce the need for pesticides and increases a healthy balance between good and bad bugs. Bee friendly flowers will help increase bee populations and in return increase pollination of fruit trees, berries and other flowering veggies. For a simple start edge garden beds with sweet alyssum or tuck it into garden nooks and crannies. Crepe myrtle can also help in warmer climates.
Cover plantings with row covers. If harmful bugs can’t find your garden they can’t do damage to your plants. Garden fabric, float cloth, row covers and mesh are all fine enough to keep bugs at bay. Cover plants when transplanted and secure around the edges. The coverings can also protect plants from garden loving wildlife and the weather.
Hoe weeds daily. Hoeing lightly every day will cut down young weeds and prevent them from growing larger. It is also a good time to hill up potato plants and look for garden problems while they are still small.
Put tools back in their place. More time is wasted in the garden searching for needed tools. Store long-handled tools like rakes and shovels on hooks near the garden or in a potting shed or tool shed and replace them each time they’re used. Smaller tools like trowels, spades, weeders and pruning shears can be color coated with paint, markers or tape to stand out amongst a colorful garden. Stored in a bucket or basket near the entrance to the garden they will always be easy to find.
Take time to smell the flowers. With all the time you saved by following these tips you can quietly relax and enjoy the garden you’ve worked so hard to create. Sit and soak up the sights of colorful flowers and growing vegetables, enjoy the sounds of birds chirping and bees buzzing, and smell the blooms of fruit trees or the deep rich soil. You’ve worked hard for the rewards of a healthy productive garden, so sit a spell and enjoy it!
Growing Spring Peas…Yes, Peas!

There’s nothing easier for a new gardener than to grow spring peas. Their variety, quick germination, easy growing habit and short to harvest nature are bound to boost any gardener’s confidence.
Peas are a cool weather crop and are usually the first seeds to be planted indoors in pots or outdoors in the ground. No garden, or garden season, would be complete without this old time favorite. And, after you have grown and eaten your own fresh peas I think you’ll agree.
There are three main varieties of peas:
- Sweet Peas, sometimes called Shelling Peas because their shell is not edible like other peas. These peas are taken out of the shell before cooking or eating.
- Snow Peas have flat edible pods with a tiny pea inside. These are common in Asian dishes or stir fry’s.
- Snap Peas also have an edible pod, but the pea inside is full size. These can be blanched and eaten, or eaten raw.
To have the most success with your pea beds start in the fall with a rich layer of well-rotted compost and manure turned into your planting area. Peas love well-drained soil, but do not like fertilizers much, so use it sparingly, if at all. Peas do however, like phosphorus and potassium, and a good sprinkling of wood ash worked into the soil before planting would be to their liking.
In most areas, peas can be directly sown in the garden 4 to 6 weeks before the last frost. Pt up peas for indoor growing in areas of the country that stay cold into the spring months. Peas are a cool weather crop, so soil temperatures should be between 45 and 70 degrees. The ground should be cool when planting, but not wet. It can be tricky to time the weather conditions. If you have wet soil for long periods consider creating raised beds or plant in pots.
Plant pea seeds 1-inch deep and 2-inches apart. When the shoots emerge you can set your poles or trellises for climbing varieties. Peas do not like a lot of water so water sparingly, but don’t let the roots dry out or no pods will form. Also, pea roots are fragile, so be cautious when pulling weeds and avoid hoeing a pea bed. If peas are a staple in your garden it’s best to rotate with other crops to avoid a buildup of soil-borne diseases.
To keep a pea crop producing long into the season, pick the pods often as this encourages more pods to develop. The best time to pick is in the morning when the dew has dried. It is also the time of day when peas are the crispiest. When picking, it’s best to use two hands, one to hold the vine secure and one to pick the pea. You don’t want to run the risk of breaking the vines off. Fresh peas can be kept in the fridge for about 5 days, but to enjoy your pea harvest well into the warmer months freeze them. If any peas miss being picked you can still use them. Simply dry and shell them. Dried peas are prefect in winter soups and stews.
But, let’s not forget—It’s Spring! And with that comes the start of salad season at our house. Yep, we are die-hard consumers of salads in many shapes and styles. The long hot months cry out for light and cool, yet nutritious meals. If it can be chopped, sliced, diced or shredded and laid on a bed of lettuce greens we are happy women. And, why not? Our area is considered the salad bowl of CA; a state that grows over 250 different crops.
But, this early in the season means only one thing…Pea Salad!
A wonderfully light and crispy salad accented with Pancetta, cheddar and onions, and a hint of fresh dill. What could be more glorious, except for maybe that delightful little POP each time you chomp down on those fresh peas. It makes the perfect side dish or potluck take-along and goes great with grilled meats. Even a baked salmon dinner will scream SPRING when served with this pea salad at its side.

PANCETTA, CHEDDAR & PEA SALAD
INGREDIENTS
- ½ pound of pancetta, cooked, drained and crumbled or finely chopped
- 1 pounds vine fresh peas (or frozen, thawed in fridge overnight)
- ¾ cup coarse grated extra-sharp white Cheddar cheese
- ½ small red onion, peeled, and finely diced
- ½ cup of mayonnaise
- ¼ teaspoon kosher salt
- ¼ teaspoon coarsely ground black pepper
- ¼ teaspoon fresh dill, chopped fine
INSTRUCTIONS
- Stir all ingredients together, put in a tightly covered container in the refrigerator for several hours so the flavors have a chance to meld. Gently stir from top to bottom before serving. Store in fridge for up to 3 days, but it won’t last that long…trust me!
NOTE: The salad can be served immediately after making it, but tastes even better if allowed to sit, tightly covered, in the refrigerator for an hour or up to three days. It should be eaten within 3 days of being made, though.
What is your favorite way to serve peas?
Recent comments
Aenean nonummy hendrerit mauris. Phasellus porta.