Archive for the ‘In the Garden’ Category
Where the Garden Begins
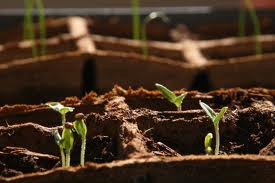
It’s here! The gardening season is right at our doorstep and I, for one, can not contain my excitement. Come June you might find me complaining about the work, but in the early spring it is all about pleasure. Going out into the garden before work to peek at the rows of feathery carrot tops, squat bean leaves, and strong tomato starts brings me a lot of pleasure, and even more satisfaction.
Evenings will be spent filling pots with compost and peat moss, sowing seeds of squash and pumpkins and cucumbers; flowers and herbs. Dinner will come late on these days for the mind will turn to future food security.
My gardens modest start begins in a collection of clay and plastic pots collected from family and friends and thrift store excursions. The black flats that hold my future garden are absconded from local nurseries and the famers market. Each flat holds six pony packs or a dozen 4-inch pots.
In past years the flats set snuggly on my little potting bench or patio table. But this year they will line the growing shelf of my newly finished greenhouse, soaking up the warm sun from the west facing bank of windows.
Build a Mini PVC Pipe Garden House
For many years I had trouble with birds (and my own chickens) getting into the garden and eating tender vegetable plants as they emerged from the soil. And, in the colder months I wanted to extend the growing season and protect my crops from frost. I wanted to install a hoop house, the kind I’d seen in magazines or while driving back country roads, but they were too large for one person to manage and too expensive for my limited budget.
I wanted something lightweight, easy to move and something I could make myself with supplies I might already have on hand.
I looked around the farm to see what I could use and hoped that an idea would come to mind. Sure enough, it did. As I stared at my raised beds I thought of a mini greenhouse type structure that could be draped with bird netting in the growing season and float cloth or plastic to extend my plantings.
Here’s what I came up with:

A PVC frame that fits over my 4’x8’ raised beds and is held in place by “C” brackets screwed to the wooden vegetable bed frame. A 10’ piece of PVC runs the length of the uprights to keep the covering draped properly over the frame. At ground level it can be tacked to the wooden vegetable bed or covered with dirt or rocks to keep it from blowing off.
How I made it:

I cut 4 pieces of PVC pipe 2 feet long; two for the sides and two, half the width of the vegetable bed, to make the peaked top. This would be wide enough to reach across the bed and give good clearance for taller plants like lettuce, broccoli or tomatoes. I then assembled the greenhouse frame using 45 degree PVC pipe fittings (these were on hand, but 90 degree might work better on the legs). Once I tested the greenhouse, to see if it did what I thought it would, I glued all the pieces together. I made 3 frames for each 8’ bed.
To install my newly made mini-greenhouse, I screwed “C” brackets into the vegetable bed frame about 6-inches from each end and in the middle of the bed (about the 4’ mark), I then zip tied a 10’ piece of PVC pipe down the middle to keep the peaks upright and to keep any covering from falling in on the plants.
In less than an hour, using the supplies I had on hand, I made enough frames to cover four of my eight vegetable beds; protecting my crops from marauding chickens and scavenging birds.
Sowing Seeds for Garden Success

In my neck of the woods, February and March are prime garden readiness months. Fruit trees are pruned, berries are trimmed of dead canes and tied to trellises or fencing, raised beds are restocked with compost or built brand new. But, the most fun of this time of year is starting seeds. We mark the day on our calendars and when it arrives the task begins like the start of an Olympic race.
There’s truly nothing better than plunging your hands deep into freshly dug soil, warmed by the spring sun and planting homegrown seedlings started way back in winter, when spring was just a hope and a dream. And, the money you save over buying already started veggies and the vibrant taste of homegrown food ain’t bad either.
This is also the time when garden centers and hardware stores stock a plethora of seed starting paraphernalia: peat pots, soil pellets, plastic pots, covered mini-greenhouses, you name it, if it can start a seed, some store in your area will carry it.
But, do you really need all this fancy commercial stuff to start the seeds you want to plant in your garden. The answer is no! Seeds are not divas. They don’t require 5-star accommodations to germinate and thrive. What they do require is the right kind of starter/growing medium, the right amount of moisture, warm temperatures and room to produce a strong healthy root system. Read the rest of the story »
Borrowed Seeds!
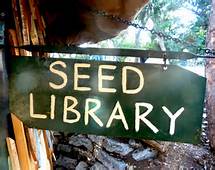
About a decade ago, a librarian from New York State had the great idea of offering seeds right along side the racks of fiction, novels and movie rentals. The project has now blossomed into the Hudson Valley Seed Library. Members borrow seeds just like books and replace them after the harvest. Since its inception the trend has taken root.
Not from New York? Not to worry. The Richmond, California Public Library has compiled a state-by-state list of all 150 seed lending libraries.
Check out one near you.
The best part though…there are no fines for overdue seeds!
photo credit edibleoffice
Winterize Garden Tools
Tools are a partner in your farm and deserve to be taken care of rather than neglected. Kept in good working order they will serve you well for years. Abandoned and abused and they will fall short in their usefulness and cost you money in replacements. How well you care for your garden tools will dictate how they will take care of you and your farming experience.
They key to a tool’s longevity is regular maintenance and winterizing. Spend a few minutes during the growing season cleaning your tools so they will be in good working order and easy to use the next time you need it. Then, spend a short amount of time at the end of the season putting your tools to bed for the winter.
To quickly and easily clean tools with teeth, blades or tines place a 5-gallon bucket near your tool shed, greenhouse or where ever you store your tools and it fill with clean sand. Now, mix in enough motor-oil so the sand is damp, about 2/3 of a quart. Periodically and at the end of the growing season scrap off any excess dirt and plunge the tool into the oiled sand several times. The friction of the up and down motion will gently scrub and oil the tool, protecting it from rust and corrosion. Brush off the sand and the tool wipe it down with a cloth dampened with oil and its ready for winter storage.
Before storing tools for the winter, check the handles for cracks and make sure spades, rakes and hoes are fastened securely to the handle. Minor cracks can be wrapped with hockey-stick tape, found at most sporting goods stores. Start a few inches below where the crack begins and wind the tape tightly around the handle, overlapping with each turn, and ending several inches above the crack. Severely cracked or damaged handles should be replaced and loose heads can be bolted in place. This is also a good time to sharpen any dull shovels or axes or bladed tools.
When tools are ready to store, don’t just throw them in a shed or garage, hang them up, off the floor so they don’t get damp during colder winter months.
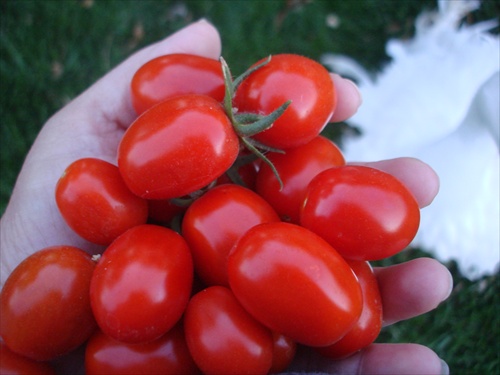
A Handful of Treasure
Every night when I get home from work I walk the farm. It has turned into an evening ritual that helps me shed the stresses of the day. It also gives me a chance to fill water troughs and feeders, pick ripened veggies, deadhead flowers and take stock of chores that need to be done.
During this evenings walk I noticed a bit of red peering out from between the roses. It was small, but bright, like a shiny marble. At first I thought it must be a bud that hadn’t opened or a rose hip that was especially red this year. As I walked closer I could see a few more scattered between the branches and leaves. When I bent over I realized the tiny red balls had nothing to do with roses at all. They were ripe Grape Tomatoes hanging in little clusters intertwined in the roses and the arbor. Some had even grown through the fence and attached themselves to a roll of garden wire on the other side. They were perfect; firm and bright and sweet right off the vine. I picked all I could see, more than a dozen in all. They will make a great addition to salads or sautéed with zucchinis and onions.
But, it’s a curious thing though. I never planted Grape Tomatoes, nor did I buy a plant. And, if I had I would never have planted them with the roses. These little gems were an act of kindness from a passing bird.
We get a few odd additions to our garden every year. A few plants that nature has decided we need. And why not? We do feed a few of her feathered friends with our garden. Maybe it’s just her way of reciprocating. No matter the reason or the cause everyone can use a handful of treasure once in a while.
Baby Pumpkins Abound!
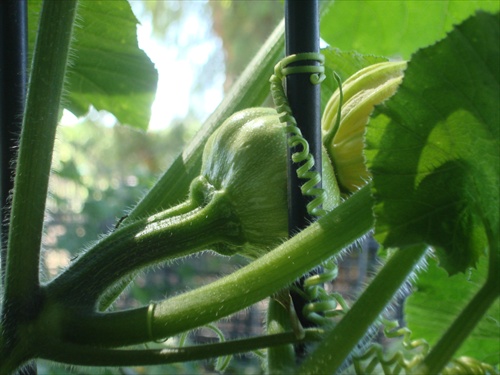
There are clutches of chicks, litters of kits, herds of kids, and bands of lambs. And, now we have a family of Cucurbitaceae’s.
The flowers I pollinated last week have all taken and we will now have a full harvest of Fall globes to adorn the front walk and the house. One thing I did notice, though, is that are many more “male” flowers than there are “female” flowers, so in the future I will be especially care to pollinate all I can find in order to maximize the harvest.
The pumpkin pictured above is only a few days old. Those pollinated before him had already morphed many times this size!
Let Fall begin!
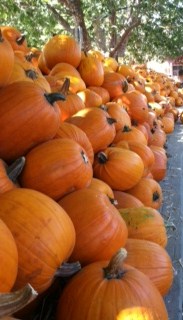
Where’s the Great Pumpkin Charlie Brown?
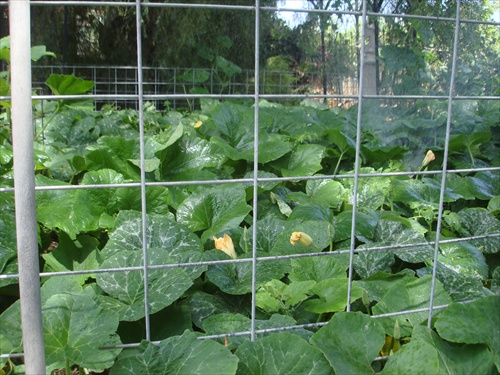
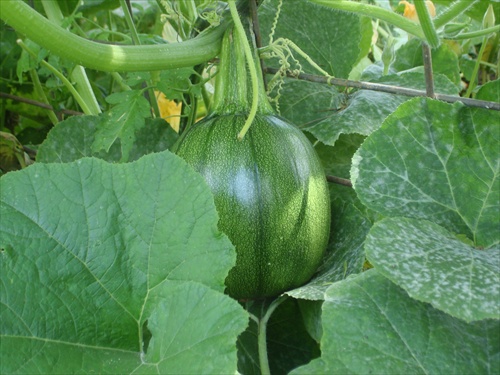
Our pumpkin and squash patch is spilling over its fencing—literally. I had no idea when I planted those small 4” pots, started from seed in early spring that they would run so far and so high. Some have attached their tendrils to low hanging branches and are climbing up into a tree, over fences, and around anything they can latch on to.
On the positive side, though, I don’t have to worry about not being able to read the plant markers anymore. The fruit has grown large enough that I can see more than a dozen Butternut Squash, Delicata, Sweet Dumplings, and a few mysterious ones I don’t recognize. I’ve forgotten the names of everything I planted all those months ago.
The only thing I can’t see is very many pumpkins. In this patch I planted Connecticut Field pumpkins and search as I may I only see a few perfectly round globes. October and November just wouldn’t be right without the glow of a carved pumpkin on the front walk. Just like inside the house would not be as festive without a collection of Sugar Pie pumpkins at every turn. Not to mention the aroma of pumpkin butter perking away in the crockpot or a harvest pumpkin bread hot from the oven. Wouldn’t be fall at all without those orange orbs.
But, not to worry, it will be harvest time soon enough and I’ll have a bushel of winter squash for soup, stews and just plain baking and eating, and there will be pumpkins for cooking and decorating even if there are only a few. Fall wouldn’t be the season I love without pumpkins and squash. Nope, not at all.
Why so few pumpkins?
Well, according to my good friend Sandy, a small pumpkin crop is the result of not enough Pumpkin Sex in the morning. You heard that right, folks…Pumpkin Sex!
Pumpkins (like other squash) have boy flowers and girl flowers, and in order for the girl flower to set fruit (grow baby pumpkins) she has to be fertilized or pollinated. You remember the birds and the bees, right?
Unfortunately, what use to be the springtime job of bees has now been relegated to us humans. And why shouldn’t it, we humans have been the primary cause of decreasing the bee population all over the country with our chemicals and pesticides and unfriendly bee practices.
So, instead of bees hoping from flower to flower spreading pollen where ever they land we must now take over that task.
Making pumpkin babies is really very simple. First you identify the boy flowers, which will have a stamen in the center of the flower. Think male parts and you won’t have any trouble identifying them. The female flower has “girl parts” or a multi-segmented stigma. This is where the pumpkin will start growing once the female flower has been pollinated. When you find a male flower, gently pick it and pull down or remove the pedals to expose the stamen. Then gently open the female flower and swirl the stamen around the stigma to transfer the pollen. You can also use a Q-tip or your finger to transfer the pollen from one flower to another, but that all seems just a bit too personal. In a day or so the female flower will close up and begin to dry, exposing its “baby bump”. Or is that “baby pump”? After about five days the little pumpkin has grown exponentially, proof that the morning pollination was a success and that Pumpkin Sex in the spring means loads of pumpkins come fall. After that just sit back and watch your pumpkins grow.
Note to self, folks, if engaging in early morning Pumpkin Sex isn’t quite up your alley start planting bee attracting flowers and shrubs so that Mother Nature can take back HER job.

Recent comments
Aenean nonummy hendrerit mauris. Phasellus porta.