Archive for the ‘In the Barn’ Category
Using Crushed Egg Shells as a Calcium Supplement
Like any good homesteader I am frugal beyond belief, always looking for ways to cut costs, reuse and repurpose. As the cost of chicken feed and supplements continue to go up I began looking for ways to offset that expense.
Of course, kitchen scrapes, spent veggies from the garden and free ranging for bugs and treats are still the main stays in supplementing feed, but what about other supplements, particularly calcium?
Hens need an ample supply of calcium for good health, and because without it their shells are thin and fragile, sometimes breaking when you collect or store eggs.
What I didn’t realize, before my research, was the wide and varying opinions of where to get calcium for your hens. Some people think only commercially available calcium in the form of oyster shells or limestone from a feed store should be used, but those can be pricey. My frugal farm girl brain wanted something cheaper and more sustainable. I didn’t have far to look for a solution as it turned out. In fact, I didn’t have to look any farther than my chicken coop.
What?? Where did you find calcium in your chicken coop, you ask?
Right inside of each nest box, that’s where!
Yep, you got it. Egg shells are high, really high, in calcium and make the perfect renewable source of a supplement your hens need for good health and firm egg shells.
In reality, farmers and homesteaders were feeding egg shells back to their flocks hundreds of years before commercial products ever hit the market.
Many commercial lay rations contain a suitable amount of calcium, but why not let your girls have a free choice of extra calcium whenever they want it? It just makes good sense to feed your hard working girls a little bit extra.
BUT—how do you feed egg shells so they don’t make my hens sick?
Logical question.
Here are a few tips on how I clean and reuse my egg shells.
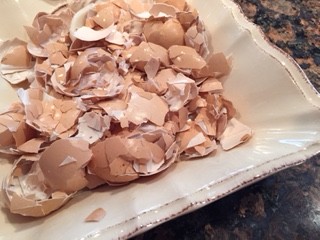
- Each time I use eggs I rinse and store them in container. As it becomes full I just smash down the shells to make room for more.
- When my container is full, I spread the crushed shells on a cookie sheet and bake in the oven at 350 for about 10-12 minutes. This will make the shells brittle, dry out the inner membrane and kill any bacteria. (I’m not so worried about bacteria when using my own eggs; the hens are use to their own germs. But, store bought eggs will have bacterial strains that your hens are not use to, and that could cause illness.)
- Once the shells have cooled a bit, crush away. You can use a potato masher, put them in a plastic bag and roll with a rolling pin, or just smash them with a wooden spoon, which is how I do it. Some people use a blender or a food processor to get a finer texture, but I’m too lazy to drag those appliances out of the cabinet.
- The goal is to smash the shells small enough that they are unrecognizable to the hens.
- To feed them either mix with their normal rations or offer them “free-choice” in a separate feeder. I use a large rabbit feeder and feed them separately. The hens are perfectly capable of deciding when they need a calcium boost and how much.
I know what you’re thinking.
Won’t feeding eggshells entice my hens to eat eggs?
It might, but not very likely. I’ve never had a problem. In fact, I’ve had more egg eaters when I didn’t feed egg shells, probably because the girls were craving calcium and the eggs were the closest source. But, every flock is different. There’s always one rouge hen that goes crazy and pecks at anything and everything. Once she gets a taste of egg she may become an egg eater, but that’s a whole different problem that I wrote about in “Hens Eating Their Eggs? There is a Reason”.
There you have it…a free source of renewable, calcium rich supplement that will keep your girls happy and you in eggs that you won’t poke a finger through. What more could a farm girl ask for?
Banish Winter Boredom in your Chicken Flock
There is nothing worse than a bored, unhappy chicken. When chickens are bored they tend to peck at each other, pulling feathers and drawing blood, causing stress and damage. The sight of blood can even turn a normally calm flock into a crazy flock that can literally peck other chickens to death. Bored chickens can also become egg eaters, breaking into your daily egg harvest, all because they were bored and had nothing to do.
During the long winter months it’s important to give your girls something to do, inside the coop and out, to prevent bad habits from forming. Just like humans who can develop “cabin fever” and resort to bad habits, chickens can develop “coop fever” with equally bad habits. Fortunately, these habits are not normal and can be prevented with a few simple flock management tricks.
Chickens get bored mostly in winter when green things growing, bugs to chase and dust to bathe in are in short supply. Pecking from boredom is also more likely to happen when coops and outside runs are too small for the number of chickens in the flock or when they are kept cooped up, unable to free-range. Chickens are hardy and can be outside in most weather, but should be kept in the coop during blizzards and frigid weather.
Treats can also help entertain chickens and keep them occupied, but too much of a good thing is not good for them. Below are a few alternatives to keeping your chickens occupied during the winter months.
Perches & Pedestals
 Chickens love to perch, whether they are watching the world go by or sleeping. It’s the “official” poultry pastime. Perching not only gets them out of the mud or snow, but it gives them a better view of what’s going on in the barnyard.
They love to hop onto ladders leaning up against a wall, low hanging branches of a nearby tree, swings, boards or dowel sticks attached to the corners of an outside run. Any creative, multi-level poultry playground will keep your flock busy the whole winter.
Pedestals, like garden statues, urns, tree stumps, even fences give chickens a good view of the world below. While statues and fences are stationary, tree stumps can be moved around the farm to give chickens different vantage points. So, the next time you fell a tree or cut up a fallen branch think about your chickens before splitting all of it into firewood.
Mounds of Organic Matter
Let Them Play Peek-a-Boo
Odd Playthings
Protected Dust Bath Area
 Chickens use dust baths to keep parasites like lice and mites from taking hold on their feathers and affecting their overall health. But, in winter, where mud and snow may prevent a suitable dust bath area one can be created in a sheltered area. Old plywood, windows or bales of straw can be set up to form a bathing area protected from the cold. Dry dirt from inside the barn can be used to fill the bathing area and provide endless hours for fluffing.
Free Ranging
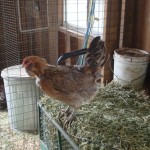
 Chickens are hardy creatures even when there’s snow on the ground. They won’t mind cold feet if it means time to run free and see what’s going on. A few bare patches where they can scratch and dig and get off the cold white stuff would be appreciated, too. A pile of hay or straw can also be used to give them a dry place and something to scratch in. But, keep a close eye on your chickens, predators searching for food in winter will find barnyard chickens easy pickings.
Enlarge the Outside Run
You and Me Together
Long winter days can be hard on both chickens and their owners. Days of gloomy skies, wind, rain or snow can make time move so slowly. Getting outside during breaks in the weather, even if the weather is not optimal, will help not only you, but your flock as well. It’s a kind of chicken therapy. You will get to hang out with them and they will get more comfortable with you being close by, a definite plus if you ever have to catch one to treat an injury or illness.
Treats
 Chickens love treats! In summer or winter treats can be a great way to add fresh produce and seeds to your flock’s diet. Seed blocks and suet cakes are easy to make and can provide extra nutrition and energy.
Vegetable trimmings, overripe fall fruits and winter veggies like cabbage, Brussels sprouts, kale and collards can be laid in baskets and hung in low branches or by supports in the outside run where chickens will have easy access to them. The flock will have loads of fun while getting extra nutrition. Whether homemade or commercial or fresh, treats can help stave off winter boredom on a gloomy day as chickens peck and scratch and play with them.
Every homesteader is counting down the days till spring shines through, when gardens are turned, babies are born and chickens run free. But, with these tips we know our chickens will be too preoccupied to get bored while waiting for spring!
For homemade chicken treat ides, check out these posts.
Suet Cakes
How to Make Homemade Suet Cakes
There’s nothing a chicken likes better than a little bit of fat during the long cold winter months to keep it healthy, happy and full of energy. Suet cakes provide all this and a few treats as well. But, commercially purchased suet cakes can be expensive and contain other chemical ingredients that you may not want your girls to have.
Making your own, homemade, suet cakes is easy. It’s even easier if you get in the habit of saving your fat or grease from cooking. I keep a container in the freezer to store grease from cooking bacon, sausage, meatloaf and hamburger (anything that produces fat, really). I don’t worry too much about using bacon fat because I don’t use a lot of it and it is mixed with the other kinds of fat. I store my fat in the freezer because our hot summer and early fall weather makes me nervous about the fat spoiling, and I’d rather be safe than sorry.
When I’m ready to make suet I can make several at one time, saving me time. The spent grease, tallow or suet is a great binder to hold everything together, and it will only take a few minutes.
Ready to make your own suet cakes?
Here’s what you’ll need:
- A container to store fat in (remember…store all year long)
- A plastic lidded freezer container
- ½ cup chicken scratch or bird seed
- ¼ cup chopped nuts (I use the flat side of a meat mallet and just give the nuts a few whacks)
- ¼ cup dried fruit like raisins, apples, apricots, anything)
- ¼ cup cracked corn (for energy and heat while they digest it)
Here’s how I did it:
- Gather all ingredients
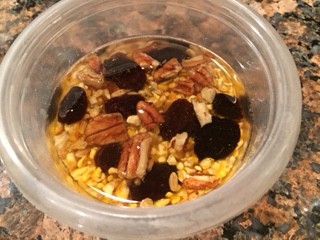
- Layer dried sliced apples in the bottom of the freezer container
- Pour the scratch or bird seed over the apples
- Layer raisins on top of scratch
- Sprinkle with chopped nuts
- Slowly heat fat until it is liquefied, let cool, but not solidify
- Pour fat over to cover everything by about ¼-inch
- Gently poke a fork around or stir to make sure fat reaches the bottom (remember, the fat holds the whole thing together)
- Cover and place in the freezer to harden.
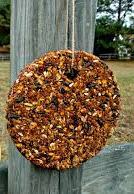
When you’re ready to use, run a knife around the edge of the container to loosen the cake, then turn it upside down and whack it on the counter until the cake falls out. At this point you can cut it to fit a purchased suet cage or you can do like I did and make a hole in the middle, thread some twine through and hang the cake where the chickens can play and peck at it.
This is a basic recipe for making suet. You can change it up with any combination of seeds, nuts and dried fruit you want. Try oatmeal, squash seeds, or dried meal worms (yum) and send your girls wild. You can also use any type of container you have—from decorative molds to cupcake liners. When the cakes have set just remove them from the freezer container and store in a zipper bag until ready to use.
One more note: Suet blocks are best used when the weather is cold, otherwise the grease will liquefy and your cake will fall to pieces.
7 Ways to Keep Poultry Warm This Winter
Wild winter weather may not have arrived yet in many parts of the country, but that doesn’t mean you can forego getting your coop ready for frigid temperatures.
If fall chores and holiday preps kept you from attending to this very important task, you still have time. Remember the weather thing? It’s unpredictable.
Here on the coast of California we rarely get bitter cold temps, but we can get nights below freezing, so as a course of action we get the coop ready for cold weather. It’s just a good habit to get into, like cleaning gutters or splitting firewood.
Chickens are fairly tough creatures and can handle the cold much better than they handle the heat, if they have proper shelter. Below are a few tips to help keep your flock warm and comfortable all winter long; how ever long that may be.
1. Check the coop–give the coop a good look over for cracked or broken windows, leaky roof, and vermin digging in. Make sure the wire is safe and secure, and the nesting boxes are in good shape. You don’t want anything sticking out or sharp that may cause injury. Make any repairs needed.
The coop doesn’t need to be air-tight. In fact, you want to have a bit of ventilation as chicken poop is damp, creating moisture build up inside the coop, which can cause mold and respiratory problems.
2. Embrace the “deep litter” method of bedding. Not only will the thick layer of bedding keep your chickens warm, it will give them something to scratch in. The microorganism action, spurred on by nitrogen rich chicken poop will give you a head start on spring composting, too.
To get started–gather up whatever you have that’s free–straw, hay, leaves, shavings, wood chips and pile it in the coop until it’s about a foot deep. Supplement this with purchased straw if you need to. It may seem like a huge amount, but don’t worry. The girls will scratch around and mash it down. At night you can scatter scratch grains in the coop to encourage the girls to hunt and peck in the morning, fluffing up the bedding.
Turn the bedding each week with a pitchfork, paying special attention to the areas below the roosts because they can become damp. If they do, simply scoop out the damp areas and add more bedding. Add more bedding material as needed.
If you have brutally cold winters and your coop is large enough, consider lining the sidewalls with straw bales. Not only will this give great insulation, but adding more bedding will be close at hand.
Extend the “deep bedding” into the outside run of your coop to draw your girls out into the sun. You can use spent vegetable plants from fall garden clean-up, grass clippings and other organic matter. Your girls will have a ball finding out what’s at the bottom.
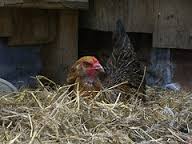
3. Make sure nesting boxes have plenty of bedding, too. Especially if they are metal like mine. I like to use a mixture of shavings and straw. The shavings make a good protective layer on the bottom, while the straw gives each box a loftiness for the hens to nestle into.
4. Keep water flowing. Although the weather may be freezing your chickens still need plenty of fresh, clean water. This may be a challenge if water troughs are constantly freezing.
To help keep water flowing use a large diameter black rubber tub instead of a metal waterer. Set the water bowl in the sun so the black rubber can absorb the heat. Putting ping pong balls (or other floaties) in the bowl will also help keep water from freezing because the balls move with the wind preventing the water from icing over.
You can also create a mini greenhouse lean-to with old windows. It’s similar to sitting next to a window in your house. It’s always warmer. Another option is to purchase a heated waterer. These work in most winter climates, but require electricity near the coop, and will increase your electric bill. Simple and free are always worth trying first before going the expensive route.
5. Let it shine. If you have electricity in your coop you also have the option of installing a heat lamp for warmth and for extra light, which encourages the girls to lay during dark winter months. I know there are two sides to this topic, and I won’t go into them here because we’re talking about keeping chickens warm, not extending laying or preventing molting.
If you decide to use a heat lamp, make sure to buy the kind with a protective cage so the chickens can’t touch the bulb and use a red bulb rather than white. White is very bright and hard on the eyes. Also, make sure the heat lamp is secured to a solid surface so it can’t fall and cause a fire. I’ve used a heat lamp for decades with no problems at all. Mine is clipped to a chain hanging from the roof joists with snap hooks.
6. Create heat from the inside out. Supplementing lay mash and scratch with a bit of cracked corn every evening creates energy to breakdown and digest the corn, which helps to build internal heat, keeping your chickens warm from the inside out.
7. Banish winter boredom to prevent feather picking, egg eating or pecking each other. Let’s face it, if you don’t like being stuck inside all winter long then why think your chickens would? We have cabin fever. They have coop fever.
When your chickens don’t have weeds or grass to munch on, bugs to scratch for or dust to bathe in they can get bored. Boredom can also be caused by a coop and run that are too small to provide interesting things for your chickens to do. So, send them outdoors to entertain themselves. If weather, and predator control permit, let chickens free range outside their normal confines. Having seasonal perches or stumps to stand on will encourage chickens to spend much of their day outdoors. Hanging overgrown squash, sunflower heads or whole cabbages will give your chickens endless hours of entertainment, not to mention treats and added nutrients.
Anything new and different in, or out, of the coop will pique your chicken’s curiosity, keeping them busy all winter long. Before you, or they, know it spring will be here, the sun will be out and temperatures will be on the rise. Just wait.
More ways to protect chickens from winter’s wrath.
Keeping Poultry Warm During Colder Months
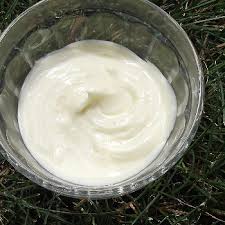
How to Make Udder Butter
For more than 40 years I raised sheep, with a few goats and cows thrown in here and there. I have seen plenty of udders stretch beyond the size of a basketball, sometimes wondering how the poor girls ever managed the ever expanding skin much less the weight. And, when the babies were born mom had to endure months of young sharp teeth gripping teats and anxious mouths aggressively nudging mom’s udder to let her milk down. I don’t think there is any other body part that takes such a beating as the livestock udder.
The weather doesn’t help much either. Most female livestock give birth in cold weather months, where low temps and frigid winds can chap and crack the skin of an udder, making nursing even more uncomfortable.
Running to the feed store to buy a can of udder cream or salve may be an easy solution, but making your own is easy and more organic for both mom and baby. Imagine a baby nursing from an udder that has been smeared with a chemical laden balm. No thank you!
INGREDIENTS:
- 1 ounce beeswax
- 2 ounces Shea butter
- 2 ounces coconut oil
- 6 ounces olive oil
- 4 drops Lavender essential oil
- 4 drops Tea Tree oil
- Plastic container large enough to reach in to scoop out the butter
DIRECTIONS:
In a double boiler, melt the beeswax over medium-high heat
When the beeswax is melted, add the Shea butter and coconut oil
Stir gently as it melts to incorporate
Add olive oil, mix thoroughly and remove from heat
Stir in lavender and tea tree oils
Cool slightly before carefully pouring into plastic container (let cool completely so it can set)
Apply to udder (for cows and goats apply after milking. For sheep who are nursing, apply morning and evening, when lambs are likely to nurse)
Store in the house, as a cold barn will make the butter a solid mass
Within a few minutes time you’ll be on your way to relieving the sore, chapped udders of farm girls who work just as hard we do.
As a side note, this udder butter works great on our hard worked human hands as well.
When the farm girls are happy, EVERYBODY’S happy! Right?
Running Against the Storm
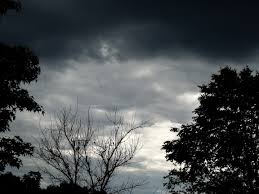
There is a storm on its way. Not a big one, but you never know how storms will change, weaken or become stronger. We need it desperately and I am thankful for it. I am also worried. Wildfires that burned and charred the hillsides just a few weeks ago left the ground barren of any vegetation. If the rain comes too hard that will mean mudslides and road closures. Not ideal for the first week back to work after a long Christmas holiday. I will pray for a gentle, steady rain as much as I send prayers of thanks for a break in the drought.
The news of the storm got us scurrying around the farm to batten things down before it hits.
Chicken feeders were topped off, as was the water trough, and more bedding was layered in the coop to provide warmth and give the hens something to do if the storm keeps them indoors.
Plants were fed and fertilized, and a few seeds were planted in the water trough garden to provide a salad greens in a month or so. A sprouted sweet potato I had been saving was planted in the potato tub as an experiment for an early crop. We’ll see how it does.
Citrus trees were covered to protect the crop from winds and losing fruit.
Rain barrels line the edge of the house, waiting to capture as much free water as they can, which will then be used to water in between future storms.
A load of firewood was picked up, hauled and stacked behind the garage, close enough to the back door to replenish the inside stack without getting drenched.
Lamps are strategically placed on night stands, on kitchen counters and in the living room in case we lose power. The generator has been pulled out and tested as back-up power for the freezer and fridge.
I think we are ready. We will know soon enough.
Celebrating the Month of Hallows

I’m sure I’ve mentioned how much I love fall at least a time or two, but it’s true. I love the way the air smells on an early foggy morning, the way it fills your lungs when you take a deep breath; the way it smells earthy and robust in the evening, like rich compost. I love the way the sun glints and sparkles over the dew on spider webs and grass as I head out to the barn to feed the critters in the morning; the way it bounces gold and orange across a late afternoon sky, just before it sets. I love the color of the leaves as they turn red and brown; yellow and gold, I love gathering firewood, picking pears, making soup and tasting fresh pressed cider. Yep, fall is my season, no doubt about it.
It’s not the fall of department stores though. You won’t find skeletons or graveyards or scary, gross, bloodied or battered images on my farm, nary a one. My fall is the fall of old, of old European traditions when autumn meant celebrating the end of summer, a harvest put up and a long winter ahead. This is my fall, color and fruit and hearty meals and warm satisfying drinks. It’s a time when part of the garden is put to bed and part is planted with winter hearty seeds. It is a time to reflect on the past and look forward to the future. It’s a time for quiet and peace.
My first weekend of October started off with an early departure from work. The drive home was slow and relaxing, my mind wandered from freeway to highway to slow country road. When I finally arrived at the farm I set about watering and feeding, a much easier task since the barn is empty of lambs and meat birds; only the chickens remain. The berries are just about done for the year and our unusually hot summer means we may not have the cool late evening breezes.
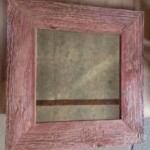
Once finished in the barn and back in the house I set out pumpkin spice candles on the mantel, in the kitchen and on various tables around the house. I love the scent they give off and the glow they lay over the house is beyond serene. I pulled out the primitive paintings of New England fall days, treasures from a trip to Vermont years ago. These are my October decorations.
It seemed like I had barely fallen asleep when sis and I were awake and off to a vintage fair up the coast. I love combing the stalls looking for useful old tools and gadgets, or new additions to the kitchen ware. I never pass up an opportunity to add to my gardening and farming collection either.
The long day left little to the imagination in the way of dinner. After a quick trip to the barn to collect the day’s bounty of eggs I was in the kitchen grilling lamb chops, making mashed potatoes and sautéing green beans, a simple dinner for a simple season.
Sunday was all about the farm and fall. We left the house early to gather a cord of firewood, adding to the stack that will be warmth and ambiance all winter, and found a tree full of fall pears, we picked a few. By mid-morning we were home, setting a new batch of seeds into rich warm compost. Our growing season is long and my goal is to have a productive winter garden. My greenhouse/potting shed is fully enclosed and all my gardening tools, supplies and implements go inside before the weather really turns. It is also my place to think and plant and read and plan. During a short break we lunched on leftovers and filled the crock pot with the makings of a hearty split pea soup; the start of a freezer full of easy meals.
It was afternoon when our arms began to feel the strain of swinging a hammer and pounding nails through metal as we repaired some siding on the greenhouse. We pushed on though until the job was finished, then we sat back and admired our handy work. There’s nothing better than working hard in the cool of a fall day. It invigorates you, makes you feel like Paul Bunyan. But, smarter heads prevailed and rather than risking injury by pushing on we quit for the day.
When I had showered and rested a bit I made a favorite fall treat— Apple Pecan Gingerbread. The aroma floated through the house while it baked, that, coupled with the scent and glow of the candles made the perfect ending to my first weekend of October. I can only hope they all turn out this wonderful.
Apple Pecan Gingerbread
Ingredients:
5 tablespoons butter, melted, plus more for greasing
3/4 cup chopped pecans
1/2 cup plus 2 tablespoons buttermilk
1/3 cup unsulphured molasses
1/2 cup sugar
1 tablespoon pure vanilla extract
1 egg
1-1/4 cup whole wheat pastry flour
1 tablespoon ground ginger
1-1/2 teaspoon baking soda
1 Firm cooking apple like Fuji or Gala apple, peeled, cored and chopped fine
Directions:
Preheat oven to 350°F. Grease an 8-inch loaf pan with butter.
In a large bowl, whisk together buttermilk, molasses, sugar, butter, vanilla and egg.
In a second large bowl, combine flour, ginger, baking soda and pecans. Add apples and toss well.
Stir flour mixture into molasses mixture and then spoon batter into pan. Bake until cooked through and a toothpick inserted in the middle comes out clean, about 45 – 50 minutes.
Let cool in pan for 30 minutes and then invert onto a plate and serve warm or at room temperature.
Frugal Friday – For the Love of Books
Ditch expensive book stores and visit your local library’s used book sale; save money while supporting a local endeavor every town should have. For just a few coins you can have a well stocked home library for pennies on the dollar.
Raising Meat Rabbits on a Suburban Homestead
From Hutch to Haute Cuisine
This article was written a few years ago, but still remains one of our most popular, so I decided to bring it back to the top of the line-up.
Second to chickens, I have always thought that rabbits made the perfect homestead livestock. They are quiet, easy to raise and don’t take up too much space. Plus, they are a great food source and provide the gardens with mounds of excellent fertilizer.
With just one breeding trio – two does (female) and one buck (male) – I can raise more than enough meat to feed my family for a full year. And the best part – it’s all done on an 8’ section of our barn wall.
But, before we get too far, as I always say when talking about raising any meat animal the biggest question to ask yourself is “Can You Do The Deed?” meaning, can you butcher your own animals or have them butchered by someone else. If you can, then in just a few months you will be well on your way to raising your own supply of healthy, drug free, humanely processed meat for the freezer.
To me the most important first question is how much meat you want to produce. This will determine how many does and bucks to buy. It will also dictate the size of your rabbitry. The average doe produces about 8 kits (babies) per litter, and she can be bred several times a year. With my two doe’s kindling (giving birth) twice a year I can raise enough meat to put rabbit on the dinner table almost every week of the year. Read the rest of the story »
It’s County Fair Time – WhooHoo
Food. Rides. Displays. Competitions. Rodeos. Awards. Animals. Fun by the Sea.
Our county fair is already a few days old, but the excitement just keeps building. Yesterday’s market lamb show saw one of DD’s protégées winning the coveted Grand Champion award and a former pupil winning Reserve Grand. Bravo! to Sam and Elizabeth for a job well done and an award hard fought won.
Makes me nostalgic for those days of old when DD was front and center in the show barn. Livestock is in our blood…forever.
But, we’ll be there tonight for The Band Perry concert.
Do you have a favorite contest at your county fair?
Recent comments
Aenean nonummy hendrerit mauris. Phasellus porta.