Archive for the ‘In the Barn’ Category
Why Raise Chickens on a Suburban Homestead?
So—you have started to turn your city plot of land into a suburban homestead. You have begun living frugally, you’ve simplified your life; begun to grow your own food and learned to preserve the harvest. Now, it’s time to start raising chickens. Why? You may ask. My answer…why not?
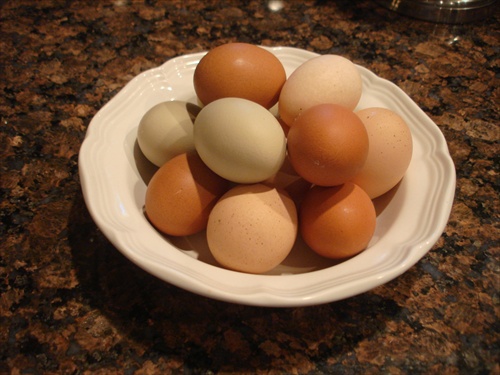
For one thing there’s the egg thing. Fresh out-of-the-nest eggs with bright orange yolks and shells that take a bit of effort to crack. Then of course there’s the supply and cost of eggs in the retail market–$6.00 per dozen and rising last I checked.
But, besides the eggs, you know that the hens producing those wonderful eggs have lived a charmed life compared to their industrialized cousins, full of fresh air and sunshine; kitchen scraps and garden trimmings. The zero foot print isn’t bad either. After all there are no resources used to get those eggs from the coop to your kitchen, unless of course you count the steps you take.
Another advantage of having your own chickens is the unending supply of fantastic manure they produce, which your garden and trees will thank you for by giving you an exceptional harvest. And, if you clean and re-bed your nesting boxes and coop before the fall weather sets in you’ll have a great supply of mulch to winterize your perennials.
Free-range chickens are also the perfect low cost rototiller. While they are clucking about entertaining you, they are also churning up the soil, grubbing around for nasty bugs and even the occasional small rodent that may venture into their path. And then, there’s the personality thing. Chickens are wonderfully funny and will give you and your kid’s hours of enjoyment. There’s nothing I like better than standing at the kitchen sink watching my girls cluck and scratch and run around the yard. They are way better than your cat! Your cat may be entertaining too, but she won’t give you breakfast. Am I right?
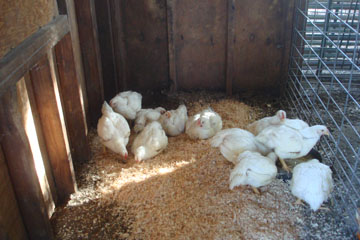
But, more importantly, at least to me, the best reason to raise your own chickens is good quality, wholesome, chemical free and humanely processed meat. That’s right, the meat chicken thing. In an 8’x10’ fenced in area, over the course of 70 days I can raise enough scrumptious meat to feed this little homestead for an entire year. This isn’t a permanent pen either. When the meat chickens are gone the pen gets taken down so the space can be used for another purpose.
Week 5: In the barn.
The journey to raising your own chickens doesn’t have to be an arduous one, lasting months or years. It can become your reality in just a few weeks. Even if you live in a big city, raising chickens can be a leap worth taking. And, I bet you’ll find out that your neighbors think it’s a cool idea, too.
There are a few things to know about raising chickens—egg layers or meat—so check out these articles for more information.
The Practice of Keeping Chickens
Raising Meat Chicken in Suburbia
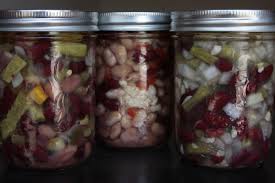
How to Make 3-Bean Salad
Summer is still in full swing in my neck of the woods and gardens literally explode with veggies waiting to be harvested. To keep pace with all that is produced, canning pots and vacuum sealers seem to run all the time. This preserved harvest will wait to be consumed in the months to come, when days are short, nights are long and we can do nothing but dream of digging our hands into fresh spring earth.
I try to revel in each season as it comes, but my planning mind is always one step (or one season) ahead. We may be in summer, but my mind is thinking fall and winter, and what we need to do to prepare, and what we can be enjoying that will remind us of summer.
But, we have to deal with what is at this moment. This week has been about beans and different ways I can use them that will be a delight in the not-to-distant future. So I settled on a batch of 3-Bean Salad. There’s nothing like that tangy sweet with firm beans and crisp veggies to harken us back to long lazy days. It will be just the treat we need when paired with slow cooked pulled pork on some stormy wet weekend. It will not only be delicious, but invoke the pleasures of spring and summer. This simple to make summertime favorite is easy and makes 8 to 9 half pints.
3-Bean Salad Recipe
2 cups green or yellow beans (or a combination of both), cut into 1-inch pieces
1 can red kidney beans, drained and rinsed
1 can cannellini beans, drained and rinsed
½ can garbanzo beans, drained and rinsed
1 medium onion (about ½ cup), sliced thin
1-1/2 stalks celery (about ½ cup), sliced thin
½ red bell pepper (about ½ cup), sliced thin
½ green bell pepper (about ½ cup), sliced thin
Brine:
1 cup white vinegar
8 oz. l fresh lemon juice
1-1/2 cups white sugar
2-1/2 cups water
½ cup vegetable oil
1 Tbsp. Kosher, canning or pickling salt
DIRECTIONS:
Wash and snap fresh beans. Blanch for three minutes and cool completely in an ice bath. Drain and rinse canned beans. Slice and measure other vegetables.
Combine vinegar, lemon juice, sugar and water, and bring to a boil. Remove from heat. Add salt and oil, and mix well. Add beans and veggie mix and bring to a simmer over medium-low heat. Cool and refrigerate for 12 to 14 hours. This starts the marinating process.
Sanitize jars, lids and rings while heating bean mixture to a boil. Fill hot jars with bean mixture and top with brine leaving ½-inch of headspace. Remove bubbles with a plastic or wooden spatula. Wipe rims with a slightly damp clean cloth, place lids and rings on and tighten finger tight. Process in a water bath for 15 minutes at a full boil. Once jars have “popped” tighten rings again, cool and wait to ENJOY!
Raising Meat Chickens in Suburbia

From Day Old to Dinner Entrée – If you want to make sure the chicken in your oven is raised well and processed humanely –Raise them yourself!
Most of my friends cringe when I tell them that we raise our own meat chickens and my daughter NEVER tells her friends for fear they will avoid eating over. But, this relatively simple process has become an integral part of our suburban homestead and food storage plan.
I’ve always had laying hens to provide us with eggs for the table and manure for the garden. And, when the girls were too old to lay they got to live out their life scratching around for bugs, churning up the soil and adding manure where ever they went; a mutually beneficial relationship I think.
It wasn’t until my friend Sandy bought and raised her first batch of meat birds that I really started to get interested in raising our own chickens for meat. But, raising 50 chicks seemed a bit too ambitious for a beginner, not to mention someone who lived in suburbia. So, several years ago I began by raising 8 Cornish/White Rock crosses, usually referred to as Cornish Rocks. These fast growing birds are the same breed raised commercially and sold to restaurants and supermarkets either as whole birds or in cut-up parts.
My test project was a huge success! All 8 chicks lived to their 8-week maturity, were healthy and seemingly happy, and the processing of the birds was nothing like I had imagined. When the project was over and we were feasting on own homegrown chicken, juicy and full of flavor I was determined that meat chickens would be an annual crop raised on our little suburban homestead. Read the rest of the story »
Predator Protection on a Suburban Homestead
When you think of a suburban homestead you do not immediately think of predators killing your livestock. But you should, because your perimeter fencing, whether it be chain link, block wall or wood fencing, may not be sufficient to ward off animal attacks. Suburban homesteads are just as vulnerable as any other homestead or farm, maybe even more so because of the proximity of domestic dogs and feral cats.
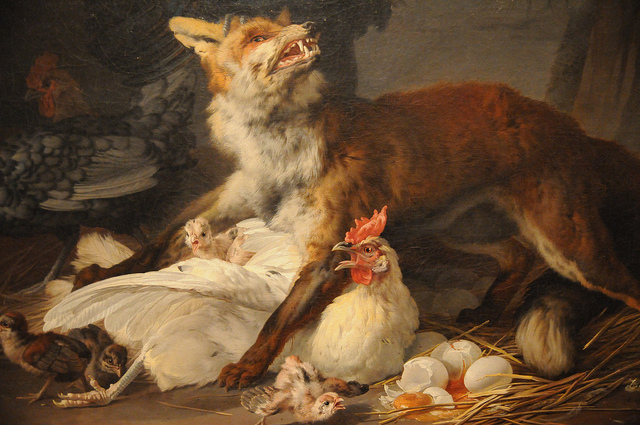
Ninety-nine percent of the time, predator losses can be prevented. But, it’s the homesteaders’ responsibility, obligation even to be cognizant of the area in which you live and what critters live around you. Do not mistake the cute cartoon characterizations of raccoons, skunks, weasels or foxes as harmless. They all have the potential to wreck havoc on your small livestock. A raccoon can literally pull a chicken right through a wire fence and weasels can kill a nest full of chicks or kits (baby rabbits) in just a few minutes. Even foxes will kill, given the chance. Then there are the airborne predators – like eagles, hawks, falcons, and owls that can swoop down and pick off rabbits and chickens.
Free-ranging chickens will look good to stray cats, while the smell and noise of your livestock can be an attractant to wandering dogs. (Personally, I think domestic dogs are the worst most indiscriminant predators. A wild animal killing for food is heartbreaking, but somewhat understandable. But, a domestic dog that runs an animal to death or grabs at legs and flesh just for play, with no intention of consuming it is intolerable.)
With information about local wildlife and domestic animals in hand, you can plan and build structures and pens that will keep out what you don’t want in.
Barns, Sheds and Outdoor Pens
Structures and fencing do not have to be extravagant or expensive to provide proper protection, but they should be solid and secure if they are going to be successful in protecting your animals. Read the rest of the story »
Selecting Livestock for your Suburban Homestead

It’s that time of year, folks. SPRING—the time when chicks hatch, ewes lamb, cows calve, sows farrow, does kid and rabbits kindle. A farm is alive with life as each new addition is born. But, as suburban homesteaders can we experience the same pleasures of raising livestock for food and fiber on our city lots just as our friends in the country can? Yes, we can!
Instead of curling up with a poultry catalog, scanning the internet dreaming of what could be or bemoaning what you think you can’t have, why not look into what you can have?
Bringing home your first flock or herd, or adding to an already existing one can be an exciting time. But, there are some things you need to do first. The most important first step, and the one I always recommend to any new suburban livestock owner, is find out what you are allowed to have on your property. Some suburban homeowners will only be able to raise a few rabbits, chickens, ducks or maybe a turkey, while others, like me, on a larger lot with different zoning regulations can have a larger variety – sheep and pigs. Regardless of your situation, you can still raise some of the meat and eggs your family eats, and that is better than nothing.
Including livestock on your suburban homestead is the backbone of a diversified healthy farm system and one that should be seriously considered regardless of your lot size. Even a few laying hens can clean up kitchen scraps, produce eggs and provide manure for the garden. It’s a whole cycle, folks.
Once you have determined which animals you are allowed to have on your property, decide what you want to have and how many. If you are allowed to have rabbits, but don’t like rabbit meat then don’t raise rabbits, at least not for meat. Rabbits for fun and manure is another choice.
The amount of space you have available for raising livestock will also dictate what you can raise and how many. Different species have different space requirements—chickens and rabbits only a few feet per animal, turkeys quite a bit more. As an example, I am zoned to raise a steer on my property, but, with gardens, fruit trees, berry patches and my existing animals I don’t have adequate space available for an animal that will eventually grow to 1000 pounds or more. I am looking into raising a heritage breed which tends to be small, but I may not have enough space for that either, even though I am zoned for a steer. So, I am content with raising meat chickens and ducks, freezer lambs and pigs because I can comfortably house and raise these animals if I raise them at different times of the year.
When you have decided what to raise and have calculated how many of each species you have room for, now is the time to seek out a breeder. Read the rest of the story »
Kitchen Fixes for Garden Problems
Solving garden woes is as close as your kitchen pantry—and free!
As an organic gardener the last thing I want around my veggies, fruits, flowers or free ranging chickens is a bunch of toxic chemicals. But, I still want to deal with the garden pests and problems that arise during the growing season. So, when I spy the creepy, crawlies, invaders, marauders or garden challenges I head to my pantry for the solution.
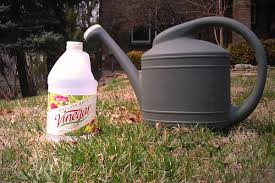
Getting rid of weeds — Plain white vinegar will kill weeds outright. But, be careful. It’s not selective and will also burn any plant it comes into contact with. For best results, spray on a sunny, warm day-75 degrees or more-and stick to non-planted surfaces like walkways, gravel or brick pathways, or in between cracks in cement. It won’t get down to the root, so a few applications may be needed. It’s a cheap way to forego Round-Up so keep plenty around.
Banish aphids and mites — These tiny pests can suck the life’s blood right out of vegetables, fruits, flowers and shrubs. If a plant has liquid in its leaves these guys will find it. To drive them out mix a few drops of liquid dish soap with water in a spray bottle and spray each affected plant generously. For larger areas mix 2-tbsps of soap with a gallon of water and pour into a pump sprayer.
Enriching sandy soil — Used coffee grounds, from your morning fix, can also fix sandy soil and increase water capacity by adding organic matter. The grounds can also improve the friability of clay soils. Simply dig them into problem areas. If your garden needs more than your morning brew can provide check out your local coffee house. Most Starbucks, Coffee Bean & Tea Leaf, and Peet’s Coffee locations offer used grounds for free, just ask.
Slaughter slugs — Slugs are attracted by the fermenting yeast in beer. Pour beer into a shallow pan like a pie tin and sink it into the soil. The smell will have slugs stampeding and maybe even dying happy.
Seasonal powdery mildew — Warm days and cool nights creates the perfect breeding ground for the mildew spores. And, the wind helps spread it from plant to plant. Mix a tbsp. of baking soda and 1 to 3 drops of horticultural oil in a gallon sprayer of water to help prevent the unsightly fungus. Spray both sides of affected leaves weekly for best results.
Eliminating earwigs — Earwigs are omnivores (plant eaters) and never live in the human ear as some old wives tales tell. To trap them, lay paper towel tubes, wrapping paper tubes or any type of cardboard tube filed with large diameter straws and place under plants where you see earwigs or earwig damage. Earwigs are active at night, so in the daylight they hide…in the tubes. Now you can grab the tubes, cover the ends with your hand and dispose of the earwigs. Some people even shake them into a bucket of soapy water.
Repelling wildlife — Ground squirrels, moles, gophers and even deer can wreak havoc on a garden. To ward them off sprinkle a generous handful of cayenne pepper on and around plants you don’t want them munching on.
Garden solutions are as close as your kitchen pantry and cost just pennies on the dollar.
Clipping Wings so Hens Can’t Fly
 With a reduced flock of hens in the barn I found myself craving some new additions a few weeks ago. As the feeling intensified the urge to buy more hens also grew. But, with a kid gone off to university, scholarship application deadlines looming and a hectic work schedule brooding a new batch of chicks was just not in the cards for our little farm, at least not this spring.
I was in our local hardware store lamenting my plight when the owner and friend suggested I call his friend who raised a variety of breeds. Armed with that knowledge nothing was going to stop me from adding to my flock. So, a few days later I called John and asked about breeds and age. Low and behold he had several hens for sale that had just started lying. Perfect, I thought. No brooding. No increase to my electric bill and instant egg production. I have to admit the birds were a bit more than I like to pay, $20 each, but when I took into consideration the time and money in chick starter it seemed like a fair trade. So we made arrangements to meet that weekend to hand off the hens.
I bought 2 Cuckoo Marans and 2 Americana’s. The Maran’s lay dark, almost chocolate brown eggs and the Americana’s lay bluish green eggs. Now with the others who lay a light brown egg we get a veritable rainbow of egg colors.
Perfect scenario, right? WRONG. The new additions had been raised on a large cattle ranch to the north of town, out in the calm and quiet of the range and hills. They were not use to the local commotion of my semi-rural street, with truck and motorcycles zipping down the street. They were nervous and flighty. I kept them in the coop for a week to get them acclimated to their new surroundings. But, that clearly was not enough time because the first day I let them out three got spooked and flew over the fence and into the commercial tree nursery that borders the east side of our property.
Of course I yelled for back up and Brianne came running. Not the school holiday she was hoping for, but pretty normal for us. After assessing the situation I grabbed the large fishing net, handed it to Brianne who immediately looked at me with this stunned, but knowing face, “you want me to climb the fence and net the hens? “Yep”, I said, “that’s the plan”. Shaking her head she shimmied over the fence and proceeded to corral the wayward hens. As she stalked through the low lying shrubs I sprinkled scratch feed near an opening in the bushes. Seemed like the perfect place to corner the new hens. Things went fairly well with the first two birds. In short order they were caught and put back into the coop for another week or so of acclimating. But, the third hen posed more of a challenge. After a few hours of trying to corner, corral, trap, cajole, tempt and sometimes outright pounce on the damn thing we gave up and figured she would either be lost to a night-time predator or fly back over the fence to be with the rest of the flock.
I was not happy at losing a $20 bird, but I also had no more time to chase her all over the open space of the nursery with no hope of catching her by hand. Nature would have to take its course, for good or bad. And, so it did.
A few days went by before the rather tuft up hen, tired of the outside world and the dangers that lay there flew back over the fence almost right in front of me. I stood there in amazement as she sauntered over to the coop and squawked and paced to be with the rest of the brood. She didn’t even flinch when I walked into the barn and unlatched the gate to the coop. She jumped through the doorway running for water and feed like she hadn’t eaten in days.
Not to assume she had learned her lesson I decided to clip the wings of all our newcomers so there would be no more escapees.
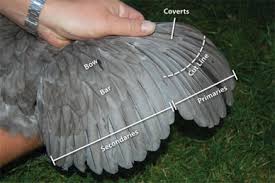
Clipping chicken wings is a fairly simple process that doesn’t cause the birds any pain or discomfort, if you do it right. Here are the steps.
- Have a pair of sharp scissors handy.
- Catch the bird you want to clip and hold her close and snug to your body with your hand underneath her for support, but don’t squash her.
- Splay the wing out so you can see the different layers of feathers.
- Locate the primary feathers. They will be long and near the end of the wing. There are about 10 of them. Check to see if the feather is immature with blood flow in the shaft or mature with a hallow shaft. If immature, cut above the blood flow.
- Clip across the primary feathers about half way down the length of the feather. Don’t get too close or you may cut the flesh. Check underneath every few feathers to make sure you are on the right track.
It’s that easy.
Homemade Chicken Treats
 Winter can be tough on chickens. Keeping them warm, having enough “unfrozen” water available and getting them enough energy to keep them healthy during the long winter months. This winter, especially, has been hard on livestock and humans alike. The endless freezing temps and unceasing snow fall has made everyone feel like Spring will never come.
Harsh winters also mean that chickens are not able to scratch about—their favorite past time—for bugs, weeds and spent produce. Boredom can set in and so can the fighting and cannibalism that goes along with spending long days cooped up in, well, coops.
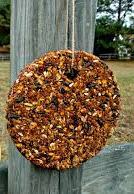
One way to fend off the torment of winter is to give your chickens a supply of good treats. Not just scratch or the occasional green tops, if you can get them in some parts of the country, but a wholesome combination of nutrients and energy boosters.
Homemade chicken treats are a cheap and easy way to give your girls what they are craving. The combination of grains for nutrition, molasses for energy, lard or tallow and egg shells in a great mixture that will help them keep warm while their bodies digest, give them energy and keep them occupied and entertained as they scratch and eat the treat blocks.
To make your own chicken treats try this easy recipe below.
2 cups Scratch
1 cup Old fashioned oat meal
1 cup Cornmeal
¾ cup Wheat germ
½ cup Dried fruit, chopped
½ cup Crushed egg shells
4 Eggs, beaten, plus the shells, crushed
¾ cup Blackstrap molasses
½ cup Coconut oil, Tallow or Lard (liquefied)
Preheat oven to 325. Mix all dry ingredients together then add all the wet ingredients and mix well. Pat into pie dishes. The block should be about 2 inches thick. Recycled pie plates work great for this. If you want to hang your block use a chopstick or straw to make a hole about an inch from the edge. Bake for 30 minutes then cool completely. Run a knife around the edge, tip the pie plate over and let the block fall out. Thread twine through the hole, tie a knot and hang where the girls can reach it.
If you have a smaller flock 6-inch pie tins can be used and the extra treat blocks can be frozen until needed, just thaw completely before hanging out for the chickens.
For a fun alternative use cookie cutters to make decorative shapes. Poke two holes in each cookie, thread twine through the holes to make a garland and hang it in the coop or outside on sunny days.

37 Pantry Staples for Preparedness
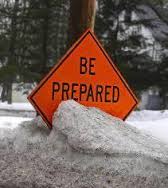 Preparing for a crisis or power outage or storm is an essential task for any homesteader and home-owner alike. It is an every day task and important topic to discuss with family and friends because when disaster strikes food and water will disappear from store shelves at an alarming rate. In fact, most authorities estimate there are 37 essential food items that will become impossible to find less than 2 hours after any disaster strikes.
Take stock of the 37 most important goods to buy from the grocery store while they are still available and save yourself and your family the stress and drama of seeking them out post crisis.
Stock up on these foods before a crisis hits
- Distilled water and seltzer water — because we can’t live without it.
- Canned liquids — like fruit juice, broth, milk and veggies.
- Powered milk — regular or goat’s milk, but not non-dairy creamers.
- Hard cheeses encased in wax — they won’t grow mold, retain moisture
- Protein bars and protein drinks — Whey Powder or protein concentrate.
- Canned & dehydrated meats — jerky, tuna, smoked salmon, sausages.
- Coffee, tea and bouillon — for energy, cooking and medicinal use.
- Oils — small containers of olive, coconut, Ghee, butter, shortening, lard.
- Whole wheat flour — non-GMO flour and whole grains for longer storage.
- Wheat germ and Shredded Wheat — for fiber, vitamins and protein.
- Potato flour — not potato starch for gluten free cooking, baking and soups.
- Corn as a grain (dried) — can be ground into flour, for baking and grits.
- Corn as a vegetable — non-GMO canned.
- Oats and Oatmeal — good source of fiber, a hearty breakfast.
- Bread crumbs & stuffing’s — sealed in plastic, for coating, fish cakes, and casseroles.
- Shelf stable, ready to eat meals — like tuna kits, GoPicnic & French Bistro.
- Crackers — packed in #10 cans, accompaniment for soups, tuna salad & PB.
- Potato Flakes & au gratin potatoes — choose those without hydrogenated oils.
- Rice — store instant to save on resources, jasmine, basmati, Arborio, short grain, & brown.
- Pastas — filling and versatile for soups, stews, casseroles & main dishes.
- Raisins, dried fruits, fruit strips — for protein, fiber, iron, vitamins & cooking.
- Jams and jellies — a comfort food along with glazes, marinades and baking.
- Canned fruits — provide calories, hydration, vitamins, use in soups and baking.
- Canned veggies — think canned with calories like root veggies, yams, sweet potatoes. Also sauerkraut, cabbage and beets, and carrots, peas and potatoes.
- Beans, legumes & peanuts — dried and canned for energy and fiber.
- Nuts, seeds and nut-butters — raw, roasted & buttered for cooking & eating.
- Honey — even if you don’t use it, buy some for flavoring, medicinal & topical.
- Iodized salt — needed to preserve and season food; inhibit germ growth and regulate fluid balance.
- Sugars and Molasses — granulated sugar, brown sugar and powdered
sugar wrapped in plastic, to protect from insects. - Spices and herbs — buy more of the spices already in your cupboard.
- Condiments — pickle relish, small cans of mayonnaise mustards, Tabasco sauce,
vinegars (balsamic, cider and rice whine), maple syrup, vanilla and almond extracts, cocoa powder and chocolate syrups. - Chocolates — it’s a morale booster that could prove essential.
- Vitamins — multi-vitamins plus Calcium with Vitamin D and magnesium.
- Food bars — are compact nutrition complete with protein and energy.
- Vodka — you can cook with it, drink it, provide first-aid, bug repellent or barter
- Dry yeast — for baking bread even though it has a short shelf life.
More stock-ups…
Along with the 37 essential food items for your Prepper’s Pantry, you also need to consider non-food related items, like hand can openers, firewood, charcoal, lighter fuel, candles, paper plates, plastic utensils and disposable cups. Also, remember feminine hygiene products for every female in your house!
If you have a root cellar, you can store fresh apples, potatoes, onions and garlic, or any other root vegetable, which will last for several months.
Last, but not least, a disaster of any kind can and most likely will be a stressful time, so never feel guilty about stocking a few of your favorite junk food items.
There you have it — 37 essential food items to stock for disaster prepping. With these items on stand-by you will be more prepared than most households in the country, which will make you and your family very happy when the unthinkable strikes.
Recent comments
Aenean nonummy hendrerit mauris. Phasellus porta.