Archive for the ‘In the Barn’ Category
Parasites in Poultry & How to Handle Them
Discovering your flock has a pesticide problem usually leads to a mad scramble to eradicate it immediately. But that may not be the best solution. Whether you have a small or large flock permanent eradication is not possible, but what is possible is to manage the parasite population.
There are risks in unchecked infestations, make no mistake about that. Diminished egg production, weight loss, or even significant die-off can happen, and it can happen in a short period of time.
Attempts to permanently eradicate parasites can leave flocks more at risk because they are not developing natural immunities that are developed with low levels of infestations. Sounds strange, I know.
Birds that live outside, scratching in the dirt, chewing on bugs, grubs and other crawlers are building natural immunity, while birds that are raised and housed in wire floored areas are not coming into contact with the elements that help them build natural immunity.
The most common poultry parasites, common to most areas of the U.S., fall into two broad categories—common internal parasites and external parasites.
INTERNAL PARASITES
Common internal parasites include roundworms, tapeworms, cecal worms, and capillaria.
To manage internal parasites, keep birds on clean ground. Parasites drop eggs on bedding and coop litter, which can then be picked up by the birds. Keeping the litter dry and fresh hinders the growth of the parasites. Giving the birds adequate roosts and a larger area in which to roam, means they will not be walking on their own manure which will also help. Keep in mind, though, that birds wandering outside can then become victim to birds of prey or feral cats.
Non-organic treatments for internal parasites can include: piperazine, phenothiazine, or dibutyltin dilaurate.
Organic treatments for internal parasites can include diatomaceous earth mixed into the feed.
EXTERNAL PARASITES
Common external parasites include poultry lice and mites.
To manage external parasite infestation, flocks should be checked regularly. Nesting boxes and floor litter should also be cleaned and changed regularly. Any detection of mites or lice should be treated early to prevent more extensive infestations throughout the flock.
Lice can be treated topically with nicotine sulphate, malathion 4-7% dusts or stiros.
Organic treatments for lice can include dusting poultry with diatomaceous earth and sprinkling it onto nesting box bedding.
Rather than eradicating parasites, the goal should be to create conditions that limit the parasite population, while also allowing birds to build up natural immunity. Sanitation is key to preventing an infestation of both internal and external parasites.
What to do When a Hen is Egg Bound?
I came home the other night to find one of my hens dead. She had hidden herself in the corner of the coop, near the feed bin.
It was sad, because I love watching my girls cluck and scratch around the yard, and I will miss the eggs, but losing livestock on a homestead is not uncommon, it’s part of the farm life. That doesn’t mean it’s easy or something we get use to. A farmer NEVER likes to lose livestock because it’s lost income or food. But, aside from the financial considerations, farmers are the most animal loving people you will ever meet. They will go out of their way to protect and care for their animals. So, if we lose one, we take it personally.
Livestock loses are, however, something we must accept as part of living this life. Illness, disease, predators, even accidents are a fact of life on a homestead. We do our best to prevent such events, but sometimes life is beyond our control.
Ok…I’m gonna say something you may think is completely horrible, but completely true…livestock are not pets.
There…I said it.
Sure we can get attached to a friendly milk cow, a playful goat or a wonderfully productive breeding ewe, but at the end of the day a vet bill may add up to more than the animal is worth, in terms of monetary value. The emotional value is a different matter altogether.
Trust me, after decades of raising livestock I have lost my fair share of animals—sometimes to illness, sometimes to lambing difficulties, sometimes to predators, and sometimes in horrific circumstances, like a dog attack.
Raising livestock is certainly NOT for the faint of heart!
After checking the hen over, I determined she died because she was egg bound, which is the inability of a hen to fully expel an egg. Basically, the egg got stuck in the oviduct.
Causes of egg bound:
- A lack of calcium or other nutrients needed for good health
- An overweight hen
- A young hen
- An unusually large egg
- A misshapen egg
What was really puzzling is that my hens are fed a balanced layer mash with added calcium, they have free range of the garden, so they get plenty of exercise and are not overweight, and they are not young. So, most of the causes of egg bound were not present.
Hens also usually show signs of being egg bound, which she did not, at least not that I saw the day or so before she passed.
Signs a hen is egg bound:
- She lays around looking sick, lethargic, fluffing herself
- She has a decreased appetite and isn’t drinking much
- If she is walking, she walks like a penguin, stopping and trying to squat
- She may appear to be straining, like she’s trying to expel something, which she is
- She may pump her tail up and down, trying to expel the egg
- She may also be panting
What can you do if your hen is egg bound?
There are a few things you can do to help the hen release the egg, once you’ve determined she really is egg bound. The above signs can be an indicator of several other conditions, so you’ll have to be sure.
First, wash your hands in warm soapy water and apply a lubricant, like vegetable oil. Very gently insert a finger into the vent, pushing straight back an inch or two. You should be able to feel the egg. If you don’t, she’s not egg bound.
If you do feel an egg, prepare a shallow tub or wash pan with warm water and Epsom salts at a ratio of 1-gallon water to 1-cup salts. The water should be deep enough so that the hen’s belly is submerged about 3 to 4 inches.
Gently put her into the water bath and let her relax there for 15 to 20-minutes. The moist heat will help her relax so she can pass the egg. After 20-minutes remove her from the water and gently towel her off. Apply some of the vegetable oil around and just inside her vent, then set her in a warm, dim, quiet place where she can rest. A dog crate works great for this because you can keep an eye on her.
Once you get her settled in, give her 1cc of calcium and some Nutri-Drench (according to package directions), then leave her alone to pass the egg. This may take a bit of time, so be patient. Be especially gentle during the entire process because the hen will be uncomfortable.
Despite your best efforts, though, she may not expel the egg, at which point you can seek a vet’s advice.
So—here’s my second horrible statement.
Does a hen warrant the expense of a vet?
For me personally, the answer is no.
There, I said it, again.
This particular hen was 3 years old. She was at the end of her productive life, and for the cost of a visit to the vet’s office, I could buy a whole new flock. So, no, if I had discovered her in time, and was not able to help her expel the egg I would not have sought vet services. It’s part of the life I’ve signed up for–the good and the bad.
What can you do to prevent a hen from becoming egg bound?
- Feed a high quality layer mix
- Provide oyster shells or crushed egg shells free choice
- Limit treats
- Make sure hens have room to roam for exercise
Springtime is Chick Time – Easy DIY Chick Brooders
Like most farm girls I’m a sucker for baby livestock,
especially chicks—seriously.
There’s no hope for it.
Even when I’m not looking to add to my flock I find it hard to pass up those chirping, fuzzy puffballs.
So—I was totally impressed with myself when, in a moment of total self-control, a few weeks ago I oohed and aahed over the dozens of livestock tanks at my local Tractor Supply filled with, you guessed it, chicks, and was able to walk away without buying a single one.
Be still my heart.
I must admit, though, I will miss those sweet little chirps that greet you anytime you’re near the brooder, but with the layers I have and the number of eggs I’m getting, I DON’T NEED ANY MORE HENS.
Sad to say, but there it is.
If baby chicks are in your future, good for you! I’m jealous.
If you are new to raising baby chicks keep reading…the basics are below.
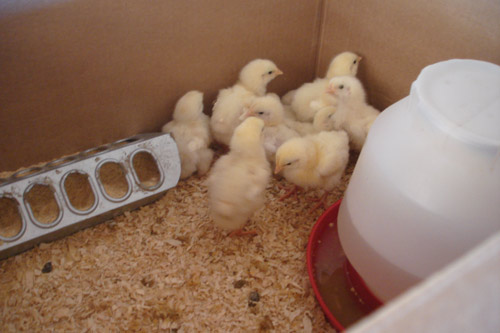
Basics of Brooding Chicks
Brooding chicks is fairly simple. The most important things to remember are to keep them warm (at least 95-degrees), dry, fed and away from animals that like to eat them as snacks, like dogs and cats.
A brooder is simply a container where the chicks can be confined in a warm environment after the hen has hatched them. Brooded chicks are not going to be raised by the hen. I have hatched many batches of chicks over the years and let the hen raise them, so I have not always been dependent on purchased chicks. However, with DD off on her own, I don’t need as many layers as before, so when I need to replace aged hens I purchase chicks locally.
I brood my chicks until they are “fully feathered out”, meaning they look more like adult hens than gangly teenagers. This will take about 6 weeks or so, so placing your brooder in an area where you can check on the chicks often, but where it won’t be in your way is important. We used to set up our brooder just off the kitchen so we could peek in every time we passed by.
Brooder Supplies:
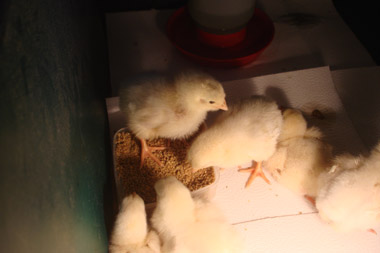
Bedding – I use pine shavings because the chicks don’t slip on the bottom of the brooder, splaying their legs. The shavings also help absorb the dampness of the droppings and spilled water.
Heat Lamp – This is a must as the lamp keeps the chicks warm. I use the clip-on kind with an infrared, non-flammable bulb.
Thermometer – Chicks need heat to survive and thrive. 95-degrees is the minimum. Having an outdoor thermometer will help you monitor the temp inside the brooder and make adjustments when needed.
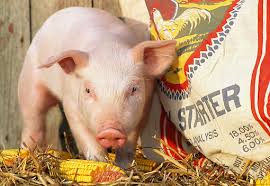
Feed – Chicks need a high level of protein for proper growth, so choose a pre-mixed “Chick Starter”. It will have all the necessary nutrients already mixed in. It comes medicated and unmedicated depending on your preference.
Water – Chicks drink a lot of water, and need a constant supply for good health. A gallon sized self-waterer is a good choice.
I’m not really good at the last minute thrown together brooder, so I’ve developed a system over the years that makes life much simpler. For one, I keep all my brooder supplies in a large plastic lidded container, which just so happens to be my brooder box. At the end of brooding one batch of chicks all the equipment is cleaned and sterilized, and placed in the box, so the next time I get a batch of chicks everything is clean, contained in one place and easy to find. No more hunting down stuff in the barn or garage. The brooder can be set up in just a few minutes. Easy!
There are many ways to brood chicks, and I will touch on what I think are the easiest and my favorites.
#1 — The Plastic Lidded Storage Container: This is my favorite brooder container. It’s inexpensive to buy, about $10, easy to set up and can be used to store all your brooder equipment when you’re done. If you have dogs or cats you may want to put a window screen over the top of the box so they can’t poke their noses in. If pets aren’t a concern, just off-set the lid a bit to make room for the heat lamp and to help keep the heat in. A word of caution: use a heat lamp that has a cage over the bulb. If the bulb touches the plastic it will melt a hole in your box. Been there, done that!
#2 — The Brooder Box: This is a wooden box that can be purchased at feed stores or on-line. They are usually made of thin plywood. Some have hinged sides so the box can be folded down for storage. This is not one of my favorites simply because they can be expensive, can warp out of shape, are hard to sterilize, and after a few uses the wood absorbs the smells of pooping chicks.
#3 — Livestock Water Tank: These are traditionally used by feed stores to house ALL their baby chicks. Although they look really cool and are sturdy, and all that, they are expensive (about $100 depending on size) and hard to store when not in use. But, if you have the space, go for it!
#4 — Cardboard Box: This is another favorite of mine. I get large, thick octagonal potato boxes from our local Big Box store and set up the brooder in the garage. The heat lamp can be hung by the rafters with a chain or rope. This is especially good if you are buying a large quantity of chicks. (I even raised our first batch of Cornish Game Hens in a box like this, albeit there were only 6. Worked like a dream.) When you’re finished using it, the box can be cut down and used as weed guard in garden pathways or put in the trash; nothing to store.
So—there you have it folks, a few simple ways to brood chicks that are easy, fast to setup and inexpensive to buy. Now you have no excuses to pass up chicks when you see um.
Let spring begin!
Homesteading Update
Taking some of the Bad and Ugly out of my Homestead
A few weeks ago I wrote about feeling like a complete and total failure at this homesteading thing. Work and life over the past several months had gotten so much in the way of my farm life that my little homestead was showing the despair of it all.
In that piece I talked about picking myself up, brushing myself off and starting fresh. Little-by-little I have been working on it, taking at least one project each weekend and completing it. One foot in front of the other has been my motto, each baby step getting closer and closer to getting back on track.
The first weekend of reining back my homesteading life was actually really fun. It had been months since I spent much time outside and on this unusually warm Saturday I spent most of the daylight hours out in the fresh air and sun, just puttering, as I call it. I refilled my patio water trough planters with new soil, breaking up the clumps and smoothing out the soil for planting. I sowed seeds for a few cool weather veggies I use often, like carrots, beets, spinach, radishes, and a variety of lettuces. Our mild winters make it possible to garden year-round.

My next project was a bit harder. I hung a few long-handled tool holders on the wall of the barn so I could get my tools out of their old metal trashcan and someplace where they could be organized. The project wasn’t hard in itself, but harder because I am beginning to really feel my age. It seems I can’t run around doing 15 different projects in a day like I use to. And, of course, I don’t want to hurt myself, so my motto has become “slow and steady wins the day”. Projects may take me a bit longer, I may take a few more breaks than I use to, but projects do eventually get finished—that’s the important part.
I was feeling so energized after getting my tools hung that I began brushing down the inside of the chicken coop in preparation for the arrival of my new hens. I knocked down cobwebs, brushed the windowsills and cleaned and repacked the nesting boxes. One thing led to another and soon I was raking the outside coop area and moving the dirt and straw and shavings to the sad, unused squash patch. Before I knew it I was digging out the door, which was piled up with so much dirt it wouldn’t close.
By the time the afternoon sun began to dip below the horizon I had raked and dug out the entire barn floor! More than 10 wheelbarrows full of aged manure, straw, shavings, and dirt went into the squash patch that day. Not bad for a middle-aged woman who hasn’t done much physical labor in recent months:)
Small steps often, right?
My most fun accomplishment of all, though, was replacing my laying hens. A rogue attack by an opossum had left me with just one older hen. ONE hen does not make a flock, or a very big omelet for that matter. We have a local farm stand that brings in day old chicks in the spring to use for educational purposes with the public and then sells off most of them in October so they don’t have to winter them over. I had been on the list for weeks before I got the call. November 1st was my pick-up date. Not ideal since the first was a Tuesday and a work day, but I was determined to get there and pick out my new hens, so I took the morning off work.
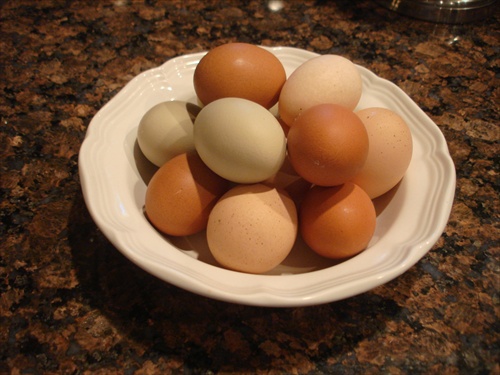
By 10:00 am I had my carrier cleaned up, in the back of my truck, and was heading down the road to the farm stand. When I got there the young ladies who run the farm took me over to the coop where all the hens were penned up. There were about 40 or so hens, mostly Rhode Island Reds and Barred Rocks. I wanted 4 or 5 hens of the same breed, but I really wasn’t interested in either Reds or Rocks. I looked around and spotted two plump Americana’s, which I immediate claimed. Now to find some pen mates. More searching and I spied what looked like the lone Wyandotte. I claimed her, too. Her companion is a greyish/silver hen with tan cape feathers, but I have no idea what breed she is. I looked in my poultry standards book and still can’t tell. It doesn’t make any difference, though. I have 5 new hens to add to my one other hen—3 Americana’s, 1 Wyandotte, 1 Cochin, and 1 mystery hen. My little flock is renewed.
But, best of all…I HAVE EGGS!!
Homemade Fire Starters
Looking for a great way to start your next fire?
Boy, do I have a dandy one that not only reuses, recycles and repurposes items that have outlived their usefulness; it’s a fun afternoon project as well.
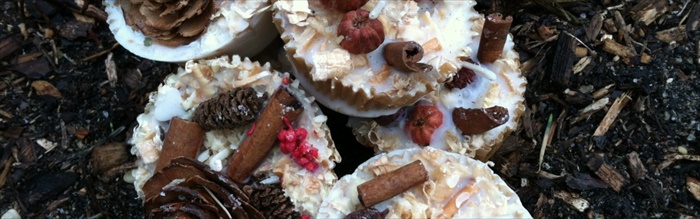
Fire starters are small wax bundles filled with various flammable materials and threaded with a wick. The bundles are used to start a small pile of wood, kindling or pinecones that in turn creates a larger fire.
They can be made from candle scrapes, bites of wax crayons, pine needles or small cones, wood shavings, even old potpourri or dried flowers.
Life on my farm is all about the senses—the looks, the smells, the sounds all play a role in making our farm a place that we love to hunker down in, so I use scrapes of scented candles and old potpourri for my mixture.
Have fun making your own homemade potpourri fire starters, or use your own materials to create new ones.
What You’ll Need:
- Paper cupcake wrappers and an old muffin tin. (I bought mine from a yard sale for a dime.)
- Wax candles scrapes, wax crayon pieces, old paraffin wax or used wax tarts. (Keep a box or bucket handy and toss all these leftovers into it.)
- Old potpourri.
- A large pot for water and smaller one for the wax. (Think of a double boiler set-up.)
- Old spoon and old ladle.
Directions:
Fill the large pan about half full of water and bring to a steady simmer.
While the water is coming to a simmer, line the muffin tin with the cupcake papers.
Place wax pieces into the smaller pan and set in the simmering water. Melt the wax slowly. Use caution when melting wax, it is very flammable.
Once the wax is completely melted, add the potpourri into the wax and stir until all the material is completely coated. The consistency should be fairly thick. If you need more material, try adding shaving, dried pine needles or small cones and seed pods, like mulberry cones. Keep the heat on so the wax won’t solidify.
Using a ladle, fill each cupcake paper. Use the old spoon to pack down the wax mixture.
When the cupcake papers are full, place the muffin tin in a safe place to cool.
When the starters have cooled, but have not solidified, run the wick through the bottom using a large needle.
Starting Your Fire
Place your kindling material in a small pile with the fire starter nestled in the middle. Light the wick, which in turn will set the fire starter on fire. The fire starter will create a flame that will last for about 5 minutes, giving time for the kindling to catch, and for you to add larger pieces of kindling. You should have a well started fire by then, and can add larger logs.
WARNING: Use great caution any time you use flammable materials or work with fire.
Trapping Flies and Gnats Naturally
During the warmer months my windows and doors are wide open. It’s my natural air conditioner, it makes the house less stuffy and I can smell all the scents the garden has to offer. Open windows and doors are also a gold sealed invitation welcoming flies into the house.
During summer’s harvest the kitchen counter is laden with the day’s pick, fermenting jars of sauerkraut or whatever, granules of sugar from the last jam making session and bowls of ripening fruit waiting to be eaten. It’s all too much for flies to ignore.
The goal is to protect your fresh produce. Your mission is to abate (or bait) the unwanted fly population.
These simple homemade fly trap solutions can help put a stop to pesky flies or ruining your bounty and summer serenity.
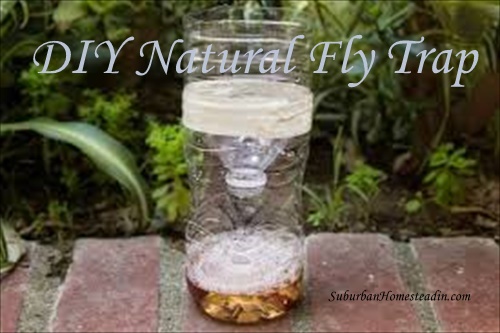
TRAP #1: This is a simple DIY project that involves a plastic bottle, water and stinky stuff. This larger trap is great for using outdoors, or in the barn or coop.
Take a 1-gallon water bottle and cut the top off, about 3-4-inches down from the mouth of the bottle.
Invert the cut off portion into the body of the bottle, leaving a several inch gap between the top and bottom of the bottle.
Pour about a cup of water in the bottom and add the stinky stuff, i.e. overripe soft fruit, a bit of leftover meat, manure, you get the picture. You can also use sweet stuff like sugar or honey.
Now—put in a few drops of liquid dish soap, 3 to 5 should do the trick.
The stinky or sweet attracts the flies while the soap weighs down their wings making it impossible for them to fly. Mission accomplished!
Remember…flies love stinky and sweet stuff, so use whatever you have around.
TRAP #2: This is a variation on the plastic bottle trap, using a Mason jar, wine bottle or decorative jar. I use a decorative jar because this trap sits on my kitchen counter, and who wants to look at dead flies in a trap? Not me!
Similar to the stinky, sweet version, this one uses a cup apple cider vinegar as the attractant.
Pour a cup of apple cider vinegar into the jar and add 3 to 5 drops of liquid dish soap. Place it near where you keep ripening fruit.
TRAP #3: Who said the sediment in the bottom f a wine bottle wasn’t useful?
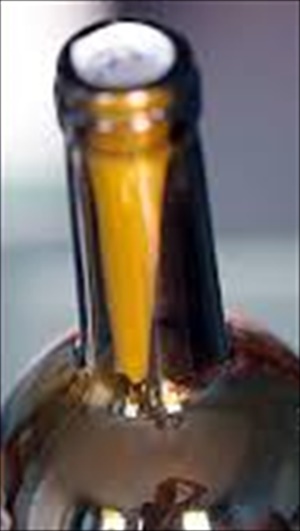
Leave an empty wine bottle open on the counter. Make a small funnel using an 8-1/2 x 11 inch piece of paper and insert it into the neck of the bottle. The small amount of wine that remains in the bottom will attract the flies. They will fly in, but they won’t fly out.
TRAP #4: This is probably the least appealing fly trap, but it works.
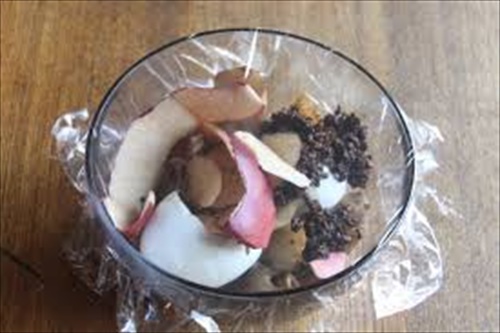
Place overripe fruit or peels in a bowl and cover with plastic wrap. Punch several small holes in the plastic. Amazingly, the flies find their way in, but can’t find their way out.
Remember—flies like stinky and sweet, so the stinkier or sweeter the better. Don’t be afraid to let your trap sit and get really smelly.
When the trap is full…or you just can’t stand to look at it anymore anymore, dump the contents into the compost bin and wash out the bottle or jar to use again. If you’ve used the plastic bottle version, simple toss the whole messy thing into the trash and make yourself a new one.
This is war, folks. Fight to win!
9 Ways to Keep Chickens Cool in Hot Weather
Baby it’s Cold Outside. What the heck!!
It’s not cold, it’s HOT, HOT, HOT!! And, not just hot, but the blistering hot that hangs on you like a heavy wool blanket.
The kind of hot that sees the thermometer hit 70 by 7:00 am, push past 80 by 8:00 am, climb to 90 by 9:00 am and soar over 100 by 10:00 am.
The kind of heat that wilts plants and kills livestock, if you don’t keep them cool.
I was enjoying our fairly mild summer of mid-80’s during the day and mid-60’s through the night, until we were hit with a weather whiplash that swing our temps from seasonably pleasant to scorching hot, like 105+ hot…for days on end. With that kind of extreme heat it’s important to keep a close eye on your critters especially chickens.
We have fairly mild winters here in So Cal, but our summers are a completely different story. Multiple days of triple digit temperatures can exhaust a flock’s ability to cool themselves and you have to be ready to step in and help. It could be the difference between ending the summer with a live flock or a dead one. I much prefer live.
How Chickens Cool Themselves
Mother Nature has equipped chickens to cool themselves by panting and holding their wings away from their body to let the air circulate. Their combs also help release heat, acting like a radiator. Too much panting, though, is a sign of distress.
Signs of Heat Stress
When chickens are having a hard time coping with the heat they will become heat stressed, which presents itself as gasping, panting, listlessness, spreading of wings, not eating or drinking, or diarrhea (if you get to this point your hens in immediate danger).
Did you know that smaller breeds and bantams, large combed breeds or lighter colored breeds are better able to withstand hot weather?
But, in extreme heat most breeds will be affected by the heat in one way or another.
Tips to help your chickens beat the heat until fall’s cool air comes along.
1. Provide lots and lots of cool water. Putting water bowls in the shade and putting small ice blocks in the water will help keep it cool. (I use small freezer containers to make 1-cup ice blocks) Freeze chopped up fruits and veggies in water to create a refreshing treat!
2. Limiting corn based feed and supplementing with juicy fruits and veggies will also help keep chickens cool and hydrated. The energy it takes to digest grains heats up a chicken’s body and can cause overheating.
3. Overripe produce can be frozen and offered “free-choice”, allowing chickens to pick at whatever intices them. Or, cube up and freeze melons for a frozen melon ice cube.
4. Allowing chickens to free range on hot summer days gets them out of a hot, stuffy coop and into the fresh air where they can settle in under bushes, dig and fluffy in soft cool dirt or find a breezy place in a shady tree. If free ranging isn’t possible, make sure to provide lots of shade in the chicken run, or fans or misters in the coop. (I planted my peach tree near the coop run so when it got bigger it would give shade as well as peaches)
5. You can also set a shallow pan of water in the run so the chickens can wade in the cool water. Check it every so often to make sure that it hasn’t gotten too hot.
6. Chickens will drink a lot of water on hot days, so make sure they will never run out by adding a few more water troughs to drink from.
7. Laying hens may also prefer nesting in cooler open areas. Providing boxes, crates or baskets out in the open for hens to use will give them a choice between laying eggs under shrubs and somewhere you can find them.
8. If your coop is set up with nipple waterers, consider putting out a few pans of water as an extra source.
9. I also like to offer a slightly deeper pan of water so my hens can dunk their heads in it. The cool water on their wattles helps to lower their body temperature quickly.
Hot summer days are not the only time you have to worry about the heat; when night time temperatures are high and chickens are cooped for the night it’s important that the coop is well ventilated to allow the air to flow. As the temperature drops, the air flow will cool off the coop. It may be necessary to install a fan to help move out the hot air. Hanging a frozen –gallon water bottle in front of the fan will help cool the air also.
Prevention of heat stress and keeping chickens hydrated is key, but if weather is extremely hot or your chickens are showing signs of stress you can add electrolytes to their water or give it to individual chickens using an eye dropper or a syringe without the needle attached.
Homemade Electrolytes
INGREDIENTS:
1 Cup Water
2 teaspoons sugar
1/8 teaspoon salt
1/8 teaspoon baking soda
DIRECTIONS:
Place all ingredients into a jar and mix gently until sugar and salt dissolve.
TO USE: use at full strength for severely stressed chickens or mix 1 cup per one gallon of drinking water.
Keeping your chickens cool in hot weather could mean the difference between life and death. Whatever you can do to help keep them cool and comfortable will not only save their life, but their egg production as well. Overheated hens don’t like laying eggs.
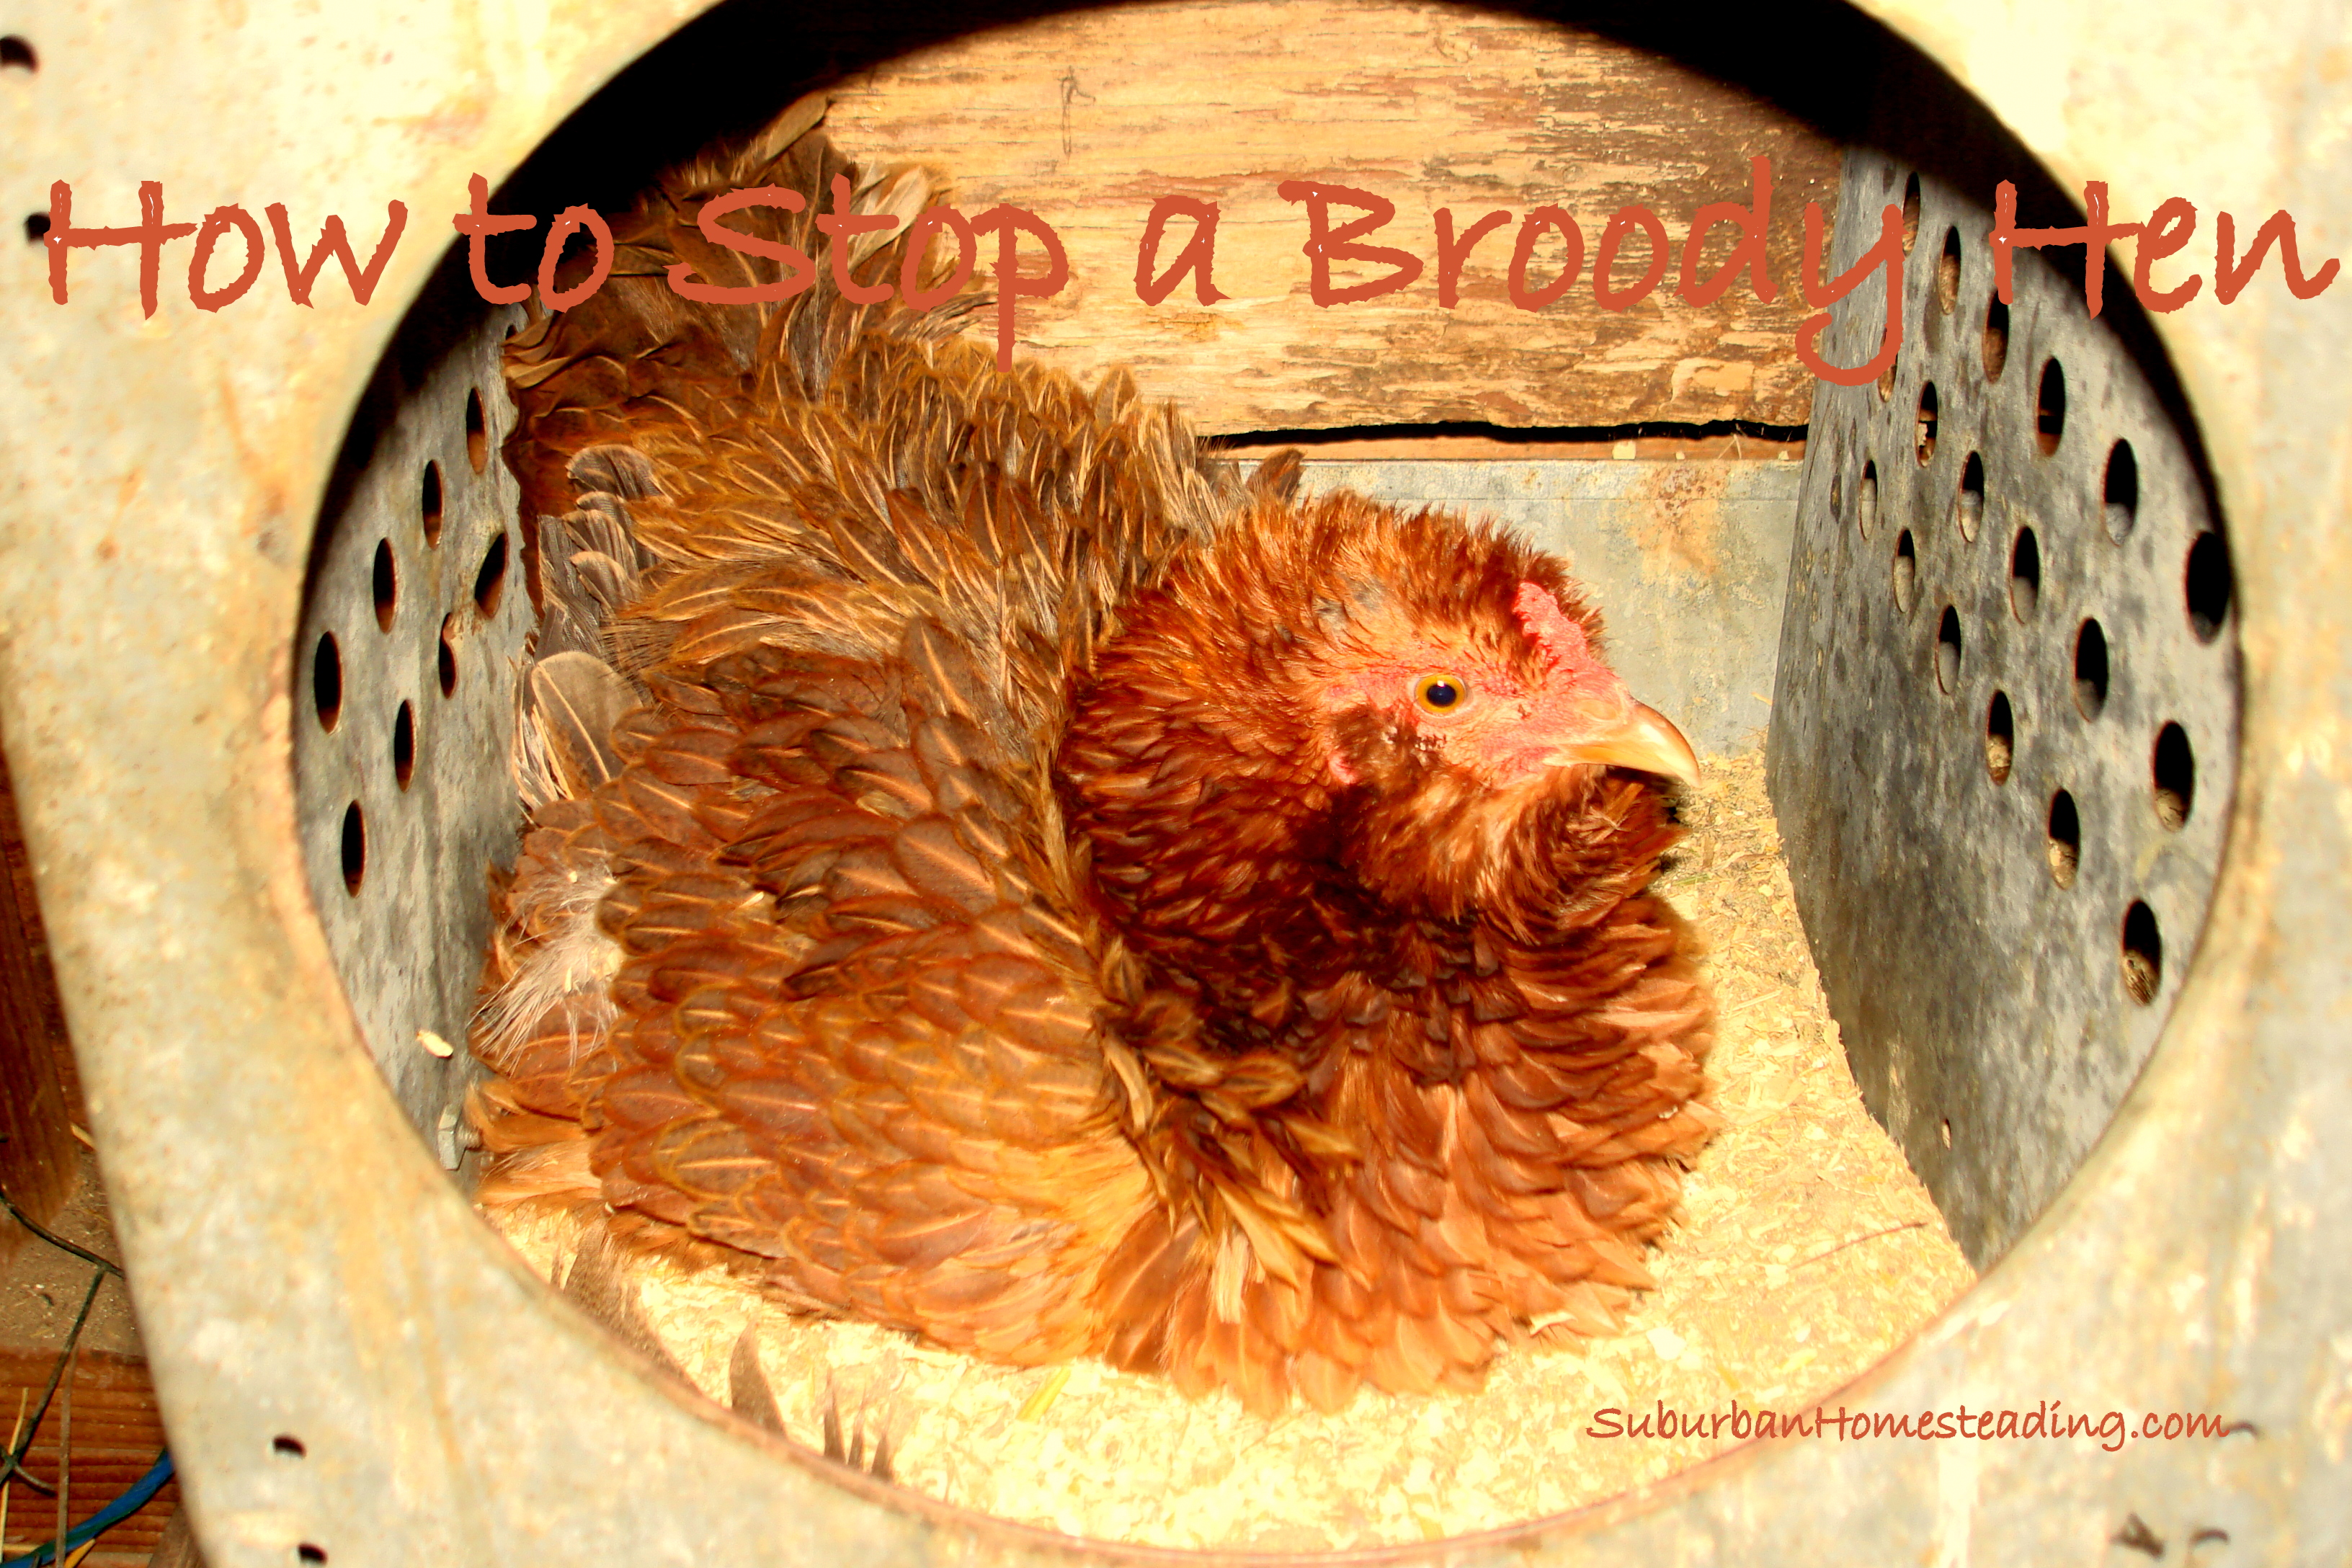
How to Stop a Broody Hen
I love it when I want more chicks and a hen or two goes broody just in the nick of time.
What I don’t like, though, is a broody hen when I have no fertile eggs.
But, what’s even worse is a broody, bitchy hen. One that is territorial, that squawks at you every time you walk into the coop, one that pecks at you when you try to remove her eggs, and one that stays on the nest for days or weeks not laying eggs and getting thinner because she is not eating.
I have one such hen…and she is driving me nuts!!
She could be in the Guinness Book of World Records for the amount of time she has been sitting on her nest.
What makes a hen go broody?
No one knows for sure the exact science behind a hen going broody, but we do know it’s a combination of hormones, instinct and maturity that makes a hen want to sit on her eggs (or anyone else’s for that matter) and make them hatch. Not a bad proposition if you have fertile eggs and want a new batch of chicks. But, it’s not as desirable when you don’t have a rooster and there’s no chance of fertile eggs much less hatching chicks.
Why don’t you want a broody hen?
If you don’t want to hatch eggs then a broody hen can become a bad thing, one because she is not laying eggs while she is broody, and two, she can entice her fellow coop mates to go broody too. There goes you egg production!
Fortunately, my other hens have jumped on the crazed motherhood bandwagon. If they did I’ve have no eggs at all, and breakfast would go out the window.
What can I do about a broody hen?
The ultimate goal is to not have a hen go broody in the first place, unless you have fertile eggs you want to hatch. Removing eggs as soon as they are laid and keeping the hen out of the nesting box after she has laid eggs are both good starts to keeping a hen from going broody.
I’ll admit it…this is where all my troubles started. Long days at work and early morning meetings meant that eggs were being left in the nesting boxes for most of the day, or sometimes until the next morning. It was a perfect recipe to send even the most reluctant hen broody.
If practicality and time keep you from collecting eggs or shooing your hens out of their nesting boxes, here are a few more tips that should break her habit. Operative word, should.
1. Kick her out with the rest of the flock. Taking her off the nest and getting her outside the coop will help break the broody cycle. Feeding time is a good time to do this because it will distract her from being off the nest. Remember though, broody hens can be bite, so be cautious.
2. Block her out of the nesting box. To dampen her instincts, put a piece of wood over the nesting box hole so she can’t get back in.
3. Get her roosting again. As the sun sets and the rest of the flock is making their way to their place on the roost pick her up and place her on the roost. Chances are she won’t be brave enough to abandon the flock in search of her nest.
4. Lower her body temperature. A few people have mentioned putting a bag of frozen veggies underneath the hen. This lowers her body temperature and signals the brain that she is not broody any longer. I’ve not tried this before. Although it sounds interesting I’m not sure I’d want to waste good veggies.
5. If all else fails, cage her up. Sounds mean, but it’s not. Simply place her in a wire mesh cage in an area with lots of bright sunlight, and plenty of food and water, but no bedding for a few days. Afterwards, let her out and see if she socializes with the rest of the flock or returns to her nest. If she is socializing she is not broody. But, if she tries to return to the nest put her back in the cage for a few more days.
It shouldn’t take long to break a broody hen using any of these methods, unless of course you are ME. I think my hen is in perpetual broody mode.
So—what was my solution?
After weeks of admittedly, inconsistent, attempts to break her broody cycle the one thing that did work was a nighttime raid by a rouge raccoon.
Yep…that worked.
Luckily, my coop is like the Fort Knox of poultry housing, so the coon didn’t stand a chance. When I arrived on the scene, at two in the morning, she was up and about; a little stressed and sticking pretty close to the other hens.
Problem solved.
BTW — I don’t recommend the raccoon method:)
How to Grow Fodder for Small Livestock
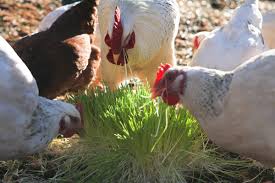
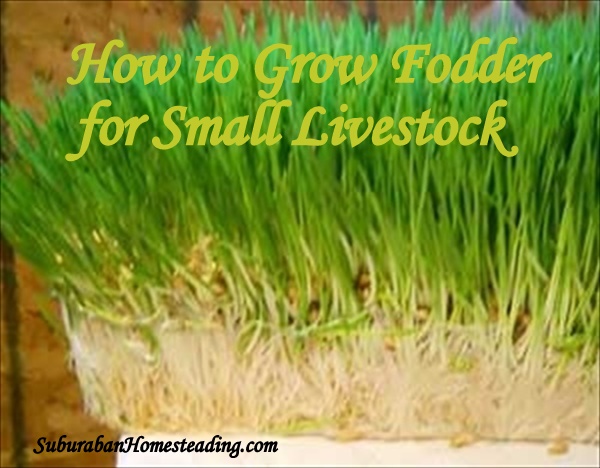 Fodder is very similar to sprouted grains and can be used as a supplemental feed for small livestock like chickens, ducks and rabbits. It’s a wonderful nutritional supplement for areas that have harsh winters, or where good quality hay might not be easily available. The digestibility of fodder is high. That’s because the starch from the sprouted grain turns to sugar and is more usable by the animal, so less is wasted through manure. Better to feed your animals than the ground through manure…don’t ya think? Many different grains can be used to grow fodder—alfalfa, barley, clover, filed peas, oats, millet, ryegrass, sunflowers and wheat just to name a few. The best part, though… …is the whole process, from soaked grain to ready-to-feed-fodder, takes about a week. In no time at all your animals will be munching on everything from roots to sprouts. Nothing will be wasted!
Building Your Own Fodder System
 Commercial fodder systems can be outrageously expensive and many are too large for the small homesteader who is using fodder for supplemental feed rather than an animal’s primary feed source. But, with bit of ingenuity you can build your own system for a few dollars. You can build a simple PVC rack, buy a utility rack, find an old used wooden rack at the thrift store, or build one out of old pallets. Pallets are so useful, aren’t they? The important thing is for the growing container to fit the depth and width of the rack, so get the rack first before buying the growing containers. Any relatively shallow container will work, but it should be at least 2” deep. Vegetable seedling trays can be easily found at garden shops or purchased on-line, or plastic storage boxes will work too. Even old plastic rain gutters or large plastic pipe cut lengthwise can work. The possibilities are endless, use your imagination! When you have your growing containers drill about a dozen or so small holes evenly around the bottom. This is where having a sturdy container comes in handy. One pound of grain will produce 8 pounds of fodder so flimsy trays will crack and break after a few uses. Better to spend a bit more for longevity.
Now for the fun part!
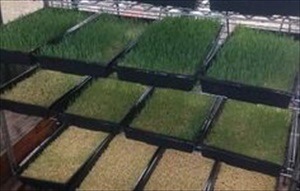
Start by soaking your grain in a 5-gallon bucket for 12-24 hours. Place the grain into the bucket and fill with water. Swirl the grain around so the chaff floats to the top. The chaff won’t sprout, so just skim it off and add to the compost bin. The amount of grain you soak will depend on the number of trays you have and the amount of fodder you want to grow. Since I’m only feeding fodder to rabbits and chickens I soak 1 pound at a time. (Remember 1 pound of grain produces 8 pounds of fodder) Here’s a trick…drill a bunch of small holes (making sure the holes are smaller than the grain) in the bottom of the bucket, then set it inside another bucket before filling it with water. When the soaking is finished, simply lift out the top bucket, leaving all the water behind. After the soaking, spread the grain evenly in each tray to a depth of 2-inches; more than that can cause molding or decreased sprouting. Less than will dry out quickly and not give you a good, robust sprout. To help smooth out the grain, so it’s evenly level, use a spatula or putty knife. Place the trays on the growing rack in a sunny area or under grow lights. Grow lights work great in winter. Water each tray 2-3 times a day. The trays should be damp, but not have standing water. Some sources recommend using a catchment basin and small pump to recirculate the water through a tube back to the trays. On the surface, this sounds like a great idea—recycling water—but it can cause mold, slim and odors. Yuck! Another option is to use a 5-gallon bucket to pump clean water to the top tray and let it filter down through all the trays, before being caught at the bottom. The used water can then be used in the garden. Repeat the watering step for 7 to 9 days depending on how fast the grains sprout. Ideally, you want about 6-inches of fodder, but that will depend on temperature and water.
You’re ready to harvest!
Flip each tray over and gently pull out the fodder. You can either feed the whole thing…root mat, seeds, sprouts and ALL! Or, cut it into serving pieces with a knife or a box cutter. The root mat holds the whole thing together, like a roll of carpet. Start a new tray every day or so, so you’ll have an on-going supply of dense, rich, nutritious feed. Your animals will love you for it!
How Much Fodder Should I Feed?
15 Ways to Save Money on Livestock Feed
I was heartbroken…
The first time I sat down to calculate the cost of raising my own meat and eggs and realized I could buy them cheaper at the market.
Mass food production has lulled us into a false sense that foods like meat and eggs should be ridiculously cheap; cheaper than they actually are.
I have been raising freezer lambs for most of my life, and you would think that homegrown—anything— would be less expensive than store bought, but it’s NOT true. Not by a long shot.
So, why do I raise my own meat and eggs if it’s more expensive? Good question.
I raise my own meat and eggs more for the quality of the product and knowing how my animals are raised and processed, rather than saving money. It’s also a quality of life decision, too. I just love watching my hens cluck and scratch around the yard, lambs stand on the fence waiting to be fed or rabbits greeting me when I walk in the barn. It makes me happy having critters around!
The overall cost of the end product depends greatly on the feed costs, but even with varying prices, store bought meat and eggs will still be the cheaper option. But, that’s not why we grow our own, is it? I love a thick cut lamb chop with plenty of marbling and a layer of fat to seal in those juices. And, let’s not forget about those bright orange egg yolks that turn into fluffy omelets when the weekend rolls around. There is satisfaction, a sense of accomplishment when you raise your own animals.
But, with all the positives the one negative is the shock of increased prices every time I enter the feed store. Don’t lose heart though, there are plenty of ways to save on livestock feed, AND boost your animals’ nutrition in the process. The following list will give you some good “cost saving” ideas to lower your feed bill without lowering animal nutrition—
15 Ways to Save Money on Livestock Feed
1. Compare prices. Call different feed stores, and feed mills, to get pricing. You’ll be surprised how much they vary. I keep a spreadsheet of sources and prices to track who is consistently lower. But remember—cheaper doesn’t always mean better. Don’t sacrifice your animals’ health by feeding lower quality grains. It’s not worth it!
2. Buy in bulk. I buy all of my livestock feed, and a lot of other homestead supplies, in bulk. Why? Because, I can get price breaks when I buy in bulk. I love discounts, don’t you? Many feed stores will give discounts when you buy multiple bags of feed. 10 bags seems to be the magic number in my area. When buying chicken, duck, rabbit or turkey feed I try to place an order with friends who also need feed. I also combine orders of pig food with a friend who raises feeder pigs for the freezer. The more we buy, the more we save. I’m a little more particular about my sheep feed. That was especially true when DD was showing lambs. But, even then I would buy 500 to 1,000 pounds at a time. My one caution: feeds that are ground or cracked can lose nutritional value in a short time, and feeds with molasses can go rancid if they sit too long. It’s best to buy a few months’ supply rather than a year’s supply.
3. Mix your own feed. Buying all the ingredients for a mixed feed may not be the most cost effective approach depending on your situation; it may actually cost you more. But, if you live in close proximity to grain mills that carry the right ingredients it would at least be worth looking into. When I had my large flock of sheep I fed cull lima beans that I purchased from a processor up the coast. The price was pennies per pound, which made the 2 hour drive worthwhile when I was buying 4,000 pounds at a time. Shop around, see what’s out there. You may even find a local farmer or grain processor that has old grains or grains not suitable for human consumption, but perfectly fine for your livestock willing to sell to you some. When I was in college I worked for a grain mill that bought grains for companies like Pillsbury. If the grains didn’t meet the moisture thresholds it was sold primarily to feed lots, but we did have a few smaller cattle ranchers buy from us. It’s worth looking into.
4. Don’t feed free choice. This is especially true for poultry and rabbits. Large livestock are usually fed their rations morning and night. I know filling that 5-pound automatic feeder with lay mash is easy, and there is quite a bit of debate around the topic. But, I like letting my girls chose when to eat and when not to eat. I think it keeps them evenly nourished and not gobbling down feed morning and night because they don’t know when they’ll eat again. When is regulating feed a good idea, especially for poultry and rabbits? When your animals free-range and have access to other foods. Have you noticed that your hens eat less when they roam? Another reason to control their feed is if you have a rodent problem. A trough full of feed is like an open invitation to a gourmet buffet to mice, rats and birds.
5. Free range your poultry and fowl as much as possible. Not a good idea with large livestock, though. I’m having visions of sheep on the road or crashing through the laundry line…not a good picture. Not everyone is able to free range, but those that can should. The variety of “goodies” adds important nutrients to their diet, plus helps keep the bug population at bay. Ranging also keeps your girls from getting bored, and it’s just plain delightful watching them scratch and peck around the farm.
6. Bring the yard to the coop or hutch. If your flock or herd can’t roam, or you have to confine them for some reason, bring overripe fruit, spent veggies, weeds and plant trimmings to the coop or hutch. A few years ago I had a problem with coyotes, even during the day, so my girls were confined to the coop and their fenced in run. Have you ever been scolded by an unhappy hen? Not pleasant I can tell you. Over time they came to enjoy having green stuff tossed in the coop. Rabbits, too, will enjoy fresh greens from the garden. They are natural browsers that like variety in their diet. Even sheep, goats and pigs can handle a bit of garden waste. Everyone will definitely appreciate all the fresh greens.
7. Get chaff from the feed store. Every bale of hay will lose a bit of chaff from being moved, creating a carpet of green around those giant stacks at the feed store. Ask if you can pick up a bucket or two, your animals will love you for it. If they are agreeable, move try filling a larger container.
8. Get scrap produce from local markets. It’s getting harder and harder to get stores to “give away” scrap produce, but it’s still worth asking. Trimmings, bruised fruit and overripe produce that can’t be sold are perfect treats for livestock. Bananas are a favorite of rabbits; chickens will love squishy tomatoes, and large livestock will go nuts for leafy greens. I’d stay away from any bakery items, though. They are heavily processed and contain preservatives and additives that we homesteaders are trying to keep out of our food sources, that goes for our eggs and meat, as well.
9. Grow your own. Even the smallest suburban homestead can grow a small patch of greens, cover crops or sunflowers dedicated just for supplemental livestock feed.
10. Create a fodder growing system. For a few dollars and a little bit of space you can start growing nutrient-dense feeds that your livestock will love. Sprouting grains like oats, barley and rye are perfect to start with because all livestock can eat them.
11. Raise meal-worms. I know what you’re thinking…totally gross, right? I’ve seen and done a lot in my life, but even I’m not up to growing squiggly little worm like things. Just the thought of it makes me shudder! BUT—they are protein packed and a fabulous low-cost way to supplement your chicken, duck and geese feed. Don’t try feeding it to other livestock, though. I’m not sure it would be a big hit.
12. Use leftover dairy products or whey from cheese making. Dairy is filled with protein. From leftover yoghurt and cheese to whey, your chickens and pigs will love it. Start them off with small amounts until they get used to it. For pigs, just pour it over the top of their grain. The moisture will help to hydrate them.
13. Feed kitchen scraps. Everyone can do this. I keep a small stainless steel bucket next to the sink and plop in veggie trimmings and leftover bread and melon rinds. As soon as I walk out the back door the ruckus begins. If my girls are out roaming they will come-a-runnin’ wanting their evening treat. Now, they go crazy anytime I have a bucket in my hand.
14. Market your eggs. Selling extra eggs may be be a way to save on feed, but is a great way to cover some of your feed costs, and have your hens pay for themselves. Plus, you’ll never be short on people looking for farm fresh eggs!
15. Cull non-productive hens and does. This may seem like a no-brainer, but many people keep small livestock just for the enjoyment of it, and that’s great. But, if your goal is to reduce feed costs, it may be time to cull those animals that are not productive. The next logical homestead step would be to butcher culled hens and make homemade broth and canned chicken for casseroles or pot pies. I know this may horrify some, but isn’t that what great-grandma would have done?
Recent comments
Aenean nonummy hendrerit mauris. Phasellus porta.