Archive for the ‘In the Kitchen’ Category
How to Make Homemade Maple Sausage
When I was a little girl and our town had not yet experienced the rapid building and influx of people of its later years, we had small neighborhood markets. The kind you still see in some larger cities or European countries. Think the Butcher, or the Baker, but no Candlestick Maker. We had small grocery stores and five & dime shops that were breeming with all kinds of curiosities – from hardware to gardening to sewing supplies, all displayed in one shop.
My favorite was the butcher shop; a long narrow store with a meat counter on one side and all kinds of meat accompaniments on the other. Behind the counter were stainless steel tables for slicing and wrapping meat. There was a large band saw for cutting carcasses into quarters or large roasts. Saws and hooks and other tools hung from the “C” shaped track that brought whole carcasses from the cooler to the cutting tables. The walk-in freezer sat at the end of the room, adorned with posters from the Lamb Council, the Pork Producers Association and the American Beef Council. In the fall, the shop owner would put a large poster on the freezer door announcing the time to order special holiday meats like fresh turkeys, hams, ducks, geese and prime rib or tenderloins.
Each week my mom would take us with her as she did her weekly meat shopping. The butcher would talk to her about what was on special, what had come in that day and what would be good choices to feed a family of five on a budget. But, without fail we left with the same thing every week – chicken, ham, homemade sausage, ground beef, stew meat and something dad could grill on the BBQ during the weekend. The butcher would wrap each cut of meat in pink paper and secure it with white butcher tape. There were no plastic bags or carts, just an arm load of meat to feed a hungry family. Before leaving, the butcher would hand us two bones as treats for our dogs, a large one for Sam our Great Dane and a smaller one for Shelly, moms Cocker Spaniel.
Decades have passed and days of neighborhood markets are mostly memories now. The butcher shop of my childhood has been paved over along with many of the stores we shopped at during my childhood. But, I’ve never forgotten the fun I had going to that butcher shop and how polite and helpful and friendly the butcher was. Read the rest of the story »
Why Every Homestead Needs a Crock Pot

A busy schedule. After school activities. Lambing, kidding, calving, farrowing season. Any day, really. There’s no day that a slow cooked meal in a crock pot won’t serve. With busy modern lives it’s partly about the convenience–the crock pot meal frees the cook from the kitchen. But, it’s also that a slow cooked meal provides a lot more than just a meal…a whole lot more.
When DD was young, raising animals, showing sheep, playing volleyball, and attending 4-H meetings it was a hard worked crock pot that made it possible for us to eat a warm hearty meal at the end of a long and busy day rather than swing by some fast food joint for a quick bite. It was so nice to come home hot, sweaty and tired, open the front door and immediately inhale the aroma of a simmering beef stew, lamb shank or Italian chicken. And, I knew that in the length of time it took DD to shower and slip into a soft cuddly pair of sweat pants I could make a salad and heat up a loaf of bread or a few dinner rolls, rounding out the crock pot dish to a truly wonderful meal.
It’s certainly true that a crock pot meal is delicious by definition. That any combination of meats and vegetables cooked through with a savory sauce is the star attraction of any meal. And, yes a crock pot meal is pretty much hands off and will provide plenty for leftovers or to be frozen for later consumption. But, when we think back on those busy days it’s not the tasty meal we remember. It’s the time we had together after a long day. Instead of scurrying around, stirring pots, sifting flour or baking, trying to get dinner on the table we spent time talking about our day, the milestones in our lives and our dreams for the future. For good or bad, what we remember was the time spent together, really being together. All we had to do to have a quality evening was put some meat and vegetables in a pot, pour in the liquid, place the lid on and set it to low before we started our day.
Pulling the lid off the crock pot, with all that steam surging up made the whole day special. It gave us an extra hour of family time, of laughter, of cuddling, of tranquility, of love. Crock pot cooking can give you extra “me” time, extra alone time, extra solace, extra time talking to friends or relatives instead of worrying about what’s for dinner. So–each time you enjoy or, better yet pass down your favorite crock pot recipe, remember that those dishes are just the by-product. What the crock pot really gave you was time well spent as a family.
How to Make Sauerkraut
For years I have been toying with the idea of learning how to ferment vegetables; sauerkraut in particular. It’s a condiment I’ve always loved—that crisp, tangy flavor brightens any number of dishes. I loved the versions I found in German markets or restaurants over the insipid, limp store bought kind.
But, in reality I was intimidated by the process of foaming, fermenting veggies under my kitchen sink. I, mistakenly, thought the process was hard and time consuming, like some kind of grandiose chemistry experiment. Time was something a mom with a farm and a kid has little of and I dreaded getting half way through the process and pulled away by, well, life.
But, boy was I wrong! Very wrong.
Nothing could be easier or simpler than slicing cabbage, sprinkling it with salt and mushing it around with your hands until those wonderful fermenting juices start to flow. After that the process pretty much handles itself.
I got my courage up when my favorite little market had cabbages on sale, 4 for $1.00. What did I have to lose, I thought, if I screwed it up. I could afford to waste a quarter if it all went to hell. Besides, the chickens or compost pile would be the happy recipients of any disastrous efforts anyway. So I dug through the display to find the smallest cabbage they had. We are, after all, a 2 person household and I knew I didn’t want a mound of kraut even if everything did turn out fine.
The recipe below is for one head of cabbage, but if you’d like to make more just double the recipe. It doesn’t take any more time to make a big batch versus a small one.
How to Make Sauerkraut
- 1 head, green cabbage
- 1-1/2 Tbsp. sea salt (the finer the better so it dissolves easily)
- 1 quart-size canning jar (I had 2 at the ready just in case)
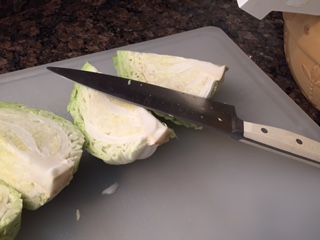
Remove any damaged or wilted leaves and wash in cold water. Cut cabbage into quarters and remove the core.
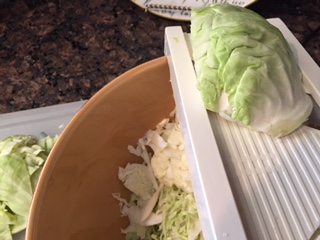
Cut cabbage with a knife into 1/4 inch slices. Or, use a Mandoline like I did to make the slices even and the job faster. Either way is fine. It doesn’t have to be perfect.
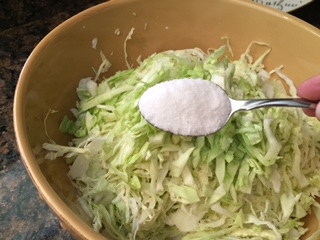
Place cabbage in a bowl large enough for you to work in. Sprinkle 1-1/2 Tbsp sea salt over the top.
Let this stand for about 15-minutes or so to let the juices start flowing, then you can begin mushing. I used my hands because it was easier to mix it up well and dig down to the bottom of the bowl, but you can use whatever you like–wooden spoon, wooden fork or anything that is blunt. The goal here is to mush the cabbage to release the juices.
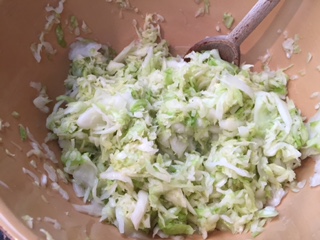
I mushed and kneaded for about 10-minutes and that gave me a nice pool of juice at the bottom of the bowl. That’s what you want.
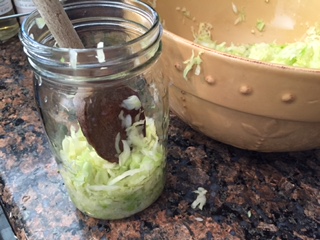
Now you can start packing your jar. I used a wide-mouth quart size canning jar. Place one or two handfuls of cabbage in the bottom of the jar and tamp it down with a wooden spoon. The goal here is to get rid of any air bubbles.
Continue packing and tamping down until you reach about 2-inches from the top of the jar. You should have enough juice to cover the cabbage completely, but if you don’t make a simple brine and fill to 1-inch from the top of the jar. (the cabbage has to be submerged in the juice or you’ll get mold and scum on the top, and that’s just gross!)
BRINE — dissolve 1 Tbsp of sea salt in 4-cups of water, but not tap water. It creates a reaction and will spoil your kraut. If you have extra brine, put it in a jar and store in the fridge. It lasts forever.
Pour the brine over the cabbage, but leave about an inch of head space. If the cabbage floats at the top use the cores, wedged under the lip of the jar to hold it down. Any cabbage exposed to the air will need to be thrown out.
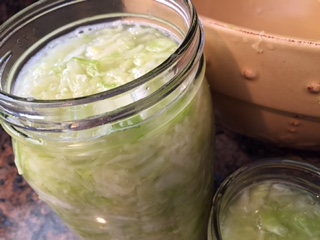
My batch made one quart and one pint jar, so it’s always a good idea to have an extra jar handy. Place the lid and band on the jar and screw down finger tight only. Place jar in a cool dark place at room-temperature for about a week. After a few days you can loosen the lid so the jar can “burp”, releasing any gasses, then tighten it again. It’s also a good idea to put the jar on a plate or shallow dish in case it leaks, which they can do from time to time. Now all you have to do is wait for nature to take its course, which will take about a week or so.
Once you’re sauerkraut is ready it can be stored in the fridge. The great thing about fermented veggies is they keep for a long time when properly stored.
The other great thing about sauerkraut is its health benefits. It’s a wonderful probiotic and digestive aid. Wonder what the ancient Germans knew that we have forgotten? Keep in mind, though, that to reap its health rewards the sauerkraut must be raw. Canning, cooking or heating kraut diminishes its health benefits because heat destroys the good bacteria and enzymes.
There you have it…quick, easy and full of nutritious benefits. My sauerkraut experiment wasn’t a science experiment at all, but a wonderfully successful 20 minute project. After this, why use store-bought kraut again?
A Few Notes for Success.
- Use only wooden utensils and a glass or ceramic bowl. Metal causes a reaction with the brine.
- If you prefer a little flavor to you sauerkraut try a bit of celery seeds, caraway seed or juniper berries.
- When the sauerkraut is exposed to air it may turn brown or develop a scum on the top. Just spoon that off and you’re good to go. Sauerkraut is a lacto-fermented food full of good bacteria to keep it, and you, safe. However, if at any time your batch smells funny, rancid or has a sharp flavor toss it. Better safe than sorry.
- Not all salts are made equal, and sea salt works much better for fermenting that iodized salt does.
Buttermilk Basics – How to Make Buttermilk
Buttermilk has been the beloved traditional ingredient of many southern dishes for decades. Whether sipped from a glass or poured from a measuring jar this old-fashioned favorite is experiencing a modern-day revival.
So—what is buttermilk? It’s a by-product of churning butter, the cloudy liquid flecked with tiny yellow bits of butter. It’s this delicate combination that makes ‘traditional” buttermilk the perfect ingredient for bringing southern flare to biscuits or southern fried chicken.
For centuries family farms and homesteads had their own milk cow and thus had a ready supply of buttermilk. But, in today’s world many modern day homesteaders live in areas that don’t allow large livestock. For some, though, housing and caring for a milk cow all year long is not part of their homesteading plan. But, that doesn’t mean you can’t have good quality buttermilk for your southern specialties. It just means you have to make your own. If you have access to good quality organic milk you can make your own buttermilk. It won’t be quite like the real thing, but it is a good substitute.
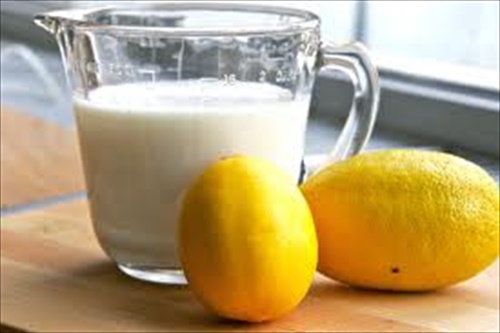
The recipe below uses lemon juice as the acid, which I think gives the buttermilk a pleasant tangy smell. The added benefit to making your own is that you can make as little or as much as you need for a given recipe. And, when used in your favorite recipes that call for buttermilk you will not be able to tell the difference.
How to make buttermilk
Step 1: Purchase a good quality organic whole milk. Or, purchase raw milk from someone who has a dairy cow.
Step 2: Combine 1 cup of milk and 1 tablespoon of fresh lemon juice in a mason jar and stir gently.
Step 3: Let mixture stand at room temperature for 5 to 10 minutes, but check the consistency after 5 minutes. It may be thick enough. If not, let it stand a bit more. The desired thickness is personal, so play around with it until you find what you like best. When finished, you’ll have thickened milk and bits of curd floating around. Perfect!
Step 4: Use the buttermilk and the curdled bits in any recipe that calls for buttermilk, like buttermilk biscuits, smoothies or buttermilk soaked fried chicken.
Store finished buttermilk in a covered mason jar in the fridge. Will last about a week or so.
Need a cool treat for a hot summer day?
Try this Mango-Buttermilk Smoothie and bring a bit of the old south to cool you off.
Mango-Buttermilk Smoothie
INGREDIENTS:
4 cups frozen diced mango
1 cup homemade buttermilk
1 tbsp. fine white sugar
½ tsp. vanilla extract
¼ tsp. cardamom
DIRECTIONS:
Pour all ingredients into a blender and process until smooth. To change the consistency, add more buttermilk, one tsp. at a time. Serve in a chilled glass with a slice of fruit on the side, and cool off!
How to Make Honey Peanut Brittle
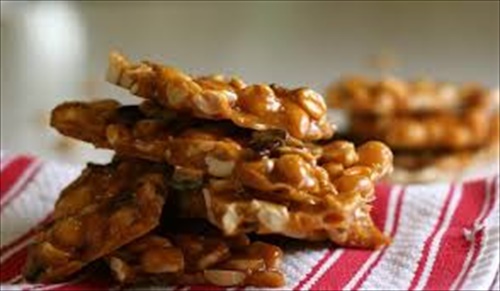
Bees are a versatile addition to any homestead and kitchen. A single hive can produce enough honey to maintain a family for a year, with a bit left over to sell, trade or share. From the earliest times honey was a prime commodity for selling or bartering. Many early-Americans came from beekeeping countries and used honey extensively in cooking and for medicinal uses. This rendition of southern peanut brittle is inspired by those early homesteaders. For a change of pace try using other nuts like pecans or almonds, or use this brittle crumbled over ice-cream for a cool and crunchy summer treat.
Honey Peanut Brittle
INGREDIENTS:
4 cups roasted & salted peanuts
1 cup sugar
1 cup honey
½ tsp. fresh lemon juice
1 tbsp. baking soda
1 tbsp. butter
Pinch of salt (optional)
DIRECTIONS:
In a deep pot bring peanuts, sugar, honey and lemon juice to a boil, stirring constantly until sugar dissolves. Continue boiling until a candy thermometer reaches 300. Remove from heat.
Carefully stir in baking soda, butter and salt (if you are using it), but be careful, the baking soda will make the mixture frothy. Spread mixture over a well-buttered baking sheet and cool completely (about an hour). When cool, break into pieces and store in an airtight container in a cool dry place. Keeps for a week, but guaranteed it won’t last that long.
Herbed Scrambled Eggs

Tired of the same old plain scrambled eggs? Looking for something with a bit more style and elegance?
Well, have I got a recipe for you!
Eggs are the one thing most homesteaders have on a regular basis. And, sometimes we even have an overabundance of them, making eggs the center of quite a few meals. When eggs seem to make their way onto my weekly menu more times than is probably wanted I turn to my favorite Herbed Scrambled Egg recipe, the one I first discovered in France many years ago. Leave it to the French to find a way to up level even the humble egg into something that we actually want to eat several times a week.
Suburban Homesteading is only part of my picture. Another part is world traveler. I love visiting other countries, exploring their culture, their history and most of all their food. It was on such a trip that I was introduced to the delicate flavor, or decadent flavor, of their morning eggs. They weren’t just plain old scrambled eggs or scrambles with cheese or bacon or ham or any of the other bits we often mix up with our scrambled eggs. These were lightly seasoned, had herbs and even a hint of cream cheese. They were sublime! Paired with fruit and toast with fresh made jam those eggs were heaven on earth.
When I came home I vowed to never eat boring, plain scrambled eggs again…and I haven’t!
To make your own French style scrambled eggs, mix up a batch of Herbs de Provence and start seasoning.
Herbs de Provence
INGREDIENTS:
4 tbsp. Thyme
3 tbsp. Marjoram
3 tbsp. Savory
2 tbsp. Rosemary
½ tsp. culinary Lavender (optional)
DIRECTIONS:
Place all ingredients in a bowl and mix well. Store in an airtight container, like a mason jar.
Herbed Scrambled Eggs
INGREDIENTS
4 Large farm fresh eggs, beaten with a splash of milk
½ tsp. Herbs de Provence (more if you prefer)
2 tbsp. Cream cheese, cut into small pieces (try white cheddar for a savory change)
Salt & pepper to taste
In a medium bowl, beat eggs with milk; mix in herbs and salt and pepper. Mix well.
Over medium-low heat skillet with a small amount of butter, let pan heat up and pour egg mixture into skillet. With a wooden spatula or spoon, gently stir eggs and cook over low heat. When eggs have almost lost their “raw look” toss in pieces of cream cheese and continue stirring. Once eggs are no longer runny, but are still moist and creamy looking remove from heat. Serve immediately with sliced fruit, toast and jam. Makes 2 servings.
Growing Spring Peas…Yes, Peas!

There’s nothing easier for a new gardener than to grow spring peas. Their variety, quick germination, easy growing habit and short to harvest nature are bound to boost any gardener’s confidence.
Peas are a cool weather crop and are usually the first seeds to be planted indoors in pots or outdoors in the ground. No garden, or garden season, would be complete without this old time favorite. And, after you have grown and eaten your own fresh peas I think you’ll agree.
There are three main varieties of peas:
- Sweet Peas, sometimes called Shelling Peas because their shell is not edible like other peas. These peas are taken out of the shell before cooking or eating.
- Snow Peas have flat edible pods with a tiny pea inside. These are common in Asian dishes or stir fry’s.
- Snap Peas also have an edible pod, but the pea inside is full size. These can be blanched and eaten, or eaten raw.
To have the most success with your pea beds start in the fall with a rich layer of well-rotted compost and manure turned into your planting area. Peas love well-drained soil, but do not like fertilizers much, so use it sparingly, if at all. Peas do however, like phosphorus and potassium, and a good sprinkling of wood ash worked into the soil before planting would be to their liking.
In most areas, peas can be directly sown in the garden 4 to 6 weeks before the last frost. Pt up peas for indoor growing in areas of the country that stay cold into the spring months. Peas are a cool weather crop, so soil temperatures should be between 45 and 70 degrees. The ground should be cool when planting, but not wet. It can be tricky to time the weather conditions. If you have wet soil for long periods consider creating raised beds or plant in pots.
Plant pea seeds 1-inch deep and 2-inches apart. When the shoots emerge you can set your poles or trellises for climbing varieties. Peas do not like a lot of water so water sparingly, but don’t let the roots dry out or no pods will form. Also, pea roots are fragile, so be cautious when pulling weeds and avoid hoeing a pea bed. If peas are a staple in your garden it’s best to rotate with other crops to avoid a buildup of soil-borne diseases.
To keep a pea crop producing long into the season, pick the pods often as this encourages more pods to develop. The best time to pick is in the morning when the dew has dried. It is also the time of day when peas are the crispiest. When picking, it’s best to use two hands, one to hold the vine secure and one to pick the pea. You don’t want to run the risk of breaking the vines off. Fresh peas can be kept in the fridge for about 5 days, but to enjoy your pea harvest well into the warmer months freeze them. If any peas miss being picked you can still use them. Simply dry and shell them. Dried peas are prefect in winter soups and stews.
But, let’s not forget—It’s Spring! And with that comes the start of salad season at our house. Yep, we are die-hard consumers of salads in many shapes and styles. The long hot months cry out for light and cool, yet nutritious meals. If it can be chopped, sliced, diced or shredded and laid on a bed of lettuce greens we are happy women. And, why not? Our area is considered the salad bowl of CA; a state that grows over 250 different crops.
But, this early in the season means only one thing…Pea Salad!
A wonderfully light and crispy salad accented with Pancetta, cheddar and onions, and a hint of fresh dill. What could be more glorious, except for maybe that delightful little POP each time you chomp down on those fresh peas. It makes the perfect side dish or potluck take-along and goes great with grilled meats. Even a baked salmon dinner will scream SPRING when served with this pea salad at its side.
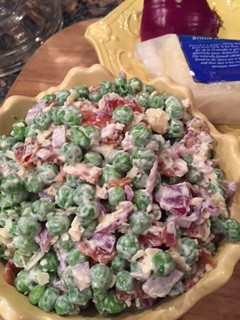
PANCETTA, CHEDDAR & PEA SALAD
INGREDIENTS
- ½ pound of pancetta, cooked, drained and crumbled or finely chopped
- 1 pounds vine fresh peas (or frozen, thawed in fridge overnight)
- ¾ cup coarse grated extra-sharp white Cheddar cheese
- ½ small red onion, peeled, and finely diced
- ½ cup of mayonnaise
- ¼ teaspoon kosher salt
- ¼ teaspoon coarsely ground black pepper
- ¼ teaspoon fresh dill, chopped fine
INSTRUCTIONS
- Stir all ingredients together, put in a tightly covered container in the refrigerator for several hours so the flavors have a chance to meld. Gently stir from top to bottom before serving. Store in fridge for up to 3 days, but it won’t last that long…trust me!
NOTE: The salad can be served immediately after making it, but tastes even better if allowed to sit, tightly covered, in the refrigerator for an hour or up to three days. It should be eaten within 3 days of being made, though.
What is your favorite way to serve peas?
Homemade English Muffins

This breakfast favorite is not English at all. In fact, the Brits never even heard of it until the 1990’s when Best Foods began shipping it to England.
What we know today as an English muffin was the invention of English immigrant, Samuel Bath Thomas. Yes—that Thomas. Sometimes called a “toaster crumpet” or “Union Jack”, it was first created in 1894 as a replacement for the very English “crumpet” and was immediately embraced by fine hotels and restaurants in New York as a more elegant alternative to toast. Ultimately, it became the quintessential American favorite for breakfast.
Homemade English muffins are so delicious that you won’t want to go back to store-bought ever again! And, they are the perfect complement to your homegrown and homemade jams and preserves! The only drawback—the process will keep you close to the kitchen for several hours. But, they are well worth the time and effort.
English Muffin Recipe
Ingredients:
1 cup whole milk
¼ cup melted butter (salted or unsalted)
2 tbsp. white sugar
6 cups all-purpose flour
1 yeast package
2 tbsp. Wheat Germ
1 cup warm water (110 degrees)
1 teaspoon salt
Directions:
Warm milk in a small saucepan until it bubbles; remove from heat. Mix in sugar, stirring until dissolved. Let cool until lukewarm. In a small bowl, dissolve yeast in warm water. Let stand until creamy, about 10 minutes.
In large bowl, combine the milk, yeast mixture, wheat germ, butter, salt, and 3 cups of flour. Beat until smooth, add salt and add the remaining three cups of flour, or enough to make a soft dough. Knead. Place in a greased bowl, cover with a towel, and let rise in a warm place. About an hour.
Punch down. Roll out to ½-inch thick. Cut rounds with biscuit cutter or an inverted drinking glass. Sprinkle cookie sheet with cornmeal and set the rounds on top to rise. Dust tops with cornmeal as well. Cover and let rise for ½ hour.
Heat a greased griddle to about 270. Cook muffins on griddle for about 10 minutes on each side. Keep baked muffins in a warm oven (no higher than 250) until all have been cooked. Each batch takes about 20 to 30 minutes. Allow to cool and place in plastic bags for storage. They freeze well.
To serve, split and toast. Serve with butter and your favorite homemade jam, jelly or preserve.
For a great weekend breakfast, toast and top the muffin with a cooked sausage patty and a poached egg then smother the whole thing with homemade gravy for a fabulous Barnyard Benedict.
For a lighter treat, toast and spread with homemade cream cheese and sliced seasonal fruit.
For a kid friendly breakfast or snack, toast and spread with peanut butter and a drizzle of honey.
How to Un-gunk the Garbage Disposal
Garbage disposals are supposed to make life easier, right? But, on an organic homestead where most kitchen scraps are either fed to chickens or composted this kitchen appliance can be more of a pain than its worth. Because it’s not used very often kitchen sinks get clogged, drain slowly and most of all smell sour.
Rather than remove it all together try these tips for using it wisely, even when it’s used sparingly.
Use the disposal every few days to keep it from rusting, corroding or getting gunked up.
Always use the disposal with a strong flow of cold water to help solidify grease and oils. Warm or hot water liquefies oils and can cause clogging.
When using the disposal keep it and the water running until everything is ground up well, then let the water run for about 20 seconds more before turning it off.
Grinding eggs shells, small pits and bones will help “scour” and “scrub” the walls of the disposal.
Cut large foods, like melon rinds, into small bits and grind them one-by-one so you don’t over work the disposal.
Don’t grind fibrous foods like artichokes, celery or corn husks because they don’t grind up well and can clog the drain.
For a good deep cleaning when you don’t want to use damaging bleach or drain cleaners, pour 1/3 cup of Borax into the drain and let stand for about an hour. Rinse thoroughly with hot water to move the Borax down the drain.
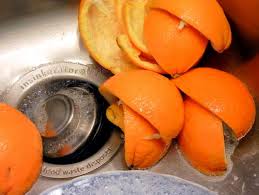
For a fresh disposal all year long, grind citrus peels, like lemon, orange, grapefruit.
Recent comments
Aenean nonummy hendrerit mauris. Phasellus porta.