How to Make Sauerkraut
For years I have been toying with the idea of learning how to ferment vegetables; sauerkraut in particular. It’s a condiment I’ve always loved—that crisp, tangy flavor brightens any number of dishes. I loved the versions I found in German markets or restaurants over the insipid, limp store bought kind.
But, in reality I was intimidated by the process of foaming, fermenting veggies under my kitchen sink. I, mistakenly, thought the process was hard and time consuming, like some kind of grandiose chemistry experiment. Time was something a mom with a farm and a kid has little of and I dreaded getting half way through the process and pulled away by, well, life.
But, boy was I wrong! Very wrong.
Nothing could be easier or simpler than slicing cabbage, sprinkling it with salt and mushing it around with your hands until those wonderful fermenting juices start to flow. After that the process pretty much handles itself.
I got my courage up when my favorite little market had cabbages on sale, 4 for $1.00. What did I have to lose, I thought, if I screwed it up. I could afford to waste a quarter if it all went to hell. Besides, the chickens or compost pile would be the happy recipients of any disastrous efforts anyway. So I dug through the display to find the smallest cabbage they had. We are, after all, a 2 person household and I knew I didn’t want a mound of kraut even if everything did turn out fine.
The recipe below is for one head of cabbage, but if you’d like to make more just double the recipe. It doesn’t take any more time to make a big batch versus a small one.
How to Make Sauerkraut
- 1 head, green cabbage
- 1-1/2 Tbsp. sea salt (the finer the better so it dissolves easily)
- 1 quart-size canning jar (I had 2 at the ready just in case)
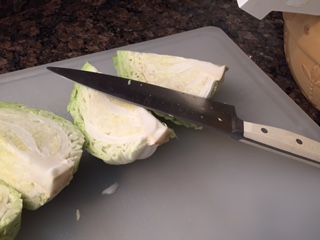
Remove any damaged or wilted leaves and wash in cold water. Cut cabbage into quarters and remove the core.
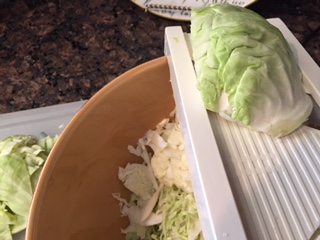
Cut cabbage with a knife into 1/4 inch slices. Or, use a Mandoline like I did to make the slices even and the job faster. Either way is fine. It doesn’t have to be perfect.
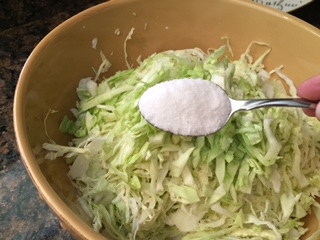
Place cabbage in a bowl large enough for you to work in. Sprinkle 1-1/2 Tbsp sea salt over the top.
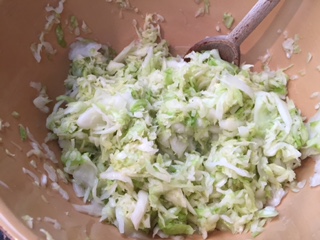
Let this stand for about 15-minutes or so to let the juices start flowing, then you can begin mushing. I used my hands because it was easier to mix it up well and dig down to the bottom of the bowl, but you can use whatever you like–wooden spoon, wooden fork or anything that is blunt. The goal here is to mush the cabbage to release the juices.
I mushed and kneaded for about 10-minutes and that gave me a nice pool of juice at the bottom of the bowl. That’s what you want.
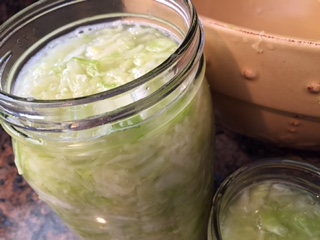
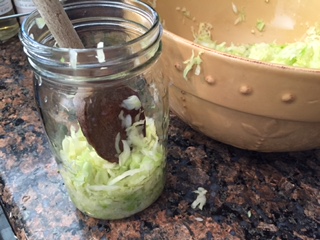
Now you can start packing your jar. I used a wide-mouth quart size canning jar. Place one or two handfuls of cabbage in the bottom of the jar and tamp it down with a wooden spoon. The goal here is to get rid of any air bubbles.
Continue packing and tamping down until you reach about 2-inches from the top of the jar. You should have enough juice to cover the cabbage completely, but if you don’t make a simple brine and fill to 1-inch from the top of the jar. (the cabbage has to be submerged in the juice or you’ll get mold and scum on the top, and that’s just gross!)
BRINE — dissolve 1 Tbsp of sea salt in 4-cups of water, but not tap water. It creates a reaction and will spoil your kraut. If you have extra brine, put it in a jar and store in the fridge. It lasts forever.
Pour the brine over the cabbage, but leave about an inch of head space. If the cabbage floats at the top use the cores, wedged under the lip of the jar to hold it down. Any cabbage exposed to the air will need to be thrown out.
My batch made one quart and one pint jar, so it’s always a good idea to have an extra jar handy. Place the lid and band on the jar and screw down finger tight only. Place jar in a cool dark place at room-temperature for about a week. After a few days you can loosen the lid so the jar can “burp”, releasing any gasses, then tighten it again. It’s also a good idea to put the jar on a plate or shallow dish in case it leaks, which they can do from time to time. Now all you have to do is wait for nature to take its course, which will take about a week or so.
Once you’re sauerkraut is ready it can be stored in the fridge. The great thing about fermented veggies is they keep for a long time when properly stored.
The other great thing about sauerkraut is its health benefits. It’s a wonderful probiotic and digestive aid. Wonder what the ancient Germans knew that we have forgotten? Keep in mind, though, that to reap its health rewards the sauerkraut must be raw. Canning, cooking or heating kraut diminishes its health benefits because heat destroys the good bacteria and enzymes.
There you have it…quick, easy and full of nutritious benefits. My sauerkraut experiment wasn’t a science experiment at all, but a wonderfully successful 20 minute project. After this, why use store-bought kraut again?
A Few Notes for Success.
- Use only wooden utensils and a glass or ceramic bowl. Metal causes a reaction with the brine.
- If you prefer a little flavor to you sauerkraut try a bit of celery seeds, caraway seed or juniper berries.
- When the sauerkraut is exposed to air it may turn brown or develop a scum on the top. Just spoon that off and you’re good to go. Sauerkraut is a lacto-fermented food full of good bacteria to keep it, and you, safe. However, if at any time your batch smells funny, rancid or has a sharp flavor toss it. Better safe than sorry.
- Not all salts are made equal, and sea salt works much better for fermenting that iodized salt does.
Recent comments
Aenean nonummy hendrerit mauris. Phasellus porta.