Posts Tagged ‘Array’
Stretching the Summer by Freezing Herbs
Most herbs are annuals and won’t last the winter in many parts of the country. But, you can extend your fresh herb season by freezing them.
Here’s the trick: pick the freshest, brightest, cleanest, most undamaged leaves, remove the stems, chop finely, and place in a bowl. (Cilantro can be chopped stems and all) Add enough olive oil or vegetable oil to just cover, and then spoon the mixture into an ice-cube tray and freeze; when the cubes are solid, store in a re-useable freezer container. Frozen herbs can be stored for up to 3 months.
Herbs like mint, basil and cilantro can liven up a simmering pot of soup, a savory sauce or even a hearty stew; just drop a frozen cube into the pot. Or, you can first defrost the cube and strain out the herbs. Don’t be wasteful though – the seasoned oil can be used in salad dressings or on steamed veggies.
![]() photo credit: ashleycoombsphotography
photo credit: ashleycoombsphotography
Accidental Education
I’ve come to realize that most of my education on the farm has been as much a case of learning by chance then by deliberate study. Or should I say we learn just by living. For certain, the learning we gain through experience or by doing sticks with us long after the classroom fades. I may not remember anything about my statistics class, but I will not forget what happened when I was dumb enough to walk through the corral with a bucket full of grain or store my feed bins too close to the sheep pens.
I’ve learned by chance, for example, that a good way to start pumpkin seeds is to let the pumpkins rot in place. As the bottom of the pumpkin decays away the seeds start to sprout inside the shell, protected by winter cold. In spring all I have to do is transplant the tiny plants into individual containers until they are ready to plant out in the pumpkin patch.
Seeds dropped by birds or blown in on the wind can nestle themselves into friable debris piles near the barn and come to sprout in the warm composting material until ready to plant.
Another accidental discovery took place this past fall after the lambs had been sent off to the butcher. We left the remaining hay in its normal place on the barn floor instead of using it for mulch or composting material. As the weeks and months went by I noticed the remaining hay bales kept settling down and spreading out more than it should be doing naturally. What the heck was going on? Read the rest of the story »
Homemade Popsicles

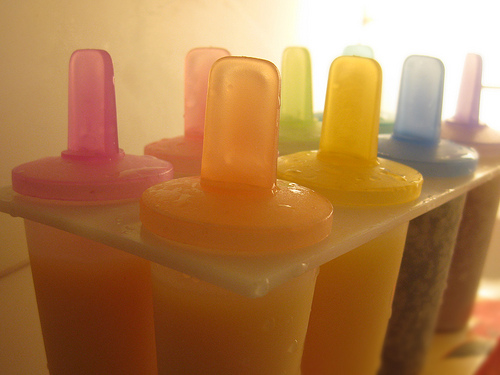
Summertime means one thing – fresh fruit – and lots of it. Once you’ve made jams and jellies, chutneys and compotes why not try a few frozen treats. Ice pops made with real fresh fruit beats anything you’ll find in a store or on an ice-cream truck— and they only take a few minutes to make. Here’s how:
Place 2 cups of chopped fruit or hulled berries into a blender with ½ cup of sugar and puree until smooth. Pour into a fine-mesh sieve, pressing fruit with a spoon or spatula to strain out any skin or seeds, and into a glass measuring cup. If you like your pops with pulp you can skip the straining part.
Pour mixture into Popsicle molds, insert sticks and freeze until firm, at least 4 hours. Store up to one week – if they can last that long.
Cooking Vegetables to Retain Vitamins and Nutrients

Vegetables are an important part of a healthy diet because they contain many beneficial nutrients, but cooking can pull out many vitamins, like C and B. To get the most out of your veggies limit their exposure to air, heat, water and time – the enemies of fresh produce.
Start buy purchasing the freshest most vibrantly colored veggies you can find. Wait to cut them until right before they are to be cooked. Try to keep pieces large so less surface area is exposed to air and heat during cooking. Cook quickly to limit the time veggies are heated: steaming is the best way followed by microwaving. Boiling is not recommended because it leaches out important vitamins into the water. Regardless of your cooking method the most important thing is to include plenty of colorful veggies in your diet.
![]() photo credit: SearchNetMedia
photo credit: SearchNetMedia
Disaster Preparedness Brings Peace of Mind

As the New Year begins, the Red Cross is encouraging families to be prepared. Knowing what emergencies are most likely for the areas where they live, work, learn and play, and taking steps to plan for them will bring families a measure of peace. Emergencies to think about can include wildfire, tornado, hurricane, earthquake or floods, but families should also plan for unusually heavy snowfall and ice storms that can cause power outages and disrupt utilities and other services.
- Grab-and-Go: These are kits or bags that contain essential and useful items in case you are forced to leave your home or shelter in place. Check out www.redcross.org for a list of items that go into an emergency preparedness kit and to watch a really cool video about being prepared.
- Gathering the following items can bring you some peace of mind now: Three-day supply of nonperishable food and water—one gallon per person per day for drinking and hygiene purposes; battery-powered or hand-crank radio, preferably NOAA weather radio; flashlight and extra batteries; first-aid kit, medications and medical items; extra cash; and copies of important documents such as proof of address, deed or lease to home, passports, birth certificates and insurance policies.
- Plan. Plan. Plan. Talk with family and household members about what they should do during a flood, earthquake, wildfire, snow storm or ice storm. Plan what to do if members are separated and choose two places to meet— one outside the home and another outside the neighborhood in case of evacuation.
- Choose an out-of-area emergency contact person. All household members should have this person’s phone number and email address. It may be easier to call long distance or text if local phone lines are out of service.
- Tell everyone in the household where emergency information and supplies are kept.
- Practice evacuating the home twice a year. Drive the planned evacuation route and plot alternate routes on a map in case main roads are impassable.
- Plan ahead for pets. In case of evacuation, make arrangements for animals. Keep a phone list of “pet friendly” motels or hotels, animal shelters and fair grounds that are along the evacuation routes.
- Be informed. Know the risks in neighborhoods where family members live, work, learn and play.
- Assemble information about what to do in case a flood, earthquake or wildfire occurs. Remember that emergencies like fires and blackouts can happen anywhere, so everyone should be prepared for them.
- Find out how to receive information from local officials in the event of an emergency. Many cities conduct CERT programs (Community Emergency Response Team) that trains residents in all aspects of disaster preparedness. They also hold first aid and CPR/ AED training events, since during a disaster first responders may not be as available. Contact the local Red Cross chapter for training.
For more information on disaster preparedness and emergency response, visit www.redcross.org. For information about CERT training classes contact your local police or fire department.
![]() Photo credit: Burke County Red Cross
Photo credit: Burke County Red Cross
Fabulous Fungi

Here’s a riddle for you: What flourishes without light, doesn’t use flowers or seeds to grow and is so diverse it can even be grown in your hall closet?
Its mushrooms of course!
Mushrooms are unique because they are not plants at all – they are fungi. They reproduce with spores not seeds and they don’t contain any chlorophyll or go through photosynthesis like regular plants. That’s why they can grow in cool, damp, dark places instead of warm, sunny ones.
The nutrients mushrooms need to grow come from a growing medium called substrate—usually a rotting log or a “brick” of straw, rice bran or sawdust in bags. A mushroom is really the fruit of the fungus; the actual “plant” if you will, is a network of root-like threads, called the mycelium. Mushrooms reach harvestable size in several weeks and can be picked for about 15 weeks.
To begin growing your own, first decide what type of mushroom you’d like to grow, as each variety likes a certain type of growing medium. It may be a good idea to start with an easy growing variety that can be found in a kit, like the shiitake or oyster, for first-timers. Kits will come complete with the right kind of substrate for the mushroom variety, mushroom spores and growing instructions.
If you decide to grow mushrooms without the aid of a kit you’ll need to do a bit more research. First, find the right kind of growing medium for the variety you want to grow-each mushroom variety has its own preferred growing conditions. While most favor logs, straw or sawdust, some will grow on used coffee grounds and even on corncobs. The medium will then need to be sterilized with heat, tightly compacted in a bag or on a tray and then inoculated with the spawn. A word of caution here: resist the temptation to use free spawn from wild mushrooms; purchase good healthy spawn from a reliable supplier.
Be sure to check out the growing habits of the variety you decide to grow so you know how and where to place your growing container. Some mushrooms grow vertically, as they would on a rotting log, and hanging them would be an ideal solution. Others grow horizontally in little clusters as they would on the floor of a dark, clammy forest. These can be grown in a tray placed in a dark closet.
Once your mini mushroom farm is set up all you have to do is water it, set it in a dark place and keep an eye on the conditions. In about a week you’ll see the beginnings of tiny little mushrooms. Depending on the variety you should have “ready to harvest” mushrooms in another 4 to 8 weeks.
How simple is that?
Before you know it you’ll have your very own ethereal fairy-garden of perky little mushrooms.
To learn more about growing mushrooms, check out www.fungi.com and www.gmushrooms.com. The Mushroom Company at www.mushroomcompany.com is a commercial grower site, but has lots of useful information.
To read more about growing mushrooms, check out “Growing Gourmet & Medicinal Mushrooms”, by Paul Stamets.
If growing mushrooms isn’t your thing, you can still enjoy them with these simple recipes. Read the rest of the story »
Farmbrarian – Farmer/Librarian

Grab a cup of coffee, pull up a chair and flip through the pages of Farmbrarian.
The Farmbrarian blog is a website that reviews books about sustainable food. Through the site, you’ll discover many titles that may be new to you. It’s a great resource for those looking to read up on the environment and food.
Farmbrarian is a collaborative effort between Erin, an academic librarian, and David, a nutrition student and future registered dietitian. Their mutual passion for nutrition, sustainable agriculture, reading and teaching lead to the founding of this unique blog, where they meet and review books about growing and eating real food.
If you don’t have time to read as many books as you’d like about sustainability-or even discover the titles, this is the place to start.
Pitting Stone Fruit Perfectly

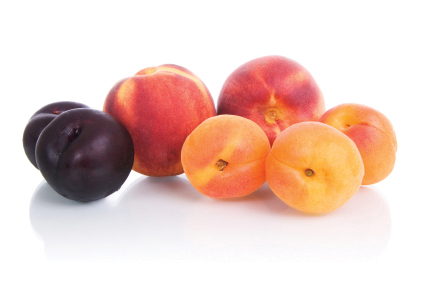
Many kinds of stone fruit have flesh that clings to the pit, making for a disappointing looking fruit when the pit is removed. To pit small stone fruits like plums or peaches, cut the fruit in half lengthwise. Then use a melon baller to scoop out the pit. You’ll have perfect looking fruit for all sorts of summer recipes in no time at all.
![]() photo credit: Wilson’s Fruit
photo credit: Wilson’s Fruit
Quick Tips For Homesteaders
Keeping Whites Whiter with Lemons
Dingy napkins, linens even white socks and T’s can be brought back to their brightest white. Simply fill a large pot with water and a few slices of fresh lemon; bring the pot to a boil. Turn off the heat and add your linens or clothing items. Let soak for up to an hour; launder as you normally would. For extra brightness, line dry them on a bright sunny day.
Removing Melted Wax
Candlelight may be romantic, but there’s nothing sexy about prying melted wax out of a candleholder. To remove wax easily, place holders in the freezer for a few hours. The wax should shrink enough that the spent candle slips out easily.
Storing Candles
We all love the glow of a candle lit room on a cold winter’s day. But, when weather is warm and days are long candles are not needed as much. To store candles and keep their true color, wrap in tissue paper and store in a dark place. To keep candles from warping make sure their storage place is cool.
Freshening up potted plants
Potted plants are a great way to bring the outside in during long winter months, but with the dry air of a heated home the topsoil can dry out, making water absorption more difficult. To freshen up potted plants, remove the top 2 to 3-inches of soil using a fork. Refill with fresh soil mixed with a slow-released fertilizer.
Removing Red Wine Stains
For a sure fire way to remove red wine stains, wet the stain with lukewarm water, then sprinkle on a layer of table salt. Rub gently and let stand for 5 minutes. Pull fabric taut across the top of a heat-proof bowl or large pan and secure with a rubber band. Place the bowl or pot in the sink and pour boiling water over the stain from a height of 3-feet. The combination of heat and pressure of the water will eliminate the stain.
Keeping Berries Perfect While Harvesting
When picking berries use several shallow pans, buckets, basket or trays; this prevents the weight of the berries on top from smashing the ones below.
Storing Tomatoes
Tomatoes are not like other vegetables, they should always be kept at room temperature. Large, shallow bowls or platters are perfect and look beautiful in the kitchen. Unripe tomatoes can be placed in a sunny window or in a brown paper bag for a few days to ripen. Be sure to check them every day to catch them at their perfect ripeness.


Recent comments
Aenean nonummy hendrerit mauris. Phasellus porta.