Archive for the ‘In the Garden’ Category
Zucchini-mania
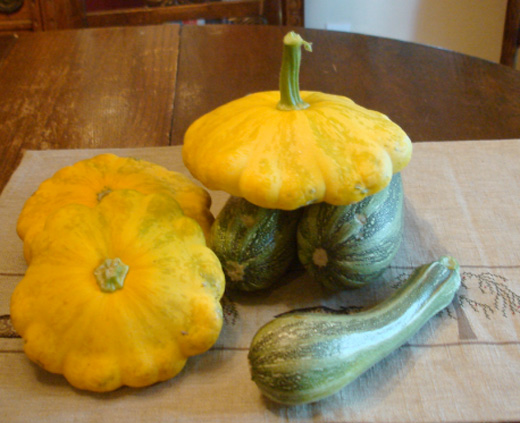
Our summer weather continues to be cooler than normal, with few days in the 80’s much less over 100. Many of our heat loving vegetables are slow to mature, but cool weather crops like lettuce and peas are flourishing. We have been enjoying the chance to work the farm throughout the day, no need to break during the hottest hours. But, I am still nervous that our temperate summer will turn into a firestorm of searing heat come September and October.
Late summer rows of beets, radishes, and carrots are in the ground. There’ll be big salads well into fall. Onions and garlic will find a home in the newly built beds, later in September. But — the two zucchini plants, started late, are doing well.
When it comes to zucchini nothing compares to a squash picked minutes before eating; not store bought nor farmer’s market. The zucchini along with the single Patty Pan are providing enough squash for this farm of two. It is a delight to fill the house with the smell of zucchini bread baking or the heavenly aroma when we sauté zucchini in lemon juice and garlic.
If I am tempted to pick some up out-of-season it’s usually because we have a craving for this rich and moist quick bread with the warm spicy kick; it’s perfect on a cool fall day or a cold winter night, toasted and slathered with fresh churned butter or a bit of sweet honey.
Since I know I’m not the only one over-run by these prolific little green sticks or golden saucers I’m including our two favorite recipes. Enjoy! Read the rest of the story »
Making Your Own Worm Bin
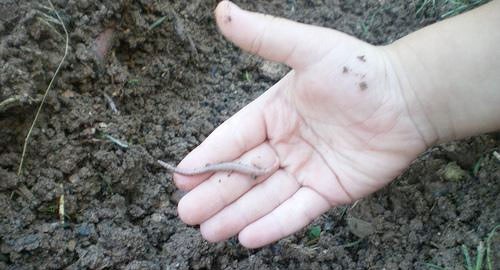
Earth worms are an essential part of good gardening. At least in my mind they are. They are eating machines, transforming kitchen and garden scraps into nutrient rich soil and castings, while churning up the soil, aerating it and improving its tilth.
Raising your own earth worms is easy and inexpensive, if you use materials you already have on hand. Or, you can buy a worm bin system from a garden center or by mail. But, no matter how you come to raising earth worms you’ll never regret the initial work or cost and your garden will benefit greatly from the improved soil.
I was lucky – the previous owners of my farm left a multi-tiered worm bin when they moved out. It sits in the shade near the barn with easy access to the garden and rabbit hutches, and is used all year round. The soil produced is a great addition to our raised beds, as long as I can keep the chickens from eating the worms. But, that’s another story.
To build your own worm bin all you need is a container, either a wooden box, plastic storage bin or 5-gallon bucket. Any type of container should be about 18 to 20-inches deep, but no more than 24-inches deep.
Ventilation of the bin is very important, so which ever type of container you choose drill a few dozen ¼-inch holes in the top and 1/8-inch holes in the bottom and on the sides so the water can drain out. If you purchase a worm bin system they will have a mesh looking bottom for ventilation. Read the rest of the story »
Growing Sweet Potatoes in a Tub
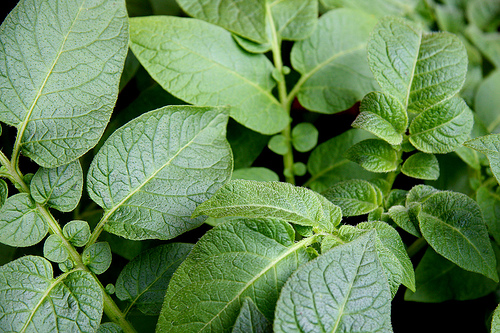
The traditional way of growing any kind of potato, whether it be baking, sweet or yam, is to plant slips in long parallel rows, giving the tubers plenty of room to grow. But, on a suburban homestead where the size of your lot dictates your growing space this is not always possible.
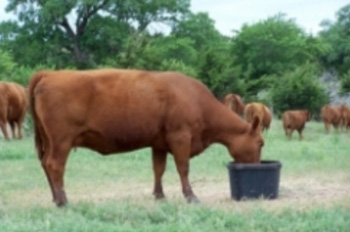 With more crops than space to grow them in we must resort to more and more creative growing methods to produce the food our family wants. Permanent beds of veggies like artichokes, asparagus and potatoes take up valuable space that could be used for root crops, beans, peas or salad greens. On our suburban homestead we have resolved the challenge by growing potatoes in large black tubs. Actually, the tubs use to hold cattle supplements; a mixture of molasses, vitamins and other nutrients used by cattlemen to keep their stock healthy (as seen in this image).
My friend and cattleman, Bill uses about a dozen of these supplement tubs each year and this is the basis of my “potted” potato patch. When the potatoes are harvested, the tubs are cleaned and stored away over the winter, leaving plenty of garden space for other crops.
A few years ago Bill gave me about 10 of these tubs, which measure 24” in diameter and are about 2 feet deep. To make them useable as a planter I drilled drain holes around the bottom every few inches using my 1-inch flat drill bit. When I’m ready to plant my spuds I fill the tub with a mix of good garden soil, well rotted compost and potting soil. Potatoes like a loamy, well-drained soil that is not too rich, which causes the plant to grow more foliage than spuds. As I stir up the mixture I remove any rocks or hard lumpy soil that can damage the growing potatoes. Read the rest of the story »
What Are The Bees Telling Us?
QUEEN OF THE SUN: What Are the Bees Telling Us? is a profound, alternative look at the global bee crisis from Taggart Siegel, director of THE REAL DIRT ON FARMER JOHN.
Siegel takes the viewer on a journey through the catastrophic disappearance of bees and the mysterious world of the beehive, this engaging and ultimately uplifting film weaves an unusual and dramatic story of the heartfelt struggles of beekeepers, scientists and philosophers from around the world including Michael Pollan, Gunther Hauk and Vandana Shiva. Together they reveal both the problems and the solutions in renewing a culture in balance with nature.
To visit the official website for Queen of the Sun click here.
Vegetable Water Does Double Duty
When I was growing up my mom never boiled vegetables because, as she said, “the best part of the vegetable is lost”.
What she meant was the vitamins and nutrients were lost in the boiling water. As I got older and became more aware and educated about organic gardening I also began to wonder if the nutrients in water used to boil potatoes and beets or the water used to steam many of our other veggies couldn’t be used on my plants.
As an experiment I would cool a pot of vegetable water then use it to water my garden. After some time I began to notice how green and lush my plants were becoming.
Now, I never throw a pot of water down the drain, but rather cool it for watering my plants, both potted and ground planted. From pots of boiled potatoes and pasta to steamed vegetables to canning, the water I use throughout the day is doing double duty—cooking and providing a nourishing drink for my plants.
And, the fact that I save a little on my water bill is just an added bonus.
Homemade Seed Tape
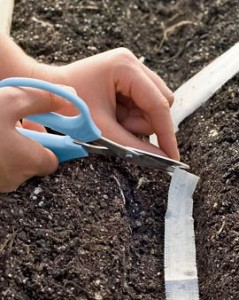
Some seeds are so small and hard to handle that you end up wasting more than you plant, or planting them so close that they need to be thinned heavily. But, it doesn’t have to be that way anymore. You can make you own homemade seed tape with toilet paper and a little bit of honey. The homemade version works just as well as the commercial ones for a lot less money.
Here’s how to make them.
1.) Start with a strip of toilet paper the length of the row you want to plant. If that is too long lengths of 12 to 18-inches is very workable and useable in a garden bed. Spread the toilet paper out flat being careful not to tear it then fold it in half length-wise. After you have creased the TP it can be unfolded to lay flat. Single or double-ply will work, but the single-ply works best because smaller seeds can root through the single layer, plus it decomposes faster. Also try to avoid scented and colored TP as it only adds chemicals to the soil.
2.) Mix about a teaspoon of honey with several drops of warm water to thin it out. The number of seed strips you are making will determine how much honey you will need. Using a small spoon, popsicle stick or paint brush gently spread a thin layer of the honey mixture down the middle of one of the folded sides of TP. Be careful not to press too hard or you will tear the TP.
3.) Before the honey dries, sprinkle an evenly spaced row of seeds down the line of honey. Check each seed packet for the recommended seed spacing. If shaking seeds out of the packet proves too difficult simply pour them into your hand or into a small bowl and place them one at a time onto the TP.
4.) Now fold the unseeded edge of the tape onto the seeded side and gently press so the honey can “glue” the two sides together. The long continuous line of honey will help keep the seeds from slipping out of place.
5.) Using a fine pen gently write the seed name, plant height, row spacing and date seed tape was made onto one edge of the seed tape. Be careful not to tear the tape. Including the plant height and row spacing will help when laying out your garden bed.
6.) After preparing the garden bed lay seed tape in desired location. Cover tape with a light peat moss mixture to the depth recommended on the seed packet. Water and keep moist as with direct sown seeds, especially after seeds have sprouted. The toilet paper tape will protect seeds from birds and small animals and from being blown away by the wind or washed away by rain or sprinklers.
The toilet paper quickly and easily decomposes never to be seen again and what remains is a perfectly laid out garden bed.
![]() photo credit: Minneapolis.Metblogs
photo credit: Minneapolis.Metblogs
Gardeners Hand Scrub
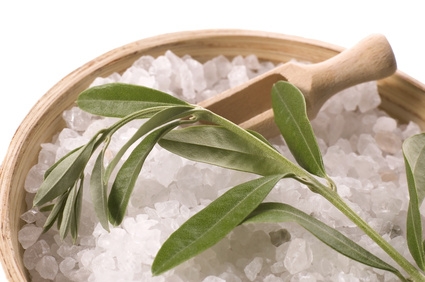
The beginning of the gardening season means not only lots of work, fresh produce and time spent in the outdoors, but also rough hands. Digging in the dirt without gloves, working with machinery, and using various tools can leave hands grimy, dirty, scratched, cracked and rough. This homemade, oil-based salt scrub will clean hands, cut through grease and promote healing. It was formulated by combining recipes and suggestions from several different sources.
Mix the ingredients thoroughly and store in a glass jar with a lid. A wide mouth canning jar works well, because it’s easy to reach into the jar and pull out a dab of scrub.
1 cup Olive Oil
½ cup Epsom salts
½ cup Rock Salt
½ cup Sea Salt
10 drops each Eucalyptus oil and Tea Tree oil
The Eucalyptus and Tea Tree oil add a bit of medicinal quality to the scrub. They provide antibacterial and anti-fungal qualities while soothing and healing rough or injured garden hands. This scrub is also good on feet and knees.
To use, wet your hands and scoop out about 1 teaspoon of the scrub. Gently rub all over hands then keep scrubbing while rinsing under warm water. Work in between fingers (or toes) and around nails get out dirt and grease. A little more may be needed on rough heels. When finished pull thick clean cotton socks or gloves over hands and/or feet. The warmth created will help the oils penetrate the skin leaving it smooth and rejuvenated.
If you take care of your hands, they take care of you, working hard in the garden!
Make Your Own Dibbler – It’s a Dandy in the Garden
What the heck is a dibble?
I’m usually not much of a perfectionist because it tends to create a whole lot of extra work. I leave those little idiosyncrasies to people like my sister, who actually measures the position of her place settings when giving a dinner party. I do however; tend to be a bit more fastidious when it comes to gardening. I lean more towards formally laid out gardens with their clean lines and appealing symmetry. And, at times I find a gardening approach, or tool, that gives me the formality I like while decreasing my workload. Fabulous!
Case in point…The Dibble…a centuries old tool that creates holes in the soil for planting bulbs or seeds, like the one below.
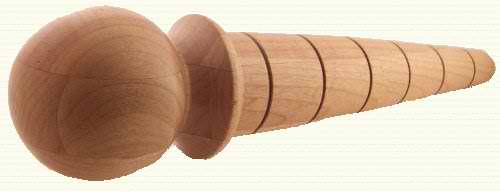
Most dibbles however, make only one hole. I wanted something that would speed up the planting process and get me off my knees. I pondered and stared, stared and pondered, before coming up with a brilliant idea – a dibble that could plant many perfectly spaced seeds at one time (did I say I wasn’t a perfectionist?).
I fantasized about how beautiful my vegetable beds would be, so formal, so linear, so precise that the gardeners of Versailles would weep. And the best part of all…I’d save money on seeds because with the right spacing I wouldn’t need to thin!
So, I set out to create the ultimate dibble for my vegetable beds. Anytime I act on one of my “fantasies” the first thing I do is scour the garage and barn to see what I have on-hand that can be salvaged. The vision in my head called for a dibble that would fit in my raised beds (4’x8’), be easy to handle and allow me to plant my seeds successively for an ongoing crop.
The vision…a board with evenly spaced pegs.
I found a nice piece of ½-inch plywood, but wanted to keep it for another project. I found 2×6’s. No. 2×4’s. No. Smaller pieces of plywood. No, no, no. Then, buried beneath a pile of scrap 1×6’s I found what I was looking for, a 1×6 that was 24 inches long, half the width of my raised beds. Perfect! I brushed it off and sanded down the edges a bit till all was smooth and clean. Then I started marking a grid pattern along the ends and sides. Since most seed spacing is 2 inches my grid spacing would be 2 inches.
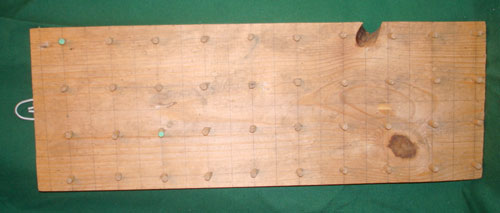
Some may think it may have been better to make a dibble that would cover a larger area, but such a contraption would be large, heavy and unwieldy. Nope this was the perfect size for my needs mainly because I often make successive plantings of certain crops and other times I plant many different varieties of the same crop in one bed. With a smaller dibble I would have more options on how to use it.
The process of making my dibble was fairly simple. After cleaning off my piece of wood I drew out the grid with intersecting points at 2 inch intervals. Read the rest of the story »
Garden Plan 2011
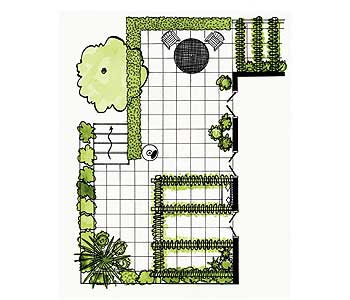
From early spring till fall’s first frost, vegetable gardens can yield not only delicious crops but exercise and life skills as well. But, to get to the point of picking fresh produce you grew yourself you must first start – with a garden plan. Winter is the perfect time to sit and dream and plan out what your garden will look like long after the cold weather disappears.
To begin with, decide what types of vegetables you want to plant and make a list. Then measure all the areas you have available that can be planted. Think about flowerbeds or parkways that could help you expand your available planting area. Not all vegetables need to grow in a set aside garden area. In fact, I normally grow some vine crops like melons, squash and pumpkins in flowerbeds, and every fence is a potential trellis for peas and beans and other vine crops, saving the “garden” for root crops, tomatoes and salad greens.
Once you have measurements for the areas that can be planted, plot them out on graph paper and get ready to “lay out” your garden. Using the growing space requirements for each crop, measure and build your graph paper garden. This will help you see if modifications need to be made because of space challenges.
My garden will be smaller this year because Brianne wanted a larger exercise area for her lambs (a sacrifice I was willing to make since this is her last year to show). What won’t change though is the geometry I use to maximize production. The 17’ x 14’ main garden area will have a center pathway of two feet. Each row of vegetables will be 2-feet wide with a one foot wide path between them for easy weeding, hoeing and harvesting. To help control the weeds and retain moisture, each row will be mulched with a layer of chipped wood, given away for free from our local library.
At the far end of each row, a variety of tomatoes will be planted for fresh, slicing, canning and sauce. Larger vegetables like cauliflower, broccoli and cabbage will be interplanted with smaller, faster growing root vegetables and greens that become harvestable long before the larger vegetables grow big enough to shade them out. On the pathway end of each row I’ll plant marigolds and herbs to help ward off insects. Non-traditional garden areas will be amended with composted rabbit, chicken and sheep manure to improve the soil quality and give the transplants a good start. Once planted, these garden areas will also be mulched to keep down the weeds.
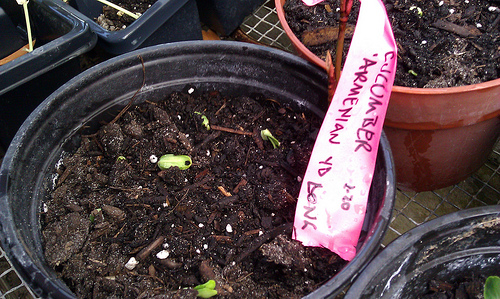
While I spend my evenings “fine tuning” my garden plan, daylight hours are for starting seeds. Vegetables like broccoli, cabbage, cauliflower, cucumbers and tomatoes like to be started indoors weeks before they are ready to “plant out” in the garden. I use a homemade seed soil mix of well-rotted compost, good soil, peat moss and sand. Pony packs, 4-inch pots, clay pots and other containers are collected year-round from family and friends. They have to be sterilized though to help prevent the potential spread of disease. I do this by mixing one teaspoon of bleach to every one gallon of water in a five gallon bucket, then rinsing each container well with clean water.
Spring is still weeks away, but so far this season we’re off to a good start. Our mild weather and decent rain has made life easy for early season cool weather vegetables. And, if things keep up we’ll have a garden bursting with vegetables full of color and flavor by the beginning of summer.
So, folks, how are your garden plans coming???
![]() photo credit: Garden and Beyond
photo credit: Garden and Beyond

Recent comments
Aenean nonummy hendrerit mauris. Phasellus porta.