Posts Tagged ‘Molasses’
Mid-West Drought to Cause Food Price Increases

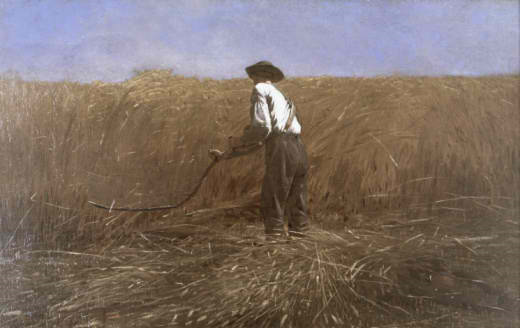
As crops shrivel and die from lack of rainfall across the country food prices will undoubtedly go up in the months to come. First will be prices on short cycle commodities like eggs, poultry and milk; followed by spikes in meat and other products that utilize corn or corn by-products in their processing.
Now is the time to stock up on items that could be out of your reach in the future. It is also the time to get serious about growing your own food. In many parts of the country there is still time to plant short term crops like root veggies and salad greens. It is also a good time to plan your fall and winter garden, taking advantage of seeds that may be on sale now.
Take advantage of summer sales on meat and lay aside items that you don’t or can’t raise yourself. I’m keeping an eye on beef and pork sales, both commodities that will be hit hard by the current crop disasters. Even if I do decide to raise a pig this fall it will be months before I can enjoy the fruits of that labor. Filling in gaps now will keep me eating well until my own pig is in the freezer.
If possible, stock up on livestock feed you can use in the next few months, pushing out the sticker shock that’s bound to come. Non-molasses based feeds like lay mash, lay pellets, pig chow and the like will take a big jump in price as the corn and other grain crops wither in the fields. Be cautious with molasses feeds though as they can go rancid if not used in a timely manner.
Speaking of other grains, they too will likely follow suit, or food distributors will take full advantage of increasing prices on corn and jump on the price-hike bandwagon, pushing prices higher to make a bigger profit. Stocking up on wheat, flour, corn meal, rice, barley, millet, etc. could help keep your family eating well over the winter months.
Remember too, grains are long term crops, meaning they take months to go from just planted seeds to a harvestable crop. A decrease in price is not likely to be seen until mid- to late- 2013, if at all. I can still remember the huge jump local fruit prices took during a grocery store strike in the early 2000’s. Prices went from under a dollar a pound for most fruits to almost $2.00 a pound and prices have never come back down. Disaster situations, like the current drought, seem to be a way for food manufacturers to increase prices whether or not the products are directly affected by market conditions. What goes up does not always come down.
This is also a great time to reevaluate how you use the food you grow or buy. Americans throw away millions of dollars worth of food because they buy more than they can use, don’t store it properly or just don’t plan to use it before it goes bad. Buying less per trip could be a solution in managing your grocery budget. Getting creative about using up everything you buy is also another tactic to keep your food budget under control.
At our homestead we try to plan meals that use up bits of leftovers to serve filling and satisfying dishes. It’s amazing how small amounts of leftovers or fresh items can be transformed into an entire meal. Case in point…tonight we will be enjoying a skillet full of beef stroganoff made from a few mushrooms, half an onion, a small amount of chuck I bought in the clearance meat section, beef broth made and frozen last winter and a dab of sour cream. I always have noodles in the pantry and a small piece of French bread and a small salad of fresh greens will round out a perfect budget meal.
Stay tuned, folks. As times get tougher you’ll see a lot more tips on how we stretch our food dollars and make the most of what we buy.
Growing Sweet Potatoes in a Tub

The traditional way of growing any kind of potato, whether it be baking, sweet or yam, is to plant slips in long parallel rows, giving the tubers plenty of room to grow. But, on a suburban homestead where the size of your lot dictates your growing space this is not always possible.
 With more crops than space to grow them in we must resort to more and more creative growing methods to produce the food our family wants. Permanent beds of veggies like artichokes, asparagus and potatoes take up valuable space that could be used for root crops, beans, peas or salad greens. On our suburban homestead we have resolved the challenge by growing potatoes in large black tubs. Actually, the tubs use to hold cattle supplements; a mixture of molasses, vitamins and other nutrients used by cattlemen to keep their stock healthy (as seen in this image).
My friend and cattleman, Bill uses about a dozen of these supplement tubs each year and this is the basis of my “potted” potato patch. When the potatoes are harvested, the tubs are cleaned and stored away over the winter, leaving plenty of garden space for other crops.
A few years ago Bill gave me about 10 of these tubs, which measure 24” in diameter and are about 2 feet deep. To make them useable as a planter I drilled drain holes around the bottom every few inches using my 1-inch flat drill bit. When I’m ready to plant my spuds I fill the tub with a mix of good garden soil, well rotted compost and potting soil. Potatoes like a loamy, well-drained soil that is not too rich, which causes the plant to grow more foliage than spuds. As I stir up the mixture I remove any rocks or hard lumpy soil that can damage the growing potatoes. Read the rest of the story »
Sunday Baking

Sundays are a day of rest at our farm. It’s a time when we leave most hard core jobs for another day. Whether we consider it the end of a week or just the beginning the pace is slower and more relaxed, with time to stroll in the garden and soak up some sun.
Sunday is also the day I bake my weekly bread. It’s a ritual I enjoy and one that lends itself well to a day of puttering. The weather is chilly and gloomy out there, a sharp contrast to the gardening-inducing sun of previous days. It is warm inside and the quiet melodic tunes coming from the radio seem to keep time with my wooden spoon moving around the bowl. I don’t know the name of the song, I don’t bother to pay attention to such mundane things on days l like this, but it a grand way to pass an afternoon. Grand indeed. Heat up the tea pot, kick off my shoes, cradle a newborn chick in my hands and breathe a little slower. Everyone has their own way of celebrating their faith. This is mine. A time when time itself seems to almost stand still, where songs sink deep into the soul reminding us of life’s more important meanings, where the food is good and a cup of tea puts a life on the mend. Life is good. Have a soulful day, all.
Buttermilk Whole Wheat Bread
(from Bernard Clayton’s New Complete Book of Breads)
(makes one 9″x5″ or two 8.5″x4.5″ loaves)
Ingredients:
2 packages dry yeast
3/4 cup warm water (105-115F)
1-1/4 cups buttermilk, room temperature
1-1/2 cups bread flour, approximately
3 cups whole wheat flour
1/4 cup shortening, room temperature
2 tablespoons brown sugar or molasses
2 teaspoons baking powder
2 teaspoons salt
Step 1 – In a large mixing bowl sprinkle the yeast over the warm water and stir briefly to dissolve. Set aside while allowing the buttermilk to reach room temperature, about 15 minutes.
Step 2 – When at room temperature, pour the buttermilk, bread flour, 1 cup whole wheat flour, shortening, brown sugar or molasses, baking powder, and salt into the yeast mixture. Blend with 50 strong strokes of a wooden spoon, or at low speed in a mixer until the flour and the dry ingredients are absorbed. With a wooden spoon or mixer flat beater stir in the remaining whole wheat flour, 1/2 cup at a time, and, when it becomes thick, work with the fingers. Allow 4 to 5 minutes for the whole wheat flour to fully absorb the liquid before adding more flour. The dough will be slightly sticky and soft. You may wish to add more bread flour to help control the stickiness.
Step 3 – Sprinkle flour on the work surface and turn out the soft dough. In the early stages of kneading, a metal spatula or dough blade will help turn and fold the dough. It will also scrape up the film of dough from the work surface. Knead with a strong push-turn-fold action, occasionally lifting the dough above the counter and banging it down hard. Knead for 8 minutes, buy hand or with a dough hook.
Step 4 – There is no “first” rising–the dough is put in the pans and set aside to rise. Divide the 2 pieces, if desired, and allow to rest for 5 minutes. Shape into balls; press the balls into ovals the length of the pans. Fold in half lengthwise, pinch the seam, and place in the pans with the seam under. Push the dough into the corners of the pans. Cover the pans with wax paper and leave at room temperature until the dough has risen 1″ to 2″ above the level of the pan, about 50 minutes. (Rising times will be reduced if using instant yeast.)
Step 5 – Preheat oven to 425F 20 minutes before baking.
Step 6 – Bake the loaf or loaves in the oven until they are golden brown and loose in the pans, about 30-35 minutes. Cover with foil if the crusts are browning too rapidly. The loaves are baked if the sound is hard and hollow when thumped on the bottom crust.
Step 7 – Remove loaves from the oven and place on wire racks to cool.

Recent comments
Aenean nonummy hendrerit mauris. Phasellus porta.