Posts Tagged ‘Gallon Bucket’
Homemade Laundry Detergent
If I told you that you could make 5 gallons of laundry soap for just a few dollars would that interest you? It peaked my interest and we’ve been making our own laundry soap ever since. The average American household washes 6 to 7.5 loads of laundry each week and spends $120 – $378 a year on detergent. With less than an hours worth of time and a few simple ingredients you could save hundreds of dollars a year.
Since making our own, this is the recipe we use. You can find all of the ingredients you need in the cleaning isle of your local grocery store, Target, K-mart or other variety store. Adding a few drops of an essential oil keeps our clothes smelling fresh as the day!
To make a 5 gallon bucket of laundry soap use:
1 cup Borax
1 cup washing soda
2/3′s of a bar of Fels-Naptha or 1 bar Ivory soap, grated (I keep an inexpensive cheese grater just for the soap)
12 cups of water, kept warm on the stove
8 cups of hot tap water to be added when you mix the ingredients in the 5 gallon bucket
2 gallons + 12 cups of hot tap water for your final stir.
Directions:
Heat 12 cups of water on LOW heat in a big pot.
Add the grated soap, stirring constantly to dissolve.
When the soap is completely dissolved add 1 cup Borax and 1 cup Washing Soda.
Stir until the Borax and Washing Soda is completely dissolved and the mixture thickens (about 5 minutes).
Add 8 cups of HOT tap water to your 5 gallon bucket.
Pour soap mixture into bucket and stir.
If you want a fragrant soap add a few drops of essential oil now. We use lavender or orange. It’s wonderful, smells fresh and clean!
Stir to combine the soap mixture, water and essential oils, if added.
Add 2 gallons + 12 cups of HOT tap water to make the five gallons.
Stir and cover. Let sit overnight.
When you’re ready to do laundry:
Use 1/2 cup of laundry soap for each load. I use the cap of an old liquid detergent container to measure with. To keep the cap from gunking up I just throw it in with the laundry. It comes out clean and fresh every time.
Store your homemade detergent in old laundry detergent containers or use it right from the 5 gallon bucket. For a pretty look in your laundry room pour it in old mason jars or decorative containers. Keep detergent covered when your not using it.
Making Your Own Worm Bin

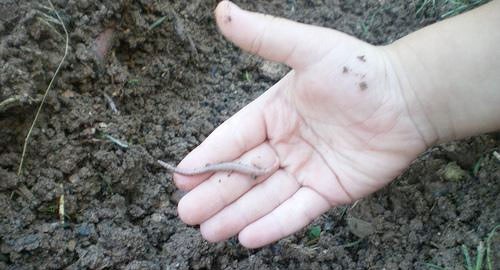
Earth worms are an essential part of good gardening. At least in my mind they are. They are eating machines, transforming kitchen and garden scraps into nutrient rich soil and castings, while churning up the soil, aerating it and improving its tilth.
Raising your own earth worms is easy and inexpensive, if you use materials you already have on hand. Or, you can buy a worm bin system from a garden center or by mail. But, no matter how you come to raising earth worms you’ll never regret the initial work or cost and your garden will benefit greatly from the improved soil.
I was lucky – the previous owners of my farm left a multi-tiered worm bin when they moved out. It sits in the shade near the barn with easy access to the garden and rabbit hutches, and is used all year round. The soil produced is a great addition to our raised beds, as long as I can keep the chickens from eating the worms. But, that’s another story.
To build your own worm bin all you need is a container, either a wooden box, plastic storage bin or 5-gallon bucket. Any type of container should be about 18 to 20-inches deep, but no more than 24-inches deep.
Ventilation of the bin is very important, so which ever type of container you choose drill a few dozen ¼-inch holes in the top and 1/8-inch holes in the bottom and on the sides so the water can drain out. If you purchase a worm bin system they will have a mesh looking bottom for ventilation. Read the rest of the story »


Recent comments
Aenean nonummy hendrerit mauris. Phasellus porta.