Posts Tagged ‘Colander’
Best Ever Berry Jam
Within 5 miles of our house we have three U-pick operations and several Farmer’s Markets where we can find a good selection of seasonal berries. And, although there is nothing better than jumping in the car, combing fields for the freshest produce and ripping it from the soil, the place I like the best is my neighbor’s backyard.
We watch Fran and Joe’s place, feed the chickens and water the gardens when they are on vacation. Our payment…anything that’s ripe.
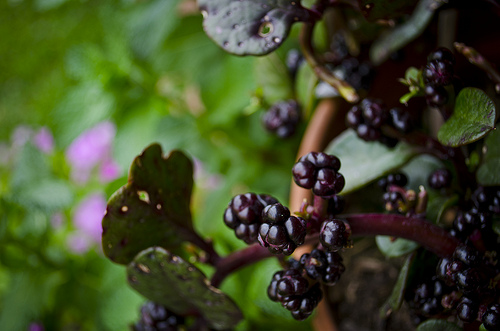
It was cloudy and a slight westerly breeze blew when Brianne and I walked down the street to check on things. As Brianne went about her chores, I headed for the berry patch. The huge, dark blackberries clung to their canes like gems. I filled my colander. I had a plan. That afternoon I would take these little gems and cook them slowly on the stove, filling the house with their sweet aroma. Mmmm.
Making any kind of Berry Jam is easy. All you really need is berries and sugar. You can use pectin (liquid or powder) if you like, but I prefer not to. I just fill a large pot with 9 cups of berries and 6 cups of sugar, turn the heat on and slowly bring to a boil, stirring occasionally, until all the sugar is dissolved. At this point I either mash the berries with a potato masher or lightly whirl them with an emersion blender, making sure to leave a bit of chunkiness. I continue cooking and stirring the jam rapidly until it reaches the gelling point. When the jam is gelled enough I remove it from the stove and ladle it into hot jars. The jars are dropped into the water bath canner for 15 minutes then set on a clean dry cloth to cool. When you hear the tell-tale POP of the lid, signaling the proper seal, you know you’ve done it right.
The whole process, from first wash of berries to the last lid POPPING takes less than an hour. And, for that you get enough berry goodness to remind you of summer all winter long. I made 9 pints of jam. That’s a lot of jam, folks! And, what a bargain, too. For the price of a few jars and lids, and free berries from friendly neighbors my pantry is stocked with something way better than Smuckers. Not a bad deal!
For detailed instructions, pick up a copy of the famous Ball Blue Book Guide to Preserving, at any hardware, farm store, book or discount store. It covers everything you need to know about canning and costs less than a case of jars. Enjoy!
![]() photo credit: Price Finder
photo credit: Price Finder
Say Cheese!
Have you ever walked through a cheese shop and marveled at the intoxicating smells, the creamy textures and robust flavors of all those varieties of cheese? From creamy, spreadable farmstead cheeses to wonderfully sharp cheddar’s to pungent crumbly blues and feta’s? It’s enough to make your taste buds euphoric.
Cheese making may seem like a daunting task. But, if you’ve never tried it, you’ll be amazed at how fast and easy it can be. The only equipment cheese making requires is a stainless steel pot (at least 10-quart), measuring spoons, cheesecloth (not gauze), colander, and a dairy thermometer.
Before you start, you’ll want to learn more about the ingredients used to make cheese and how each one will help you make your own wonderful end product.
The Main Attraction – MILK. Using fresh, whole milk from grass-fed cows or dairy goats will produce the best results. Try purchasing from a local producer or farmers’ market. (to find local producers contact your local Farm Bureau office)
Low-fat milk can also be used, but it will produce less cheese in the end. Store-bought milk will work fine also. Just be sure to avoid any brands marked “ultra-pasteurized” because the pasteurization process damages the milks ability to coagulate. Ultra-pasteurized milk may be able to sit around for many weeks without spoiling, but it can’t be made into cheese.
Get Some Culture. Cheese cultures and starters are bacteria’s, molds and acids that help the coagulation process which develops each cheeses unique flavor. Cultures can be found at natural foods stores or through specialty suppliers like New England Cheesemaking Supply or Leeners.
Rennet. Rennet, which comes in liquid, tablet or powder form, contains enzymes that cause milk solids to separate from the whey and form curds. Traditionally, rennet is made from the stomach lining of an infant ruminant or grazing animal. (The enzymes help the animal digest its mother’s milk.)
Most store-bought cheeses rely on animal-based rennet, but vegetable rennet is also widely available. Vegetable rennet is made from plants, like figs and thistle that have the coagulating properties needed to make cheese.
Salt. Salt is used as a flavor enhancer and preservative. It also draws out excess moisture in the cheese. You can use specialty cheese salt, which is coarser than table salt, or non-iodized salt, but do not use iodized salt because it stops the active starter bacteria.
Clean water. Filtered water is best when making cheese because some municipal water supplies contain additives that compromise milk’s ability to be made into cheese.
Now you’re ready to make cheese!
30-minute Mozzarella
1 gallon milk
1 1⁄2 tsp powdered citric acid dissolved in 1/4 cup cool water
1/4 tsp liquid rennet diluted in 1/4 cup cool water (if using rennet tablets, follow conversion instructions on the package)
1 to 2 tsp cheese salt
Slowly heat the milk to 55 degrees Fahrenheit in a stainless steel pot. While stirring, slowly add the citric acid solution to the milk and mix thoroughly but gently.
Heat the milk to 88 degrees over medium-low heat. The milk will begin to thicken like yogurt.
Gently stir in the diluted rennet for 30 seconds. Then don’t disturb the milk while you let it heat to between 100 and 105 degrees. In about 5 to 8 minutes, the curds should begin to break up and pull away from the sides of the pot. Turn off the heat.
The curds will look like thick yogurt and become a bit shiny, and the whey will be clear. If the whey is still milky white, wait a few more minutes before turning off the heat.
Scoop out the curds with a slotted spoon and put in a bowl. Reserve the whey. Press the curds gently with your hands, squeezing out as much whey as possible.
Heat the reserved whey to 175 degrees. Shape the curds into several small balls, rolling them between your palms. Put them, one at a time, into a ladle, and dip them in the hot whey for several seconds. Then gently fold the cheese over and over (as in kneading bread) with a spoon or your hand. (You’ll want to wear rubber gloves at this point, as the cheese will be extremely hot.) This distributes the heat evenly throughout the cheese, which will not stretch until it is too hot to touch (145 degrees inside the curd).
Repeat this process several times until the curd is smooth and pliable; mix in salt after the second time. When the cheese stretches like taffy, it’s done. If the curds break instead of stretch, they are too cool and need to be reheated.
When the cheese is smooth and shiny, roll it into balls and eat while warm. Although best eaten fresh, it can be stored in the refrigerator for a week or so.
Makes: About 1 pound
Simple Cream Cheese
2 quarts cream or half-and-half, at room temperature (about 72 degrees)
1 packet direct-set mesophilic starter or 4 ounces prepared mesophilic starter
Cheese salt (optional)
Add the starter to the cream, and mix thoroughly. Cover and let sit for 12 hours; a solid curd will form.
Pour the curd into a colander lined with cheesecloth. Tie the cheesecloth into a bag, and hang from a hook until the bag stops dripping, about 12 hours. Changing the bag once or twice can speed up the process.
Place cheese in a bowl and mix in the desired amount of salt. You can leave the cheese in this container, or pack it into molds of any size. You can also add any desired herbs and spices at this stage. Your cream cheese will store in the refrigerator for up to 2 weeks. Makes: About 1 pound
Super Simple Ricotta
Ricotta is traditionally made by recooking the whey from a previous batch of hard cheese, such as Parmesan, but this recipe is a simpler version. Use fresh ricotta in Italian classics like lasagna, or serve with honey and Italian breads.
1 gallon milk
1 tsp citric acid dissolved in 1/4 cup cool water
1 tsp cheese salt (optional)
Add the milk and the citric acid solution to a stainless steel pot. Stirring occasionally to prevent scorching, slowly heat the mixture to between 185 and 195 degrees. As soon as the curds and whey separate (there should be no milky whey, only clear whey), turn off the heat and let sit undisturbed for 10 minutes.
Line a colander with cheesecloth, and ladle the curds into the colander. Mix in the salt with a spoon. Let the cheese drain for 30 to 45 minutes. For firmer cheese, tie the cheesecloth into a bag and hang it from a hook to drain. Serve immediately or refrigerate. Makes: 1 1⁄2 to 2 pounds
Home Cheese Making by Ricki Carroll is a great resource for any new cheesemaker. Ricki has taught thousands of people to make cheese; and to her devotees she is known as “The Cheese Queen.” You can order the special ingredients from her company, New England Cheesemaking Supply or call 413-628-3808. Be sure to check out the site’s step-by-step photographic instructions for making many kinds of cheese.
Goat’s Milk Feta Cheese
Making feta goat milk cheese at great way to use up excess goats milk and can be used in almost any dish that calls for cheese. Its best use, though, is replacing ricotta and cottage cheese.
1 gallon goat milk
½ cup distilled vinegar
Any spices or herbs you would like to add
Pour milk into pot; turn heat on low. While milk is warming, set colander in sink and line with cheesecloth.
Before milk comes to a boil, the surface of the milk will look like it has a “skin,” and the skin will begin to dance. When this happens, turn heat off immediately. Slowly stir in ½ cup of distilled vinegar. This is the acid that will create curds and whey.
Let the milk sit for 1-hour while the curds form and separate from the whey.
After an hour, carefully pour the mixture into the cheesecloth-lined colander. Be very careful because the mixture is hot and will splatter.
Drain the curds to the consistency you desire. For moister cheese, drain for less time; drain longer for a drier cheese. Drier cheese crumbles better on salads.
Next, pour cheese back into the pot and add any herbs or seasonings you like. Horseradish, salt, onion mixes, garlic and chives are traditional favorites. Or, pat into rounds and roll in herbs or seasonings.
Makes: about 1 pound
![]() photo credit: quinn.anya
photo credit: quinn.anya


Recent comments
Aenean nonummy hendrerit mauris. Phasellus porta.