Search results
Preserving the Harvest
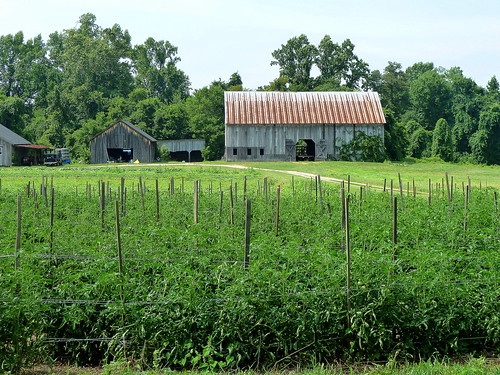
The garden is in full swing this time of year. Vegetables are picked daily and the vacancies are replanted for another round of late summer or fall crops. The kitchen is abuzz with cleaning and chopping and blending and boiling.
This is the time that canning begins in earnest.
Our cooler than normal temperatures this summer have been a God send for summer canning. What would normally be a hot, sticky task has, so far, been a great pleasure. We’ve already canned blueberry, apricot and mixed berry jam; peach chutney, spiced peaches, zucchini relish and festive mild salsa. In a month there will be tomatoes – paste, stewed and sauce for pastas and pizzas.
I first learned to can with my mom. We had a neighbor on our street that made almost everything from scratch. From baking bread and making hamburger buns to canning jams, jellies, chutney’s and pie filling she made them all at home and in season. When our home garden overflowed we would take the extra produce to our neighbor and she would help us “put it up” for the winter. I loved the process of canning – getting produce ready for each recipe, stirring a bubbling pot over the stove, and then labeling colorful jars full of homegrown produce that would line our pantry shelves. Each bite throughout the winter would remind us of our summer garden and the days spent canning with friends. It was a country girls dream come true.
First time canning can be a daunting undertaking. With the fear of spoilage and the potential for botulism it’s a normal reaction. But, with proper handling and adherence to processing guidelines, the chances of causing harm are minimized. But, rest easy. Today’s methods of preserving are much easier and much more foolproof thanks to the two-piece lid closures from jar manufactures.
If you’ve decided that preserving food is on your homestead “TO-DO” list there are two important things you must do. The first is to destroy all micro-organisms such as bacteria, molds and yeasts that are naturally present in food to prevent them from spoiling the preserved food. The second important thing is to make sure your preserving containers are well sealed so that other organisms can’t enter, or they will also cause your carefully prepared food to spoil.
For the first-time canners simple recipes like jams are quick and easy. Or, try small batch canning (recipes that produce 2 to 4 pints or half-pints) until you feel more comfortable with the process. Anyway you approach it canning will bring summer’s colorful bounty to your family’s table all winter long.
To learn more about preserving the harvest check out these helpful links:
For canning books that would make great additions to your homestead library check these out.
http://www.amazon.com/Complete-Book-Small-Batch-Preserving-Year-Round/dp/1554072565
Gadzukes… Zucchini’s!

Zucchini is a delicious and simple addition to any garden. They are very common in many gardens because they are beautiful, so easy to grow and prolific. But, these garden staples can produce too much of a good thing.
If you suffer from “what to do with all these zucks”, try this simple relish recipe and put a lid on all those zucks. This recipe was given to me by my mother-in-law and has been a staple in our pantry for years. It makes a great substitute for sweet pickle relish on hamburgers and hotdogs and is the main ingredient in our homemade Thousand Island dressing.
Zucchini Relish
10 cups – grated zucchini
4 cups – grated yellow onion
5 Tbsp – salt
1 each – grated red and green bell pepper
3 cups – sugar
2 Tsp – dry mustard
3 Tsp – turmeric
2 Tbsp – cornstarch
2 Tsp – celery seed
½ Tsp – pepper
2-1/2 cups – cider vinegar
2 small jars – pimiento
Mix grated zucchini, onion and salt. Let stand overnight.
Rinse and drain. Place in large stock pot. Add red and green peppers, sugar, mustard, turmeric, cornstarch celery seeds, pepper and vinegar. Cook on low to medium heat until thick, stirring constantly, about 5-minutes. Do not over-cook. Ladle into sterilized, hot jars and seal immediately. Makes about 6 pints.
![]() photo credit: seelensturm
photo credit: seelensturm
Suburban Homesteading – One, Two, Three
Three Easy Steps To Get You Started – Homesteading In Suburbia
Part One of a Three Part Series
Starting a suburban homestead can be a daunting task, not to mention gleaning through the mounds of information and trying to scale it down to meet the needs of your suburban homestead. With this in mind, Suburban Homesteading – One, Two, Three will lay out the basic steps for turning your suburban home into a productive homestead.
During the homesteading era of the 1800’s, a family’s primary concerns were to provide shelter, warmth, food and water. But for the modern day suburban homesteader, these are either already provided through the home (i.e. heat and water) or easily accessible as in the case of food from a grocery or big-box store. So, homesteading becomes a choice rather than a necessity. Even though you have time to think about what you want to do as a suburban homesteader, there are still practical steps each family should take. And the first step to take is to PLAN.
STEP ONE – Having the Family Discussion
If you’ve been thinking about turning your humble suburban lot into a thriving, productive “mini-farm,” discuss it with your family first…kids included. It’s difficult to homestead alone, and without the family’s “buy-in,” it can be an uphill struggle.
Talk about the kind of homestead you want to have and how self-sufficient you want to become.
The most important step in a successful homestead that doesn’t overwhelm you is “THE PLAN”. Since this is the beginning stage of the plan, dream big and list everything you want to do, be and have. Don’t worry about having enough space or buying the right supplies, there are plenty of people who grow food on apartment balconies or on condo patios.
Reality will set in soon enough – forcing you to scale down your plans and be a bit more realistic. But, for now, the sky’s the limit.
To help get you talking about the possibilities a sampling of questions you and your family will want talk about is below. As you go through this process, more questions may come to mind. Include any of your own questions along with the answers to the list that is provided. This is by no means all the questions that should be asked. They’re provided just to get you thinking.
The answers to some of these questions will depend on the amount of time and effort you want to dedicate, and can dedicate to your homesteading venture.
Be sure to write down your answers so you’ll have them for future steps in the process.
Food Storage Fundamentals
 One of the goals of any homestead is to ultimately provide homegrown fruits, vegetables, meat and dairy. And a “suburban homestead” is no different. But, we all have to eat while the homestead “gets off the ground”. Along with that, we should always be prepared to survive what ever natural disasters frequent the area of the country we live in. One way to do this is with long-term food storage.
Now, more than ever, the topic of food storage is being discussed from coffee houses to corner offices. The more information we hear about the depth of our economic challenges, the length of time it will take to fully recover and the predictions about food shortages, the more families are turning to storing food.
With all the information swirling around the actual process of figuring out what to store, how much to store, where to store it and what to store it in can be quite daunting.
The websites below give great information about the entire process.
The University of Utah website gives a concise easy to understand overview of the need and process of food storage; while the food calculator you’ll find here is a great tool to figure out “how much” of each food item your family should store.
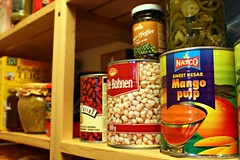
Food Storage Made Easy is a fun website that can address all your questions about food storage. It also has a lot of great examples and photos of what a food storage pantry looks like.
I haven’t mentioned food storage containers mainly because I prefer the more frugal approach of getting food grade buckets from donut shops or deli. If that’s not your style, you can Google food storage containers, there are lots of choices.
The best way to make it through any disaster, whether natural or man-made is to be prepared. But, remember this is a process that can be done over time; adding storage items to your weekly or monthly shopping. Or, whenever you find great sales on the foods your family enjoys. It doesn’t have to be done all at once.
Recent comments
Aenean nonummy hendrerit mauris. Phasellus porta.