Pumpkin Butter
 With fall in the air and Halloween just a few weeks away the pumpkin harvest in our county is in full swing. Beautiful orange globes of all sizes can be found in every farm stand, filling shop windows and decorating front porches. But what about eating pumpkins?
In the world of pumpkins, there are varieties that are prefect for carving – and those that are made for eating. That huge spooky-faced Jack O’Lantern may look great all lit up on Halloween night, but it isn’t the best choice for recipes that call for pumpkin.
There are carving pumpkins and then there are eating pumpkins!
While all pumpkins are edible, the larger varieties used for carving make poor cooking choices because they are low in sugar, have thin walls (which means less meat), and are stringy. Although, you can puree the meat of these pumpkins for soup or pumpkin bread, most pumpkin recipes taste better when using the smaller, sweeter varieties that weigh 3 to 6 pounds. Pumpkins with names like New England Pie, Baby Pam, Small Sugar, Trickster or Winter Luxury pretty much say it all. Eat Me!!
So – you have your perfect eating pumpkin…now what?
Make puree of course!
When selecting your pumpkins, like any other squash, look for ones that are firm, without bruises or soft spots, and have good orange color.
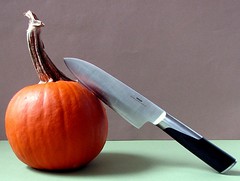
- Wash the exterior of the pumpkin in cool or warm water without soap. Cut the pumpkin in half using a serrated knife so it won’t slip and cut you.
- Scrape the inside to get out the seeds and all the stringy stuff that covers the inside.
- SAVE THE SEEDS!! to plant next year! Place them in a bowl of water and rub them between your hands. Pick out and discard any orange bits, drain off the water, spread seeds out on a clean towel or newspaper to dry and they’re ready to save for next year’s garden.
- To steam cook, place steamer basket in the bottom of a large heavy pot. Put in enough water so it reaches the bottom of the basket. You may need to add more water later. Set the pumpkin in the basket and get the steamer going. Cooking time is about 8 to 12 minutes, depending on your stove. It’s done when the pumpkin literally falls off the skin.
- Use a spoon to lift and scoop the cooked pumpkin out of the skin. It should come out easily, if the pumpkin is cooked enough. (If the pumpkin seems watery simply drain off the liquid or place pulp in a cheesecloth to drip overnight).
- For a nice, smooth puree use an emersion hand blender. Regular blenders work fine too. Or, even a hand mixer. With the emersion blender, it only takes 2 or 3 minutes! Note that the yield is about 2 or 3 cups of puree per 6 inch diameter pie pumpkin.
Now you’re ready to make Pumpkin Butter.

Gathering Ingredients and Supplies
- 7 quarts pumpkin puree. Puree cooks down to about half its volume when making pumpkin butter. For 7 quarts of pumpkin butter, you’ll need 6 or 7 small pie pumpkins.
- Cinnamon
- Cloves
- Allspice
- Jar thongs
- Jar funnel
- Crock pot (slow cooker)
- Large spoons and ladles
- Pressure canner
- Canning jars
Recipe and Directions
Once you’ve made the puree, fill a crock pot to within 2 inches of the rim, about 5-quarts.
Add to the crock pot:
- 2 tbsp, ground cinnamon
- 1 tsp, ground cloves
- 1/2 tsp, allspice
- 4 cups sugar
Set the crock pot on low or medium heat. Cover loosely with lid. Don’t seal tightly as you want the steam to escape so the puree can thicken. Cook for 6 to 8 hours or overnight. Overnight cooking will reduce puree by half. At the end of the cooking time add the remaining pumpkin puree and 2 more cups of sugar; let it cook a few more hours so flavors can blend.
This is a good time to get the jars ready, so you won’t be rushed later. A dishwasher is fine for washing jars; the processing will sterilize them as well as the contents. If you don’t have a dishwasher, wash jars in hot, soapy water and rinse, then sterilize jars by boiling for 10 minutes. Keep jars in hot water until ready to use.
Jars washed in the dishwasher can be left on “heated dry” until they are ready to be used. Keeping them hot will prevent the jars from breaking when filled with hot pumpkin butter. Put the lids into a pan of boiling water for 5 minutes.
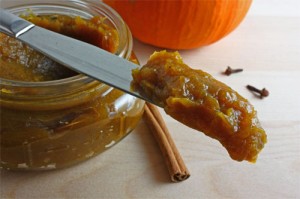
Once the pumpkin butter is finished you’ll want to blend it so you have a smooth, creamy final product. This is where an emersion blender comes in handy. It does a great job right in the pot.
If your pumpkin butter turns out too thick, simply add a bit of apple juice or apple cider and blend until you get a consistency that’s to your liking. If it’s not thick enough, continue to cook with the lid off so the steam can escape.
That’s it! You’re done! Your pumpkin butter is ready to use, unless you want to can or freeze it.
A word of caution here… the USDA and university researchers DO NOT recommend home canning of pumpkin purees for long term storage. But, it can be canned and stored in the fridge for several months without problems.
To Can: Fill hot, sterile jars to within 1/4 inch from the top, wipe any spillage from the rim; seat the lid and tighten the ring. Since pumpkin is a low acid fruit you must pressure can it to reach a temperature high enough to kill any bacteria.
If you’d still like to can your pumpkin butter, place jars in the pressure canner and follow the manufacturer’s directions for cubed squash. Remember – there are no specific canning processing times for pumpkin butter. With that in mind, sealed canned puree and pumpkin butter can be stored safely in the refrigerator for several months.
To Freeze: For safety’s sake it is preferable to freeze pumpkin puree and make small batches of butter as needed. Simply place in freezer bags or containers, trying to remove as much air as possible.
To read more about why it’s not recommended to can pumpkin purees click here
http://www.uga.edu/nchfp/publications/uga/pumpkin_butter.html
Recent comments
Aenean nonummy hendrerit mauris. Phasellus porta.