The Homesteaders GMO
Wait! Don’t yell at the screen, throw your computer, or block the blog. I haven’t lost my mind or gone over to the dark side. In fact, I am very much in control of my senses. And, I am still very much against splicing, dicing and re-arranging the genes in our food. We have already manufactured all nutrients out of our food, why take it one step further by bringing the alien stuff into our kitchen.
The GMO I am speaking of is:
Grinding My Own.
That’s right, folks, grinding grains, primarily for baking.
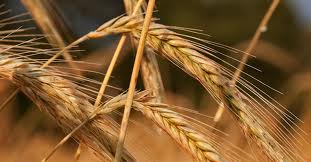
All the media about GMO’s (the other one) has had one very positive effect—the increased interest and growing of various grains and wheats regionally. These are not huge corporate farms that grow for mega businesses like Pillsbury. These are small farmers growing grains suited to their area. Grains like the heirloom Red Fife, a low-yield grain that packs big flavor and loft to whole wheat bread, or, the Sonora wheat, a stubby, drought-tolerant variety grown for tortillas since the 1880’s.
This comeback in growing heirloom varieties has been spurred by the desire to eat more locally, grow grains with more flavor and vitamins than commercial grains have. And, with local grown and milled, grains are fresher than store bought. Small lot local mills also grind their grains differently than large-scale commercial operations. Small mills grind the entire wheat berry at cooler temperatures, which retains more of the flavor and nutrients, whereas commercial millers separate the different parts of the berry, then re-combine them to make whole-wheat flour. This milling may produce flour that has a longer shelf-life, but many of the vitamins have been lost in the process.
It may take a bit of time to bring many of these grains into larger markets, mainly because the farmer, miller, and market infrastructure hasn’t changed since the 1900’s. But, there is a benefit to the home baker and that is we can get our hands on these nutrient rich, little know grains now and grind them ourselves, producing an even fresher loaf of bread.
Home grains are just at the beginning stage of being used, but they are poised to be as coveted as the heirloom tomato. For many it will be like baking with a new ingredient.
If you’re interested in experimenting with your baking try these suppliers for wheat berries and flour. Wheats are good for up to one year when refrigerated.
Local Harvest. localharvest.org, for a list of local Farmer’s Markets
Bluebird Grain Farms. bluebirdgrainfarms.com
Bob’s Red Mill. bobsredmill.com
Camas Country Mill. camascountrymill.com
Community Grains. communitygrains.com
Fairhaven Organic Flour Mill. www.fairhavenflour.com
Also try well-stocked grocery stores and local mills in your area.
Get started baking your own bread with this simple recipe.
True Whole Wheat Bread
Ingredients
SOAKER
5 teaspoons coarse whole-grain polenta or corn grits
3 tablespoons bulgur wheat
DOUGH
About 3 1/2 cups whole-wheat bread flour such as hard red, hard white, or Red Fife
1 3/4 teaspoons instant yeast such as RapidRise
1 3/4 teaspoons fine sea salt
About 2 tbsp. olive oil or grapeseed oil
1 teaspoon melted butter
DIRECTIONS
1. Make soaker: Put polenta and bulgur in a small bowl, add 1/2 cup boiling water, and let stand until grains are softened, 3 to 4 hours.
2. Make dough: Combine 3 1/2 cups flour, the yeast, and salt in a bowl of a stand mixer or large mixing bowl. Add 1 cup plus 2 tbsp. room-temperature water, the soaker, and 2 tbsp. oil, mixing on low speed with a dough hook or stirring by hand with a wooden spoon until well incorporated. The dough should be soft and tacky; adjust with flour or water as necessary. If using a mixer: Beat on medium speed, scraping down inside of bowl occasionally, until dough is smooth, soft, and stretchy (it should still feel tacky), 12 to 15 minutes. If kneading by hand: Transfer to a lightly floured work surface and knead with damp hands, adding only a light coating of flour and wetting hands as required to prevent sticking, until dough is smooth, soft, and stretchy (it should still feel tacky), 12 to 15 minutes.
3. Let dough rest 5 minutes for the moisture to even out. Make any final flour or water adjustments, using mixer or by hand, adding water or flour, until dough feels soft, supple, and tacky but not sticky.
4. Transfer dough to a 2-qt. glass measure, if you have one, or put in a medium bowl. Cover bowl and let dough rise at room temperature until it’s 1 1/2 times its original size, 45 minutes to 1 1/2 hours; when touched gently, it should spring back slowly.
5. Punch dough down, knead a couple of times, and shape into a smooth 9-in. oval. Set in an oiled 5- by 9-in. loaf pan. Brush top with oil and cover with plastic wrap. Let rise until dough comes to top of pan and holds a small dent when pressed with a finger, 30 minutes to 1 1/2 hours.
6. Meanwhile, preheat oven to 375°. When dough has risen, brush with butter and bake until bread is nicely browned and an instant-read thermometer inserted into center registers at least 195°, about 40 minutes.
7. Let bread cool in pan on a rack about 10 minutes, then loosen from pan (if it sticks, cool in pan another 5 minutes). Cool at least 1 hour on rack.
Make ahead: For soaker, up to 1 day, chilled. Bring to room temperature before using.
Recent comments
Aenean nonummy hendrerit mauris. Phasellus porta.