Posts Tagged ‘Mail’
Shards of Golden Light
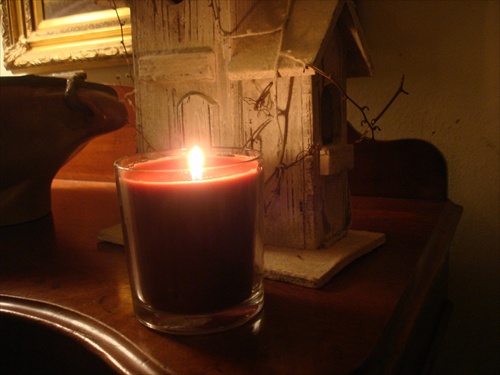
I wrote this post over a year ago, but it still holds true today; we gather and store burned down remnants of candles all year long, and we turn them into new candles in the fall. The box we store the bits and pieces in may be larger than when we first started, and the collection of fire safe containers has definitely grown, but the process of making light for winter remains the same–melt, pour, set, light.
I love the glow of candle light. It casts a warm comfortable feeling over the entire room. From the first hint of fall’s chill until buds burst in the warm spring air there are candles burning in my little farmhouse.
They are on my mantel, set in a collection of thrift store candle holders on my hearth, on the window sill of my kitchen, in my bedroom and even along side my bath tub. It’s amazing how much that little flickering flame of light can calm and restore and bring peace at the end of a busy day.
But, what once was a necessity for lighting a room, reading a newspaper, or illuminating a path has become almost a luxury. Years ago I could buy candles for a few dollars, but now they cost more than I spend on a bag of chicken feed. Being the frugal farmer that I am however, I have found a few tricks to keep my love affair with candles without breaking the bank.
One is to use the department store gift cards I receive in the mail. You know the ones I’m talking about…where they give you $10 off of a purchase to entice you into the store, hoping you’ll spend more. I’m too savvy for their ploys, though. I am usually able to find 3” pillars, or jarred candles or 6 votives for just under the minimum $10 (which I am still able to use my card to purchase). More times than not I walk out of the store with beautiful scented candles for no money at all. How’s that for farm girl frugality?
My second method to keeping the candle flames flickering is to save all the little bits and pieces of burned down candle wax. I keep them in a ziplock bag. When I have gathered enough pieces of the same color (or similar color) I melt them down to make new candles. I save all the old jars from any jarred candles because they are made of tempered glass and safe for pouring hot wax into.
For just a few dollars in a package of wick and a $2.00 pot I bought at the thrift store I can make a new candle in less than 30-minutes and enjoy the glow of my recycled wax for hours. How great is that!
To make your own candles out of bits and pieces all you need is a stainless steel pot (one you don’t mind getting covered with wax), a larger pot, an old jarred candle jar and a package of wicks.
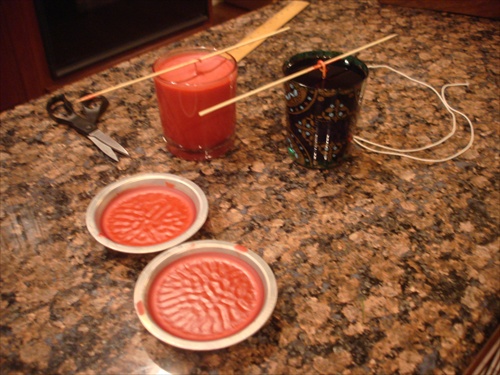
Now—fill the larger pot half way with water and set it on a medium flame. Cut the wick 1-inch taller than the jar, tie a knot at one end, wrap it around a pencil or chop stick a few times so it sets nicely on the bottom of the jar.
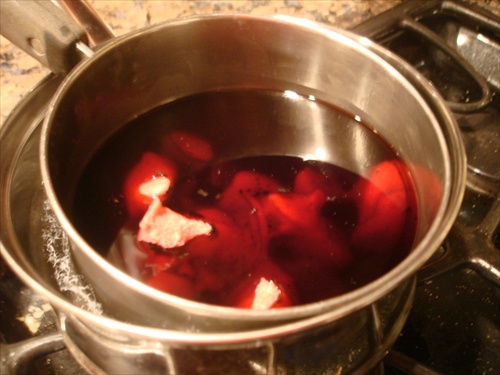
Place the wax bits in the smaller pot and set it inside the larger pot–like a double boiler. Let the wax melt, stirring occasionally at first, then constantly as the wax gets hotter. When all the wax has melted, gently pour it into the prepared jar. (if your wax has bits of wick or debris in it, pour it through a small hand-held sieve). Let it set overnight. When you’re ready to burn the new candle, cut the wick to 1/2-inch and light it.
Voila! That’s all it takes to keep the candle glow burning all the way through to spring.
California’s Cheese Trail
California Bountiful is a monthly publication sent out by Farm Bureau to FB members or to people who have insurance through the FB providers. It’s a great snapshot of what is going on in California Agriculture and for the past few years they have been concentrating on the upsurge in smaller sustainable farms, unusual crops and niche industries that are building up in response to a generation of new farmers more interested in sustainability, non-commercial varieties of crops, pasture raising and smaller high quality production of value added products than their corporate farm counterparts.
So, when I opened my mail yesterday and found the magazine buried within a pile of junk I instantly knew what my night time reading was going to be. Even more exciting was the centerfold. Now, don’t get excited folks, this is not your traditional centerfold. This one was about dairy sheep and the making of cheese from sheep’s milk, something I’ve been interested in for a long time. The article spotlighted one particular farm—Bellwether Farms—from a coastal region north of San Francisco. But what was even more exciting than the article about how Bellwether came to be, the pasture grazing sheep or the tails about learning cheese making from the best cheese regions in Italy was a mention on their website about a cheese trail right here in California! This was exciting! Read the rest of the story »
Making Your Own Worm Bin

Earth worms are an essential part of good gardening. At least in my mind they are. They are eating machines, transforming kitchen and garden scraps into nutrient rich soil and castings, while churning up the soil, aerating it and improving its tilth.
Raising your own earth worms is easy and inexpensive, if you use materials you already have on hand. Or, you can buy a worm bin system from a garden center or by mail. But, no matter how you come to raising earth worms you’ll never regret the initial work or cost and your garden will benefit greatly from the improved soil.
I was lucky – the previous owners of my farm left a multi-tiered worm bin when they moved out. It sits in the shade near the barn with easy access to the garden and rabbit hutches, and is used all year round. The soil produced is a great addition to our raised beds, as long as I can keep the chickens from eating the worms. But, that’s another story.
To build your own worm bin all you need is a container, either a wooden box, plastic storage bin or 5-gallon bucket. Any type of container should be about 18 to 20-inches deep, but no more than 24-inches deep.
Ventilation of the bin is very important, so which ever type of container you choose drill a few dozen ¼-inch holes in the top and 1/8-inch holes in the bottom and on the sides so the water can drain out. If you purchase a worm bin system they will have a mesh looking bottom for ventilation. Read the rest of the story »
Sneaky Stores – Savvy Shopper

Department stores may have dozens of ways to trick shoppers into spending more than they normally would, as described in this Daily Finance article , but they haven’t fooled this savvy shopper. Traveling down my path to a more frugal lifestyle full of experiences rather than stuff I have learned to spot these tricks and have a few of my own up my sleeve as well.
I rarely shop major malls any more. I usually buy only what I need rather than trendy “want” items. And, when I do purchase items I favor second-hand or thrift stores over department or specialty stores. I’ve recently discovered the last Friday of the month sales at the Salvation Army in my sisters town. Each time I’ve been I’ve found wonderful quality clothing, house wares and furniture.
I’m not much of a designer brand person. I would never pay those outrageous prices for a pair of jeans. But, if I can find good quality garments for a few dollars who cares whose name is on the tag. The greater point is to find items that will last for several seasons or several years. And that’s what I’ve done. On my last trip I found 3 pairs of Coldwater Creek jeans, in excellent condition, for $3 each; Land’s End long-sleeved t-shirts, great for wearing under my wool sweaters, for $1.50, a large ceramic mixing bowl for $2, 30-feet of garden fencing that will be perfect around new transplants or emerging seeds for $4, and an emersion blender, ideal for making pureed soups, fruit butters and of course smoothies, for $3.
But, my savvy shopping doesn’t stop there.
Ever get those $10 off cards or coupons in the mail or stuck to the Sunday paper? Well – if you’re a savvy shopper you can use them to your advantage, get what you need and not pay much (or anything) at all. I get them all the time and now have a few family members and friends that save them for me as well. I always carry a list of small items I need for the house.
The trick is to have a list of items that are priced at $10 or just over. Wait for the coupons to come out and then buy only one of those items with each coupon. If they don’t have the item you’re looking for – walk out of the store. Don’t wander around trying to find a replacement. Retailers know the longer a consumer is in the store the more likely they are to make a purchase. In the last month or so I’ve been able to buy four seasonal pillar candles ($.84); two short-sleeved t-shirts ($1.30); a package of sport socks (free); a scarf (free) and leather gloves for my thrift store raincoat ($4), and a frame for my daughters county fair picture ($1.69). Not bad. Not bad at all.
It’s a game and I’m playing it the best I can. Why spend good money on things that don’t matter? Why should I care what brand of jeans I wear while cleaning the garden or working the sheep. The truth is I don’t; don’t care to spend money on those things when it could go towards new livestock, our spring seed order or new equipment.
So, come on, folks. Play the game with me. See how much you can save. See how frugal you can become.
![]() photo credit: chocolategirl64
photo credit: chocolategirl64


Recent comments
Aenean nonummy hendrerit mauris. Phasellus porta.