Suburban Root Cellar

Long before the first icebox was put into use or the first refrigerator was invented families used root cellars to keep their harvest fresh through the cold and bleak winter months. Cellars kept apples, carrots, turnips, potatoes and squash, even salt pork and smoked meats, milk, cream, butter and cheese were kept in the root cellar to stay cool and fresh, ready to sustain the family until spring crops could be harvested.
Root cellars are low-tech natural choices for keeping your harvest fresh for months without depending on ozone-depleting refrigeration, or electricity. Canned fruits and vegetables can also be stored at the optimum temperature in root cellars.
Unfortunately, most root cellars are large walk-in structures dug into the ground or the side of a hill, built with stone and beams and wooden roofs, piled high with dirt. Above ground cellars are covered with thick layers of sod to keep them cool inside. These are hardly conducive to a homestead on a suburban lot.
So, how can the suburban homesteader benefit from centuries of free refrigeration?
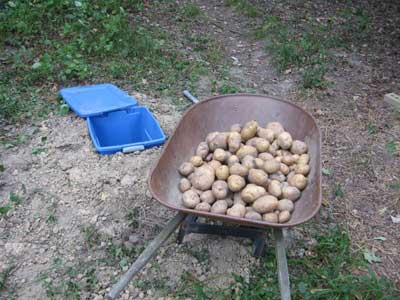
Using lidded plastic storage bins is one way (like the picture above). Storage bins come in several sizes measuring two feet to three or four feet in length and most are barely two feet deep, making them easier to reach the bottom than the more commonly used 55-gallon drum. They can be dug into the ground or into a small sloped area. Bins can even be placed in the ground at an angle half way with the excavated dirt used under the front of the bin to bury them up to their lids. Sloping the bins means that water will drain away better. These bins have a curled lip around the edge, allowing for small holes to be drilled all around for a bit of air circulation without letting in any water or mice.
To store root vegetables, first put down a layer of straw in the bottom of the bin, then a layer of vegetable, then more straw and another layer of vegetable, and so on until the bin is full. Ripe, unblemished fruit can be individually wrapped and placed in a padded cardboard box before placing into the bin. When each bin is full, autumn leaves or more straw can be piled on top a foot or so for added insulation. Normal winter conditions in different areas will determine how deep the bins need to be placed and how much they need to be covered. When it’s time to use your stores simply push aside the snow and leaves and lift the lid to get what you need. Be sure to check for softening or spoilage. If this occurs remove the affected fruits or vegetables and use quickly. Remember the old saying – “One bad apple can spoil the whole bushel”.
That’s all there is to it. What could be a simpler, more secure food supply? Even if the electricity goes off, your buried treasure will be safe, able to feed your family, which is more than you can say about gold.
APPROXIMATE STORAGE TIMES:
1 to 2 Weeks: Broccoli, Eggplant
2 to 4 Weeks: Cauliflower
3 to 5 Weeks: Brussel Sprouts
1 to 2 Months: Jerusalem Artichokes, Tomatoes, Chinese Cabbage, Parsnips
2 to 3 Months: Radishes, Rutabagas
3 to 4 Months: Cabbage, Squash
4 to 6 Months: Beets, Carrots, Potatoes, Turnips
5 to 6 Months: Pumpkins
Recent comments
Aenean nonummy hendrerit mauris. Phasellus porta.