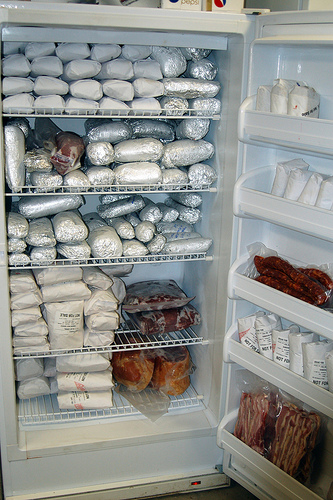
Organizing the Well Stocked Freezer
I opened the door to my freezer the other day, to get something out for dinner, and instead of finding what I wanted an avalanche of frozen meat came tumbling out and landed right onto my foot (%#@$), nearly breaking my toes. At that moment, amidst the pain and four-letter words I vowed to get my freezer organized and stay organized so something like this would never happen again.
I normally purchase frozen items when they are on sale and when I have a coupon for them. Meat from the discount bin and butter when it’s on sale at holiday time are big items. But, because they are not “planned for” purchases I usually have not made space for them in the freezer, so things are just shoved in where ever they will fit. Bad idea, as I came to discover.
So, I set out to reorganize my 25 cubic foot upright. But, how?
Easy part first – The Freezer Door: This is the warmest part of the freezer. I use it to store soup base, butter, lemonade concentrate and half-gallon milk jugs filled with water to use in the ice crest or in the rabbit hutch on hot summer days.
When the door was finished I stood there staring at four large shelves and one pull-out drawer crammed full of chicken, lamb, beef, pork and a variety of other frozen staples like flour, rice, spaghetti sauce and pre-made soups. Where to begin? I scratched my head.
I knew I wanted everything “contained”, easy to locate, with older items close to the front so they would be used before newer purchases. After standing there for a few minutes I decided to use the same approach as I had when I organized my garage, plastic lidded bins. Only this time I wouldn’t need the lids. I measured the length and width of the shelves and determined what size bins to buy. One large bin would be too heavy when full, so I decided to buy two smaller bins that could sit side-by-side. I headed off to town and purchased eight 16-quart bins that measured 11”x16”. Perfect!
Fortunately for me the day was cold and I didn’t have to worry about spoiling what was in the freezer as I pulled packages out and sorted them. Shelf by shelf I sorted meat into bins and vegetables, soups, sauces and other items out of the way as I worked my way through the freezer. Now I have an individual bin for chicken, pork and beef. Since we butchered a whole lamb last fall I needed two bins for those packages. The bins also have a slight slant to them and when sitting on the shelf provide a nice little “cave” between them for oddball items or overflow. The bottom drawer is used for miscellaneous items like odd cuts of lamb we feed to the dogs, lamb salami I had made out of our ground lamb, and large roasting chickens that won’t fit in the bins.
The top shelf is stocked with rice, flour, vegetables, fruit, ice cream, pre-made soups and sauces. At a glance I can now see if I need to purchase more of a particular item, helping me take advantage of sales and coupon specials. I can also see what I may have too much of, enticing me to find new recipes in order to use it more quickly.
My organization project also showed me how woefully lax I have been at dating my meat and freezer containers, leaving too much to memory on when it was purchased or made. In the future, I’ll be more diligent about dating and labeling what goes into the freezer so I can use the oldest items first.
All-in-all it was a well used chilly afternoon.
![]() photo credit: Cowgirl Jules
photo credit: Cowgirl Jules

Please forgive the unsolicited advice – but I have a tip that has helped me a lot in remembering to label my freezer items. I bought a package of Post-It Note Flags and keep that along with 2 fine point Sharpies in a little caddy near where I prepare items for the freezer. The caddy sitting there serves as a reminder, the Post-It Flags are so easy to pull off even my lazy butt will do it, and I no longer have to go on a hunt for a pen or marker – it’s all in one little station! (If Post-It Flags don’t stick to your containers, you could try pop-up tape or masking tape – the main point is to have a little station with all the items you need handy.) 🙂 If you give it a try, hope it works for you too!