Archive for the ‘In the Kitchen’ Category
Homemade Mulling Spices
Can you feel it? It’s coming. Pushing out the warm sultry days of late summer and replacing it with crisp cool days that glow like gold. It’s creeping closer…softly…silently…like little cat feet.
It’s October!!!
October is my soul month, truly. And, if you’ve read this blog for long you’ve read lots of stories about my love of October. It’s the time of year that I feel the most alive, while at the same time feeling the most at home. I love everything about it—the way the afternoon sun turns golden and bathes the world in soft hues of amber, while the leaves shower down in shades of orange, red and umber; how the crisp air smells as it pushes summer out of its way. Or, the way pine and firewood smoke mingle and hang like a fragrant curtain.
October is a time for fall festivals, trips to local apple farms, hard cider tasting (and not so hard cider tasting), and searching for the perfect pumpkin to adorn our house. It is also a time when friends get together around a warm fireplace and turn a simple soup or stew dinner into a truly memorable evening. And, let’s not forget the array of hot toddies to keep the fall chill at bay.
Yep, October starts a fall season that is all about food, friends, family and merriment.
I break out my pumpkin scented candles, keep a big fire going whenever I’m home, and load up the slow cooker, but most of all I love to have a pot of mulling spices ready for a warm your soul cider concoction.
Can you smell the nutmeg cloves, orange, cinnamon, and apple cider?
Isn’t it heavenly?
It really sets the mood of a warm and inviting home, even if you’re not mulling cider or wine. Add the smell of a rich pumpkin pecan bread and you’ve got me hanging out at home all day! It’s that relaxing.
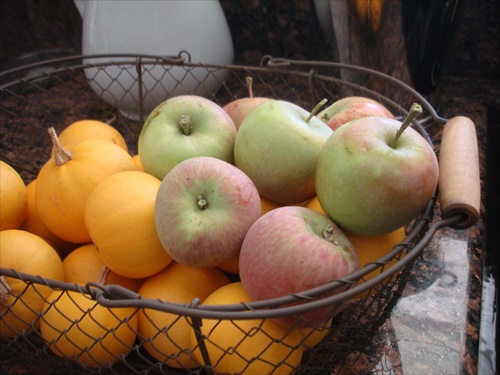
Our annual trip to the apple farms sets this scene in motion when we come home laden down with pounds of heritage apples and gallons of fresh pressed apple cider.
Looking towards the parties and cold weather ahead I mix up a batch of homemade mulling spices. I store mine in a canning jar and make a few 4-ounce jars to give as hostess gifts. They are unique and very much liked. This recipe makes eight 4-ounce jars.
Mulling Spice Mix

INGREDIENTS:
16 cinnamon sticks broken into pieces
4 whole nutmeg pods, smashed to pieces with the flat side of a meat mallet
½ cup whole cloves
¼ cup whole all allspice
½ cup dried orange peel
1 cup candied ginger, chopped
DIRECTIONS:
Place 2 or 3 pieces of cinnamon stick in the bottom of each jar. In a medium bowl, combine the nutmeg, cloves, allspice, dried orange peel and candied ginger.
Scoop mixture into each jar and close with the canning lid.
To make a mulling spice sachet: place 2 to 3 tablespoons of the spice mixture into empty clothe sachet or tea bags and tie closed, leaving some headspace.
TO MAKE MULLED APPLE CIDER: pour a ½ gallon of apple cider into a slow cooker and add 1 mulled spice bag. Allow to simmer for several hours before drinking. Keep slow cooker on low to keep cider warm. (Mulled cider can also be made on the stove top, but it takes longer. With the slow cooker you can add all in the ingredients and walk away; leaving the cider to do its business while filling the house with a wonder fall aroma.
To serve a “grown-up” version, adding a splash of Calvados before serving brings the whole thing together.
TO SERVE: Ladle hot mulled cider into mugs.
NOTE: One of the great things about making your own mulling spices is that you can tailor the mix to fit your tastes. Experiment with different combinations and make your own version.
Making Parmesan Biscuits

It’s no mystery that fall, and especially October, is my favorite time of year. I have written about my love affair with the season many times before, and you can read about it here, and here, and here.
The cast of an amber sun setting low in the sky throws a glow over the whole farm and bathes it in the quite serenity of a changing season. Colorful leaves carpet the ground like an artist’s painting. You can smell the coolness in the air as it pushes against the warm Indian summer breeze. Fall fruits and veggies stand out with their muted hues of red and orange; gold and plum. Even the earth takes on a new smell as the scent of fallen leaves mixes with freshly turned soil waiting to be planted with fall seeds.
But, the best part of fall.
The very best part of fall can be seen in the kitchen.
After months of summer greens, fresh salads, crispy vegetables, juicy fruits and plump berries, the kitchen switches over into heartier fare for the table. Soups and stews; roasts and chops take center stage now.
But, one of my most favorite things about fall is having a simmering pot of soup on the stove or in the slow cooker. The aroma that fills our little home is like a comfortable blanket spread over you as you lay in front of a crackling fire. It’s enough to warm the heart and soul, as well as the tummy.
On our little homestead soup is not only a mid-day snack, but a full blown meal as well. My stash of cookbooks has more soup recipes tucked in between the pages than any other kind. There are hearty fare soups chock full of chunky roots vegetables, a thick broth and bites of meat; creamy, full bodied soups with tubers, or noodles or rice; and then there’s the more brothy soups that spotlight flavorfully rich bases more than vegetables or meat. But, no soup would be complete without a little crispy biscuit to go with it.
Over the years I’ve tried many different kinds of biscuits with varying opinions, but the one we coming back to, the one that everyone keeps requesting is the Parmesan cheese biscuit. I found the recipe in a Farm Bureau long ago and it has been on our table ever since. It’s one of those recipes that you fall in love with, not for the sheer genius of it, but because it’s so dang simple. With just three ingredients, it takes no time at all to become totally addicted to the little things. Make a double batch of dough to keep in the freezer, just in case…or, just because.
Parmesan Biscuits
INGREDIENTS:
16 tbsp. unsalted butter, room temperature, softened
2 cups finely grated Parmigiano-Reggiano cheese (it’s important to use the real stuff. It is 1/3 of the ingredients after all)
1-3/4 cups all-purpose flour
DIRECTIONS:
1. Preheat oven to 350; position racks in top and bottom third of the oven. Line 2 baking sheets with parchment paper or baking mats.
2. Fit stand mixer with the paddle attachment. In the bowl combine the butter, cheese and flour, and beat until a stiff dough forms. (For a few minutes the dough will appear dry and not come together; keep mixing and it will form).
3. Divide dough in 3 pieces and roll each piece into a 9-inch log, about 1-1/2 inches in diameter. Wrap each log tightly with plastic wrap, and refrigerate for about an hour—this will make slicing the dough much easier.
At this point, you can freeze 2 of the logs and bake one; or if making a double batch, you can wrap each log in plastic wrap, vacuum seal it and freeze for up to 2 month. When ready to use, let it sit at room temperature for 15 minutes before slicing.
Moving on…
4. Slice the logs into 1/3-inch-thick rounds, and arrange on the cookies sheet about 2 inches apart. Bake for 15-18 minutes, or until they turn golden brown around the edges. Shift and rotate the pan half way through baking for even browning. Cool on the cookie sheet for 10 minutes before transferring to a wire rack to cool completely. The biscuits can be stored for 5 days at room temperature in an airtight container.
NOTE:
These little biscuits are great for stacking on ham, smoked turkey, salmon or trout pate. Spreadable cheeses, other pate’s, or just by themselves are also good options.
You can also make Parmesan sticks by rolling out the dough into a rectangle and slicing it long and thin.
INGREDIENTS:
- 16 tbsp. unsalted butter, room temperature, softened
- 2 cups finely grated Parmigiano-Reggiano cheese (it’s important to use the real stuff. It is 1/3 of the ingredients after all)
- 1-3/4 cups all-purpose flour
DIRECTIONS:
- 1. Preheat oven to 350; position racks in top and bottom third of the oven. Line 2 baking sheets with parchment paper or baking mats.
- 2. Fit stand mixer with the paddle attachment. In the bowl combine the butter, cheese and flour, and beat until a stiff dough forms. (For a few minutes the dough will appear dry and not come together; keep mixing and it will form).
- 3. Divide dough in 3 pieces and roll each piece into a 9-inch log, about 1-1/2 inches in diameter. Wrap each log tightly with plastic wrap, and refrigerate for about an hour—this will make slicing the dough much easier.
- At this point, you can freeze 2 of the logs and bake one; or if making a double batch, you can wrap each log in plastic wrap, vacuum seal it and freeze for up to 2 month. When ready to use, let it sit at room temperature for 15 minutes before slicing.
- Moving on…
- 4. Slice the logs into 1/3-inch-thick rounds, and arrange on the cookies sheet about 2 inches apart. Bake for 15-18 minutes, or until they turn golden brown around the edges. Shift and rotate the pan half way through baking for even browning. Cool on the cookie sheet for 10 minutes before transferring to a wire rack to cool completely. The biscuits can be stored for 5 days at room temperature in an airtight container.
- NOTE:
- These little biscuits are great for stacking on ham, smoked turkey, salmon or trout pate. Spreadable cheeses, other pate’s, or just by themselves are also good options.
- You can also make Parmesan sticks by rolling out the dough into a rectangle and slicing it long and thin.
Roasted Sweet Potatoes & Brussels Sprouts

Do you have a favorite fall vegetable? I do.
I have always been crazy for sweet potatoes. They are my “go-to” fall vegetable, whether they are baked and smothered with butter then sprinkled with salt and pepper, smashed with sweet maple syrup and nutmeg, or roasted with fragrant herbs.
I love trying new fall veggies to add to my kitchen arsenal. But, I have to admit I’ve never been a fan of Brussels sprouts. Those little globe-like cabbage looking things never really appealed to me, probably because my family never ate them…ever. Really—I can’t remember one time growing up that my mom cooked Brussels sprouts.
So, when I found a recipe on the internet for roasted Brussels sprouts I was less than tempted. Even though the picture was beautiful and they looked appealing I refused to be tricked into trying them.
It wasn’t until I had them at a restaurant that I became a convert. They were tender, flavorful and downright yummy. I was sold, and they now make regular appearances on our fall dinner table.
I have never had them any other way but roasted, and I have several different ways to flavor them during the roasting process. Why mess with a good thing, right?
Boy was I ever wrong!
It was a few weeks ago and sis and I were making dinner. I had bought some Brussels sprouts from the market, but they weren’t enough for two people. When I looked around my kitchen I spied a few small sweet potatoes. Not enough for two people either.
At that moment a stroke of brilliance came over me. Why not fix both? Together.
I combed through recipes and combined pieces of a few different one’s and voila! A masterpiece was born.
I cleaned and halved the Brussels sprouts and peeled and cut the sweet potatoes into chunks. Then I drizzled everything with almond oil, sprinkled it with ground cumin, salt and pepper, and tossed the whole thing together. Best idea ever!
I loved the nutty flavor from the almond oil and the cumin brought out a wonderful earthy dimension to the whole dish. After they were roasted, I splashed a bit of balsamic vinegar over, added a bit of thyme springs for good measure and sprinkled on some chopped pecans.
The whole thing turned out divine.
What started out as not enough veggies for our two-person dinner, turned into a flavorful fall mixture and ended in discovering a new favorite side dish. Don’t ya just love experimental cooking?
NOTE: This would make a great holiday side dish. But, if you’re worried about commandeering your oven for 45 minutes make them a day or two ahead and store in a lidded container, then pop them in a 400 degree oven for 5 to 10 minutes, just until they sizzle and are hot. They turn out great!
Roasted Sweet Potatoes & Brussels Sprouts
INGREDIENTS:
1 pound of Brussels sprouts, washed, outer leaves removed and stems trimmed
4 small or 1 large sweet potato, peeled and cut into chunks
2 cloves garlic, peeled and chopped
1/3 cup Almond oil (be adventurous and try other nut oils or olive oil)
1 teaspoon ground cumin
¼ teaspoon garlic salt
1 teaspoon sea salt
Ground pepper to taste
Splash of balsamic vinegar
Thyme leaves for garnish
1/8 cup chopped pecans
DIRECTIONS:
Preheat oven to 400 degrees.
Rinse, remove outer leaves, trim stems and cut Brussels sprouts in half. Small one’s can be kept whole. Place in a large bowl.
Peel and cube sweet potatoes. Add to bowl.
Peel and mince garlic cloves. Add to bowl.
Pour almond oil over vegetables and toss to coat.
Add cumin, garlic salt, sea salt and pepper. Toss to mix.
Drizzle cookie sheet or large casserole dish with oil and spread to coat.
Pour vegetables into pan and arrange so they are in a single layer.
Roast for 30-35 minutes. Veggies are done when they are browned and fork tender.
Spoon into a serving dish and sprinkle with balsamic vinegar (about 1-2 tbsp.) Garnish with thyme and chopped pecans.
Eat hot!
INGREDIENTS:
- 1 pound of Brussels sprouts, washed, outer leaves removed and stems trimmed
- 4 small or 1 large sweet potato, peeled and cut into chunks
- 2 cloves garlic, peeled and chopped
- 1/3 cup Almond oil (be adventurous and try other nut oils or olive oil)
- 1 teaspoon ground cumin
- ¼ teaspoon garlic salt
- 1 teaspoon sea salt
- Ground pepper to taste
- Splash of balsamic vinegar
- Thyme leaves for garnish
- 1/8 cup chopped pecans
DIRECTIONS:
- Preheat oven to 400 degrees.
- Rinse, remove outer leaves, trim stems and cut Brussels sprouts in half. Small one’s can be kept whole. Place in a large bowl.
- Peel and cube sweet potatoes. Add to bowl.
- Peel and mince garlic cloves. Add to bowl.
- Pour almond oil over vegetables and toss to coat.
- Add cumin, garlic salt, sea salt and pepper. Toss to mix.
- Drizzle cookie sheet or large casserole dish with oil and spread to coat.
- Pour vegetables into pan and arrange so they are in a single layer.
- Roast for 30-35 minutes. Veggies are done when they are browned and fork tender.
- Spoon into a serving dish and sprinkle with balsamic vinegar (about 1-2 tbsp.) Garnish with thyme and chopped pecans.
- NOTE: This would make a great holiday side dish. But, if you’re worried about commandeering your oven for 45 minutes make them a day or two ahead and store in a lidded container, then pop them in a 400 degree oven for 5 to 10 minutes, just until they sizzle and are hot. They turn out great!
5-Color Peanut Coleslaw

Over the years I have created a “go-to” list of favorite summer side dishes. You know the kind—baked beans, potato salad, pasta salad, corn salad, pea salad—the kind of cool, refreshing and creamy dishes that go great with BBQ’s or potlucks or just eaten by themselves when the hot weather makes eating the last thing on your mind.
This recipe has it all. Crunch. Cool. Sweet. Tang. It’s our favorite slaw and goes great with steaks and burgers, or chicken and fish. Add a handful of shredded leftover chicken and make it a meal for those hot days when heating up the kitchen is anything but appealing. It’s that good!
5-Color Peanut Coleslaw
INGREDIENTS:
1 pound cabbage, shredded
1 ½ cups red cabbage, shredded
3/4 cup celery, finely sliced
3/4 cup julienned carrots
3/4 cup julienned orange bell pepper
1/3 cup green onion, finely chopped
1/3 cup red wine vinegar
1 tablespoon water
1 ½ tablespoon sugar
1/2 teaspoon seasoning salt
1/4-1/2 teaspoon garlic powder
1/3 cup vegetable oil
1 cup roasted unsalted peanuts
DIRECTIONS:
1. In a large mixing bowl, combine coleslaw, red cabbage, celery, carrots and green onions. (Using a mandolin makes shredding quick and easy)
2. In a pint size Mason jar, combine wine vinegar, water, sugar, seasoned salt, garlic powder and oil. Shake gently to incorporate.
3. Mix dressing with coleslaw; stir in peanuts and toss well.
4. Refrigerate until ready to serve.
NOTE: This is one of those great recipes that can be added to to create a variety of styles. Add edamame, almonds and wontons for an Asian flare; or roasted corn, jalapenos and tortilla strips for a slightly Latin flavor; or add chopped kale, broccoli and peas for big veggie packed meal.
INGREDIENTS:
- 1 pound cabbage, shredded
- 1 ½ cups red cabbage, shredded
- 3/4 cup celery, finely sliced
- 3/4 cup julienned carrots
- 3/4 cup julienned orange bell pepper
- 1/3 cup green onion, finely chopped
- 1/3 cup red wine vinegar
- 1 tablespoon water
- 1 ½ tablespoon sugar
- 1/2 teaspoon seasoning salt
- 1/4-1/2 teaspoon garlic powder
- 1/3 cup vegetable oil
- 1 cup roasted unsalted peanuts
DIRECTIONS:
- 1. In a large mixing bowl, combine coleslaw, red cabbage, celery, carrots and green onions. (Using a mandolin makes shredding quick and easy)
- 2. In a pint size Mason jar, combine wine vinegar, water, sugar, seasoned salt, garlic powder and oil. Shake gently to incorporate.
- 3. Mix dressing with coleslaw; stir in peanuts and toss well.
- 4. Refrigerate until ready to serve.
- NOTE: This is one of those great recipes that can be added to to create a variety of styles. Add edamame, almonds and wontons for an Asian flare; or roasted corn, jalapenos and tortilla strips for a slightly Latin flavor; or add chopped kale, broccoli and peas for big veggie packed meal.
Blackberry Cobbler with Oatmeal Topping

Peaches and plums and berries, oh my!
Its summertime and that means one major thing around here…cobbler. From the first bloom of spring right up to harvest time we dream of desserts made with our favorite fruits.
Every house I’ve ever live in has had a berry patch. Not a large mind you, but enough canes to produce enough fruit for summer desserts and extra for canning and freezing so we can enjoy the fresh taste of summer all winter long. They are perfect for the suburban homestead where space may be at a premium. They can be grown on fences, trellises or arbors, making them perfect for a vertical garden because they leave valuable ground for root crops or non-trailing vegetables.
My current berry patch abuts a perimeter fence. It is just 3-foot wide by 30-foot long and has blackberries, raspberries and boysenberries that I train to grow on a 54-inch tall cattle panel. The canes are managed and pruned so we don’t have them rooting all over the place. As they start to push out new growth in the spring I fill one gallon nursery pots with rich compost and nestle the budding new growth down into the soil to root, starting a new batch of canes.
Over the years I’ve helped friends and family start their own berry patches with cuttings from my own. Berry canes are easy to root, grow in many different soil types and best of all…grow like weeds once they get started. It’s one of the best plants for new gardeners, and a favorite of well-seasoned homesteaders.
And, let’s not forget those plump, juicy, flavorful berries that explode in your mouth with a burst of flavor, or make a thick decadent jam, luscious pie or frozen little gems waiting to be blended up into a refreshing smoothie.
But…I have to admit there’s nothing better than a warm fresh berry cobbler warm from the oven. Well—unless it’s a berry cobbler with a big glob of creamy vanilla ice-cream on top. That’s a double yum.
There’s a lot of debate about fruit cobblers and what constitutes a “real” cobbler. There are cobblers topped with fluffy biscuits, some with cake-like toppings and others with a light batter pored over, creating a cobbled effect when it bakes. But, around here cobbler means one thing and one thing only, sweet seasonal fruit encased in a crumbly oatmeal brown sugar topping.

Blackberry Cobbler with Oatmeal Topping
INGREDIENTS
FILLING:
3 cups blackberries
2/3 cup sugar (depending on the sweetness of the fruit)
1 Tbsp. all-purpose flour
TOPPING:
1/3 cup all-purpose flour
½ cup packed brown sugar
¼ cup butter, melted
1 cup rolled oats
¼ Tsp. ground nutmeg
DIRECTIONS for Filling: Put all ingredients into a large saucepan and slowly bring to a boil until the sugar dissolves.
DIRECTIONS for Topping: Put all ingredients into a large mixing bowl. Pour melted butter over and mix with a fork until it is crumbly.
Heat oven to 375. Pour berry mixture into an 8-inch square baking dish. Cover with oatmeal topping. Bake for 30 – 35 minutes or until bubbly. Serve at room temperature with vanilla ice cream.
TIP: My family likes this topping so much that I make a double batch. I put a layer on the bottom and one on the top for an extra crispy yum.
INGREDIENTS:
- FILLING:
- 3 cups blackberries
- 2/3 cup sugar (depending on the sweetness of the fruit)
- 1 Tbsp. all-purpose flour
- TOPPING:
- 1/3 cup all-purpose flour
- ½ cup packed brown sugar
- ¼ cup butter, melted
- 1 cup rolled oats
- ¼ Tsp. ground nutmeg
DIRECTIONS:
- DIRECTIONS for Filling: Put all ingredients into a large saucepan and slowly bring to a boil until the sugar dissolves.
- DIRECTIONS for Topping: Put all ingredients into a large mixing bowl. Pour melted butter over and mix with a fork until it is crumbly.
- Heat oven to 375. Pour berry mixture into an 8-inch square baking dish. Cover with oatmeal topping. Bake for 30 – 35 minutes or until bubbly. Serve at room temperature with vanilla ice cream.
12 Ways to use Mint

We are being overrun!
No—really. I’m not joking.
With all the cool evenings and warm days my mint patch has literally exploded.
I thought I was being clever when I potted up a few of my favorite kinds of mint (spearmint, peppermint and some plain old garden mint someone gifted to me) to control its invasive growing habit, rather than plant it directly in the garden.
Seems I wasn’t so clever after all. Those aggressive little…I won’t say it…grew right through the hole in the pots and PLANTED themselves in my flowerbed. NOW, I have a forest of mint! Yikes.
I know what you’re thinking…
…we complain when a plant doesn’t produce and now I’m complaining when it produces too much.
Mint is one of those plants that grow extremely well regardless of the conditions, so controlling the chaos is a bit of a challenge.
With way too much on my hands I set out to find a few awesome ways to use and preserve my little radical greens. Here are a few:
1. Make mint lemon water – add a few sprigs of mint and several slices of lemon to a cold jug of water. It will keep you cool and refreshed no matter how hot the day.
2. Add it to iced tea or lemonade – for a twist on a summer classic.
3. Use as a room freshener – cut a few sprigs and place in a decorative vase or Mason jar.
4. Keep the bugs out – mint attracts “good” bugs and repels “bad” bugs, so plant up a few pots of Penny Royal mint and place them near doorways to repel ants and flies. I said POTTED, right?
5. Breathe freshener – who needs mint gum when you can just pluck and chew on a mint leaf?
6. Pair with fruit or veggies – mint gives a light fresh taste to veggies like tomatoes, peas, cucumbers, potatoes and beets. Or, mince and sprinkle on a bowl of strawberries.
7. Mojitos – this is a no-brainer. Who wouldn’t love an ice cold glass of lime juice, sugar, club soda, and rum, with a spring of mint, of course.
8. Tame an upset tummy – place a few peppermint leaves in a cup and pour hot water over. Let cool slightly and drink warm to calm things down.
9. Mint Pesto – whip up a batch of mint pesto to use on homegrown lamb kabobs or grilled chops.
10. Create a relaxing bath – pour 1 cup baking soda, 1 cup Epsom salts and ¼ cup of mint leaves in your bath for a relaxing, muscle easing soak.
11. Make fleas flee – pets can be bothered by fleas in summer, so bundle up 2 parts fresh spearmint, 1 part fresh thyme and 1 part fresh wormwood, and tuck it inside a small pillow, placed near your pet’s bed or another favorite resting place.
12. I SAVED THE BEST FOR LAST!!
Minted Lemon Slushy

INGREDIENTS:
- 1 cup fresh squeezed lemon juice (4-6 lemons)
- ½ cup honey
- 3 cups water, divided
- 1 generous handful mint leaves, remove from stems
DIRECTIONS:
- Juice lemons and remove any seeds. In a small pan, slowly heat lemon juice, honey and ½ cup of water. Stir until the honey dissolves. When mixture begins to simmer, remove from heat, and toss in mint leaves. Let steep for 10-minutes. Strain out leaves and add remaining water. Pour liquid into ice cube trays and freeze.
- When ready to serve, put minted lemon ice cubes into a blender and blend. Slowly add water until it reaches the slushy consistency you want (about a cup). Serve immediately with a sprig of mint.
Need a little more color in your life? Try juicing “Pink Lemonade” lemons for a fun summertime twist.
Want a more decadent version? Add a ½ cup of gin to the blender and add water only if you need to.
INGREDIENTS:
- 1 cup fresh squeezed lemon juice (4-6 lemons)
- ½ cup honey
- 3 cups water, divided
- 1 generous handful mint leaves, remove from stems
DIRECTIONS:
- 1. Juice lemons and remove any seeds. In a small pan, slowly heat lemon juice, honey and ½ cup of water. Stir until the honey dissolves. When mixture begins to simmer, remove from heat, and toss in mint leaves. Let steep for 10-minutes. Strain out leaves and add remaining water. Pour liquid into ice cube trays and freeze.
- 2. When ready to serve, put minted lemon ice cubes into a blender and blend. Slowly add water until it reaches the slushy consistency you want (about a cup). Serve immediately with a sprig of mint.
7 Tips to Maintaining your Cutting Boards

Cutting boards are in use almost daily at my house. I have different kinds that I use for different purposes. There’s polyethylene for chopping vegetables or slicing cheese, and wood and bamboo for carving meat. They are hardworking pieces of equipment in my farm kitchen.
Over the years I’ve owned many sizes and kinds of cutting boards, but none of them really lasted that long. They would discolor, become riddled with bacteria or just plain crack. Then I discovered I was not taking care of them properly.
Yes, there is a right and a wrong way to care for your cutting boards!
Who knew!
Proper care will help them last a long time, while not taking care of them will shorten their useful life, causing you to replace them long before you should have to.
Following these 7 simple tips will help you extend the life of any cutting board.
1. Avoid letting your wooden cutting board to become too dry. Super dry cutting boards can crack and break.
2. Don’t soak your cutting board or let it sit wet. Dampness can swell the wood and weaken boards that are made of multiple pieces. And, never put a wooden board in the dishwasher, that’s just a bad thing all around.
3. Wash and dry boards immediately after each use, especially when cutting meat, fish or poultry, so bacteria doesn’t have a chance to seep into the cut marks. Use warm soapy water, work it into a lather so it gets into all the crevasses, then rinse well and allow to air dry before putting it away.
4. Use the entire surface of the board for cutting, move around the board. Cutting in one spot can cause the board to wear unevenly.
5. Use both sides of the board so both work surfaces are used, evening out the wear.
6. Never use a razor-edged cleaver, it can chip or splinter the board, creating spaces for bacteria to take hold.
7. Season your wooden cutting boards periodically to keep them in good, usable condition, and from absorbing colors and odors from the foods you’re cutting.
How the heck do you season a cutting board?
It’s pretty easy and straight forward. Since I’m not a professional chef, that uses cutting boards all day long, I can get away with seasoning mine 2 or 3 times a year.
To start with, get yourself some food-safe mineral oil. I got mine at Wal-Mart. Then find yourself a clean soft cloth that can be dedicated to seasoning your boards. I bought a new flat cotton weave dish towel just for this purpose and store it on a lidded container.
Now—to season…
…pour on what looks like too much oil, and then rub it into the board using your cloth. Your board may look like it has a thick oil slick on it, but let it rest for about 5-minutes so the oil can soak in. You’ll be surprised at how fast a thirsty board will soak up the oil! I know I was.
Once you have oiled the top of all your cutting boards let them rest for several hours or overnight to the oil really soak in. You may need to reapply another layer if your board seems especially dry.
Now you can oil the other side (remember, you’ll be using both sides to even out the wear). When both sides are well-oiled you can stand them on one edge and let them air dry. I like to use a plate or platter rack for this part.
After your boards have been well seasoned, you can come up with your own schedule. I re-season mine in December, after the holidays and again in June, before the busy BBQ season begins.
To tell if your boards need to be freshened up, simply dribble a few drops of water onto the board. If it “beads” it is fine. If not, it’s time to re-season.
Keeping up a routine means you and your cutting boards will be well-oiled partners in the kitchen. How cool would that be? A kitchen partner!
With the right seasoning and care, a wooden cutting board can last for years, and may even become a family heirloom.
Slow Cooker Pulled Pork Recipe

Independence Day is just around the corner, and like me, I’m sure you are looking for a full-proof recipe that will keep you in on the celebrations and OUT of the kitchen. Am I right?
My “go to” favorite recipe is slow, simmering pulled pork in the Crock-Pot. It’s a full proof recipe that can’t be messed up.
I’m serious, you can’t mess this one up. I dare you to try!
It’s also a recipe you’ll love because you can take advantage of all the great sales on pork shoulder roasts during the summer month, or clean out the freezer while waiting for the coming fall harvest.
The other reason I love pulled pork is its versatility. Check it out…there is Carolina pulled pork with its vinegary based sauce, or the spicy Louisiana version. But, my all-time favorite is a Texas style chock full of thick gooey sauce.
This recipe is simple and economical. It can take a tough cut of meat and turn it into something your family and guests will go crazy over. Plus, using a Crock Pot gives you plenty of time to enjoy the long hectic summer months, what a bonus!
And, remember, you can’t mess this up.
Cooked more than the recommended time…no problem.
Cook it days ahead of a party…no problem.
Cook it and freeze for a great winter time treat…no problem.
Change the seasonings to fit your family’s taste…absolutely no problem.
I wasn’t kidding about being versatile.
Even if you want to toss a frozen hunk of meat into the Crock Pot, it’s no problem.
I can’t rave enough about adding this recipe to your farmhouse arsenal of full proof, quick and easy recipes.
Slow Cooker Pulled Pork Recipe
‘
- 1-1/2 cups ketchup
- 1/2 cup brown sugar
- 1/2 cup broth, beef or chicken
- 3 tablespoons Worcestershire sauce
- 4 cloves garlic, crushed
- 1 onion, diced small
- 2 tablespoons browning sauce
Lay onions on the bottom of pot and place pork roast on top.
Mix all other ingredients and pour over roast.
Cook on low for 8-12 hours, or until the meat is falling off the bone. (Sometimes I cook the pulled pork through the night so it’s ready by morning.)
Remove meat from the slow cooker and cool on a cutting board until you can handle it without getting burned. This is where things get to be “hands-on”.
Pull the meat from the bone and separate the fat. Use two forks, pulling in opposite directions, to shred the meat. NOTE: I have read that some use the paddle attachment on their Kitchen Aid mixer to make this part go faster, but I prefer the fork method because the clean-up is easier.
Drain off the fat from the liquid and put the meat back into the slow cooker. Turn on low and let the meat simmer and absorb more of the sauce until it’s ready to serve. After all, it’s all about the sauce…right?

Now you’re ready to pile up those buns!
Want a few more ideas for your pulled pork?
· Use your own favorite BBQ sauce.
· Cook the pork shoulder ahead of the gathering then reheat in the slow cooker until it’s warmed through.
· Cook up a batch of pulled pork and portion it into freezer containers for quick summer meals.
· Pulled pork is the ultimate when piled on a bun and topped with your favorite coleslaw, but if you have family or friends, like me, who are gluten intolerant, skip the bun, it’s great just by itself.
· Try something new by dotting your bun with yellow mustard and lying on a nice thick pickle. Cool, crisp, sweet, tart. Your mouth won’t know what to do.
· Looking for a pulled pork recipe that’s versatile enough to use in many different dishes? Check out this simple take on an American classic and use it in dishes from salads to nachos; homemade pizzas to southwestern tacos. The possibilities are as endless as the days of summer.
Simple Pulled Pork Recipe
· 1 pork shoulder
· 1 onion, diced
· 1 cup broth (chicken, beef or vegetable)
· 2 teaspoon granulated garlic
· 1 teaspoon dry mustard
· 1 teaspoon salt
· ½ teaspoon black pepper
Should I Refrigerate my Eggs?
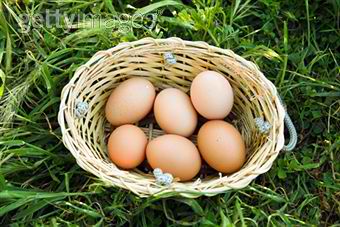
There’s just something about having fresh eggs on a kitchen counter that I love. It speaks to my inner farm girl. It shows me how productive my little farm is, and it reminds me to use eggs often (not that using eggs is a problem around here).
But, when friends and family visit they always ask me, “shouldn’t your eggs be in the fridge”?
The answer to that question is, yes. And, no.
For centuries eggs sat on a counter or table in the kitchen because there was no refrigeration. Just look at any period movie that portrays life in the 1700’s, 1800’s, even the early 1900’s, and I bet if you look closely at the kitchen scenes you’ll see eggs out in the open.
Today’s consumer is so afraid of food and how it can be stored that they think every little bit sitting out is a recipe for food poisoning.
Believe it or not there are several reasons I keep eggs on the counter. For one, when egg laying season hits full force, and I am overwhelmed with eggs, there just isn’t enough room in the fridge to store them all. Second, my favorite baking recipes call for room temperature eggs, and I like having them at the ready instead of delaying while eggs come to room temp. And, thirdly, eggs don’t have to be refrigerated to keep from spoiling.
WHAT???
You heard me right. Eggs DON’T need to be refrigerated, at least not in the short term. I’ll explain when they should in a bit.
So—why don’t eggs have to be refrigerated, you ask?
One simple, yet little know reason.
Hens lay eggs surrounded with a thin, invisible, film called the cuticle or “bloom”. This cuticle film seals the egg, helping to prevent bacteria from entering tiny pores in the shell. The cuticle also helps to prevent the loss of moisture as eggs age. We already knew how wonderful chickens are, but how cool is that? Mother Nature has equipped our hens with a self-sealing mechanism that has enabled eggs to safely stay unrefridgerated for centuries.
BUT—and there’s usually a but, isn’t there? This does not apply to all eggs.
Commercially produced eggs must be washed before they are sold to the public to meet USDA requirements. Washing removes the thin film making eggs more susceptible to contamination. Without the protective cuticle film, eggs must be refrigerated or else they will spoil.
For the home egg producer, however, the question now becomes, to wash or not to wash?
Personally, I don’t wash my eggs and never have, until I am ready to use them. For decades, I have left duck, goose and chicken eggs on the counter to be easily used throughout the week. There is one exception though. If I get an extremely dirty or poopy egg it is washed right away and put in the fridge. Who wants THAT stuff hanging around your kitchen workspace? Also, if I get more eggs than I can use in a week or so they go into the fridge unwashed. Eggs can be stored out of the fridge for about a week and a half. If you don’t think you’ll be using them in that time pop um into the fridge.
So—how do I store eggs on the counter? That’s the fun part.
As I said before, I love having eggs on the counter, those subtle hues of green, blue, tan and almost pink make such an inviting picture. But, what I love even more are eggs in a pretty container. Sometimes I just leave them in my vintage wire collection basket, while other times they are neatly arranged in a colorful ceramic bowl or in a vintage egg crate. I love switching up my containers to create a new look.
For longer term storage, the fridge is still your best bet. But, for everyday use let your imagination run wild and create your own farm girl vignette. You’ll enjoy the view.
10-Weeks to a Well-Stocked Pantry
A few posts back I wrote about how a well-stocked pantry can save you money and time, while adding to your homestead’s ability to weather situations that may prevent you from getting to town for supplies. You can read “Creating a Well-Stocked Homestead Pantry”, here.
It’s one thing to have a stocked pantry. It’s quite another to “start” creating and paying for a well-stocked pantry. My larger pantry happened over time, but the smaller “starter” pantry took just a few weeks. For many, building a pantry in a few weeks is thought of as an expensive proposition. But it doesn’t have to be. The tips below will help you get started on building a pantry for only a few dollars each week.
Want to build a homestead pantry on a few dollars a week? Here’s how.
Pick a day of the week to be your starter day, like Monday. Beginning on Monday, and every day after that, put away $2.00. Put it in a jar. Put it in an envelope. Put it in a drawer. Just, put it away.
At the end of seven days, take your $14.00 a go shopping for the staple items that will make up the base of your pantry. You’re only going to spend $14.00. Any change remaining after your purchases will be put back into your collection to use the following week.
Remember…these categories are based on those in “Creating a Well-Stocked Homestead Pantry”. You can reread it here to refresh your memory.
A little note: There is no right or wrong way to supply your pantry. In my sample I tried to cover several categories of what I felt were the most important and would be used more often. You could easily concentrate on just one area until it is filled, or create your own. You know your family and what they will eat better than anyone. If you have to, make your own list.
WEEK 1: Starting Amount – $14.00
- All-purpose white flour (10 lbs.) – $5.12 – Wal-Mart
- Sugar (10 lbs.) – $5.74 – Wal-Mart
- Table Salt (4 lbs.) – $2.77 – Wal-Mart
- Amount Remaining: .37
WEEK 2: Starting Amount – $14.37
- Old-Fashioned Oatmeal (5 lbs.) – $3.95 – Smart & Final bulk section
- White Rice (20 lbs.) – $8.92 – Wal-Mart
- Sea Salt (1 lb.) – $1.00 – Big Lots
- Amount Remaining: .50
WEEK 3: Starting Amount – $14.50
- Pearled Barley (5 lbs.) – $3.95 – Smart & Final
- Spaghetti Noodles (4 lbs.) – $3.59 – Smart & Final
- Egg Noodles (2.5 lbs.) – $6.39 – Smart & Final
- Amount Remaining: .57
WEEK 4: Starting Amount — $14.57
- Dried Great Northern Beans (5 lbs.) – $7.99 – Smart & Final
- Corn Meal (5 lbs.) – $3.99 – Smart & Final
- Baking Powder (12 oz.) – $1.89 – Smart & Final
- Amount Remaining: .70
WEEK 5: Starting Amount – $14.70
- Split Peas (5 lbs.) – $4.29 – Smart & Final
- Flour Whole Wheat – (5 lbs.) – $4.59 – Smart & Final
- Yeast (2 lbs.) – $4.79 – Smart & Final
- Baking Soda (1 lb.) – .89 – Smart & Final
- Amount Remaining: .14
WEEK 6: Starting Amount – $14.14
- Brown Rice (5 lbs.) – $4.29 – Smart & Final
- Tube Pasta (4 lbs.) – $4.00 – Smart & Final
- White Vinegar (1 gal.) – $2.04 – Wal-Mart
- Cider Vinegar (1 gal.) – $3.79 – Wal-Mart
- Amount Remaining: .02
WEEK 7: Starting Amount – $14.02
- Bread Flour (10 lbs.) – $7.29 – Smart & Final
- Dried Pinto Beans (10 lbs.) – $5.99 – Smart & Final
- Amount Remaining: .74
WEEK 8: Starting Amount – $14.74
- Olive Oil (1 qt.) – $7.99 – Smart & Final
- Arborio Rice (2 lbs.) – $3.99 – Smart & Final
- Fine Salt (1 lb.) – $1.00 – Big Lots
- Coarse Salt (1 lb.) $1.00 – Big Lots
- Amount Remaining: .76
WEEK 9: Starting Amount: $14.76
- Butter (3 lbs.) – $7.79 – Costco
- Brown Sugar (4 lbs.) – $4.00 – Smart & Final
- Macaroni (2 lbs.) – $1.98 – Smart & Final
- Amount Remaining: .99
WEEK 10: Starting Amount: $14.99
- Vegetable Shortening (3 lbs.) – $4.39 – Wal-Mart
- Walnuts, halves (1/2 lb.) – $4.25 – Smart & Final
- Almonds, slivered or sliced (1/2 lb.) – $3.29 – Smart & Final
- Sunflower Seeds, shelled (1 lb.) – $1.50 – Big Lots
- Cornstarch (16 oz.) – $1.49 – Wal-Mart
- Amount Remaining: .07
In just a few short weeks you’ll be well on your way to stocking a full pantry. If you don’t want to spend 10-weeks gathering up your supplies, save a bit more each week, or save for a longer period of time then go shopping all at once. Be sure to take advantage of sales and coupons to make your hard earned money go even farther.
At the end, you’ll experience the luxury of walking to the pantry and pulling out what you need to make a meal. No more last minute runs to the grocery store. No more frantic trips ahead of winter storms only to find store shelves empty. Now, you can sail right through whatever life, and Mother Nature throws your way.
Recent comments
Aenean nonummy hendrerit mauris. Phasellus porta.