Archive for February, 2016
Frugal Friday – Volunteer at a Farmers Market

Farmers markets are a great place to buy local produce and talk with local growers, but did you know it’s a great place to volunteer? Most vendors can’t be at all the markets they sell at, so they bring in volunteers to help man their booth and sell their product. It’s a fun way to become part of the “inner circle” of your local market, and, you may even get paid in produce. You may even get enough to can.
Check with the organizer of your local farmers market to see if vendors are looking for help.
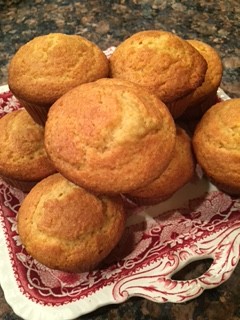
Homemade Golden Corn Bread Muffins
Okay…I know what you all are thinking…who the heck CAN’T make a simple corn muffin? I would be thinking the same thing, but hear me out.
Have you ever had one of those culinary mishaps that looked like it was going to be a complete and total disaster? The kind that you think is not recoverable, but in the end turns out to be one of your best dishes ever?
Well—that was me the other night.
I had gotten off late from work and for some ungodly reason I had been thinking of cornbread muffins for most of the day. Not just a slight pang of interest, but an uncontrollable urge to scarf down an entire batch of corn muffins slathered with butter and dripping in honey. It was ridiculous, actually.
So, when I got home, dropped my gear and got into the kitchen I began pulling out the ingredients. I quickly realized, much to my horror, that I had soy milk, but not regular milk, and lots of butter, but no canola oil. (I primarily use olive, avocado or nut oils). I thought right then and there that my long craved for muffins would be just another unfulfilled dream. As I starred in the fridge at the butter and soy milk I thought, “What the heck, what do I have to lose”. I grabbed the two misfit ingredients, melted the required amount of butter to substitute for the oil and began whipping up a batch of muffins. As I spooned the batter into a muffin pan lined with papers I tasted the batter. Not bad, I thought. I couldn’t really tell the difference. Was that a good sign, I wondered. Would all be well, I thought.
Into the oven they went. Now—I have to say cornbread muffins are a quick bread to make, usually done in about 12 to 15 minutes. I set the oven timer for 15 minutes just to accommodate the less than normal ingredients and began cleaning up the kitchen. In a few minutes I could smell the muffins. The aroma was sweet and fragrant. When the timer went off I pulled the muffin pan out. They were slightly golden, but not too golden. They had risen well and looked like every other cornbread muffin I had ever made. I gently pressed the top of one of the muffins to see if they were done and my finger went right through the top.
DANG!!! Completely mushy!!
That was it…disaster, a waste of good food, a waste of time, and I still didn’t have my longed for muffins. I was disappointed.
But, something told me not to give up. After all they looked fine. The batter tasted fine. I slid them back into the oven and set the time for another 5 minutes, then another, then another. After they had been in the oven for a full 30 minutes their tops were a deep golden brown, but not burned. A toothpick inserted came out clean and they smelled heavenly. I pulled them out to let them rest for a few minutes. The proof would be in the tasting, though.
When the muffins had cooled just a bit I pulled one out of the pan, gently removed the paper liner, pulled off an edge and popped it into my mouth.
SUCCESS!!
It was divine; light like a cake, slightly sweet and buttery. I cut the muffin in half, spread some soft butter over the top, drizzled it with wild clover honey and took a huge bit. It was heaven.
What started out with a craving, skated the edge of disaster and finally reached a wonderful end would now become my dinner.
I heated up some soup I had made earlier in the week, stacked a few muffins on my plate and nestled down in front of the fireplace for a perfect winter meal.
Not every supposed kitchen mishap turns out to be a disaster. Sometimes they turn out to be a brilliant alternative to the norm.
Check out this recipe for making cornbread muffins with soy milk and butter instead of milk and oil.
Golden Corn Bread Muffins
INGREDIENTS:
1 cup corn meal
1 cup all-purpose flour
1/3 cup honey
4 tsp. baking powder
½ tsp. salt
1 cup soy milk
1 large egg
¼ cup butter, melted
DIRECTIONS:
Preheat oven to 400 degrees.
In a large bowl, mix all dry ingredients then stir in milk, egg, and melted butter. Beat until fairly smooth. (the batter will be fairly thick).
Line muffin pan with muffin papers and fill each paper about 2/3rds with batter.
Bake for about 20 minutes and then check every 5 minutes until muffins are golden brown and a toothpick inserted comes out clean. Makes about a dozen.
Frugal Friday – Don’t buy it just to trash it

We as a society spend hundreds of dollars each year buying items that we just throw in the trash. Sounds ridiculous doesn’t it, but it’s true. Trash bags are a good example. We buy them just to throw them away in a few days or a week. You might as well throw dollar bills in the garbage.
Try using paper or plastic grocery bags, or other shopping bags and save money for other purchases; useful one’s that is. I have not purchased a trash bag for more than 15 years, and I haven’t missed them. Sure using a grocery bag may mean more trips to the outside trash can, but I’d rather save the money to buy more seeds or garden supplies. Wouldn’t you?
How to Make Whipped Body Butter
Winter weather can wreak havoc on a farm girl’s skin. From drying winds to freezing temps to furnace or fire that burns night and day, the effects are all the same. Dry, flaky, itchy skin! Yuck.
Being conscience of the number of chemicals that are in commercial body products and wanting something more organic that could be made in small batches to suit my own needs I decided a DIY body butter project was in order.
In a moment of brilliance I called my friend Sandy who is the homemade body product queen in my area. She has literally made everything from soap to toothpaste to lotion to lip balm all out of natural ingredients on her kitchen counter.
When she finished explaining to me how to make this incredibly nourishing body butter that your skin will love you for I was practically drooling. The recipe sounded more like something I could eat rather than something I was going to smear all over my body. BUT DON’T EAT IT.
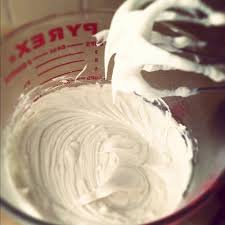
The whipped butter is smooth and creamy without a greasy feeling and the basic recipe can be altered to make many different versions, using oils and essential oils that are your favorites.
Basic Whipped Body Butter Recipe
- 1/2 cup shea butter
- 1/4 cup coconut oil
- 1/4 cup sweet almond oil
- 10-20 drops of essential oil
- Small lidded jar (About a ½-pint size. I like to use cute one’s that look great in my bathroom.)
DIRECTIONS:
Combine all ingredients, except for the essential oils, in a small pot or double boiler. (I used an old Pyrex bowl set over a pot of simmering water, creating my own double-boiler). Gently melt over medium-low heat stirring constantly until everything becomes well incorporated and liquid.
Remove the bowl and set aside. Allow everything to partially set. It’s ready when you can stick your finger in the bowl, making an indentation that stays. The setting up part is important or your butter won’t whip up well.
When the mixture is properly set, add any essential oils you choose. This is where the fun comes in. You can literally use any oil or combination of oils that strike your fancy. How about a calming Orange-Vanilla or a relaxing and meditative lavender, or perhaps rosemary-mint? No matter which combination you settle on your body will love you for it!
Moving on…when the mix is partially set and the essential oils have been added, use a hand mixer, stand mixer or stick blender to whip the butter into a fluffy consistency and stiff peaks form.
You’re finished!
Spoon the butter into a jar and label it so no one thinks it’s edible because it kind of looks like frosting.
And, by all means…NO LICKING THE BEATERS!
You can store your body butter for about 60 days at room temperature or keep in the fridge. This is nice during the summer when the butter can slightly melt. If that happens simply pop it into the fridge until it sets up.
Now you’re armed to fight Mother Nature all winter long.
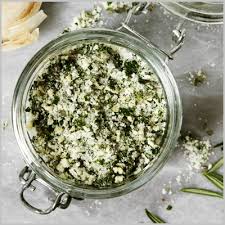
Making Homemade Tuscan Herbed Salt
During the long winter months I can’t help but think of spring planting, sprouts emerging or the bright fresh harvest of summer. Fresh anything is a welcome relief from a desolate winter. Herbs especially make winter seem a little less brutal. They add so much life to winter dishes and nothing tastes better than dishes made with fresh herbs.
Most of my herb harvest is preserved in oil or ice, to be pulled out and added to soups or stews or to other hearty winter fare, but roasts, those hunks of meat cooked long and slow, benefit greatly from a crust of salt and herbs. Preserving herbs with salt lets you savor a bit of summer in the middle of winter. The herbs will dry out as the salt draws out the moisture, but somehow they still seem fresher than those I dry the traditional way.
It’s important to use a coarse salt rather than table or iodized salt because these will make the mixture too salty and overwhelm your meat. This is where you can be a bit adventurous as well. Try a Celtic or pink salt for a different flavor. Experiment and find your favorite mix. The mix of herbs can also be changed to fit the meat you are cooking. I like rosemary and thyme for lamb or parsley, basil and tarragon for beef, but the choice is yours.
No matter what salt or which herbs you choose a fresh batch of herbed salt will enhance any cut of meat, so it’s worth the few minutes of your time to bring summer’s flavor to your winter dinner.
This batch is made using a food processor, but you can also use a chef’s knife and chop the whole pile by hand. Just remember to keep scraping and piling the mixture in the middle of a cutting board, and use a rocking motion when cutting. Scrape, pile, chop. That’s all there is to it.
Tuscan Herbed Salt
INGREDIENTS:
- 6 large cloves of garlic
- 1/2 cup coarse sea salt or kosher salt or a mixture (not table or iodized salt)
- 4 cups fresh herb leaves – any combination of rosemary, sage, thyme, oregano, savory, dill, parsley, tarragon, chervil, basil, etc.
DIRECTIONS:
- Peel the garlic cloves and rough chop
- Clean, dry & remove leaves from herbs (you don’t want stems)
- Add ½ the salt to a food processor
- Add ½ garlic and top with ½ the herbs
- Pulse until mix is incorporated, but not pureed
- Add remaining salt, then garlic, then herbs
- Pulse more until mixture is well incorporated
- Spread mixture in a thin layer on a parchment lined baking sheet, and let air dry for a few days
- Store in an air tight container (will stay fresh for several months)
Frugal Friday – Declutter & Sell, Sell, Sell
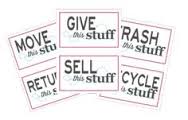
Long winter days that have us trapped inside is the perfect time to start going through those closets and cabinets, decluttering what we haven’t used in a while. But, don’t just donate the discards. See if they can be sold on craigslist, ebay, at a garage sale or local consignment store for cash. The cheapskate in you will love making money before donating the items, and you never know what people are looking for. If that puts a bit of green in your wallet, move on to the garage and earn even more.
To make the process less overwhelming start small, one closet, one cabinet at a time. I go through my house one drawer, cabinet, closet at a time throughout the year. Over time you will create a routine that keeps your house and mind clutter free.
Banish Winter Boredom in your Chicken Flock
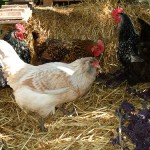
There is nothing worse than a bored, unhappy chicken. When chickens are bored they tend to peck at each other, pulling feathers and drawing blood, causing stress and damage. The sight of blood can even turn a normally calm flock into a crazy flock that can literally peck other chickens to death. Bored chickens can also become egg eaters, breaking into your daily egg harvest, all because they were bored and had nothing to do.
During the long winter months it’s important to give your girls something to do, inside the coop and out, to prevent bad habits from forming. Just like humans who can develop “cabin fever” and resort to bad habits, chickens can develop “coop fever” with equally bad habits. Fortunately, these habits are not normal and can be prevented with a few simple flock management tricks.
Chickens get bored mostly in winter when green things growing, bugs to chase and dust to bathe in are in short supply. Pecking from boredom is also more likely to happen when coops and outside runs are too small for the number of chickens in the flock or when they are kept cooped up, unable to free-range. Chickens are hardy and can be outside in most weather, but should be kept in the coop during blizzards and frigid weather.
Treats can also help entertain chickens and keep them occupied, but too much of a good thing is not good for them. Below are a few alternatives to keeping your chickens occupied during the winter months.
Perches & Pedestals
 Chickens love to perch, whether they are watching the world go by or sleeping. It’s the “official” poultry pastime. Perching not only gets them out of the mud or snow, but it gives them a better view of what’s going on in the barnyard.
They love to hop onto ladders leaning up against a wall, low hanging branches of a nearby tree, swings, boards or dowel sticks attached to the corners of an outside run. Any creative, multi-level poultry playground will keep your flock busy the whole winter.
Pedestals, like garden statues, urns, tree stumps, even fences give chickens a good view of the world below. While statues and fences are stationary, tree stumps can be moved around the farm to give chickens different vantage points. So, the next time you fell a tree or cut up a fallen branch think about your chickens before splitting all of it into firewood.
Mounds of Organic Matter

Let Them Play Peek-a-Boo
Odd Playthings

Protected Dust Bath Area
 Chickens use dust baths to keep parasites like lice and mites from taking hold on their feathers and affecting their overall health. But, in winter, where mud and snow may prevent a suitable dust bath area one can be created in a sheltered area. Old plywood, windows or bales of straw can be set up to form a bathing area protected from the cold. Dry dirt from inside the barn can be used to fill the bathing area and provide endless hours for fluffing.
Free Ranging
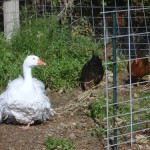 Chickens are hardy creatures even when there’s snow on the ground. They won’t mind cold feet if it means time to run free and see what’s going on. A few bare patches where they can scratch and dig and get off the cold white stuff would be appreciated, too. A pile of hay or straw can also be used to give them a dry place and something to scratch in. But, keep a close eye on your chickens, predators searching for food in winter will find barnyard chickens easy pickings.
Enlarge the Outside Run

You and Me Together

Long winter days can be hard on both chickens and their owners. Days of gloomy skies, wind, rain or snow can make time move so slowly. Getting outside during breaks in the weather, even if the weather is not optimal, will help not only you, but your flock as well. It’s a kind of chicken therapy. You will get to hang out with them and they will get more comfortable with you being close by, a definite plus if you ever have to catch one to treat an injury or illness.
Treats
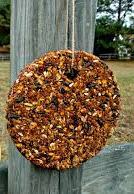 Chickens love treats! In summer or winter treats can be a great way to add fresh produce and seeds to your flock’s diet. Seed blocks and suet cakes are easy to make and can provide extra nutrition and energy.
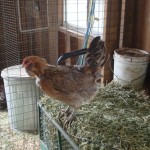
Vegetable trimmings, overripe fall fruits and winter veggies like cabbage, Brussels sprouts, kale and collards can be laid in baskets and hung in low branches or by supports in the outside run where chickens will have easy access to them. The flock will have loads of fun while getting extra nutrition. Whether homemade or commercial or fresh, treats can help stave off winter boredom on a gloomy day as chickens peck and scratch and play with them.
Every homesteader is counting down the days till spring shines through, when gardens are turned, babies are born and chickens run free. But, with these tips we know our chickens will be too preoccupied to get bored while waiting for spring!
For homemade chicken treat ides, check out these posts.
Suet Cakes
Woodcutter Carrots

Carrots are a staple in most gardens. Those bright orange cylinders are sweet and crunchy, packed with wholesome goodness. They are the perfect snack dipped into sour cream seasoned with garlic and herbs. They are a versatile addition to soups and stews, and stand up well to being sauteed, braised and covered in glaze. But, our favorite carrot dish is one that we discovered year’s ago in France.
Woodcutter Carrots is actually a French peasant dish. In days of old poor workers would eat this dish for lunch. The heartiness of the carrots, combined with the sweetness of the onions and crispness of the bacon made it a filling and nutritious mid-day meal. Not to mention inexpensive to make.
This has become our favorite carrot dish and graces the dinner table several times a month in the fall and winter months. The fact that it is easy and almost full proof to make is just an added bonus. Although the recipe calls for pancetta, we have been successful making it with maple cured and regular bacon. And, we have used a variety of carrots from baby to fresh picked with a bit of the tops still on for a more elegant presentation.
No matter how you chose to alter the recipe I’m sure it will end up being a favorite with your family, too.
INGREDIENTS:
1 pound of carrots, peeled and kept whole
1 onion, diced small
6 slices of pancetta or any other bacon, chopped small
15 ounces beef broth, canned or homemade
2 tbsp chopped parsley
DIRECTIONS:
Chop bacon into small pieces and place in a large skillet. Cook until almost crispy.
Add onions and cook until browned, almost caramelized.
Lay carrots in a single layer on top of the onions and bacon.
Pour beef broth over all.
Place lid on skillet and simmer over low-to-medium flame until carrots are tender but firm, not mushy, about 10 to 15 minutes.
Remove carrots to a serving plate. Increase flame and cook down broth until reduced by half. Spoon bacon and onion mix over carrots, sprinkle with parsley and serve.
The leftovers make a wonderful mid-day meal paired with a salad and crusty bread.
Frugal Friday – Gleaning Fields

Not every homestead can have a huge orchard and vegetable garden, or even a small one for that matter. Lot size can make it difficult. But, did you know that many regional food banks have gleaning programs? That’s right! Food banks partner with local growers and backyard gardeners to glean excess fruit for low-income families.
Volunteers are used to pick fruit and vegetables from local growers and are sometimes rewarded with a portion of the harvest. Check with your local food bank to see if they have a gleaning program. You may just fill your house with produce while teaching your kids about giving back.
10 Ways to Use Wood Ash on a Homestead
There’s nothing better on a cold winter’s day than a roaring fire. The warmth and ambiance fills the soul, not to mention warms it as well. I usually have a fire going from the time I get home from work until it’s time to turn in. The fire not only heats the house, but it also keeps the furnace from going on until it’s really needed. And, by that time I’m snug in a warm bed. So, the fireplace pulls double duty.
I get seasoned and split firewood from a local rancher who allows me to pick it up for free as long as I “pick it up”. No delivery service here. Not a bad deal and the exercise in the cool fall months is very energizing.
Our winters are not terribly cold here, so I only go through about 3-4 cords of wood. But, imagine 3 to 4 cords worth of fireplace ash! And, consider this…a cord of wood produces about 50 pounds of ash.
Yikes…what to do with all that ash???
Well—the good thing about natural wood and ash from the wood is that it’s considered a natural substance. When wood is burned it lets out nitrogen and sulfur as a gas, and what remains is magnesium, calcium, potassium and other trace elements. In fact, wood ash contains most of the 13 essential nutrients needed for soil to sustain plant growth. That’s right. Wood ash can be used as a soil conditioner, insect repellent, and fertilizer. It can even be used to make soap.
So—before you toss that ash into the trash bin check out these 10 uses around the homestead.
In The Garden
- Enrich Compost – Mix in about a cup of ash to a 4’x4’x4’ compost bin to enhance its nutrients. Or, calculate a cup per 64-cubic feet of raw compost materials. Don’t overdo it though. Ash is very alkaline and will throw off the Ph balance of your compost if you use too much.
- Use as a Pre-emergent – Sprinkle ash on the soil in winter or early spring, before plants emerge. If you add ash to areas where seeds or transplants will be planted, hold off planting for a few weeks. Also wait a few weeks to sprinkle around newly planted areas. The shock of the sudden increase in Ph could be too much for young plantings.
- Repel Slugs & Snails –Spread evenly around garden beds, on dirt paths, around berry patches and fruit trees to ward off slugs and snails. It’s caustic, so the slimy bugs won’t like it.
- Terrific Tomatoes – Make an ash tea to boost the potassium level of potassium loving tomatoes. Put 5 pounds of ash into a permeable cloth, like a burlap bag or an old t-shirt made into a bag. Tie it closed and lower the bag into a 50-gallon trashcan filled with water. Let it sit for about 4 days, then pour about a cup full on your tomatoes once a week.
- Feed your Lawn – Before a storm, lightly sprinkle ash on your lawn to provide extra nutrients. The rain water will help push the nutrients down to the roots, where they are needed.
The secret to using wood ash in the garden is to “dust it”, don’t “dump it”.
Around The Homestead
- De-skunk the Dog – If man’s best friend has tangled with a skunk, simply rub a handful of ash all over his body. The ash will naturalize the smell.
- De-Ice the Driveway – Ash won’t hurt the soil or cement so it can be used to melt ice, snow or provide traction where needed.
- Clean Sooty Windows – Use a damp sponge and dip into a pail of ash. The ash dust scrubs away soot and residue.
- Absorb Paint – Sprinkle ash onto an area where paint has been splattered and scuff with your boot to absorb and blend it in with the cement.
- Make Soap – Ashes can be made into lye by soaking them in water. Immerse the ashes in water and let them settle then skim off the lye from the top. You can do this every day until you have enough lye to make soap. The lye can be mixed with animal fat and then boiled to make soap.
Notes of Caution:
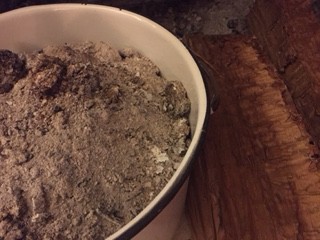
Before you launch off and clean out that wood stove or firebox there are a few tips to handling ash safely. First off, find yourself a sturdy metal trashcan with a lid, one that will be dedicated to hold only ash. Secondly, wait for the ash to cool completely before putting it in the trashcan. No warm or hot stuff. When cleaning out the firebox or stove use caution to not breathe in the ash dust or get it in your eyes, nose or mouth, it’s caustic. It’s best to wear protective gear when doing this. You know…goggles, gloves and mask. Better safe than sorry. Keep it stored in a safe place with the lid tightly fastened so a brisk wind won’t send the ash flying around the homestead for animals and humans to breathe.
I use a thrift store ash bucket to transfer ash from the fireplace to the larger ash can outside. This way I’m not dragging the bigger can in and out of the house. Whatever is not used in the garden or compost is put in my yard waste can for the trash company to compost.
Recent comments
Aenean nonummy hendrerit mauris. Phasellus porta.